Detailed introduction to deployment in Python
I have been learning flask for a while, but I have never deployed it, so I was thinking about how to deploy it. Think about it, let’s get the service started first, so I thought about getting the service started first. Here is the choice It is Flask+uwsgi+Nginx+Ubuntu. The Python option is 2.7.2. This is the one that comes with the Ubuntu system. It feels simple to learn without having to go through the software connection. Currently, my own flask is written in python3, and I will slowly transition to it. , let’s get this figured out first, then it will be very easy to optimize. In fact, I don't know much about many principles. Let's set this up first and slowly understand the logic inside.
Nginx
Nginx is an efficient web server and reverse proxy server that can be used as a load balancing (when n users access the server, it can achieve offloading and share the server's load. pressure), compared with Apache, Nginx supports high concurrency, can support millions of TCP connections, and hundreds of thousands of concurrent connections. It is simple to deploy, consumes less memory, and has low cost. However, Nginx does not have as many modules as Apache. Nginx supports uWSGI's uwsgi protocol, so we can combine Nginx with uWSGI, and Nginx hands over dynamic content to uWSGI for processing through uwsgi_pass.
Official documentation is here
The best Nginx tutorial is here
uwsgi
- Those who have read the previous section will know that WSGI is a communication protocol.
- uwsgi is a line protocol rather than a communication protocol. It is often used for data communication between the uWSGI server and other network servers.
- uWSGI is a web server that implements two protocols, uwsgi and WSGI.
1 |
|
Use the following command to install flask
1 |
|
After installation, we can test it,
import flask
No error is reported, which proves that our flask is installed successfully. So the next thing we have to do is install ngnix and uwsgi.
1 |
|
After installation, we can start it first, nginx start directly starts from the command line, simple and crude

This way we nginx has started successfully. Next, we use pip to install uwsgi
After we install it, let’s start working.
First I create an app under hellowflak Python package,
1 2 |
|
Next we create view.py
1 2 |
|
Then we create hello in the same directory as app. py
1 2 |
|
, then we can use Python to debug our program locally,

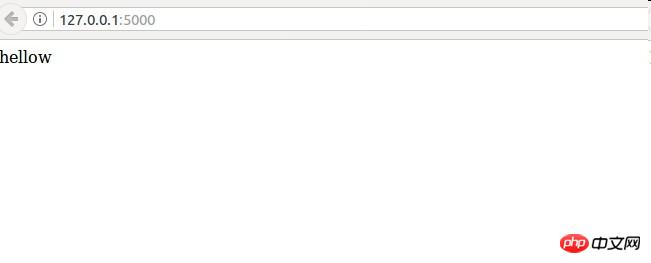
then we can use the browser to Take a look, enter the address and you can get this. From this point of view, there is no problem with our flask program.

Then what we have to do next is to let nginx take on the web service.
What I did here was to delete the nginx configuration file simply and rudely
1 |
|
Next, I created a configuration file under hellowflask
1 2 3 4 5 6 7 8 9 10 11 12 |
|
A brief explanation: server_name can be a domain name or an IP address. uwsgi_pass indicates the communication method between Nginx and uwsgi. What I chose here is the specified port number.
Then let’s soft-connect our configuration to nginx.
1 |
|
1 |
|
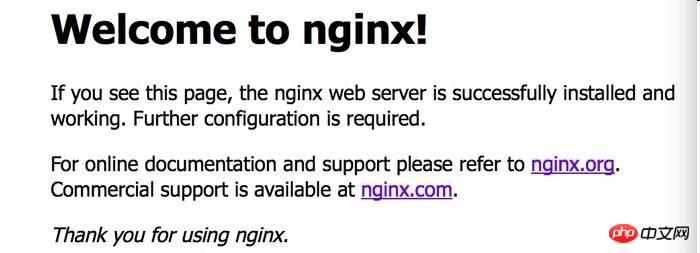
What’s here is not a welcome, but a 502 error, because our current uwsgi file has not been configured yet, and we have not started uwsgi, so the next step is to get it out For this uwsgi, the example below is my configuration.
1 2 3 4 5 6 7 8 9 10 11 |
|
At this time our uwsgi has been configured, so let’s start it,
1 |
|
我们去重新启动我们的nginx,
1 |
|
1 |
|
1 |
|
1 |
|
完工之后,感觉还是很简单的 有问题那么就去看log,只要log配置得当,那么排除错误是很快的。
The above is the detailed content of Detailed introduction to deployment in Python. For more information, please follow other related articles on the PHP Chinese website!

Hot AI Tools

Undresser.AI Undress
AI-powered app for creating realistic nude photos

AI Clothes Remover
Online AI tool for removing clothes from photos.

Undress AI Tool
Undress images for free

Clothoff.io
AI clothes remover

Video Face Swap
Swap faces in any video effortlessly with our completely free AI face swap tool!

Hot Article

Hot Tools

Notepad++7.3.1
Easy-to-use and free code editor

SublimeText3 Chinese version
Chinese version, very easy to use

Zend Studio 13.0.1
Powerful PHP integrated development environment

Dreamweaver CS6
Visual web development tools

SublimeText3 Mac version
God-level code editing software (SublimeText3)

Hot Topics
 1664
1664
 14
14
 1423
1423
 52
52
 1321
1321
 25
25
 1269
1269
 29
29
 1249
1249
 24
24
 How to use Jenkins Pipeline to build a continuous packaging and deployment process for PHP programs?
Jul 30, 2023 pm 07:41 PM
How to use JenkinsPipeline to build a continuous packaging and deployment process for PHP programs? Jenkins is a very popular continuous integration and deployment tool. It provides a wealth of plug-ins and functions to make the build and deployment process simple and efficient. JenkinsPipeline is the latest plug-in for Jenkins, which allows us to use a complete and extensible DSL (DomainSpecificLanguage) to define continuous integration and deployment.
 How to deploy a trustworthy web interface on a Linux server?
Sep 09, 2023 pm 03:27 PM
How to deploy a trustworthy web interface on a Linux server? Introduction: In today's era of information explosion, Web applications have become one of the main ways for people to obtain information and communicate. In order to ensure user privacy and information reliability, we need to deploy a trustworthy Web interface on the Linux server. This article will introduce how to deploy a web interface in a Linux environment and provide relevant code examples. 1. Install and configure the Linux server. First, we need to prepare a Li
 How to solve the problem of inaccessibility after Tomcat deploys war package
Jan 13, 2024 pm 12:07 PM
How to solve the problem that Tomcat cannot successfully access the war package after deploying it requires specific code examples. As a widely used Java Web server, Tomcat allows developers to package their own developed Web applications into war files for deployment. However, sometimes we may encounter the problem of being unable to successfully access the war package after deploying it. This may be caused by incorrect configuration or other reasons. In this article, we'll provide some concrete code examples that address this dilemma. 1. Check Tomcat service
 Yolov10: Detailed explanation, deployment and application all in one place!
Jun 07, 2024 pm 12:05 PM
1. Introduction Over the past few years, YOLOs have become the dominant paradigm in the field of real-time object detection due to its effective balance between computational cost and detection performance. Researchers have explored YOLO's architectural design, optimization goals, data expansion strategies, etc., and have made significant progress. At the same time, relying on non-maximum suppression (NMS) for post-processing hinders end-to-end deployment of YOLO and adversely affects inference latency. In YOLOs, the design of various components lacks comprehensive and thorough inspection, resulting in significant computational redundancy and limiting the capabilities of the model. It offers suboptimal efficiency, and relatively large potential for performance improvement. In this work, the goal is to further improve the performance efficiency boundary of YOLO from both post-processing and model architecture. to this end
 How to deploy applications using Docker containerization in FastAPI
Jul 28, 2023 pm 01:25 PM
How to use Docker containerization to deploy applications in FastAPI Introduction: Docker is a containerization technology that packages applications and their dependencies into an independent, portable container to achieve rapid deployment and expansion. FastAPI is a modern, high-performance web framework based on Python that provides a simple and fast API development experience. This article will introduce how to use Docker containerization to deploy applications in FastAPI and provide corresponding code examples.
 Gunicorn Deployment Guide for Flask Applications
Jan 17, 2024 am 08:13 AM
How to deploy Flask application using Gunicorn? Flask is a lightweight Python Web framework that is widely used to develop various types of Web applications. Gunicorn (GreenUnicorn) is a Python-based HTTP server used to run WSGI (WebServerGatewayInterface) applications. This article will introduce how to use Gunicorn to deploy Flask applications, with
 Best practices and common problem solutions for deploying web projects on Tomcat
Dec 29, 2023 am 08:21 AM
Best practices for deploying Web projects with Tomcat and solutions to common problems Introduction: Tomcat, as a lightweight Java application server, has been widely used in Web application development. This article will introduce the best practices and common problem solving methods for Tomcat deployment of web projects, and provide specific code examples to help readers better understand and apply. 1. Project directory structure planning Before deploying a Web project, we need to plan the directory structure of the project. Generally speaking, we can organize it in the following way
 How to deploy and maintain a website using PHP
May 03, 2024 am 08:54 AM
To successfully deploy and maintain a PHP website, you need to perform the following steps: Select a web server (such as Apache or Nginx) Install PHP Create a database and connect PHP Upload code to the server Set up domain name and DNS Monitoring website maintenance steps include updating PHP and web servers, and backing up the website , monitor error logs and update content.


