

Detailed introduction to SpringMVC verification

As mentioned earlier: Spring+SpringMVC+MyBatis in-depth learning and construction (15) - SpringMVC annotation development (basics)
Main content of this article:
(1 ) SpringMVC verification
(2) Data echo
(3) Exception handler
(4) Image upload
(5) Json data Interaction
(6) Support RESTful
1. SpringMVC verification
1.1 Verification understanding
In projects, the front-end is usually used more Verification, such as js verification on the page. For those with higher security requirements, it is recommended to perform verification on the server.
Server verification:
Control layer controller: Verify the legality of the parameters requested by the page. In the server control layer controller verification, the client type (browser, mobile client, remote call) is not distinguished.
Business layer service (mostly used): mainly verifies key business parameters, limited to service Parameters used in the interface.
Persistence layer dao: Generally not verified.
1.2springmvc verification requirements
springmvc uses hibernate's verification framework validation (it has nothing to do with hibernate).
Verification ideas:
The page submits the requested parameters, requests them to the controller method, and uses validation for verification. If there is an error in the verification, the error message will be displayed on the page.
Specific requirements:
Modify the product and add verification (verify the length of the product name and non-empty verification of the generation date). If there is an error in the verification, an error message will be displayed on the product modification page.
1.3 Environment preparation
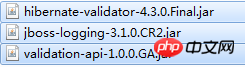
The jar package required for hibernate verification framework validation:
1.4 Configuring the validator
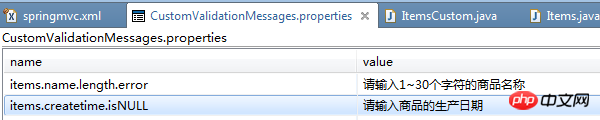
Configure in springmvc.xml under classpath:
<!-- 校验器 --><bean id="validator"class="org.springframework.validation.beanvalidation.LocalValidatorFactoryBean"><!-- Hibernate校验器--><property name="providerClass" value="org.hibernate.validator.HibernateValidator" /><!-- 指定校验使用的资源文件,在文件中配置校验错误信息,如果不指定则默认使用classpath下的ValidationMessages.properties --><property name="validationMessageSource" ref="messageSource" /></bean><!-- 校验错误信息配置文件 --><bean id="messageSource"class="org.springframework.context.support.ReloadableResourceBundleMessageSource"><!-- 资源文件名--><property name="basenames"> <list> <value>classpath:CustomValidationMessages</value> </list> </property><!-- 资源文件编码格式 --><property name="fileEncodings" value="utf-8" /><!-- 对资源文件内容缓存时间,单位秒 --><property name="cacheSeconds" value="120" /></bean>
1.5 Inject validator into the processor adapter
Configure in springmvc.xml under classpath:
1.5.1 Configuration method 1

<!-- 自定义webBinder --><bean id="customBinder"class="org.springframework.web.bind.support.ConfigurableWebBindingInitializer"><property name="validator" ref="validator" /></bean><!-- 注解适配器 --><beanclass="org.springframework.web.servlet.mvc.method.annotation.RequestMappingHandlerAdapter"><property name="webBindingInitializer" ref="customBinder"></property></bean>
/**
 * 商品信息的扩展类
 * @author Joanna.Yan
 * */public class ItemsCustom extends Items{//添加商品信息的扩展属性}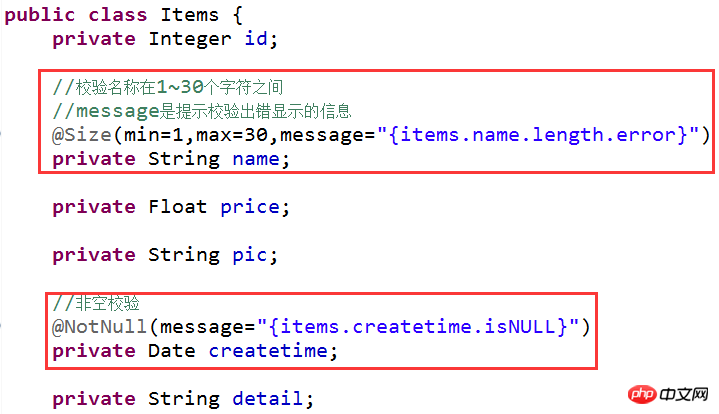

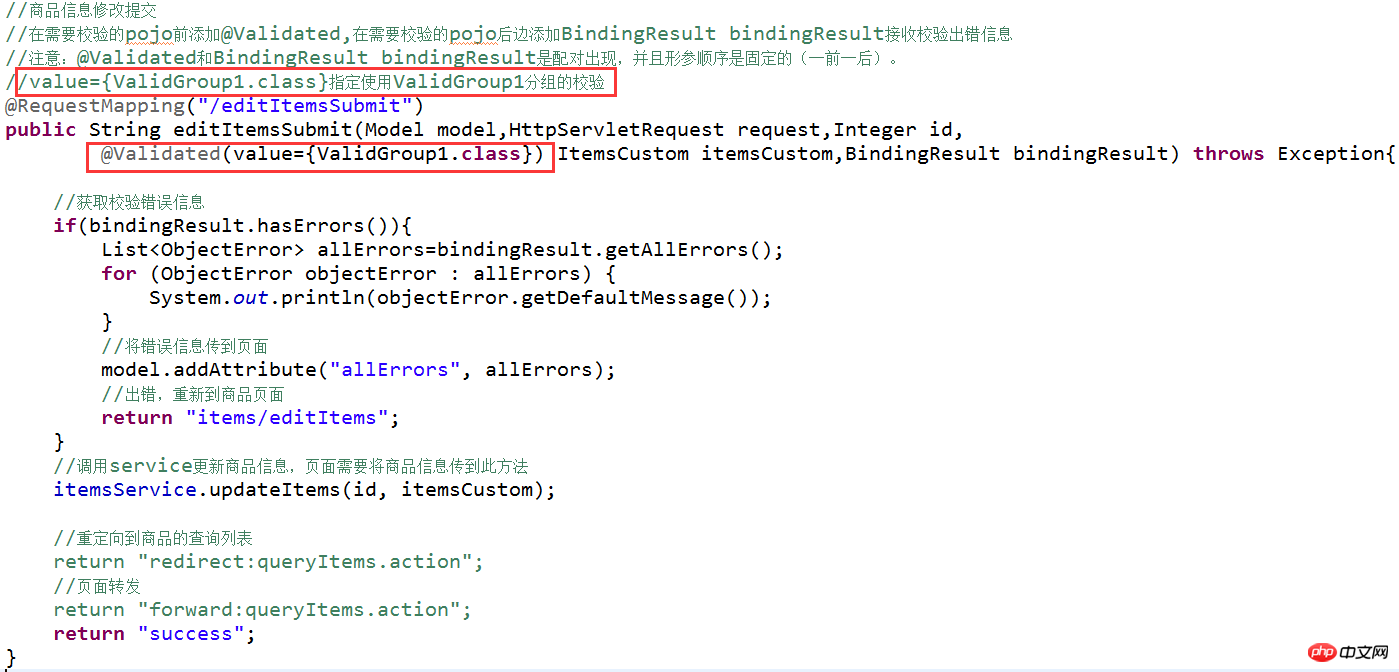
    //商品信息修改提交//在需要校验的pojo前添加@Validated,在需要校验的pojo后边添加BindingResult bindingResult接收校验出错信息//注意:@Validated和BindingResult bindingResult是配对出现,并且形参顺序是固定的(一前一后)。@RequestMapping("/editItemsSubmit")public String editItemsSubmit(Model model,HttpServletRequest request,Integer id,
            @Validated ItemsCustom itemsCustom,BindingResult bindingResult) throws Exception{        //获取校验错误信息if(bindingResult.hasErrors()){
            List<ObjectError> allErrors=bindingResult.getAllErrors();for (ObjectError objectError : allErrors) {
                System.out.println(objectError.getDefaultMessage());
            }//将错误信息传到页面model.addAttribute("allErrors", allErrors);//出错,重新到商品页面return "items/editItems";
        }//调用service更新商品信息,页面需要将商品信息传到此方法        itemsService.updateItems(id, itemsCustom);        //重定向到商品的查询列表//        return "redirect:queryItems.action";//页面转发//        return "forward:queryItems.action";return "success";
}<c:if test="${allErrors!=null }"><c:forEach items="${allErrors }" var="error">${error.defaultMessage }<br/></c:forEach></c:if> //商品信息修改提交//在需要校验的pojo前添加@Validated,在需要校验的pojo后边添加BindingResult bindingResult接收校验出错信息//注意:@Validated和BindingResult bindingResult是配对出现,并且形参顺序是固定的(一前一后)。@RequestMapping("/editItemsSubmit")public String editItemsSubmit(Model model,HttpServletRequest request,Integer id,
@Validated ItemsCustom itemsCustom,BindingResult bindingResult) throws Exception{ //获取校验错误信息if(bindingResult.hasErrors()){
List<ObjectError> allErrors=bindingResult.getAllErrors();for (ObjectError objectError : allErrors) {
System.out.println(objectError.getDefaultMessage());
}//出错,重新到商品页面return "items/editItems";
}//调用service更新商品信息,页面需要将商品信息传到此方法 itemsService.updateItems(id, itemsCustom); //重定向到商品的查询列表// return "redirect:queryItems.action";//页面转发// return "forward:queryItems.action";return "success";
}<%@ page language="java" contentType="text/html; charset=UTF-8"pageEncoding="UTF-8"%><%@ taglib uri="" prefix="c" %><%@ taglib uri="" <%@ taglib prefix="spring" uri="" %>
<spring:hasBindErrors name="item"><c:forEach items="${errors.allErrors}" var="error">${error.defaultMessage }<br/></c:forEach></spring:hasBindErrors>/**
* 校验分组
* @author Joanna.Yan
* */public interface ValidGroup1 {//接口中不需要定义任何方法,仅是对不同的校验规则进行分组//此分组只校验商品名称长度}/**
* 校验分组
* @author Joanna.Yan
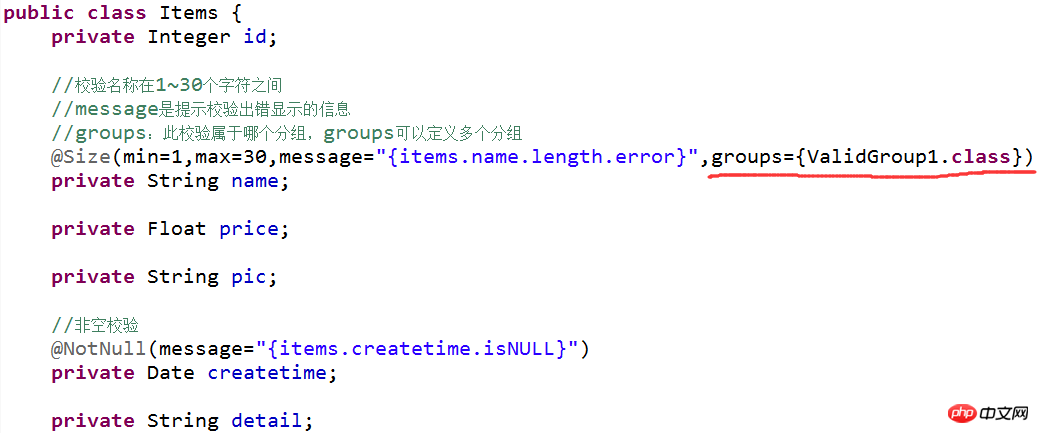
* */public interface ValidGroup2 {//接口中不需要定义任何方法,仅是对不同的校验规则进行分组}1.10.3在校验规则中添加分组
1.10.4在controller方法中使用指定分组的校验
1.10.4校验注解
@Null 被注释的元素必须为 null
@NotNull 被注释的元素必须不为 null
@AssertTrue 被注释的元素必须为 true
@AssertFalse 被注释的元素必须为 false
@Min(value) 被注释的元素必须是一个数字,其值必须大于等于指定的最小值
@Max(value) 被注释的元素必须是一个数字,其值必须小于等于指定的最大值
@DecimalMin(value) 被注释的元素必须是一个数字,其值必须大于等于指定的最小值
@DecimalMax(value) 被注释的元素必须是一个数字,其值必须小于等于指定的最大值
@Size(max=, min=) 被注释的元素的大小必须在指定的范围内
@Digits (integer, fraction) 被注释的元素必须是一个数字,其值必须在可接受的范围内
@Past 被注释的元素必须是一个过去的日期
@Future 被注释的元素必须是一个将来的日期
@Pattern(regex=,flag=) 被注释的元素必须符合指定的正则表达式
Hibernate Validator 附加的 constraint
@NotBlank(message =) 验证字符串非null,且长度必须大于0
@Email 被注释的元素必须是电子邮箱地址
@Length(min=,max=) 被注释的字符串的大小必须在指定的范围内
@NotEmpty 被注释的字符串的必须非空
@Range(min=,max=,message=) 被注释的元素必须在合适的范围内
2.数据回显
2.1什么是数据回显
提交后,如果出现错误,将刚才提交的数据回显到刚才的提交页面。
2.2pojo数据回显方法
springmvc默认对pojo数据进行回显,springmvc自动将形参中的pojo重新放回request域中,request的key为pojo的类名(首字母小写),如下:
controller方法:
@RequestMapping("/editItemSubmit")public String editItemSubmit(Integer id,ItemsCustom itemsCustom)throws Exception{springmvc自动将itemsCustom放回request,相当于调用下边的代码:
model.addAttribute("itemsCustom", itemsCustom);jsp页面:
页面中的从“itemsCustom”中取数据。
如果key不是pojo的类名(首字母小写),可以使用@ModelAttribute完成数据回显。
@ModelAttribute作用如下:
(1)绑定请求参数到pojo并且暴露为模型数据传到视图页面。
此方法可实现数据回显效果。
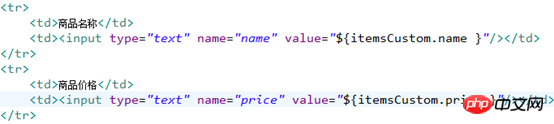
// 商品修改提交@RequestMapping("/editItemSubmit")public String editItemSubmit(Model model,@ModelAttribute("item") ItemsCustom itemsCustom)页面:
<tr><td>商品名称</td><td><input type="text" name="name" value="${item.name }"/></td></tr><tr><td>商品价格</td><td><input type="text" name="price" value="${item.price }"/></td></tr>如果不用@ModelAttribute也可以使用model.addAttribute("item", itemsCustom)完成数据回显。
(2)将方法返回值暴露为模型数据传到视图页面
//商品分类@ModelAttribute("itemtypes")public Map<String, String> getItemTypes(){

        Map<String, String> itemTypes = new HashMap<String,String>();
        itemTypes.put("101", "数码");
        itemTypes.put("102", "母婴");        return itemTypes;
}页面:
商品类型:<select name="itemtype"><c:forEach items="${itemtypes }" var="itemtype"><option value="${itemtype.key }">${itemtype.value }</option> </c:forEach></select>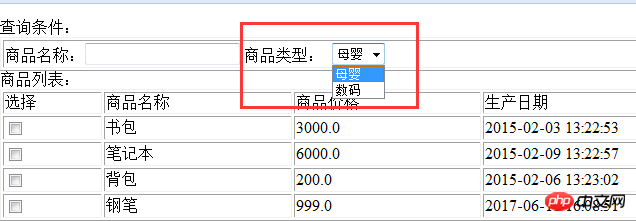
2.3简单类型数据回显
最简单方法使用model。
//简单数据类型回显
model.addAttribute("id", id);3.异常处理器
3.1异常处理思路
系统中异常包括两类:预期异常和运行时异常RuntimeException,前者通过捕获异常从而获取异常信息,后者主要通过规范代码开发、通过测试手段减少运行时异常的发生。
系统的dao、service、controller出现异常都通过throws Exception向上抛出,最后由springmvc前端控制器交由异常处理器进行异常处理,如下图:
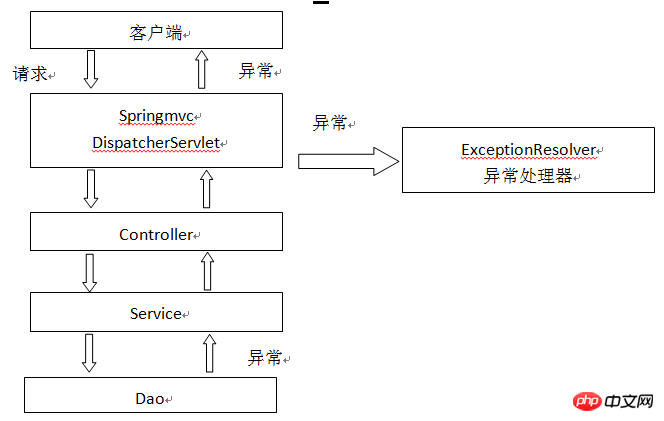
springmvc提供全局异常处理器(一个系统只有一个异常处理器)进行统一异常处理。
3.2自定义异常类
对不同的异常类型定义异常类,继承Exception。
package joanna.yan.ssm.exception;/**
 * 系统自定义异常类,针对预期的异常。需要在程序中抛出此类异常。
 * @author Joanna.Yan
 * */public class CustomException extends Exception{//异常信息public String message;public CustomException(String message) {super();this.message = message;
    }public String getMessage() {return message;
    }public void setMessage(String message) {this.message = message;
    }

}3.3全局异常处理器
思路:
系统遇到异常,在程序中手动抛出,dao抛给service、service抛给controller、controller抛给前端控制器,前端控制器调用全局异常处理器。
全局异常处理器处理思路:
解析出异常类型
如果该异常类型是系统自定义的异常,直接取出异常信息,在错误页面展示
如果该异常类型不是系统自定义的异常,构造一个自定义的异常类型(信息为“未知错误”)
springmvc提供一个HandlerExceptionResolver接口。
package joanna.yan.ssm.exception;import javax.servlet.http.HttpServletRequest;import javax.servlet.http.HttpServletResponse;import org.springframework.web.servlet.HandlerExceptionResolver;import org.springframework.web.servlet.ModelAndView;public class CustomExceptionResolver implements HandlerExceptionResolver{/* * ex:系统抛出的异常     */@Overridepublic ModelAndView resolveException(HttpServletRequest request,
            HttpServletResponse repsonse, Object handler, Exception ex) {//handler就是处理器适配器要执行的Handler对象(只有一个method)//1.解析出异常类型//2.如果该异常类型是系统自定义的异常,直接取出异常信息,在错误页面展示//3.如果该异常类型不是系统自定义的异常,构造一个自定义的异常类型(信息为“未知错误”)CustomException customException=null;if(ex instanceof CustomException){
            customException=(CustomException)ex;
        }else{
            customException=new CustomException("未知错误");
        }//错误信息String message=customException.getMessage();
        ModelAndView modelAndView=new ModelAndView();//将错误信息传到页面modelAndView.addObject("message", message);//指向错误页面modelAndView.setViewName("error");return modelAndView;
    }

}3.4错误页面
<%@ page language="java" import="java.util.*" pageEncoding="UTF-8"%><%String path = request.getContextPath();String basePath = request.getScheme()+"://"+request.getServerName()+":"+request.getServerPort()+path+"/";%><!DOCTYPE HTML PUBLIC "-//W3C//DTD HTML 4.01 Transitional//EN"><html>
  <head><base href="<%=basePath%>"><title>错误提示</title><meta http-equiv="pragma" content="no-cache"><meta http-equiv="cache-control" content="no-cache"><meta http-equiv="expires" content="0">    <meta http-equiv="keywords" content="keyword1,keyword2,keyword3"><meta http-equiv="description" content="This is my page"><!--<link rel="stylesheet" type="text/css" href="styles.css?1.1.11">-->

  </head>
3.5在springmvc.xml配置全局异常处理器
    <!-- 全局异常处理器
只要实现HandlerExceptionResolver接口就是全局异常处理器--><bean class="joanna.yan.ssm.exception.CustomExceptionResolver"></bean>3.6异常测试
在controller、service、dao中任意一处需要手动抛出异常。
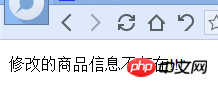
如果是程序中手动抛出的异常,在错误页面中显示自定义的异常信息,如果不是手动抛出异常说明是一个运行时异常,在错误页面只显示“未知错误”。
在商品修改的controller方法中抛出异常。
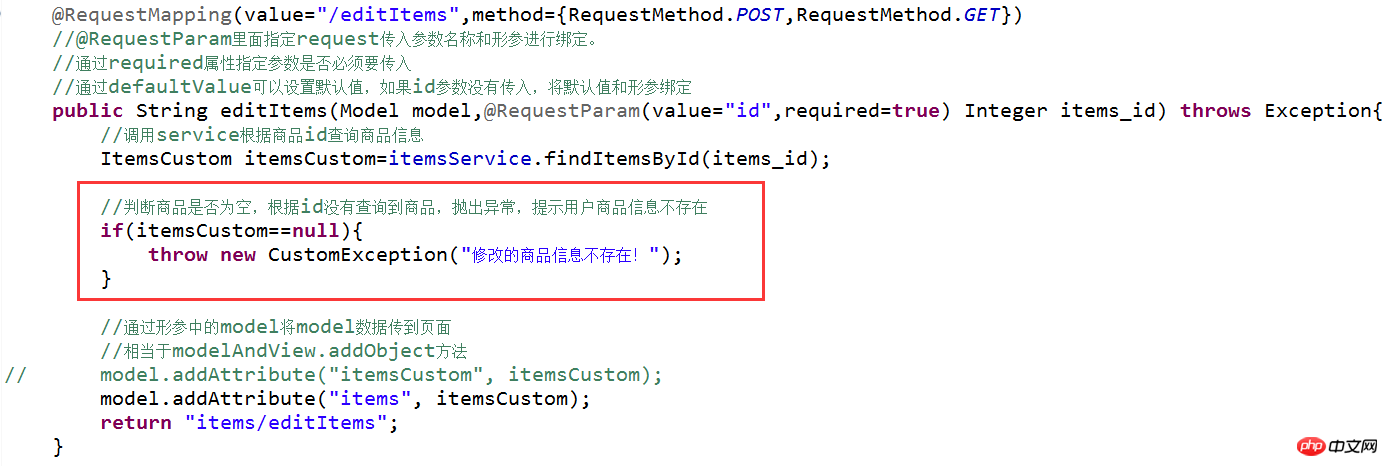
在service接口中抛出异常:
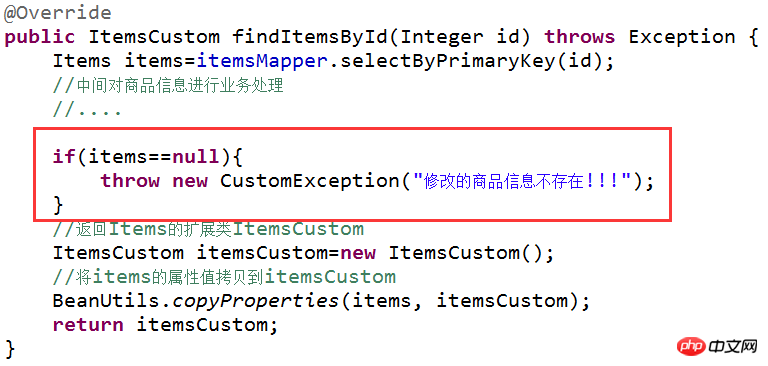
如果与业功能相关的异常,建议在service中抛出异常。
与业务功能没有关系的异常(比如形参校验),建议在controller中抛出。
上边的功能,建议在service中抛出异常。
4.图片上传
4.1配置虚拟目录
在Tomcat上配置图片虚拟目录,在tomcat下conf/server.xml中添加:
<Context docBase="F:\develop\upload\temp" path="/pic" reloadable="false"/>
访问http://localhost:8080/pic即可访问F:\develop\upload\temp下的图片。
注意:在图片虚拟目录中,一定要将图片目录分级创建(提高I/O性能),一般我们采用按日期(年、月、日)进行分级创建。
4.2配置解析器
springmvc中对多部件类型解析。
在页面form中提交enctype="multipart/form-data"的数据时,需要springmvc对multipart类型的数据进行解析。
在springmvc.xml中配置multipart类型解析器。
<!-- 文件上传 --><bean id="multipartResolver"class="org.springframework.web.multipart.commons.CommonsMultipartResolver"><!-- 设置上传文件的最大尺寸为5MB --><property name="maxUploadSize"><value>5242880</value></property></bean>
4.3加入上传图片的jar
上边的解析器内部使用下边的jar进行图片上传。
4.4上传图片
controller:
    @RequestMapping("/editItemsSubmit")public String editItemsSubmit(
            Model model,
            HttpServletRequest request,
            Integer id,
            @ModelAttribute("items") @Validated(value={ValidGroup1.class}) ItemsCustom itemsCustom,
            BindingResult bindingResult,
            MultipartFile items_pic//接收商品图片) throws Exception{        //获取校验错误信息if(bindingResult.hasErrors()){
            List<ObjectError> allErrors=bindingResult.getAllErrors();for (ObjectError objectError : allErrors) {
                System.out.println(objectError.getDefaultMessage());
            }//将错误信息传到页面model.addAttribute("allErrors", allErrors);//可以直接使用model将提交的pojo回显到页面model.addAttribute("items", itemsCustom);//简单数据类型回显model.addAttribute("id", id);//出错,重新到商品页面return "items/editItems";
        }        //上传图片String originalFilename=items_pic.getOriginalFilename();if(items_pic!=null&&originalFilename!=null&&originalFilename.length()>0){//存储图片的物理路径String pic_path="F:\\develop\\upload\\temp\\";//新的图片名称String newFileName=UUID.randomUUID()+originalFilename.substring(originalFilename.lastIndexOf("."));//新图片File newFile=new File(pic_path+newFileName);//将内存中的数据写入磁盘            items_pic.transferTo(newFile);//将新图片名称写到itemsCustom中            itemsCustom.setPic(newFileName);
        }        //调用service更新商品信息,页面需要将商品信息传到此方法        itemsService.updateItems(id, itemsCustom);        //重定向到商品的查询列表//        return "redirect:queryItems.action";//页面转发//        return "forward:queryItems.action";return "success";
}页面:
form添加enctype="multipart/form-data",file的name与controller形参一致:
<form id="itemForm" action="${pageContext.request.contextPath }/items/editItemsSubmit.action" method="post" enctype="multipart/form-data"><input type="hidden" name="id" value="${items.id }"/>修改商品信息:<table width="100%" border=1><tr><td>商品名称</td><td><input type="text" name="name" value="${items.name }"/></td></tr><tr><td>商品价格</td><td><input type="text" name="price" value="${items.price }"/></td></tr><tr><td>商品生产日期</td><td><input type="text" name="createtime" value="<fmt:formatDate value="${items.createtime}" pattern="yyyy-MM-dd HH:mm:ss"/>"/></td></tr><tr><td>商品图片</td><td><c:if test="${items.pic !=null}"><img src="/pic/${items.pic}" width=100 height=100/><br/></c:if><input type="file" name="items_pic"/> </td></tr><tr><td>商品简介</td><td><textarea rows="3" cols="30" name="detail">${items.detail }</textarea></td></tr><tr><td colspan="2" align="center"><input type="submit" value="提交"/></td></tr></table></form>5.Json数据交互
5.1为什么要进行json数据交互
json数据格式在接口调用中、html页面中较常用,json格式比较简单,解析还比较方便。
比如:webserivce接口,传输json数据。
5.2springmvc进行json交互
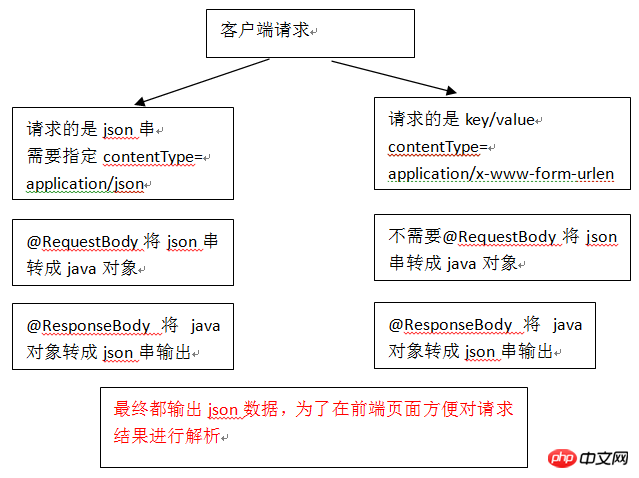
(1)请求json、输出json,要求请求的是json串,所以在前端页面中需要将请求的内容转成json,不太方便。
(2)请求key/value、输出json。次方法比较常用。
5.3环境准备
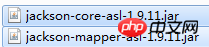
5.3.1加载json转换的jar包
springmvc中使用jackson的包进行json转换(@requestBody和@responseBody使用下边的包进行json转换),如下:
5.3.2配置json转换器
在classpath/springmvc.xml,注解适配器中加入messageConverters
!--注解适配器 --><bean class="org.springframework.web.servlet.mvc.method.annotation.RequestMappingHandlerAdapter"><property name="messageConverters"><list><bean class="org.springframework.http.converter.json.MappingJacksonHttpMessageConverter"></bean></list></property></bean>
注意:如果使用
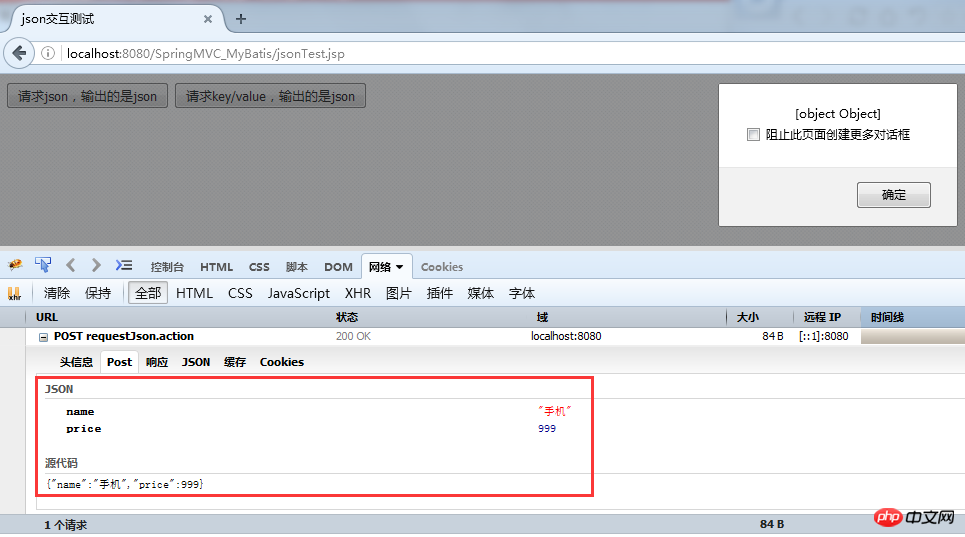
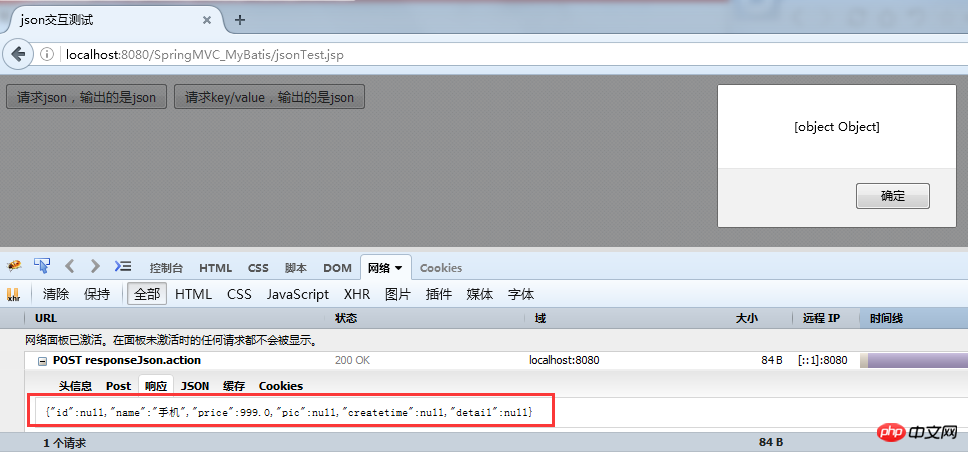
5.4json交互测试
这里分输入json串输出json串和输入key/value输出json两种情况进行测试。
新建jsonTest.jsp
<%@ page language="java" import="java.util.*" pageEncoding="UTF-8"%><%String path = request.getContextPath();String basePath = request.getScheme()+"://"+request.getServerName()+":"+request.getServerPort()+path+"/";%><!DOCTYPE HTML PUBLIC "-//W3C//DTD HTML 4.01 Transitional//EN"><html>
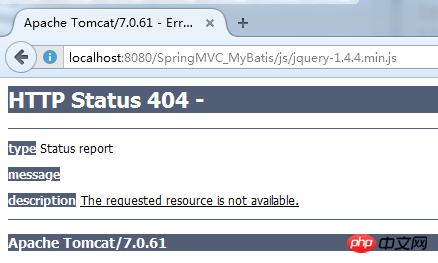
<head><base href="<%=basePath%>"><title>json交互测试</title><meta http-equiv="pragma" content="no-cache"><meta http-equiv="cache-control" content="no-cache"><meta http-equiv="expires" content="0"> <meta http-equiv="keywords" content="keyword1,keyword2,keyword3"><meta http-equiv="description" content="This is my page"><!--<link rel="stylesheet" type="text/css" href="styles.css?1.1.11">--><script type="text/javascript" src="${pageContext.request.contextPath }/js/jquery-1.4.4.min.js?1.1.11"></script> <script type="text/javascript"> //请求json,输出的是json function requestJson(){
$.ajax({
type:'post',
url:'${pageContext.request.contextPath }/requestJson.action',
contentType:'application/json;charset=utf-8', //数据格式是json串,商品信息 data:'{"name":"手机","price":999}',
success:function(data){//返回json结果 alert(data);
}
});
}
//请求key/value,输出的是json function responseJson(){
$.ajax({
type:'post',
url:'${pageContext.request.contextPath }/responseJson.action', //请求是key/value这里不需要指定contentType,因为默认就是key/value类型 //contentType:'application/json;charset=utf-8', //数据格式是json串,商品信息 data:'name=手机&price=999',
success:function(data){//返回json结果 alert(data);
}
});
} </script>
</head>
<body><input type="button" onclick="requestJson()" value="请求json,输出的是json"/> <input type="button" onclick="responseJson()" value="请求key/value,输出的是json"/>
</body></html>新建Controller:
package joanna.yan.ssm.controller;import joanna.yan.ssm.po.ItemsCustom;import org.springframework.stereotype.Controller;import org.springframework.web.bind.annotation.RequestBody;import org.springframework.web.bind.annotation.RequestMapping;import org.springframework.web.bind.annotation.ResponseBody;

@Controllerpublic class JsonTest {//请求json串(商品信息),输出的竖json(商品信息)//@RequestBody将请求的商品信息的json串转成itemsCustom对象//@ResponseBody将itemsCustom转成json输出@RequestMapping("/requestJson")public @ResponseBody ItemsCustom requestJson(@RequestBody ItemsCustom itemsCustom){        return itemsCustom;
    }    //请求key/value,输出的竖json@RequestMapping("/responseJson")public @ResponseBody ItemsCustom responseJson(ItemsCustom itemsCustom){        return itemsCustom;
    }
}(1)测试输入json串输出是json串
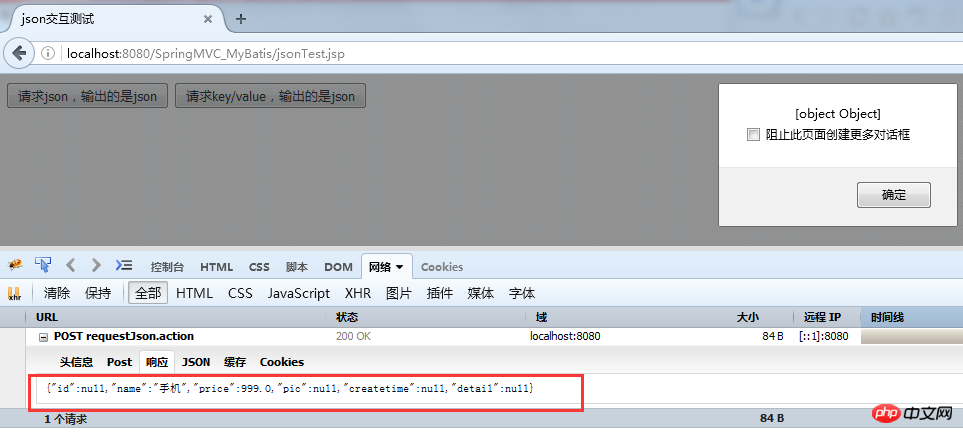
(2)测试输入key/value输出是json串

6.RESTful支持
6.1什么是RESTful
RESTful架构,是目前最流行的一种互联网软件架构。它结构清晰、符合标准、易于理解、扩展方便,所以得到越来越多网站的采用。
RESTful(即Representational State Transfer的缩写)其实是一个开发理念,是对http的很好的诠释。
(1)对url进行规范,写RESTful格式的url
非REST的url:http://...../queryItems.action?id=001&type=T01
REST的url风格:http://..../items/001
特点:url简洁,将参数通过url传到服务端
(2)对http的方法规范
不管是删除、添加、更新...使用url是一致的,如果进行删除,需要设置http的方法为delete,同理添加...
后台controller方法:判断http方法,如果是delete执行删除,如果是post执行添加。
(3)对http的contentType规范
请求时指定contentType,要json数据,设置成json格式的type...
目前完全实现RESTful的系统很少,一般只实现(1)、(3),对于(2)我们一个方法经常会同时存在增删改查,实现起来太费劲了。
下面举例实现(1)、(2)。
6.2REST的例子
6.2.1需求
查询商品信息,返回json数据。
6.2.2controller
定义方法,进行url映射使用REST风格的url,将查询商品信息的id传入controller。
输出json使用@ResponseBody将java对象输出json。
    //查询商品信息,输出json///itemsView/{id}里面的{id}表示占位符,通过@PathVariable获取占位符中的参数//如果占位符中的名称和形参名一致,在@PathVariable可以不指定名称@RequestMapping("/itemsView/{id}")public @ResponseBody ItemsCustom itemsView(@PathVariable("id") Integer id) throws Exception{
        ItemsCustom itemsCustom=itemsService.findItemsById(id);return itemsCustom;
}6.2.3REST方法的前端控制器配置
在web.xml增加配置:
  <!-- springmvc前端控制器,rest配置  -->
  <servlet>  <servlet-name>springmvc_rest</servlet-name>  <servlet-class>org.springframework.web.servlet.DispatcherServlet</servlet-class>  <init-param>  <param-name>contextConfigLocation</param-name>  <param-value>classpath:spring/springmvc.xml</param-value>  </init-param>  <load-on-startup>1</load-on-startup>
  </servlet>

  <servlet-mapping>  <servlet-name>springmvc_rest</servlet-name>  <url-pattern>/</url-pattern>
  </servlet-mapping>
6.3对静态资源的解析
配置前端控制器的url-parttern中指定/,对静态资源的解析出现问题:
在springmvc.xml中添加静态资源解析方法。
    <!-- 静态资源的解析
         包括:js、css、img...-->
         <mvc:resources location="/js/" mapping="/js/**"/>
<mvc:resources location="/img/" mapping="/img/**"/>The above is the detailed content of Detailed introduction to SpringMVC verification. For more information, please follow other related articles on the PHP Chinese website!

Hot AI Tools

Undresser.AI Undress
AI-powered app for creating realistic nude photos

AI Clothes Remover
Online AI tool for removing clothes from photos.

Undress AI Tool
Undress images for free

Clothoff.io
AI clothes remover

Video Face Swap
Swap faces in any video effortlessly with our completely free AI face swap tool!

Hot Article
Hot Tools

Notepad++7.3.1
Easy-to-use and free code editor

SublimeText3 Chinese version
Chinese version, very easy to use

Zend Studio 13.0.1
Powerful PHP integrated development environment

Dreamweaver CS6
Visual web development tools

SublimeText3 Mac version
God-level code editing software (SublimeText3)
Hot Topics


 How to quickly build a statistical chart system under the Vue framework
Aug 21, 2023 pm 05:48 PM
How to quickly build a statistical chart system under the Vue framework
Aug 21, 2023 pm 05:48 PM
How to quickly build a statistical chart system under the Vue framework. In modern web applications, statistical charts are an essential component. As a popular front-end framework, Vue.js provides many convenient tools and components that can help us quickly build a statistical chart system. This article will introduce how to use the Vue framework and some plug-ins to build a simple statistical chart system. First, we need to prepare a Vue.js development environment, including installing Vue scaffolding and some related plug-ins. Execute the following command in the command line
 Can buildings be built in the wild in Mistlock Kingdom?
Mar 07, 2024 pm 08:28 PM
Can buildings be built in the wild in Mistlock Kingdom?
Mar 07, 2024 pm 08:28 PM
Players can collect different materials to build buildings when playing in the Mistlock Kingdom. Many players want to know whether to build buildings in the wild. Buildings cannot be built in the wild in the Mistlock Kingdom. They must be within the scope of the altar. . Can buildings be built in the wild in Mistlock Kingdom? Answer: No. 1. Buildings cannot be built in the wild areas of the Mist Lock Kingdom. 2. The building must be built within the scope of the altar. 3. Players can place the Spirit Fire Altar by themselves, but once they leave the range, they will not be able to construct buildings. 4. We can also directly dig a hole in the mountain as our home, so we don’t need to consume building materials. 5. There is a comfort mechanism in the buildings built by players themselves, that is to say, the better the interior, the higher the comfort. 6. High comfort will bring attribute bonuses to players, such as
 Best practices and precautions for building a web server under CentOS 7
Aug 25, 2023 pm 11:33 PM
Best practices and precautions for building a web server under CentOS 7
Aug 25, 2023 pm 11:33 PM
Best practices and precautions for building web servers under CentOS7 Introduction: In today's Internet era, web servers are one of the core components for building and hosting websites. CentOS7 is a powerful Linux distribution widely used in server environments. This article will explore the best practices and considerations for building a web server on CentOS7, and provide some code examples to help you better understand. 1. Install Apache HTTP server Apache is the most widely used w
 Quickly install PyTorch in PyCharm: an easy guide
Feb 24, 2024 pm 09:54 PM
Quickly install PyTorch in PyCharm: an easy guide
Feb 24, 2024 pm 09:54 PM
PyTorch Installation Guide: Quickly set up a development environment in PyCharm PyTorch is one of the most popular frameworks in the current field of deep learning. It has the characteristics of ease of use and flexibility, and is favored by developers. This article will introduce how to quickly set up the PyTorch development environment in PyCharm, so that you can start the development of deep learning projects. Step 1: Install PyTorch First, we need to install PyTorch. The installation of PyTorch usually needs to take into account the system environment
 What's the best way to set up a Douyin account? What is the five-piece account creation kit?
Apr 02, 2024 am 09:52 AM
What's the best way to set up a Douyin account? What is the five-piece account creation kit?
Apr 02, 2024 am 09:52 AM
With the rapid development of mobile Internet, the short video application Douyin has become an indispensable part of people's daily lives. Having a popular Douyin account can not only attract the attention of fans, but also bring commercial value. So, how to set up the best Douyin account? 1. What is the best way to set up a Douyin account? 1. Clear positioning When creating a Douyin account, you must first clarify your positioning. Do you want to be a funny joker or a professional knowledge sharer? Clear positioning can help attract precise fans, thereby increasing the value of your account. 2. Account naming: A good account name can make fans remember you at a glance. The account name should be concise and clear, related to your positioning, and have a certain degree of creativity. Avoid using names that are too common to avoid confusion with others
 How to build an account matrix? What are the functions of matrix construction?
Mar 23, 2024 pm 06:46 PM
How to build an account matrix? What are the functions of matrix construction?
Mar 23, 2024 pm 06:46 PM
In today's information-rich era, social media platforms have become the main way for people to obtain and share information. For individuals and enterprises, establishing an effective account network to achieve maximum dissemination of information and enhance influence has become an urgent challenge that needs to be solved. 1. How to build an account matrix? 1. Clarify the target audience. Before building an account matrix, the key is to clearly define the target audience and gain an in-depth understanding of their needs, interests, and consumption habits, so that a more targeted content strategy can be developed. 2. Choose the appropriate platform. According to the characteristics of the target group, choose the appropriate social media platform for layout. Currently, the mainstream social media platforms include Weibo, WeChat, Douyin, Kuaishou, etc. Each platform has its own unique user groups and communication characteristics, and the selection needs to be based on the actual situation.
 Network security reinforcement techniques for building web servers under CentOS 7
Aug 05, 2023 pm 01:12 PM
Network security reinforcement techniques for building web servers under CentOS 7
Aug 05, 2023 pm 01:12 PM
Network security reinforcement techniques for building web servers under CentOS7 The web server is an important part of the modern Internet, so it is very important to protect the security of the web server. By hardening network security, you can reduce risks and avoid potential attacks. This article will introduce network security reinforcement techniques commonly used when building web servers on CentOS7, and provide corresponding code examples. Update your system and software First, make sure your system and software are up to date. You can use the following command to update
 Teach you step by step the detailed steps of setting up a web server on CentOS
Aug 07, 2023 pm 03:25 PM
Teach you step by step the detailed steps of setting up a web server on CentOS
Aug 07, 2023 pm 03:25 PM
Teach you step-by-step the detailed steps of setting up a web server on CentOS. Introduction A web server is a software that supports the HTTP protocol and is used to provide web pages and web services. You can use common software such as Apache and Nginx to build a web server on CentOS. This article will use Apache as an example to introduce the detailed steps of building a web server on CentOS. Install Apache First, open a terminal and enter the following command to install Apache: sudoyuminst
