
 Backend Development
Python Tutorial
Detailed example of recording user account login status (python)
Backend Development
Python Tutorial
Detailed example of recording user account login status (python)
Detailed example of recording user account login status (python)

The birth of a flask-based web application is the sixth article. This article mainly introduces the development of the function of recording user account login status. It has certain reference value. Interested friends can refer to the previous
The login and registration functions have been completed, but after logging in successfully and returning to the homepage, I found that it is still completely white. Yes, the title has always been written on the blog, so the ultimate goal is to write a light blog, but before publishing the article, is it right? Do you want to record the login status first?
User login
There are many ways to record login status. The first thing that comes to mind is to use the session that comes with flask, but flask also provides a A more convenient extension, the flask-login package, can be used in the same way as before. You first need to install it:
pip3.6 install flask-login
and then initialize it in default.py:
from flask.ext.login import LoginManager
......

login_manager=LoginManager()
login_manager.session_protection="strong"

#可设置为None,basic,strong已提供不同的安全等级
login_manager.login_view="login" #设置登录页
and then modify it according to your needs. The User model is modified because Flask-Login requires that the User model must implement four methods, which are:
is_authenticated() Determine whether to log in, log in and return True, otherwise return False
is_active() Whether login is allowed, that is, whether the user has been disabled, if disabled, return False
is_anonymous() Falsefor ordinary users
get_id() Return the user's unique identifier, using Unicode encoding
These four methods can be implemented directly in the User model, but there is a simpler way, which is to inherit the UserMixin class provided by Flask-Login, which It contains the default implementation of these methods. The modified User model is:
from flask.ext.login import UserMixin

class User(UserMixin,db.Model):
  __tablename__="users"
  id=db.Column(db.Integer,primary_key=True)
  ......
flask-login also requires the program to implement a callback function, and the specified identifier is used in the user:
@login_manager.user_loader
def load_user(user_id):
  return User.query.get(int(user_id))
After that, you can easily use the flask-login framework and continue to modify the navigation part of the homepage template to display the user name and corresponding information:
{%extends "bootstrap/base.html "%}
{% block title%}牛博客 {% endblock %}<!--覆盖title标签-->
{% block navbar %}
<nav class="navbar navbar-inverse"><!-- 导航部分 -->
<p class="navbar-header">
<a class="navbar-brand" href="#" rel="external nofollow" rel="external nofollow" >
牛博客
</a>
</p>
<p class="collapse navbar-collapse" id="bs-example-navbar-collapse-1">
<ul class="nav navbar-nav">
<li><a href="/" rel="external nofollow" >首页</a></li>
</ul>
<ul class="nav navbar-nav navbar-right">
{% if current_user.is_authenticated %}
<li><p class="navbar-text"><a href="#" rel="external nofollow" rel="external nofollow" class="navbar-link">{{current_user.username}}</a> 您好</p></li>
<li><a href="{{url_for('logout')}}" rel="external nofollow" >登出</a></li>
{% else %}
<li><a href="{{url_for('login')}}" rel="external nofollow" >登录</a></li>
{% endif %}
</ul>
</p><!-- /.navbar-collapse -->
</nav>
{% endblock %}
{% block content %} <!--具体内容-->
<p class="container">
</p>
{% endblock %}The url_for method appears here, and its main function is to use the program Generate a URL based on the information, such as passing in the method name of the view to generate the corresponding URL. You can also generate URL parameters through the dynamic parameters of the method, such as url_for('index',age=5), the result is /?age=5
The main content is to determine whether you are logged in. If you are logged in, it will display {{username}} Hello and provide a logout function. Otherwise, the login link will be displayed.
Modify login form:
class LoginForm(Form):
  username=StringField("请输入用户名",validators=[DataRequired()])
  password=PasswordField("请输入密码")
  remember_me=BooleanField("记住我")
submit=SubmitField("登录")Add remember me item, BooleanField defaults to multi-select button
Modify login view method:
@app.route("/login",methods=["GET","POST"])
def login():
  form=LoginForm()
  if form.validate_on_submit():
    username = form.username.data
    password = form.password.data
    user = User.query.filter_by(username=username, password=password).first()
    if user is not None:
      login_user(user,form.remember_me.data)
      return redirect(url_for("index"))
    else:
      flash("您输入的用户名或密码错误")
      return render_template("/login.html",form=form) # 返回的仍为登录页
return render_template("/login.html",form=form)where login_user is The flask_login plug-in is provided to set user login. The second parameter is the remember me option. If True is entered, the cookie storage status is provided. Otherwise, closing the browser status will cancel it.
New logout method :
@app.route("/logout",methods=["GET","POST"])
@login_required
def logout():
  logout_user()
return redirect(url_for("index"))This method is very simple. Just use the logout method provided by flask-login. Note that the @login_required decorator indicates that only logged-in users can access this view method.
Run the test and enter the home page address:
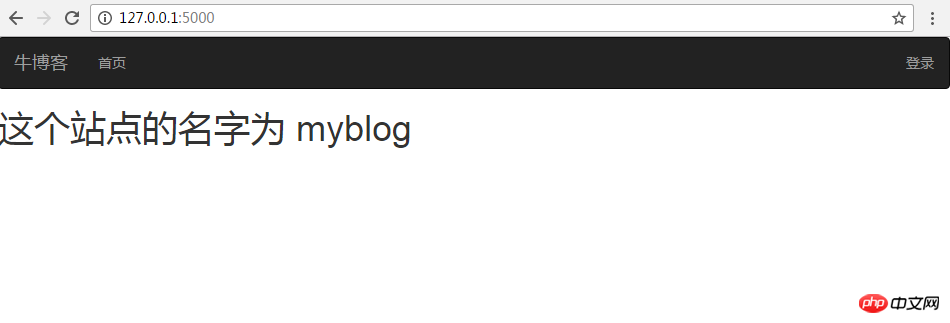
Click the login button in the upper right corner:
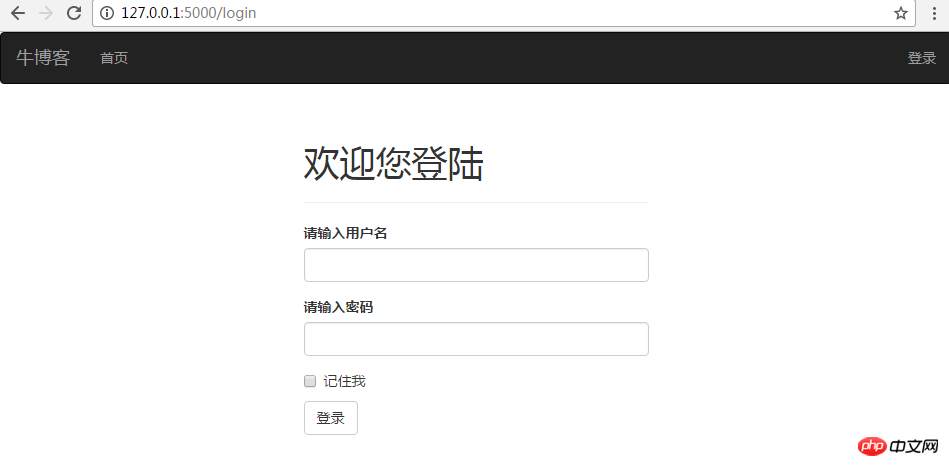
Enter user name zhangji password 123 and select remember me, click OK:
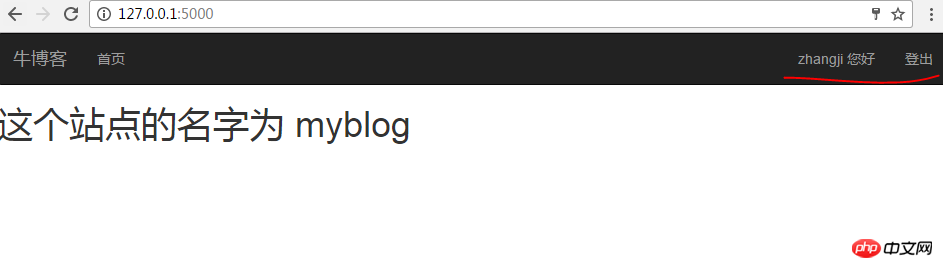
Pay attention to the red line part, the display is normal, click to log out at this time:

Pay attention to the red line and return to the initial state.
Chapter Conclusion
The next step was supposed to be the post and follow functions, but it is obvious that the code is now in default.py, and the code structure is becoming increasingly difficult to handle. , so the length of this chapter is relatively small. The next chapter will focus on refactoring the existing code and grouping the functions, and then continue to write the next functions. Thanks for watching.
The above is the detailed content of Detailed example of recording user account login status (python). For more information, please follow other related articles on the PHP Chinese website!

Hot AI Tools

Undresser.AI Undress
AI-powered app for creating realistic nude photos

AI Clothes Remover
Online AI tool for removing clothes from photos.

Undress AI Tool
Undress images for free

Clothoff.io
AI clothes remover

Video Face Swap
Swap faces in any video effortlessly with our completely free AI face swap tool!

Hot Article
Hot Tools

Notepad++7.3.1
Easy-to-use and free code editor

SublimeText3 Chinese version
Chinese version, very easy to use

Zend Studio 13.0.1
Powerful PHP integrated development environment

Dreamweaver CS6
Visual web development tools

SublimeText3 Mac version
God-level code editing software (SublimeText3)
Hot Topics
 1664
1664
 14
1423
52
1321
25
1269
29
1249
24
14
1423
52
1321
25
1269
29
1249
24

 PHP and Python: Different Paradigms Explained
Apr 18, 2025 am 12:26 AM
PHP and Python: Different Paradigms Explained
Apr 18, 2025 am 12:26 AM
PHP is mainly procedural programming, but also supports object-oriented programming (OOP); Python supports a variety of paradigms, including OOP, functional and procedural programming. PHP is suitable for web development, and Python is suitable for a variety of applications such as data analysis and machine learning.
 Choosing Between PHP and Python: A Guide
Apr 18, 2025 am 12:24 AM
Choosing Between PHP and Python: A Guide
Apr 18, 2025 am 12:24 AM
PHP is suitable for web development and rapid prototyping, and Python is suitable for data science and machine learning. 1.PHP is used for dynamic web development, with simple syntax and suitable for rapid development. 2. Python has concise syntax, is suitable for multiple fields, and has a strong library ecosystem.
 How to run sublime code python
Apr 16, 2025 am 08:48 AM
How to run sublime code python
Apr 16, 2025 am 08:48 AM
To run Python code in Sublime Text, you need to install the Python plug-in first, then create a .py file and write the code, and finally press Ctrl B to run the code, and the output will be displayed in the console.
 PHP and Python: A Deep Dive into Their History
Apr 18, 2025 am 12:25 AM
PHP and Python: A Deep Dive into Their History
Apr 18, 2025 am 12:25 AM
PHP originated in 1994 and was developed by RasmusLerdorf. It was originally used to track website visitors and gradually evolved into a server-side scripting language and was widely used in web development. Python was developed by Guidovan Rossum in the late 1980s and was first released in 1991. It emphasizes code readability and simplicity, and is suitable for scientific computing, data analysis and other fields.
 Python vs. JavaScript: The Learning Curve and Ease of Use
Apr 16, 2025 am 12:12 AM
Python vs. JavaScript: The Learning Curve and Ease of Use
Apr 16, 2025 am 12:12 AM
Python is more suitable for beginners, with a smooth learning curve and concise syntax; JavaScript is suitable for front-end development, with a steep learning curve and flexible syntax. 1. Python syntax is intuitive and suitable for data science and back-end development. 2. JavaScript is flexible and widely used in front-end and server-side programming.
 Golang vs. Python: Performance and Scalability
Apr 19, 2025 am 12:18 AM
Golang vs. Python: Performance and Scalability
Apr 19, 2025 am 12:18 AM
Golang is better than Python in terms of performance and scalability. 1) Golang's compilation-type characteristics and efficient concurrency model make it perform well in high concurrency scenarios. 2) Python, as an interpreted language, executes slowly, but can optimize performance through tools such as Cython.
 Where to write code in vscode
Apr 15, 2025 pm 09:54 PM
Where to write code in vscode
Apr 15, 2025 pm 09:54 PM
Writing code in Visual Studio Code (VSCode) is simple and easy to use. Just install VSCode, create a project, select a language, create a file, write code, save and run it. The advantages of VSCode include cross-platform, free and open source, powerful features, rich extensions, and lightweight and fast.
 How to run python with notepad
Apr 16, 2025 pm 07:33 PM
How to run python with notepad
Apr 16, 2025 pm 07:33 PM
Running Python code in Notepad requires the Python executable and NppExec plug-in to be installed. After installing Python and adding PATH to it, configure the command "python" and the parameter "{CURRENT_DIRECTORY}{FILE_NAME}" in the NppExec plug-in to run Python code in Notepad through the shortcut key "F6".
