

Fix Page Fault In Nonpaged Area Error In Windows

Numerous Windows 10 users have encountered the frustrating Page Fault In Nonpaged Area Error, a notorious Blue Screen of Death (BSOD) message that can be challenging to resolve. This article provides a comprehensive guide on understanding and fixing this error.
 If you're facing the Windows 10 Page Fault In Nonpaged Area error, utilize the solutions outlined here to resolve it.
Table of Contents
- Understanding Page Fault In Nonpaged Area Error
- Causes of Page Fault In Nonpaged Area Error
- Resolving Page Fault In Nonpaged Area Error on Windows 10
- Initial Troubleshooting Steps
- Solution #1: Revert Recent Windows Changes
- Solution #2: Remove Third-Party Antivirus Software
- Solution #3: Check for Hard Drive Errors
- Solution #4: Utilize Windows Memory Diagnostic Tool
- Solution #5: Disable Automatic Paging
- Solution #6: Update Your Drivers
- Conclusion
Understanding Page Fault In Nonpaged Area Error
The Page Fault In Nonpaged Area error, also known as PAGE_FAULT_IN_NONPAGED_AREA, is a BSOD error identified by the error code STOP: 0x00000050 (0xCD3DD628, 0x00000001, 0x804EFC9A, 0x00000000). When this error occurs, you may also see additional error messages, including:
- Driver names like ntfs.sys or ntoskrnl.exe
- Stop: 0X00000050 (00000050 error)
- STOP: 0x50, among others
The STOP:0x00000050 error signifies that the system attempted to access a memory page that was not available, causing the Windows OS to halt the ongoing process.
Consequences of the Page Fault In Nonpaged Area error may include:
- Frequent operating system crashes
- Loss of crucial data
- Hardware malfunctions
- Inaccessibility to programs on Windows OS
Causes of Page Fault In Nonpaged Area Error
Microsoft indicates that the Page Fault In Nonpaged Area error with code 00000050 can stem from both software and hardware issues, such as:
- Interrupted or incomplete Windows updates
- Conflicts or incompatibilities with drivers or third-party software (e.g., printers, antivirus programs)
- Defective RAM
- Corrupted memory
- Damaged registry files
- Presence of malware on the system
Resolving Page Fault In Nonpaged Area Error on Windows 10
To address the Page Fault In Nonpaged Area Error on Windows 10, consider the following solutions:
Initial Troubleshooting Steps
Before delving into the technical fixes for the Page Fault In Nonpaged Area Error on Windows 10, try these preliminary steps:
- Restart your computer and attempt the process again to see if the issue resolves itself.
- Perform an anti-malware scan to eliminate any malware or viruses that might be obstructing the Windows update process.
- Temporarily disable any third-party antivirus or firewall software, then attempt to print the document you were working on.
If these initial steps do not resolve the Page Fault In Nonpaged Area Error, proceed with the following technical solutions.
Important: Before applying these solutions, ensure you create a Windows restore point to safeguard against potential issues.
Solution #1: Revert Recent Windows Changes
To address the Page Fault In Nonpaged Area error using this method, start Windows in Safe Mode and then undo recent changes on your PC.
Safe Mode starts Windows with minimal drivers and services, ensuring stability.
To enter Safe Mode on Windows 10:
- Click the Start button.
- Select the Power icon.
- Hold down the Shift key and click Restart.
- From the new menu, choose Troubleshoot > Advanced Options > Startup Settings.
- Click Restart.
- After rebooting, select option 4 for Safe Mode or option 5 for Safe Mode with Networking.
In Safe Mode, you can run anti-malware software to remove potential malware or uninstall a recent Windows update that might be causing the Page Fault In Nonpaged Area error.
Solution #2: Remove Third-Party Antivirus Software
Antivirus software can sometimes trigger false positives or cause driver conflicts. If disabling the antivirus does not resolve the issue, consider uninstalling it.
Before uninstalling, perform a full system scan to ensure no malware is interfering with system operations. This scan can help remove any malware contributing to the error.
Solution #3: Check for Hard Drive Errors
To check for hard drive errors, use Windows' built-in tools to assess disk integrity. This process can identify and fix common errors like the Page Fault In Nonpaged Area error (STOP: 0x00000050).
To perform a system file check from the command line, follow these steps:
- Press Windows Key S.
- Type CMD to open the command prompt.
- Click Run as Administrator.
- Type (or copy-paste) 'chkdsk c: /f' and press Enter.
After the SFC process completes, restart your device and check if the error is resolved. The "chkdsk C: /f" command detects and repairs file system issues.
For physical drive issues, use the "chkdsk C: /r" command instead. You can run both commands together by typing "chkdsk C: /f /r" to identify and repair hard drive errors.
 Restart your computer to see if the PAGE FAULT IN NONPAGED AREA error is resolved.
Solution #4: Utilize Windows Memory Diagnostic Tool
The STOP: 0x00000050 error can result from issues with Random Access Memory (RAM). Windows Memory Diagnostic is a built-in tool that checks for RAM problems and reports any issues found. To use it:
Press Windows Key S.
Type "memory diagnostic" in the search box.
-
The Windows Memory Diagnostic tool offers two options:
- "Restart your computer now and check for problems immediately."
- "Check for problems the next time you start your computer." This option scans before loading Windows.

Choose the option that suits your needs.

Wait for the process to complete and check for any RAM issues to guide your next steps.
Solution #5: Disable Automatic Paging
Disabling Automatic Paging can help resolve the Page Fault in Nonpaged Area error on Windows OS. To do this:
- Press Windows Key E.
- Right-click on This PC in the left pane.
- Select Properties > Advanced System Settings > Performance Settings.
- In the Performance Settings window, go to the Advanced tab.
- Click Change, then uncheck "Automatically Manage Paging File Size for All Drives".
- Click OK to save the settings, then restart your computer.
Solution #6: Update Your Drivers
Outdated or faulty device drivers can cause the Page Fault in Nonpaged Area error. To address this:
- Press Windows R.
- Type devmgmt.msc in the run dialog box and press Enter.
- Look for drivers marked with a yellow exclamation sign.
- Right-click on each identified driver and select Update Driver Software, then follow the on-screen instructions.
- If updating fails, consider disabling or uninstalling the driver. It will be updated during the next Windows Update.
Note: After updating drivers, ensure you update Windows to obtain the latest driver versions.
Solution #7: Physically Check RAM
RAM issues are a common cause of the Page Fault in Nonpaged Area error. If your computer has multiple RAM chips, removing a faulty one might resolve the issue. If you have only one RAM chip and it's causing the STOP: 0x00000050 error, follow these steps:
- Completely shut down your computer.
- Remove the battery and unplug all power cords.
- Disconnect the RAM strip.
- Reinsert the RAM strip correctly.
Restart your computer to check if the Page Fault in Nonpaged Area error is resolved.
Conclusion
This article has provided insights into the causes of the PAGE FAULT IN NONPAGED AREA error and offered multiple solutions to address it. By following these steps, you should be able to resolve the error and restore your system's functionality.
Interested in receiving promotions, deals, and discounts on our products? Subscribe to our newsletter by entering your email address below! Stay updated with the latest technology news and productivity tips directly in your inbox.
Next Article
- Fixed: Print Spooler Keeps Stopping on Windows 10
The above is the detailed content of Fix Page Fault In Nonpaged Area Error In Windows. For more information, please follow other related articles on the PHP Chinese website!

Hot AI Tools

Undresser.AI Undress
AI-powered app for creating realistic nude photos

AI Clothes Remover
Online AI tool for removing clothes from photos.

Undress AI Tool
Undress images for free

Clothoff.io
AI clothes remover

Video Face Swap
Swap faces in any video effortlessly with our completely free AI face swap tool!

Hot Article
Hot Tools

Notepad++7.3.1
Easy-to-use and free code editor

SublimeText3 Chinese version
Chinese version, very easy to use

Zend Studio 13.0.1
Powerful PHP integrated development environment

Dreamweaver CS6
Visual web development tools

SublimeText3 Mac version
God-level code editing software (SublimeText3)
Hot Topics
 1672
1672
 14
1428
52
1332
25
1277
29
1257
24
14
1428
52
1332
25
1277
29
1257
24

 Windows kb5054979 update information Update content list
Apr 15, 2025 pm 05:36 PM
Windows kb5054979 update information Update content list
Apr 15, 2025 pm 05:36 PM
KB5054979 is a cumulative security update released on March 27, 2025, for Windows 11 version 24H2. It targets .NET Framework versions 3.5 and 4.8.1, enhancing security and overall stability. Notably, the update addresses an issue with file and directory operations on UNC shares using System.IO APIs. Two installation methods are provided: one through Windows Settings by checking for updates under Windows Update, and the other via a manual download from the Microsoft Update Catalog.
 Nanoleaf Wants to Change How You Charge Your Tech
Apr 17, 2025 am 01:03 AM
Nanoleaf Wants to Change How You Charge Your Tech
Apr 17, 2025 am 01:03 AM
Nanoleaf's Pegboard Desk Dock: A Stylish and Functional Desk Organizer Tired of the same old charging setup? Nanoleaf's new Pegboard Desk Dock offers a stylish and functional alternative. This multifunctional desk accessory boasts 32 full-color RGB
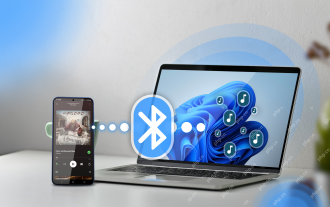 How to Use Windows 11 as a Bluetooth Audio Receiver
Apr 15, 2025 am 03:01 AM
How to Use Windows 11 as a Bluetooth Audio Receiver
Apr 15, 2025 am 03:01 AM
Turn your Windows 11 PC into a Bluetooth speaker and enjoy your favorite music from your phone! This guide shows you how to easily connect your iPhone or Android device to your computer for audio playback. Step 1: Pair Your Bluetooth Device First, pa
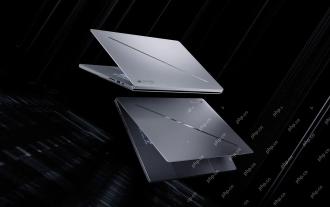 ASUS' ROG Zephyrus G14 OLED Gaming Laptop Is $300 Off
Apr 16, 2025 am 03:01 AM
ASUS' ROG Zephyrus G14 OLED Gaming Laptop Is $300 Off
Apr 16, 2025 am 03:01 AM
ASUS ROG Zephyrus G14 Esports Laptop Special Offer! Buy ASUS ROG Zephyrus G14 Esports Laptop now and enjoy a $300 offer! Original price is $1999, current price is only $1699! Enjoy immersive gaming experience anytime, anywhere, or use it as a reliable portable workstation. Best Buy currently offers offers on this 2024 14-inch ASUS ROG Zephyrus G14 e-sports laptop. Its powerful configuration and performance are impressive. This ASUS ROG Zephyrus G14 e-sports laptop costs 16 on Best Buy
 5 Hidden Windows Features You Should Be Using
Apr 16, 2025 am 12:57 AM
5 Hidden Windows Features You Should Be Using
Apr 16, 2025 am 12:57 AM
Unlock Hidden Windows Features for a Smoother Experience! Discover surprisingly useful Windows functionalities that can significantly enhance your computing experience. Even seasoned Windows users might find some new tricks here. Dynamic Lock: Auto
 How (and Why) to Turn Off Mouse Acceleration on Windows 11
Apr 15, 2025 am 06:06 AM
How (and Why) to Turn Off Mouse Acceleration on Windows 11
Apr 15, 2025 am 06:06 AM
Improve mouse accuracy: Disable Windows 11 mouse acceleration function The mouse cursor moves too fast on the screen, even if you only move the mouse a few centimeters? This is what the mouse acceleration function is. This article will guide you on how to disable this feature to better control mouse movement. Is it wise to disable mouse acceleration? There is no direct "Mouse Acceleration" option in Windows systems. Instead, it is the "Enhanced Pointer Precision" setting, which Microsoft sees as a mouse acceleration feature. When this feature is enabled, the mouse's DPI (dots per inch) setting takes effect. It controls the relationship between the physical movement speed of the mouse and the distance the cursor moves on the screen. Move the mouse slowly, Windows will reduce the effective DPI and the cursor moves shorter
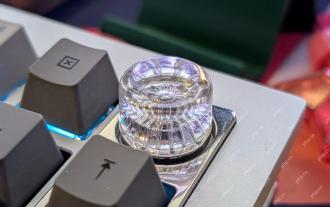 Your Keyboard Needs a Big Ol' Volume Knob
Apr 18, 2025 am 03:04 AM
Your Keyboard Needs a Big Ol' Volume Knob
Apr 18, 2025 am 03:04 AM
In today's touchscreen world, the satisfying tactile feedback of physical controls is a welcome change. That's why a keyboard with a large volume knob is surprisingly appealing. I recently experienced this firsthand, and it's been a revelation. For
 How to Right-Click With No Mouse
Apr 18, 2025 pm 12:03 PM
How to Right-Click With No Mouse
Apr 18, 2025 pm 12:03 PM
The mouse is a vital component to getting work done on your PC. But when you’re stuck with a faulty mouse, you can run into a few problems including the inability to right-click. But the good news is that there are definitely ways t
