

How to downgrade from macOS Monterey

This guide explains how to safely downgrade from macOS Monterey to Big Sur. Major macOS updates, especially betas, can introduce problems like incompatibility, speed issues, or missing features. This article provides a step-by-step process using a few apps and a USB drive.

Downgrading macOS Monterey: A 5-Step Process
Step 1: Back Up Your Files
Before downgrading, create a backup of essential files. The article recommends Get Backup Pro as a time-saving alternative to Time Machine, allowing you to selectively back up important files and folders.
- Open Get Backup Pro and create a new backup project.
- Name the backup and select an external drive.
- Add files and folders, then start the backup.
The article also suggests using CleanMyMac X to clean up your Mac before backing up to minimize unnecessary files.

Step 2: Create a Bootable Big Sur Installer
You'll need a bootable Big Sur installer on a USB drive (at least 16GB). If you don't already have one, follow these instructions:
- Connect the USB drive.
- Open Terminal and use the command:
sudo /Applications/Install\ macOS\ Big\ Sur.app/Contents/Resources/createinstallmedia --volume /Volumes/MyVolume(replace/Volumes/MyVolumewith your drive's path). - Follow the prompts, entering your admin password.
- Eject the drive once the process is complete. (If you need to format the drive first, use Disk Utility to erase it, choosing APFS or macOS Extended.)
Step 3: Delete macOS Monterey
- Restart your Mac, holding Command R to enter Recovery mode.
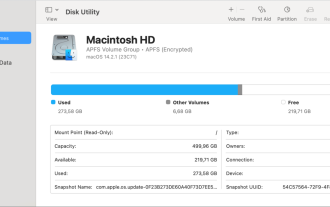
- Open Disk Utility, select your main drive, and click "Erase."
- Choose APFS or macOS Extended and confirm.

Step 4: Reinstall macOS Big Sur
- Restart your Mac, holding down the Option key.
- Select the Big Sur installer from the startup disk options.
- Click "Continue" to reinstall. (If booting from the external drive fails, check Startup Security Utility in Recovery mode (Command R) to enable booting from external media.)
Step 5: Restore Your Backup
Once Big Sur is reinstalled, restore your backup using either Time Machine (via Recovery mode) or Get Backup Pro.
Replacing Monterey Features in Big Sur
The article suggests Setapp apps as alternatives for some Monterey features:
- Live Text: Use TextSniper to extract text from images and videos.
- Quick Note: Use NotePlan and SideNotes for note-taking and quick notes.
- Focus mode: Use Session, Be Focused, One Switch, Serenity, or Focus to manage notifications and distractions.


A 7-day free trial of Setapp is offered to try these apps.
The above is the detailed content of How to downgrade from macOS Monterey. For more information, please follow other related articles on the PHP Chinese website!

Hot AI Tools

Undresser.AI Undress
AI-powered app for creating realistic nude photos

AI Clothes Remover
Online AI tool for removing clothes from photos.

Undress AI Tool
Undress images for free

Clothoff.io
AI clothes remover

Video Face Swap
Swap faces in any video effortlessly with our completely free AI face swap tool!
Hot Article
Hot Tools

Notepad++7.3.1
Easy-to-use and free code editor

SublimeText3 Chinese version
Chinese version, very easy to use

Zend Studio 13.0.1
Powerful PHP integrated development environment

Dreamweaver CS6
Visual web development tools

SublimeText3 Mac version
God-level code editing software (SublimeText3)
Hot Topics
 1657
1657
 14
1415
52
1309
25
1257
29
1229
24
14
1415
52
1309
25
1257
29
1229
24

 Fix your Mac running slow after update to Sequoia
Apr 14, 2025 am 09:30 AM
Fix your Mac running slow after update to Sequoia
Apr 14, 2025 am 09:30 AM
After upgrading to the latest macOS, does the Mac run slower? Don't worry, you are not alone! This article will share my experience in solving slow Mac running problems after upgrading to macOS Sequoia. After the upgrade, I can’t wait to experience new features such as recording and transcription of voice notes and improved trail map planning capabilities. But after installation, my Mac started running slowly. Causes and solutions for slow Mac running after macOS update Here is my summary of my experience, I hope it can help you solve the problem of slow Mac running after macOS Sequoia update: Cause of the problem Solution Performance issues Using Novabe
 How to get rid of 'Your screen is being observed' error
Apr 05, 2025 am 10:19 AM
How to get rid of 'Your screen is being observed' error
Apr 05, 2025 am 10:19 AM
When you see the message "Your screen is being monitored", the first thing you think of is someone hacking into your computer. But that's not always the case. Let's try to find out if there are any issues that need you to worry about. Protect your Mac With Setapp, you don't need to worry about choosing a tool to protect your computer. You can quickly form your own suite of privacy and security software on Setapp. Free Trial Security Test What does "Your screen is being monitored" mean? There are many reasons why there is a Mac lock screen message that appears with “Your screen is being monitored”. You are sharing the screen with others You are recording the screen You are using AirPlay You are using some apps that try to access your screen Your computer is infected with evil
 How to reduce WindowServer Mac CPU usage
Apr 16, 2025 pm 12:07 PM
How to reduce WindowServer Mac CPU usage
Apr 16, 2025 pm 12:07 PM
macOS WindowServer: Understanding High CPU Usage and Solutions Have you noticed WindowServer consuming significant CPU resources on your Mac? This process is crucial for your Mac's graphical interface, rendering everything you see on screen. High C
 How to make a video into a live photo on Mac and iPhone: Detailed steps
Apr 11, 2025 am 10:59 AM
How to make a video into a live photo on Mac and iPhone: Detailed steps
Apr 11, 2025 am 10:59 AM
This guide explains how to convert between Live Photos, videos, and GIFs on iPhones and Macs. Modern iPhones excel at image processing, but managing different media formats can be tricky. This tutorial provides solutions for various conversions, al
 Mac Disk Utility: How to Repair Disk with First Aid? How to Recover It?
Apr 13, 2025 am 11:49 AM
Mac Disk Utility: How to Repair Disk with First Aid? How to Recover It?
Apr 13, 2025 am 11:49 AM
You might need to repair your Mac disk if your computer won’t start up, apps keep freezing, you can’t open certain documents, or the performance has slowed to a halt. Luckily, Apple includes a handy tool you can use to
 Is Google Chrome Not Working on Mac? Why Are Websites Not Loading?
Apr 12, 2025 am 11:36 AM
Is Google Chrome Not Working on Mac? Why Are Websites Not Loading?
Apr 12, 2025 am 11:36 AM
With a market share of over 65.7%, Google Chrome is the biggest web browser in the world. You can use it if you use other operating systems like Windows and Android, but many Mac users also prefer Chrome over Safari. Mo
 How to show only active apps in Dock on Mac
Apr 09, 2025 am 11:44 AM
How to show only active apps in Dock on Mac
Apr 09, 2025 am 11:44 AM
Mac Dockbar Optimization Guide: Show only running applications The dock bar of your Mac is the core of the system, from which you can launch Finder, Trash, recently used apps, active apps, and bookmark apps, and even add folders such as Document and Downloads. By default, the Mac dock bar will display more than a dozen Apple-owned applications. Most users will add more applications, but rarely delete any applications, resulting in the dock bar being cluttered and difficult to use effectively. This article will introduce several ways to help you organize and clean up your Mac dock bar in just a few minutes. Method 1: Manually organize the dock bar You can manually remove unused applications and keep only commonly used applications. Remove the application: Right-click on the application
 How to delete files on Mac
Apr 15, 2025 am 10:22 AM
How to delete files on Mac
Apr 15, 2025 am 10:22 AM
Managing Mac storage: A comprehensive guide to deleting files Daily Mac usage involves installing apps, creating files, and downloading data. However, even high-end Macs have limited storage. This guide provides various methods for deleting unneces
