

Atomfall: Robotics Facility Guide

Navigating Atomfall's Robotics Lab: A Comprehensive Guide
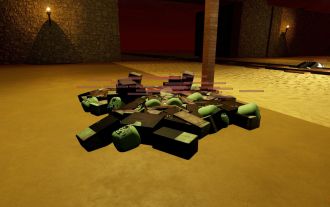
The Interchange's Robotics Lab is a heavily guarded area brimming with Atomfall's darkest secrets. This perilous location is packed with automated turrets, hostile combat robots, and other environmental hazards. However, the potential rewards—including valuable supplies like Training Stimulants and ammunition—make it a worthwhile, albeit risky, venture. Furthermore, accessing the lab is crucial for completing Doctor Garrow's storyline and unlocking all game endings.

Accessing the Robotics Lab
The Robotics Lab lies deep within the Interchange, nestled between Data Stores Bravo and Delta. To reach it, you must enter the Interchange from either Skethermoor or Slatten Dale. Approaching from Skethermoor is recommended. Data Store Bravo requires power to open the Robotics Lab door, necessitating a Signal Redirector, obtainable from Skethermoor Prison or the Protocol Field Station.

Two gun turrets guard the door, and two patrolling robots (one with a machine gun, the other a flamethrower) pose additional threats. Defeating these robots yields Atomic Batteries, useful for powering other Data Stores. Use the Signal Redirector at the sides of the Robotics Lab door to disable the turrets. A note from a deceased scientist near the door falsely suggests a Signal Redirector inside the lab; ignore this.
Essential Preparations
Before venturing into the Robotics Lab, ensure you have:
- A Signal Redirector
- A rifle, handgun, shotgun, and ample ammunition for each
- Bandages and crafting materials
- Burn Salve
- (Optional) Painkillers (highly recommended against machine gun fire)
Obtaining the Control Room Keycard
Upon entering the Robotics Lab, store unnecessary items in the Storage Tube and collect extra ammo from the security room's desk. Proceed through the rail tunnel to the main area. To access the Control Room:
- Navigate to the upstairs area on the left (the Cafeteria offers a shortcut but be wary of rats).
- Reach Room 4 (room number is floor-marked).
- Crawl through the vent to retrieve the keycard from the desk.
- Unlock the exit door and then the Control Room.
The Control Room contains supplies, including Training Stimulants. Activating the button provides Signal Redirector location hints (if needed) and reactivates lower-level turrets and a machine gun robot.
Securing the Storage Room Key

The Robot Assembly Bay (opposite the Control Room) holds the key to the upper storage room. After powering the area, use the lever to drop a dead scientist, revealing the key. This provides additional supplies, but expect robot encounters.
Accessing the Secure Lab

The Secure Lab's bulkhead requires power from both lab sides. Once power is restored, use the Signal Redirector at several Junction Boxes to energize the door.
-
Left Side: Access the switch room below the Control Room. Use the Signal Redirector on the opposite box to power the panel, then pull the lever. This electrifies the floor. Navigate upstairs to safely switch another Junction Box, deactivating the electrified water. Remember, the Signal Redirector's needle indicates proximity to a Junction Box.
-
Right Side: Proceed to the yellow doors. Neutralize or evade the patrolling robot. Use the Signal Redirector through the window to activate the Junction Box. Open the door, reach the back, pull the lever, and climb crates to activate the ceiling Junction Box.
Once both sides are powered, use the control panel to open the bulkhead and descend the elevator shaft (a one-way trip).

Retrieving Doctor Garrow's Research Notes

The lower level is heavily defended. An exit tunnel (to the right) provides a means of escape and resupply (though infested with Ferals).
To proceed, activate three consoles (A, B, C). Follow the right-hand path counterclockwise, deactivating turrets and evading robots. Console C is first, followed by Console B (expect robot encounters). Deactivate the final turret above the bathrooms (carefully selecting the correct Junction Box to avoid electrocution). Activate Console A in the central room. The yellow doors open, revealing the Head Office Keycard (from a deceased scientist). Use the keycard to unlock Doctor Holder's office (upstairs from Console B), retrieve the research notes, and return to the Interchange via the exit tunnel.

The above is the detailed content of Atomfall: Robotics Facility Guide. For more information, please follow other related articles on the PHP Chinese website!

Hot AI Tools

Undresser.AI Undress
AI-powered app for creating realistic nude photos

AI Clothes Remover
Online AI tool for removing clothes from photos.

Undress AI Tool
Undress images for free

Clothoff.io
AI clothes remover

Video Face Swap
Swap faces in any video effortlessly with our completely free AI face swap tool!

Hot Article
Hot Tools

Notepad++7.3.1
Easy-to-use and free code editor

SublimeText3 Chinese version
Chinese version, very easy to use

Zend Studio 13.0.1
Powerful PHP integrated development environment

Dreamweaver CS6
Visual web development tools

SublimeText3 Mac version
God-level code editing software (SublimeText3)
Hot Topics
 1657
1657
 14
1415
52
1309
25
1257
29
1229
24
14
1415
52
1309
25
1257
29
1229
24

 Roblox: Dead Rails - How To Tame Wolves
Apr 07, 2025 am 06:05 AM
Roblox: Dead Rails - How To Tame Wolves
Apr 07, 2025 am 06:05 AM
In the desolate landscapes of Roblox's Dead Rails, survival hinges on overcoming numerous threats. Undead hordes, vampires, and werewolves roam the wasteland, alongside the outlaws and wolves that predate the outbreak. However, a unique opportunity
 Strength Levels for Every Enemy & Monster in R.E.P.O.
Apr 07, 2025 am 10:45 AM
Strength Levels for Every Enemy & Monster in R.E.P.O.
Apr 07, 2025 am 10:45 AM
In R.E.P.O., some monsters are small enough to throw out easily, while others are as hard to shake like tanks unless you have strong powers—or stacked with a lot of powerful upgrades (because your life may depend on that). If you're tired of pressing the grab button and being crushed, this list will tell you how much power you need to lift, throw or slam them against every monster in the game, from a small goblin to a giant Trucci. Requires 4 power upgrades: animal Mind manipulator Squirter 9 power upgrades are required: Men with bow chef hunter Shadow Children 13 power upgrades are required: Clown (beam transmitter) Leader Robe monster Truci No need for strength (or
 Roblox: Grow A Garden - Complete Mutation Guide
Apr 18, 2025 am 01:10 AM
Roblox: Grow A Garden - Complete Mutation Guide
Apr 18, 2025 am 01:10 AM
Maximize your profits in Roblox's Grow A Garden by understanding the lucrative world of crop mutations! These rare variations significantly boost your harvest's value. While you can't directly control mutations, knowing how they work provides a signi
 Roblox: Bubble Gum Simulator Infinity - How To Get And Use Royal Keys
Apr 16, 2025 am 11:05 AM
Roblox: Bubble Gum Simulator Infinity - How To Get And Use Royal Keys
Apr 16, 2025 am 11:05 AM
Royal Keys are some of the most valuable items you can find in Roblox's Bubble Gum Simulator Infinity. These rare tools allow you to open Royal Chests — limited-time loot containers packed with high-tier items, boosts, and even ultra-rare rewards. If
 Blue Prince: How To Get To The Basement
Apr 11, 2025 am 04:04 AM
Blue Prince: How To Get To The Basement
Apr 11, 2025 am 04:04 AM
Unlocking the Basement in Blue Prince: A Comprehensive Guide Finding the basement in Blue Prince is crucial for progressing to Room 46, but its location and access method aren't immediately obvious. This guide will walk you through accessing the base
 Mandragora: Whispers Of The Witch Tree - How To Unlock The Grappling Hook
Apr 18, 2025 am 12:53 AM
Mandragora: Whispers Of The Witch Tree - How To Unlock The Grappling Hook
Apr 18, 2025 am 12:53 AM
Mandragora's dungeons offer Metroidvania-style challenges, requiring players to revisit earlier areas with newly acquired tools. The grappling hook is a prime example, enabling rapid traversal of long distances. While this crucial tool is obtained r
 Nordhold: Fusion System, Explained
Apr 16, 2025 am 04:07 AM
Nordhold: Fusion System, Explained
Apr 16, 2025 am 04:07 AM
Nordhold Tower Fusion Guide: Synergistic Tower Combinations for Enhanced Defense Mastering tower combinations in Nordhold is key to effective base defense. Certain towers synergize exceptionally well, creating powerful defensive strategies. This gui
 Assassin's Creed Shadows - The Tournament Guide
Apr 05, 2025 am 01:08 AM
Assassin's Creed Shadows - The Tournament Guide
Apr 05, 2025 am 01:08 AM
Assassin's Creed: Shadows side events are well worth participating. As the game’s difficulty increases rapidly, these activities can help you keep up with the pace of RPGs. However, some more challenging and rewarding side quests will only be unlocked after specific requirements are completed in a specific phase of the game. This may confuse some players why some tasks cannot be performed. You can find this in a mission called "Champions". It makes players confused about how to access it. If you are stuck and cannot trigger the task, this guide will walk you through all the steps. How to unlock the "Champion" mission This task will not be possible until you complete all the necessary prerequisites, when you know that you need to do it
