

How to fix Windows update error 0x80244011?

Windows Update failures are a recurring thorn in the side of individuals who try to maintain the Windows operating system as fast and secure as possible. These happen when the operating system fails to receive or install updates and halts the deployment of patches intended to enhance functionality and protect against potential future threats.
Included among these failures is error 0x80244011 as a specific roadblock, typically causing updates to hang. Users typically initiate an update check through Settings, only to find that the system initiates its processes but soon after stops, displaying the error code 0x80244011 in the update log or as a notification.
This error often reflects issues such as difficulties connecting to Microsoft’s update servers, possibly due to network constraints or service interruptions. Alternatively, it may signal problems within the update mechanism itself, where corrupted data or misconfigured components prevent successful execution.
The lack of an immediately apparent cause complicates diagnosis, requiring users to explore various solutions systematically. When updates cannot be installed due to error 0x80244011, the consequences extend beyond mere inconvenience. The system remains exposed to unpatched vulnerabilities, risking security breaches that could compromise data integrity.
Additionally, users miss out on performance optimizations and compatibility fixes, potentially leading to software conflicts or degraded functionality over time. To address this, multiple approaches are available below, and FortectMac Washing Machine X9 can assist in resolving underlying Windows issues that might contribute, ensuring the system regains its ability to stay current and secure.

Fix 1. Enable or restart relevant services
Updating your system requires certain Windows services. If these are turned off, you can run into problems.
- Type in Services in Windows search and press Enter.
- Find Windows Update service.
- If it is already running, right-click and pick Restart.
- If the service is not running, double-click it, and select Automatic under the Startup type from the drop-down menu.
- Click Start, Apply, and OK.
- Repeat this process for Background Intelligent Transfer Service (BITS) and Cryptographic services.

Fix 2. Run Windows update troubleshooter
The Windows update troubleshooter can automatically identify and resolve common problems that may be impeding the proper installation of updates.
- Type Troubleshoot in Windows search and press Enter.
- Select Additional troubleshooters/Other troubleshooters.
- Find Windows Update from the list.
- Click it and select Run the troubleshooter/Run.
- Restart your PC when the update process finishes.

Fix 3. Perform Disk Cleanup
Issues can be present in the Windows update cache, so make sure you clean it as follows:
- Type Disk Cleanup in Windows search and hit Enter.
- If your Windows is installed on drive C, pick it from the list (it should be by default) and press OK.
- Click Clean up system files.
- Select your main disk again and click OK.
- Here, select the largest portions of the data used – these typically include Temporary Internet Files, Windows Update, Temporary Files, Recycle Bin, Delivery Optimization Files, and others.
- Click OK – the process should be finished shortly.

Fix 4. Perform a Clean Boot
A clean boot helps you identify any third-party apps that may conflict with updates.
- Type msconfig in Windows Search and press Enter to open the System Configuration window.
- Click on the Services tab and check the Hide all Microsoft Services box.
- Click Disable all to disable non-Microsoft services, then click the Startup tab.
- Open the Task Manager, disable all startup items, and close the Task Manager.
- Go to the Boot tab and mark the Safe boot option.
- Click OK on the System Configuration window and restart your computer.
- If “Show taskbar buttons on all taskbars” setting works correctly, it means that third-party software is causing the problem. To determine which app it is, enable half of the services and reboot your PC, checking if the problem is still there. Repeat the process until you find the culprit.

Fix 5. Install the update manually
You can always try to install the updates manually instead.
- Type in Updates in Windows search and press Enter.
- Select View update history.
- Find the update that failed with the 0x80244011 error and copy its KB number.
- Open your browser and go to Microsoft Update Catalog.
- Within the search bar, type in the KB number and clicks Search.
- Find the correct version of the update for your operating system (to check this, right-click on Start and pick System. Under Device specifications and check the System type) and click Download.
- Use on-screen guidelines to finish the installation process and restart your PC.

Fix 6. Reset Windows update components
Resetting Windows Update components entails restarting the BITS, Cryptographic, MSI Installer, and Windows Update Services. This can alleviate problems by emptying the update cache and restarting update services from scratch.
- Open Command Prompt as administrator.
- Stop the Windows Update-related services by running the following commands one at a time, pressing Enter after each one:
net stop wuauserv
net stop cryptSvc
net stop bits
net stop msiserver - Rename the SoftwareDistribution and Catroot2 folders by running the following commands:
ren C:\Windows\SoftwareDistribution SoftwareDistribution.old
ren C:\Windows\System32\catroot2 Catroot2.old
Note: If your Windows installation is not on the C drive, replace “C” with the appropriate drive letter. - Restart the Windows Update-related services by running the following commands:
net start wuauserv
net start cryptSvc
net start bits
net start msiserver - Reboot your computer.

Fix 7. Use Media Creation Tool
If you tried all the methods above and nothing worked, you can employ the official tool from Microsoft to repair Windows installation and update it to the latest version.
- Visit the official Microsoft website and download Windows 10 installation media (Windows 11 version).
- Double-click the installer and select Yes when UAC shows up.
- Agree to terms.
- Select Upgrade this PC now and click Next.
- Windows will start downloading the needed files.
- Agree to the terms once again and click Next.
- Before installing, make sure that you are happy with your choices (otherwise, you can click Change what to keep option).
- Finally, click Install to begin the upgrade process.

The above is the detailed content of How to fix Windows update error 0x80244011?. For more information, please follow other related articles on the PHP Chinese website!

Hot AI Tools

Undresser.AI Undress
AI-powered app for creating realistic nude photos

AI Clothes Remover
Online AI tool for removing clothes from photos.

Undress AI Tool
Undress images for free

Clothoff.io
AI clothes remover

Video Face Swap
Swap faces in any video effortlessly with our completely free AI face swap tool!

Hot Article
Hot Tools

Notepad++7.3.1
Easy-to-use and free code editor

SublimeText3 Chinese version
Chinese version, very easy to use

Zend Studio 13.0.1
Powerful PHP integrated development environment

Dreamweaver CS6
Visual web development tools

SublimeText3 Mac version
God-level code editing software (SublimeText3)
Hot Topics


 What's New in Windows 11 KB5054979 & How to Fix Update Issues
Apr 03, 2025 pm 06:01 PM
What's New in Windows 11 KB5054979 & How to Fix Update Issues
Apr 03, 2025 pm 06:01 PM
Windows 11 KB5054979 Update: Installation Guide and Troubleshooting For Windows 11 24H2 version, Microsoft has released cumulative update KB5054979, which includes several improvements and bug fixes. This article will guide you on how to install this update and provide a solution to the installation failure. About Windows 11 24H2 KB5054979 KB5054979 was released on March 27, 2025 and is a security update for Windows 11 24H2 versions.NET Framework 3.5 and 4.8.1. This update enhances security and
 How to fix KB5055523 fails to install in Windows 11?
Apr 10, 2025 pm 12:02 PM
How to fix KB5055523 fails to install in Windows 11?
Apr 10, 2025 pm 12:02 PM
KB5055523 update is a cumulative update for Windows 11 version 24H2, released by Microsoft on April 8, 2025, as part of the monthly Patch Tuesday cycle, to offe
 How to fix KB5055518 fails to install in Windows 10?
Apr 10, 2025 pm 12:01 PM
How to fix KB5055518 fails to install in Windows 10?
Apr 10, 2025 pm 12:01 PM
Windows update failures are not uncommon, and most users have to struggle with them, most often becoming frustrated when systems fail to install critical patche
 Proven Fixes and Tips for KB5054980 Not Installing
Mar 31, 2025 pm 02:40 PM
Proven Fixes and Tips for KB5054980 Not Installing
Mar 31, 2025 pm 02:40 PM
Troubleshooting KB5054980 Installation Issues on Windows 11 Microsoft released KB5054980 on March 25, 2025, for Windows 11 versions 22H2 and 23H2. While this update doesn't include new security features, it incorporates all previously released securi
 Windows 10 KB5055063: What's New & How to Download It
Mar 31, 2025 pm 03:54 PM
Windows 10 KB5055063: What's New & How to Download It
Mar 31, 2025 pm 03:54 PM
Windows 10 KB5055063 update details and installation troubleshooting KB5055063 is an update for the .NET Framework for Windows 10 22H2 version, including important improvements and fixes. This article will explore KB5055063 in depth, including download methods and various ways to solve installation failure problems. Introduction to Windows 10 KB5055063 KB5055063 is a cumulative update for .NET Framework 3.5, 4.8, and 4.8.1 for Windows 10 version 22H2, on March 25, 2025
 How to fix KB5055612 fails to install in Windows 10?
Apr 15, 2025 pm 10:00 PM
How to fix KB5055612 fails to install in Windows 10?
Apr 15, 2025 pm 10:00 PM
Windows updates are a critical part of keeping the operating system stable, secure, and compatible with new software or hardware. They are issued on a regular b
 How to fix KB5055528 fails to install in Windows 11?
Apr 10, 2025 pm 12:00 PM
How to fix KB5055528 fails to install in Windows 11?
Apr 10, 2025 pm 12:00 PM
Windows updates are essential to keep your system up to date, secure, and efficient, adding security patches, bug fixes, and new functionality for Windows 11 us
 Fix This Module Is Blocked from Loading into LSA
Apr 02, 2025 pm 08:01 PM
Fix This Module Is Blocked from Loading into LSA
Apr 02, 2025 pm 08:01 PM
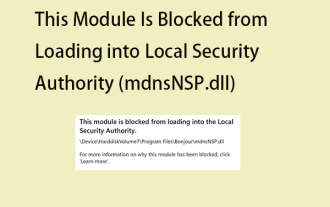
After upgrading Windows 11 24H2, you encounter an error "This module prevents loading to local security agency (mdnsNSP.dll)"? This article provides several solutions. Local Security Agency (LSA) protection is a security feature of Windows that helps prevent credentials used to log in to Windows. Many users receive the following error message after a fresh installation of Windows 11 24H2 and installing the latest version of iTunes: This module prevents loading to the local security authority. \Device\HarddiskVolume3\Program Files\Bonjour\mdnsNSP.dll for
