

Upgrade macOS: How to update your Mac operating system step-by-step


Every year, Apple introduces a new macOS update with exciting features, but upgrading isn’t always seamless. From Reddit stories and personal experience, I’ve seen how updates can sometimes cause compatibility issues or slowdowns.
In this guide, I’ll show you how to properly prepare your Mac for an update, the best way to upgrade, and some apps that can make the process smoother.
What went wrong? |
Why did it happen? |
How is it fixed? |
Broken apps |
Mac updated to incompatible software |
Disable automatic system updates in System Settings. |
Mac running poorly |
Outdated operating system |
Update in System settings > General > Software Update. |
No update option |
Not supported on model |
Download OpenCore Legacy Patcher. |
Too many redundant files backed up |
Used Time Machine |
Get more control over what files to back up with Get Backup Pro. |
Progress stopped during update |
Unreliable internet connection |
Check your connection with WiFi Explorer before updating. |
Some files aren’t there after update |
Lost files during macOS installation process |
Use Disk Drill to restore lost files. |

Never lose data during the update
Before upgrading macOS, make a bootable backup with Get Backup Pro. If the update goes wrong, you could get everything back. Get Backup Pro is available on Setapp.
Try free Security-tested- How to update a Mac
- How to turn on automatic updates
- Update all your Mac software instantly
- How to install a new macOS Sonoma
- How to install macOS updates on an unsupported Mac
- How to update a Mac running macOS High Sierra or earlier
- How to run Catalina on an older Mac
- How to run Mojave on an older Mac
- How to prepare your Mac for an OS update
- FAQ about how to update macOS
How to update a Mac
Let's start with the simplest things.Apple designs its OS and software with the user in mind, ensuring everything is easy and intuitive. Updating macOS is no exception — it’s designed to be a straightforward process that anyone can handle.
Here is how to update a Mac:
- On the top left, choose Apple menu > System Settings.
- Click General on the left side of the System Settings window, and then click Software Update on the right side. There, you will see if there is any update and have the option to install it.

That's all you need to do. Next time you're thinking "How do I upgrade my operating system on my Mac?" remember this simple process.
How to turn on automatic updates
You can trigger your Mac to update automatically, but first, a word of caution. Many set their Mac to update automatically so they don't ask themselves "How do I update macOS?" every few months. It's typically fine to have your Mac update automatically, but there have been some features that break old apps in newer macOS builds. I would caution you to consider your needs; if you can't risk apps not working or perhaps files being shifted around, I would advise against automatic updates.
But for most, it's fine to automatically upgrade your Mac. Here's how to do that on macOS Ventura and macOS Sonoma:
- On the top left, choose Apple menu > System Settings.
- Click General on the left side of the System Settings window, and then click Software Update on the right side.
- Next, click on the info button next to Automatic Updates.
- There you'll see options for "Check for updates," "Download new updates when available," "Install macOS updates," and "Install application updates from the App Store." Toggle what you want to do for automatically updating your system. Click Done. And that's it.

As you can see, you have a bit of control here. You can choose to have your Mac check for updates automatically, but not download them. This is a smart choice for those who want a bit more control over when their Mac updates.
If your Mac runs macOS 13 Ventura and later, you have the privilege of receiving real-time security updates separately from regular macOS updates. Apple introduced this change to ensure your Mac always complies with the latest security standards and is less vulnerable to security breaches and malware, even if you don't update your macOS in time.
Update all your Mac software instantly
One thing to remember when you update your Mac is that the next step should be updating your apps for them to work properly on a new system. You will find some pending software updates in the App Store (if you install your apps from App Store) but not all. I have my favorite method to do that. I prefer to bulk update all apps with CleanMyMac.
CleanMyMacis a smart and effortless Mac care app that has a dedicated Updater tool. Here's how to use it:
- Install and open CleanMyMac.
- Click Applications on the left panel > Scan.
- If you see a window saying "X Application Updates Available," click Update. Alternatively, click Manage Applications at the top of the CleanMyMac window and select Updater.

How to install macOS Sonoma
In September 2023, Apple released a new macOS Sonoma that brings multiple improvements and new features to your Mac.If you haven’t updated to Sonoma yet and are considering making the switch, I’ll guide you through the process.
- Go to Apple menu > System Settings > General > Software Update.
- Here you'll find the latest information about which software updates you can download.
- If your Mac is compatible and able to download Sonoma, you should see a macOS Sonoma icon in the Software Update menu with a large "Upgrade Now" button next to it. Click on the button to upgrade to macOS Sonoma.Your Mac will then download and install the update. You may need to restart your Mac to complete the process.
You can also clean install macOS Sonoma. Check out this guide for more details.
Here is how Sonoma looks on my Mac:

How to install macOS updates on an unsupported Mac
Every year when Apple releases a new operating system, it usually drops support for at least one older Mac model, meaning the new macOS can't be installed on that Mac. Unfortunately, replacing a Mac is not as easy as replacing macOS, so you may be looking for a workaround to install a macOS update on an unsupported Mac.
There is such a workaround, but I must warn you that I don't encourage anyone to try it. Especially if you don't have a solid technical background, it's better to avoid the risk. But if you do want to take this step, you'll need to install macOS with a third-party patcher.
Important note
Before you download the patcher, make sure you back up your essential files to an external device with Get Backup Pro. Use these instructions for proper backup. I also recommend installing Disk Drill, the app that will rescue your files in case they get damaged in the process of macOS installation.To install macOS Sonoma on an unsupported Mac, you should download a patcher from the OpenCore Legacy Patcher. You'll find all the instructions on how to install Sonoma with this patcher on their website. Just to explain the process shortly, you'll need to load the Sonoma installation files to an external USB, then run the patcher, and install macOS Sonoma. Note that this method doesn't guarantee success, some Mac models won't be able to install Sonoma even with the patcher.
To install macOS Big Sur, Ventura, etc. on an unsupported Mac, you'll have to go through a similar process, except you need to download a different patcher from GitHub, and then run it through your Mac's Terminal.
How to update a Mac running macOS High Sierra or earlier
Unlike recent macOS, High Sierra and earlier versions can’t be installed directly from the Software Update pane in the Mac menu.
Here's how to run updates for old (or shall I say ancient) versions:
- Open the App Store on your Mac.
- Search for macOS.
- Once you find the right version, click the Get or Download button.
- Wait for the installer to finish downloading.
- Once the download is complete, click Continue.
- Wait for the installation to complete (feel free to continue your work with your update running in the background).
How to run Catalina on an older Mac
To run Catalina on an older Mac, you can use the patcher. Download the Catalina patcher from the website of the developer, DOSDude1. On the website, you’ll find a detailed video tutorial on how to install Catalina using this patcher. Make sure you prepare a flash drive for a bootable installer — this will be necessary to carry out the installation.
How to run Mojave on an older Mac
Similar to Catalina, you can install Mojave on an unsupported Mac with a patcher. Download the Mojave patcher from DOSDude1's website here. It also contains all the requirements and a step-by-step guide on how to use the patcher. By the way, these websites usually have a Donate link, so feel free to reward the devs for their hard work creating the patchers!

How to prepare your Mac for an OS update
Knowing how to update the latest Mac system is one thing – preparing your machine is equally important. To prepare your Mac for an upgrade, you'll want to make sure your files are organized properly, all of your system settings are correct, and that your file system is backed up. It's also important to know if your Mac is eligible for an update.

Prepare your Mac for update
Even with plenty of free storage, it's smart to declutter before upgrading. Use CleanMyMac's Smart Care, Cleanup, and My Clutter tools to get your Mac in top shape. Available on Setapp.
Try free Security-testedStep 1: Check the general requirements (and hardware)
To see what specs your Mac has, follow these steps:
- From the menu bar on your Mac, select the Apple icon on the top left.
- Select About This Mac from the drop-down menu.
This will tell you what year your Mac was made, the version of macOS or OS X you're currently on, the computer's RAM (Memory), processor, and which graphics card your Mac has. These are important to know, as upgrading macOS can require up to 44 GB of storage available on your Mac.
Note
To see how much available storage space you have, follow the two-step process above, then go to the Storage tab at the top of the window.When you want to upgrade macOS, keep in mind the Mac models this macOS version is compatible with. You can find this information on Apple's official website under the macOS compatibility section and by visiting the "About This Mac" menu on your Mac and comparing your model with the list of supported devices for the macOS version you want to install.
Read also:
- Best Uninstaller for Mac
- How to Install macOS Sequoia
- Clean Install macOS Monterey
- Prepare Your Mac for High Sierra
Step 2: Back up your Mac
When it's time to back your Mac up, Apple has an official method dubbed Time Machine. When you use Time Machine, it keeps what's called an "image" of your Mac, which is what a backup really is.
The purpose of creating a backup is most often to have a recent safe point you can reboot from. It's important to run backups as often as possible. The problem is, Time Machine creates too many redundant copies and often backs up the files you don’t want to back up. There's a much better way to back up your Mac: Get Backup Pro.
Get Backup Pro makes the backup process simple, and you remain in total control. One issue many have with Time Machine is it often starts backing up during the day, which consumes resources on your Mac, and things you're working on may not save in your backup. Get Backup Pro lets you back your Mac up to any device you like, and you can set the schedule you want for backing your Mac up.

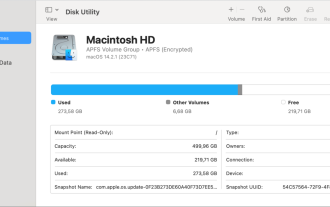
Step 3: Make sure you have sufficient space for macOS update
Apple recommends you have a minimum of 26 GB of available storage when upgrading your Mac from macOS Sierra and even more — 44 GB — for older macOS versions. It's also wise to have a strong internet connection, as the download can take quite a bit of time!
Here's how to check your system to see if your Mac has enough space for an Apple OS update:
- From the menu bar on your Mac, select the Apple icon on the top left.
- Select About This Mac from the drop down menu.
- Click More Info.
- Scroll down to Storage andcheck if you have enough storage space available.
Step 4: Clean your Mac
When you think "How do I update my Mac operating system?," you should also be thinking about how to prepare your Mac for the update. Remember that if you need to boot your Mac from a backup, it will load exactly what you have on your Mac at the time of the update. Now is a great time to delete apps, re-organize your files, and make sure your settings are optimized.
There's just no better app for this than CleanMyMac. It leaves your Mac running in peak condition, and like Get Backup Pro I've mentioned earlier, it can be set to alert you on a schedule that it's time to clean up your Mac.
All you have to do is open CleanMyMacon your Mac, click the Smart Care on the left pane, and the app will scan your system and clean up unnecessary files. On top of that, it will scan for malware and ensure your settings are set to keep your Mac running as fast as possible by doing things like freeing up RAM and running maintenance scripts.
If you want to really dial your Mac in, CleanMyMac has:
- A tool for uninstalling apps, which also removes their associated files: Applications > Scan > Manage My Applications >Uninstaller.
- An option to run the maintenance tasks: Performance >Scan > View All Tasks > MaintenanceTasks.
These will take the Smart Care feature a step further with a more detailed scrubbing of your Mac.

Step 5: Check your internet
While your macOS will remind you to plug in your device if the charge is not high enough for the update process, the quality of your internet connection will remain overlooked as long as it's there.
This means you are better off checking your WiFi with tools like WiFi Explorer and do your best to help everything work nicely for your large update to fully download without a hitch. This WiFi analyzer and monitor can help you check your connection parameters.

Get a small toolkit to ensure smooth macOS updates
New versions of macOS are exciting for Mac enthusiasts but don't rush to download them. Always make sure you've cleaned your Mac using CleanMyMac, and back up your machine with Get Backup Pro. Another great app to download is Disk Drill, which can help you recover files you thought were lost.
All these apps are available for free as part of a seven-day trial of Setapp, a platform of high-performance, best-in-class web, iOS, and macOS apps. Alongside Disk Drill, Get Backup Pro, WiFi Explorer, and CleanMyMac, you'll get unlimited access to the full Setapp library of more than 250 excellent tools.
FAQ about how to update macOS
How can I update drivers on Apple OS?
Drivers are what allow your Mac to communicate with peripherals like graphics cards, speakers, or printers. You can't directly update drivers on a Mac; your best bet is to update your operating system, which has all the necessary drivers. If you're using a specific app to communicate with peripherals, like an app for a printer, updating the app itself may install new drivers.
Mac won't update?
If your Mac simply won't update, it's likely a hardware issue. As we noted, you'll need quite a bit of storage to update your Mac. If you don't have the space for a new OS, you will be unable to run the latest version of macOS. Your Mac may also be too old. Though the system requirements help avoid this, Apple only supports older machines for a certain amount of time; this is often because other specs, like graphics cards, are no longer adequate for newer versions of macOS. It's also possible the update was interrupted; this is why we advise you have a strong internet connection before updating your Mac. These are core issues with a Mac which won't update. If you're experiencing issues, get hold of Apple for support.
Should I update my Mac?
The short answer is yes. Updating macOS is not only a path toward more new features and Mac capabilities, it’s also an important security measure. While Apple updates privacy and security features with each new update, getting those updates is vital.
The above is the detailed content of Upgrade macOS: How to update your Mac operating system step-by-step. For more information, please follow other related articles on the PHP Chinese website!

Hot AI Tools

Undresser.AI Undress
AI-powered app for creating realistic nude photos

AI Clothes Remover
Online AI tool for removing clothes from photos.

Undress AI Tool
Undress images for free

Clothoff.io
AI clothes remover

Video Face Swap
Swap faces in any video effortlessly with our completely free AI face swap tool!

Hot Article
Hot Tools

Notepad++7.3.1
Easy-to-use and free code editor

SublimeText3 Chinese version
Chinese version, very easy to use

Zend Studio 13.0.1
Powerful PHP integrated development environment

Dreamweaver CS6
Visual web development tools

SublimeText3 Mac version
God-level code editing software (SublimeText3)
Hot Topics
 1662
1662
 14
1418
52
1311
25
1261
29
1234
24
14
1418
52
1311
25
1261
29
1234
24

 Fix your Mac running slow after update to Sequoia
Apr 14, 2025 am 09:30 AM
Fix your Mac running slow after update to Sequoia
Apr 14, 2025 am 09:30 AM
After upgrading to the latest macOS, does the Mac run slower? Don't worry, you are not alone! This article will share my experience in solving slow Mac running problems after upgrading to macOS Sequoia. After the upgrade, I can’t wait to experience new features such as recording and transcription of voice notes and improved trail map planning capabilities. But after installation, my Mac started running slowly. Causes and solutions for slow Mac running after macOS update Here is my summary of my experience, I hope it can help you solve the problem of slow Mac running after macOS Sequoia update: Cause of the problem Solution Performance issues Using Novabe
 How to reduce WindowServer Mac CPU usage
Apr 16, 2025 pm 12:07 PM
How to reduce WindowServer Mac CPU usage
Apr 16, 2025 pm 12:07 PM
macOS WindowServer: Understanding High CPU Usage and Solutions Have you noticed WindowServer consuming significant CPU resources on your Mac? This process is crucial for your Mac's graphical interface, rendering everything you see on screen. High C
 How to make a video into a live photo on Mac and iPhone: Detailed steps
Apr 11, 2025 am 10:59 AM
How to make a video into a live photo on Mac and iPhone: Detailed steps
Apr 11, 2025 am 10:59 AM
This guide explains how to convert between Live Photos, videos, and GIFs on iPhones and Macs. Modern iPhones excel at image processing, but managing different media formats can be tricky. This tutorial provides solutions for various conversions, al
 Mac Disk Utility: How to Repair Disk with First Aid? How to Recover It?
Apr 13, 2025 am 11:49 AM
Mac Disk Utility: How to Repair Disk with First Aid? How to Recover It?
Apr 13, 2025 am 11:49 AM
You might need to repair your Mac disk if your computer won’t start up, apps keep freezing, you can’t open certain documents, or the performance has slowed to a halt. Luckily, Apple includes a handy tool you can use to
 How to delete files on Mac
Apr 15, 2025 am 10:22 AM
How to delete files on Mac
Apr 15, 2025 am 10:22 AM
Managing Mac storage: A comprehensive guide to deleting files Daily Mac usage involves installing apps, creating files, and downloading data. However, even high-end Macs have limited storage. This guide provides various methods for deleting unneces
 How to type hashtag on Mac
Apr 13, 2025 am 09:43 AM
How to type hashtag on Mac
Apr 13, 2025 am 09:43 AM
You can’t really use the internet nowadays without encountering the hashtag symbol that looks like this — #. Popularized on a global scale by Twitter as a way to define common tweet themes and later adopted by Instagram and other apps to c
 Is Google Chrome Not Working on Mac? Why Are Websites Not Loading?
Apr 12, 2025 am 11:36 AM
Is Google Chrome Not Working on Mac? Why Are Websites Not Loading?
Apr 12, 2025 am 11:36 AM
With a market share of over 65.7%, Google Chrome is the biggest web browser in the world. You can use it if you use other operating systems like Windows and Android, but many Mac users also prefer Chrome over Safari. Mo
 How to show only active apps in Dock on Mac
Apr 09, 2025 am 11:44 AM
How to show only active apps in Dock on Mac
Apr 09, 2025 am 11:44 AM
Mac Dockbar Optimization Guide: Show only running applications The dock bar of your Mac is the core of the system, from which you can launch Finder, Trash, recently used apps, active apps, and bookmark apps, and even add folders such as Document and Downloads. By default, the Mac dock bar will display more than a dozen Apple-owned applications. Most users will add more applications, but rarely delete any applications, resulting in the dock bar being cluttered and difficult to use effectively. This article will introduce several ways to help you organize and clean up your Mac dock bar in just a few minutes. Method 1: Manually organize the dock bar You can manually remove unused applications and keep only commonly used applications. Remove the application: Right-click on the application
