

Organize your iPhone photos like a pro

Efficiently manage iPhone photos: Say goodbye to the mess and organize them easily!
Everyone’s mobile album is filled with various photos: screenshots, emoticons, photos of children or pets, travel photos, and even countless photos of coffee... This article will guide you how to quickly find and delete unwanted photos and free up your phone’s storage space.

With CleanMy® Phone Smart Cleanup Tool
Easily remove screenshots, outdated emoticons or similar photos with this AI-powered cleaning tool designed for iPhone and iPad. Try it on Setapp now!
Free trial of safe and reliable iPhone photo organization
The best way to easily organize massive photos in the iPhone photo app is to use CleanMy® Phone.

This AI-powered app scans your images on the device and displays scan results by category (portrait, text, travel, etc.). You can open each category to browse similar photos, easily select and delete unwanted photos.

The app even allows you to quickly enhance individual images or add them to favorites. More importantly, you can click on the folder icon with the " ” sign to move your favorite pictures into the folder.
CleanMy® Phone helps you organize your photos better:
- AI-powered scans carefully analyze the photo gallery on your device.
- No content will be deleted without your approval.
- Deleted images will be placed in "Recent Deleted" and can be restored within 30 days if you change your mind.
- Easily move photos to folders or mark them as favorites.


Use the Photos app to organize photos
You can also use the built-in photo app for iPhone to manage your photos.
The app has four main tags: Photos (all photos are sorted by shooting date), Featured (Selected Photos), Photo Albums (the best choice for managing different types of photos), and Search.
In Photos, you can browse photos by date and view photos by year, month, or day. This is very convenient if you want to find images created within a specific time period. Albums contain Recent Projects and Collections by default, and you can create your own albums and organize your photos manually. Featured automatically combines photos of your choice to highlight the exciting moments.

To organize your photos into a neat stack, use the Album feature. There are two ways you can do this.
You can browse the photo gallery, open the photos you want to organize, and then click the "Share" button in the lower left corner of the screen.

In the Share menu, find the Add to Album option, and select the album you want to put the photo into or create a new album.

The second way to organize your photos to your photo album is in the Album tab of the Photos app.
Go to "Album", click the plus icon in the upper left corner of the screen, and click "New Album". Enter the name of the new album and click "Save" to confirm.
Next, you will be prompted to select the photo you want to add to the new album.
If you know which photos to organize and can quickly pick them out in the Photos library, then we think this is the best way to do it. Otherwise, looking at your library one by one is a more thorough choice, and you can take the time to decide which album each photo should be placed in.
To rename or delete an album, simply go to Album, hold the album you want to manage, and select the action you want:

In addition, you can rename the album by clicking the Edit button in the upper right corner of the Album tab.
To delete photos from the album, open the album, then hold the photo to open the photo menu, then click Remove from Album, or open the album, click Select, click all the photos you want to delete, click the trash can icon in the lower right corner of the screen, and confirm whether you want to "Remove from Album" or "Delete".
If you click on the three dots in the upper right corner of the screen in the album, you will see an "Add Photo" option. This is another shortcut to batch add multiple photos to a specific album from your library.

Another way the Photos app helps you organize your iPhone photos is its facial recognition feature. The app will automatically group photos by the characters in the film.
If a contact has been assigned a photo, its other photos will be grouped together. You can view the person's photos by opening them, tapping the "i" icon at the bottom of the screen, and then tapping the small icon with the person's photos in the lower left corner.
In this menu, you can choose to view all photos of this person in gallery form, change the main photo of this contact, decide to reduce the frequency of this person, or if the algorithm incorrectly recognizes others as this person, you can unassign photos by clicking “This is not [name]”.
The Photos app also groups photos that are not assigned to contacts. Their photo icon has a question mark in a blue circle. By clicking on this icon, you can name this person, view other photos with them, and choose to reduce their appearance frequency.

If you want to rearrange photos on your iPhone, you can change the order of photos in your custom album, with Favorites and Recent Items arranged in chronological order.
To rearrange photos in your custom album, open it through the Album tab in Photos, hold the photo you want to move, and place it in your new location in your album.
It's easy to overdo it when managing photos on your iPhone and delete more photos than you expected. Sometimes your fingers slip and choose more photos than planned, and sometimes you decide not to include screenshots of some important information, but then you find out that you are not backing up the information elsewhere.
This is why the "recent deletion" of "photos" is so important. You can find it at the bottom of the Album tab. Deleted images are left in "Recent Deleted" for 30 days before they are permanently deleted.
Pro Tip: Easily backup photos to storage space of your choice with Dropshare. First add your storage space in the app, then just click on the Share icon when viewing photos in Photos, select Dropshare, and sync photos to your storage! You can even update the file name before syncing.

Delete unnecessary screenshots
When your iPhone storage is full and you don't even know where to start organizing photos on your iPhone, you need to clean it up carefully.
At this time, the Media Type section in the "Photo" tag comes in handy. This feature will automatically organize photos on your iPhone, so you don't have to look at the entire library to find screenshots, selfies, videos, or cute time-lapse photography you've done before but completely forgotten after a few months.

Since videos usually take up the most space, we like to start from there. Screenshots are also easy to delete. If you have backed up important images elsewhere, you may want to take advantage of the Select All feature of Photos.
All albums except "Recent Projects" have this feature. Open the album you want to clean up, click "Select" in the upper right corner of the screen, and then click "Select All" in the upper left corner. Next, click the trash can icon to delete.

If you need to delete multiple photos, click Select and then click the photo you want to select, or hold the first photo and move your finger up and down to select an adjacent picture.
Delete duplicates and blurry pictures
The Photos app on your iPhone also has a Utility section in the Album tab, allowing you to manage duplicates, hidden images and more.
If your photo library is so cluttered that finding images from two months ago is more complicated than saving it again, the Duplicate feature will come in handy.
To use it, open Photos, click Album, and scroll down. Click "Duo" and browse the image. You can select all and delete them with one click, or you can merge single duplicates.
This feature is useful before you sync your photos with an online backup, saving space and making your photo set easier to manage. When backing up photos, you can choose to sync with Apple's built-in iCloud, which offers 5GB of free storage, or use external storage options. We like Google's Photos app because it uses the larger 15GB of free storage in your Google account.
Google Photos allows easy sync of your iPhone gallery, organize photos into albums, and provides practical features such as creating collages, animations, moving photos to archives, and freeing up some space.

Which method is the best way to store iPhone photos—built-in iCloud, Google Photos, or other external storage solutions—will depend on your needs and preferences, so we recommend you explore all of them before making a decision.
Tips for quickly deleting duplicates and various cluttered files
While “duplicates” is a great tool in the iPhone’s Photos app, it’s not perfect. It does not recognize some duplicates we created manually through the Duplicates tool for Photos, and it only selects the exact same copy, so similar photos are ignored.
If you want to clean up duplicates and similar photos, as well as other digital cluttered files such as screenshots, emoticons, or blurry photos, the CleanMy® Phone, an AI-powered iPhone and iPad cleaning tool, may help.

CleanMy® Phone will run a scan on your iPhone or iPad and highlight pictures you can delete. While the app allows you to delete without viewing the scan results, it recommends that you manually check everything set to delete.

CleanMy®Phone recognizes your duplicates, screenshots, and blurry images, allowing you to quickly view what you can delete.

Decide immediately what you want to delete, retain, collect, or add to your album.

Organize your iPhone photos
The best way to organize your iPhone photos is the one you actually use - having a cluttered phone with no space to store new memories, important documents or work files isn't a fun thing to do. While buying a new phone with more storage might seem attractive, it won’t make it easier to find photos, screenshots, or scans you actually need.
That's why it's crucial to figure out how to organize photos on your iPhone in a way that you can understand. Create an album for a dedicated image type and use the built-in tools in the Photos app to find duplicates, pictures, screenshots, and videos of specific characters. Catalog photos into an album and delete photos that you no longer need.
Use iCloud, Google Photos, or alternative external storage to back up your photos in case of an accident, or help retain storage on your device. Try saving photos to external drives more easily using Dropshare. Keep your phone in the best shape with CleanMy® Phone’s cleaning and tidying tools.
You can find CleanMy® Phone and Dropshare on Setapp, an app subscription service that offers dozens of tools for your Mac, iPhone, and iPad. With one subscription, you can use many apps to handle your daily tasks more easily. You can start a free trial of Setapp now and use the app for 7 days on the platform for free!
The above is the detailed content of Organize your iPhone photos like a pro. For more information, please follow other related articles on the PHP Chinese website!

Hot AI Tools

Undresser.AI Undress
AI-powered app for creating realistic nude photos

AI Clothes Remover
Online AI tool for removing clothes from photos.

Undress AI Tool
Undress images for free

Clothoff.io
AI clothes remover

Video Face Swap
Swap faces in any video effortlessly with our completely free AI face swap tool!

Hot Article
Hot Tools

Notepad++7.3.1
Easy-to-use and free code editor

SublimeText3 Chinese version
Chinese version, very easy to use

Zend Studio 13.0.1
Powerful PHP integrated development environment

Dreamweaver CS6
Visual web development tools

SublimeText3 Mac version
God-level code editing software (SublimeText3)
Hot Topics


 Spotify on Apple Watch: How to use it in 2025
Apr 04, 2025 am 09:55 AM
Spotify on Apple Watch: How to use it in 2025
Apr 04, 2025 am 09:55 AM
With the support of Apple devices' interconnected ecosystem, managing and synchronizing your Apple devices has become a breeze. Unlock Mac with Apple Watch? Simple! (If you haven't set this unlocking method yet, you should really try it, it's very time-saving). Can you pay with Apple Watch without using iPhone? Apple can handle it easily! Today we will focus on how to download the Spotify playlist to an Apple Watch and play without an iPhone. Spoiler: This is possible. How to use Spotify on Apple Watch: A quick overview Let's dive into the key issues and their solutions directly. If this form helps you, that would be great! If you
 Fix your Mac running slow after update to Sequoia
Apr 14, 2025 am 09:30 AM
Fix your Mac running slow after update to Sequoia
Apr 14, 2025 am 09:30 AM
After upgrading to the latest macOS, does the Mac run slower? Don't worry, you are not alone! This article will share my experience in solving slow Mac running problems after upgrading to macOS Sequoia. After the upgrade, I can’t wait to experience new features such as recording and transcription of voice notes and improved trail map planning capabilities. But after installation, my Mac started running slowly. Causes and solutions for slow Mac running after macOS update Here is my summary of my experience, I hope it can help you solve the problem of slow Mac running after macOS Sequoia update: Cause of the problem Solution Performance issues Using Novabe
 How to get rid of 'Your screen is being observed' error
Apr 05, 2025 am 10:19 AM
How to get rid of 'Your screen is being observed' error
Apr 05, 2025 am 10:19 AM
When you see the message "Your screen is being monitored", the first thing you think of is someone hacking into your computer. But that's not always the case. Let's try to find out if there are any issues that need you to worry about. Protect your Mac With Setapp, you don't need to worry about choosing a tool to protect your computer. You can quickly form your own suite of privacy and security software on Setapp. Free Trial Security Test What does "Your screen is being monitored" mean? There are many reasons why there is a Mac lock screen message that appears with “Your screen is being monitored”. You are sharing the screen with others You are recording the screen You are using AirPlay You are using some apps that try to access your screen Your computer is infected with evil
 How to reduce WindowServer Mac CPU usage
Apr 16, 2025 pm 12:07 PM
How to reduce WindowServer Mac CPU usage
Apr 16, 2025 pm 12:07 PM
macOS WindowServer: Understanding High CPU Usage and Solutions Have you noticed WindowServer consuming significant CPU resources on your Mac? This process is crucial for your Mac's graphical interface, rendering everything you see on screen. High C

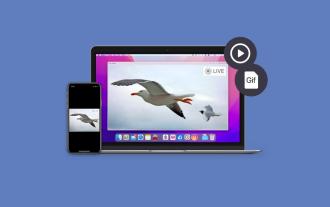 How to make a video into a live photo on Mac and iPhone: Detailed steps
Apr 11, 2025 am 10:59 AM
How to make a video into a live photo on Mac and iPhone: Detailed steps
Apr 11, 2025 am 10:59 AM
This guide explains how to convert between Live Photos, videos, and GIFs on iPhones and Macs. Modern iPhones excel at image processing, but managing different media formats can be tricky. This tutorial provides solutions for various conversions, al
 Email is not syncing? How to refresh the Mail app on Mac
Apr 04, 2025 am 09:45 AM
Email is not syncing? How to refresh the Mail app on Mac
Apr 04, 2025 am 09:45 AM
Mac mail synchronization failed? Quick solution! Many Mac users rely on the included Mail app because it is simple and convenient. But even reliable software can have problems. One of the most common problems is that Mail cannot be synced, resulting in recent emails not being displayed. This article will guide you through email synchronization issues and provide some practical tips to prevent such issues. How to refresh the Mail app on your Mac Operation steps Click the envelope icon Open the Mail app > View > Show Tab Bar > Click the Envelope icon to refresh. Use shortcut keys or menu options Press Shift Command N. Or open the Mail app
 Here's how to view, edit, and remove Exif metadata from photos
Apr 04, 2025 am 10:22 AM
Here's how to view, edit, and remove Exif metadata from photos
Apr 04, 2025 am 10:22 AM
Understanding and Managing Exif Metadata on Your Mac Every photo you take contains more than just the image itself. Embedded within the file is Exif metadata, holding details like date, time, camera settings, GPS location, and copyright information.
