

Angular 2 Components and Providers: Classes, Factories & Values


Core points
- Angular 2 components are able to use providers, which are a set of injectable objects that components can use. Providers are the basis of Angular 2 Dependency Injection (DI) systems.
- Providers can be divided into three types: class provider, factory provider and value provider. The class provider generates an instance of the class, the factory provider generates the return value of the specified function, and the value provider directly returns its value.
- Angular 2's DI system allows registering classes, functions, or values (called providers), resolving dependencies between providers, making the provider's results work in code, and maintaining the injector hierarchy.
- Angular's injector creates an instance of the class provider only once and caches it. As long as the same provider is used, the same instance will be received for each subsequent injection. This feature gives you the flexibility to control the results generated by any one provider and whether we use a single instance or multiple instances.
- Angular 2 allows the registration of a provider using a key associated with the actual provider (called "tokens"). This feature is useful for unit testing, where a mock class that does not make server calls can be replaced without changing component code.
The previous article discussed how to use @Input and @Output annotations to pass data into and out of components. This article will introduce another basic aspect of Angular 2 components - their ability to use Providers.
You may have seen "providers" in the component configuration properties list, and you may realize that they allow you to define a set of injectable objects that can be used for a component. This is good, but of course it raises the question, "What is a provider?"
Answer this question requires in-depth discussion of Angular 2's dependency injection (DI) system. We may specifically cover DI in future blog posts, but a series of articles by Pascal Precht introduce this very well, starting from here: https://www.php.cn/link/f7f3bfce09a3008d185e1775549ec2d2 DI and Angular 2 DI systems (as described in Pascal's article), but in short, the DI system is responsible for:
- Register a class, function, or value. In the context of dependency injection, these items are called "providers" because they produce results. For example, classes are used to provide or generate instances. (See below for more details on provider types.)
- Solve dependencies between providers—for example, if one provider needs another.
- When we request the provider's results, make the provider's results work in the code. This process (making the provider result available to the code block) is called "injecting it". The code that injects the provider's results is logically called an "injector".
- Maintain the hierarchy of the injector so that if the component requests the provider results of the unavailable provider in its injector, DI will search up the hierarchy of the injector.
In previous articles, we included a chart showing components forming a hierarchy that starts with the root component. Let's supplement this chart to contain the injector and its registered resources (provider):

Figure 1: Each component has its own injector for registering a provider. The injector creates a sub-injector, requests to the provider start with the local injector, and searches up the injector hierarchy.
From above we can see that although the components form a downward directional graph, their associated injectors have a bidirectional relationship: the parent injector creates a child injector (downward), when requesting the provider, if the component is The requested provider cannot be found in its own injector, Angular 2 will search up the parent injector (up). This means that providers with the same identifier at the lower level will cover (hide) providers with the same name at the higher level.
What is a provider?
So, what are these "providers" registered by the injector at each level? It's actually very simple: the provider is Angular for providing (generating, generating) the resource or JavaScript "thing" we want to use:
- Class provider generates/provides instances of the class.
- The factory provider generates/provides the content returned when running the specified function.
- The value provider does not need to take action like the previous two to provide the result, it only returns its value.
Unfortunately, the term "provider" sometimes refers to both a class, function, or value, and also to something generated by the provider—a class instance, a return value or return value of a function.
Let's see how we can add providers to components by creating class providers using MyClass (a simple class that will generate the instances we want to use in our application).

Figure 2: Simple class with four attributes. (Code screenshot from Visual Studio Code)
Okay, this is the class. Now let's instruct Angular to register the class provider using it so that we can ask the dependency injection system to provide an instance for us to use in our code. We will create a component ProvDemo_01.ts which will be used as the root component of the application. We load this component in bootstrap.ts and start our application:
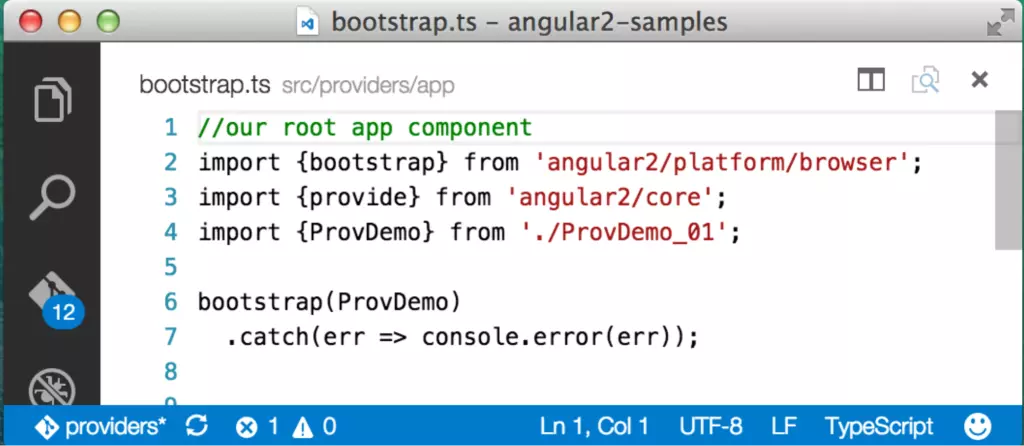
Figure 3: Start the application's bootstrap.ts file, which instantiates the root component.
If the above doesn't make sense, check out our previous article, which covers the process of building a simple Angular 2 application. Our root component is called ProvDemo, and the repository contains several different versions of the component. You can change the displayed version by updating the line imported from ProvDemo above. The first version of our root component looks like this:

Figure 4: Import MyClass's CompDemo, add it to the providers array, and use it as a type in the constructor parameter.
Adding MyClass to this component is simple to provide:
- Import
MyClass - Add it to
@Component'sproviders's property - Add a parameter of type "
MyClass" to the constructor
Behind the scenes, when Angular instantiates a component, the DI system creates an injector for the component that registers the MyClass provider. Angular then sees the MyClass type specified in the constructor's parameter list and looks for the newly registered MyClass provider and uses it to generate an instance, which is then assigned to "myClass" ( Initial lowercase "m").
The process of finding the MyClass provider and generating the instance to be assigned to "myClass" are both done by Angular. It uses TypeScript syntax to understand the type to search, but Angular's injector is responsible for finding and returning MyClass instances.
In view of the above, you may conclude that Angular takes a list of classes in the "providers" array and creates a simple registry to retrieve the class. However, for increased flexibility, there is a subtle adjustment. One of the main reasons for the need to be "tuned" is to help us write unit tests of components that have providers that we don't want to use in the test environment. There aren't many reasons not to use real things for MyClass, but if MyClass calls the server to retrieve data, we may not want or cannot do so in a test environment. To solve this problem, we need to be able to replace the simulation in ProvDemo that does not make server calls. MyClass
reference to MyClass? This is not efficient and is a bad pattern for writing tests. MyClassMock
component code. To achieve this, when Angular registers a provider, it sets up a map to associate a key (called a "token") with the actual provider. In the example above, the token and the provider are the same thing: ProvDemo. The MyClass attribute added to the MyClass decorator is abbreviated for: @Component
providers
<code>providers: [ provide(MyClass, {useClass: MyClass} ]</code> so that when we request the provider, the dependency injection system returns the MyClass instance" . Most of us are used to treating keys as numbers or strings. But in this case, the token (key) is the class itself. We can also use strings as tokens to register providers as follows: MyClass
MyClass
<code>providers: [ provide("aStringNameForMyClass", {useClass: MyClass} ]</code>This will associate the token (key)
<code>provide(MyClass, {useClass: MyClassMock})
</code>. When our code requires the DI system to inject MyClass into the test, we get an instance of MyClassMock which can forge data calls. The end effect is that all code remains the same and we don't have to worry about whether the unit test will call a server that may not exist in the test environment. MyClass
MyClassMockInject non-class provider
Above, we inject the class provider instance into the constructor by writing the following code:
TypeScript allows us to specify that the
<code>constructor( myClass: MyClass ) {...}
</code> type, and the DI system will do the work and provide us with myClass instances. MyClass
But if we use string tokens instead of classes, how do we tell Angular to inject our provider results? Let's edit the bootstrap.ts file to add a new value provider and register it with a string token. Remember that a value provider is a provider type that returns the value associated with the token. In the example above, we tell Angular to register providers by adding them to the @Component attribute of providers, but we can also register providers by passing them into the bootstrap function (the same content can be added to the providers Attributes):

Figure 5: Added bootstrap.ts of the value provider.
Here, we add the provider by calling the provide function and passing in a string token ("SECURITY_KEY") and an object that specifies that we want to create a value provider and the provider itself ——In this case, it is a simple value. Now we want to inject the value generated by the value provider into our constructor, but this doesn't work...
<code>providers: [ provide(MyClass, {useClass: MyClass} ]</code>This is because "SECURITY_KEY" is not a type. To make it possible to inject providers with non-class tokens, Angular provides us with a @Inject parameter decorator. Like all other decorators, we need to import it, and then we use it to tell Angular to inject the provider associated with our string token. To do this, we adjust create ProvDemo_02.ts:

Figure 6: Import the "Inject" decorator and use it to inject the value provider identified with the string token.
We can inject the same syntax using MyClass Provider:
<code>providers: [ provide("aStringNameForMyClass", {useClass: MyClass} ]</code>Okay, we've learned how to register and use providers, but let's get a look at what providers return.
Provider and Singleton
As we saw above, the provider is responsible for generating the things to be injected. The class provider generates an instance and injects it into it. However, it is important to understand that you don't get a new instance every time you inject the class provider result. Instead, the DI system generates an instance once, caches it, and receives the same instance for each subsequent injection every time you use the same provider.
The last point is important, because each component has its own injector and its own registered provider. MyClass has a time attribute set to the current time (in milliseconds) and a random number to help us see if we get the same instance each time. We will add a ChildComp component to the application.

Figure 7: Inject MyClass into the constructor. ChildComp
and use it to set the type in the constructor parameter list. Important: The only purpose of MyClass imported MyClass is to be used as a token used by the DI system to find the registered provider. ChildComp Because does not register its own provider with the token, Angular looks up the injector hierarchy to find one. In order for this to work, we need to add ChildComp to the ChildComp component: ProvDemo

Figure 8: 's ChildComp was added to the template. ProvDemo
, add the ChildComp attribute to @Component to tell directives we will use the ProvDemo component and add the ChildComp element to the template. When the application is running, the console output shows that both ChildComp and ProvDemo receive the same ChildComp instance: MyClass
<code>providers: [ provide(MyClass, {useClass: MyClass} ]</code> to add ChildComp to its injector Provider: MyClass

Figure 9: Defining your own provider's MyClass. ParentComp
attribute to the @Component annotation. Of course, we can see that two different providers instances were created: MyClass
<code>providers: [ provide("aStringNameForMyClass", {useClass: MyClass} ]</code>Summary
In this article, we define what a provider is and introduces three different types of providers. We then looked at how to register a provider for the component and how to inject the results generated by the provider into the component. We also looked at how Angular uses the injector hierarchy to find the requested provider. Angular gives you more control over how dependency injection systems work and where to find providers, but the above should help you get started creating and using providers in your Angular 2 application.
FAQs about Angular 2 Components, Providers, Classes, Factory and Values (FAQ)
What is the difference between a class and a factory in Angular 2?
In Angular 2, classes are the blueprints for creating objects. It encapsulates the data and the functions that operate on that data. On the other hand, a factory is a pattern for creating objects. In Angular 2, factories are used to create and configure services or values that have no explicit classes to represent. Factory provides a way to generate different classes of instances based on context or configuration.
How do components and providers interact in Angular 2?
In Angular 2, components and providers work together to create a dynamic and interactive user interface. Components are building blocks of Angular applications, and providers are used to create services that components can use. Providers allow components to share data and functionality, making it easier to maintain and update applications.
What does the value do in Angular 2?
The values in Angular 2 are used to provide configuration information to other parts of the application. They can be injected into controllers, services, and factories, allowing these parts of the application to be configured at runtime. This makes the application more flexible and easier to test.
How to bind classes in Angular 2?
Class binding in Angular 2 is a way to dynamically add and remove CSS classes to elements. You can bind a class to an expression, which is added to the element when the expression evaluates to true. If the expression evaluates to false, the class will be deleted. This allows you to create dynamic and interactive user interfaces.
What is the API in the context of Angular 2?
In the context of Angular 2, API (Application Programming Interface) is a set of rules and protocols used to build and interact with software applications. Angular 2 provides a rich API that allows developers to create complex applications with less code and effort. The Angular 2 API includes features for creating components, services, instructions, pipelines, and more.
How to use a factory in Angular 2?
To use a factory in Angular 2, you first need to define it. This is done by creating a function that returns the object you want the factory to generate. You can then register this factory with the Angular module using the .factory method. Once the factory is registered, you can inject it into other parts of the application, such as controllers and services.
How to create components in Angular 2?
Creating a component in Angular 2 involves defining a class and decorating it using the @Component decorator. @Component The decorator tells Angular that the class is a component and provides metadata that determines how the component is processed, instantiated, and used at runtime.
How to use providers in Angular 2?
The provider in Angular 2 is used to create and provide services to the application section. To use a provider, you first need to register it with the Angular module. After registration, the provider can be injected into components, other services, and even other providers.
How to create a service in Angular 2?
Creating a service in Angular 2 involves defining a class that encapsulates the numbers and functions provided by the service. This class will then be decorated with a @Injectable decorator which tells Angular that the class is a service that can be injected into other parts of the application.
How to use values in Angular 2?
The values in Angular 2 are used to provide configuration information to other parts of the application. To use a value, you first need to register it with the Angular module. After registration, the value can be injected into the controller, the service, and the factory.
The above is the detailed content of Angular 2 Components and Providers: Classes, Factories & Values. For more information, please follow other related articles on the PHP Chinese website!

Hot AI Tools

Undresser.AI Undress
AI-powered app for creating realistic nude photos

AI Clothes Remover
Online AI tool for removing clothes from photos.

Undress AI Tool
Undress images for free

Clothoff.io
AI clothes remover

Video Face Swap
Swap faces in any video effortlessly with our completely free AI face swap tool!

Hot Article
Hot Tools

Notepad++7.3.1
Easy-to-use and free code editor

SublimeText3 Chinese version
Chinese version, very easy to use

Zend Studio 13.0.1
Powerful PHP integrated development environment

Dreamweaver CS6
Visual web development tools

SublimeText3 Mac version
God-level code editing software (SublimeText3)
Hot Topics


 What should I do if I encounter garbled code printing for front-end thermal paper receipts?
Apr 04, 2025 pm 02:42 PM
What should I do if I encounter garbled code printing for front-end thermal paper receipts?
Apr 04, 2025 pm 02:42 PM
Frequently Asked Questions and Solutions for Front-end Thermal Paper Ticket Printing In Front-end Development, Ticket Printing is a common requirement. However, many developers are implementing...
 Demystifying JavaScript: What It Does and Why It Matters
Apr 09, 2025 am 12:07 AM
Demystifying JavaScript: What It Does and Why It Matters
Apr 09, 2025 am 12:07 AM
JavaScript is the cornerstone of modern web development, and its main functions include event-driven programming, dynamic content generation and asynchronous programming. 1) Event-driven programming allows web pages to change dynamically according to user operations. 2) Dynamic content generation allows page content to be adjusted according to conditions. 3) Asynchronous programming ensures that the user interface is not blocked. JavaScript is widely used in web interaction, single-page application and server-side development, greatly improving the flexibility of user experience and cross-platform development.
 Who gets paid more Python or JavaScript?
Apr 04, 2025 am 12:09 AM
Who gets paid more Python or JavaScript?
Apr 04, 2025 am 12:09 AM
There is no absolute salary for Python and JavaScript developers, depending on skills and industry needs. 1. Python may be paid more in data science and machine learning. 2. JavaScript has great demand in front-end and full-stack development, and its salary is also considerable. 3. Influencing factors include experience, geographical location, company size and specific skills.
 Is JavaScript hard to learn?
Apr 03, 2025 am 12:20 AM
Is JavaScript hard to learn?
Apr 03, 2025 am 12:20 AM
Learning JavaScript is not difficult, but it is challenging. 1) Understand basic concepts such as variables, data types, functions, etc. 2) Master asynchronous programming and implement it through event loops. 3) Use DOM operations and Promise to handle asynchronous requests. 4) Avoid common mistakes and use debugging techniques. 5) Optimize performance and follow best practices.
 How to merge array elements with the same ID into one object using JavaScript?
Apr 04, 2025 pm 05:09 PM
How to merge array elements with the same ID into one object using JavaScript?
Apr 04, 2025 pm 05:09 PM
How to merge array elements with the same ID into one object in JavaScript? When processing data, we often encounter the need to have the same ID...
 How to achieve parallax scrolling and element animation effects, like Shiseido's official website?
or:
How can we achieve the animation effect accompanied by page scrolling like Shiseido's official website?
Apr 04, 2025 pm 05:36 PM
How to achieve parallax scrolling and element animation effects, like Shiseido's official website?
or:
How can we achieve the animation effect accompanied by page scrolling like Shiseido's official website?
Apr 04, 2025 pm 05:36 PM
Discussion on the realization of parallax scrolling and element animation effects in this article will explore how to achieve similar to Shiseido official website (https://www.shiseido.co.jp/sb/wonderland/)...
 The Evolution of JavaScript: Current Trends and Future Prospects
Apr 10, 2025 am 09:33 AM
The Evolution of JavaScript: Current Trends and Future Prospects
Apr 10, 2025 am 09:33 AM
The latest trends in JavaScript include the rise of TypeScript, the popularity of modern frameworks and libraries, and the application of WebAssembly. Future prospects cover more powerful type systems, the development of server-side JavaScript, the expansion of artificial intelligence and machine learning, and the potential of IoT and edge computing.
 The difference in console.log output result: Why are the two calls different?
Apr 04, 2025 pm 05:12 PM
The difference in console.log output result: Why are the two calls different?
Apr 04, 2025 pm 05:12 PM
In-depth discussion of the root causes of the difference in console.log output. This article will analyze the differences in the output results of console.log function in a piece of code and explain the reasons behind it. �...
