
 Software Tutorial
Office Software
Sharing Your Excel Spreadsheet With Others? Do These 8 Things First
Software Tutorial
Office Software
Sharing Your Excel Spreadsheet With Others? Do These 8 Things First
Sharing Your Excel Spreadsheet With Others? Do These 8 Things First

Quick Links
- Remove Unnecessary Data to Clean the Spreadsheet
- Check the Spreadsheet for Errors and Issues
- Protect Your Workbook With a Password
- Add Clear Instructions for Publicly Shared Spreadsheets
- Create a Backup Copy of Your Workbook
- Adjust Sharing Settings as Needed
- Ensure the File Is Optimized for Printing
- Consider the File Format and Size
Sharing an Excel file properly is just as important as creating it professionally. That’s why I always review the file's formatting, correct any errors, back it up, and apply password protection before sharing it. Here's a checklist of everything I do before sending my file to colleagues or clients.
1 Remove Unnecessary Data to Clean the Spreadsheet

Before sharing an Excel spreadsheet, one of the first things I do is tidy it up to make it easier for the recipient to navigate. I remove unnecessary data and check the formatting to ensure I've used consistent fonts, sizes, and styles throughout the spreadsheet. If the workbook has multiple sheets, I ensure the format is consistent throughout.
I also check that I've used consistent numbers, text, and date formats and that data is consistently aligned within cells across the workbook. I remove empty columns and rows, delete any notes, and remove unnecessary calculations used while preparing the sheet. Also, I remove duplicate entries and properly label columns and rows.
To avoid surprises, I open the spreadsheet on my other computer and smartphone to see how it will appear on the recipient's end. This helps me catch formatting issues beforehand.
2 Check the Spreadsheet for Errors and Issues

Once my Excel spreadsheet looks cleaner, I check for and fix errors. I ensure formulas are correctly set up, look for incorrect cell references, and use Excel's built-in error-checking tools to catch critical calculation problems. I use the trace precedent and dependent tools to find incorrect links and missing references.
I also verify that any embedded links point to the intended destinations. When using conditional formatting, I ensure the rules work as expected. I sort and filter the data to confirm everything is working correctly. I don't overlook seemingly simple steps, like running a spell check, to catch any spelling mistakes.
These steps help me identify potential problems early on, preventing confusion or misinterpretation of data by the recipient.
3 Protect Your Workbook With a Password
I always password-protect my Excel spreadsheet before sharing it, especially if it contains confidential information. This allows me to control who can access it and make changes to the document. While I personally don't use these options, you can set different passwords to lock individual sheets, the workbook structure, and more.
When sharing the password, I use a different, more secure channel than the one used to send the file. I also double-check that the password protection works correctly. To password-protect an Excel file, click on the "File" tab, select "Info," then click "Protect Workbook," choose "Encrypt with Password," and set a strong, unique password.

4 Add Clear Instructions for Publicly Shared Spreadsheets
Before sharing a spreadsheet publicly, I add clear instructions to ensure that users of all expertise levels can understand and use the sheet. I clearly mark where users need to enter data or perform calculations, explain complex formulas, and use comments, notes, and color coding to highlight key outputs and important sections.
I also add my email address in the file so anyone encountering a problem can quickly contact me. Also, I change the file's access permissions to View-Only (more on that later). This prevents others from making changes to the original file while allowing them to view it and, if needed, create their own copies.
5 Create a Backup Copy of Your Workbook

I always create a backup of my Excel spreadsheet before sharing it. This way, if someone unintentionally alters the document, I can still access the original copy, upload it to the drive, and share it again. The backup also protects me from losing data if the original file is corrupted or accidentally deleted.
Also, when making new changes, I can use the backup instead of tampering with the original file. When working in Excel’s desktop app, I create a backup by saving the file in two locations. When using Excel online, I either download the file for backup or create an online copy and store it in OneDrive’s Personal Vault for added security.
6 Adjust Sharing Settings as Needed
Before sharing any Excel file, I always adjust the sharing settings to ensure that only the intended recipients can access it with the appropriate level of permission. If I want others to view the file, I set the permissions to view only. If I want them to be able to make changes, I keep the file editable.
I can also share the file with different recipients and customize the access permissions individually. I set an expiration date for time-sensitive files that automatically revoke access after a certain time. I inform the recipients about their permission levels and test the file to ensure users won’t be locked out due to misconfigured permissions.
7 Ensure the File Is Optimized for Printing

If I know the recipient will print the Excel file and use it in the physical form, I check that the content fits nicely on the pages based on the paper size and orientation they will use. I review and adjust page breaks to ensure data isn’t awkwardly split between pages and double-check that no critical elements are hidden or missing.
I only send the file after previewing how the printed document will look. I also print the document whenever possible to ensure everything works fine.
8 Consider the File Format and Size
I also keep in mind the file format when sharing. If I only want the recipient to view the file, I convert it to a non-editable PDF that perfectly preserves its presentation. I keep the file in its original format (XLSX) if the recipient needs it in the original format. I also ask if the recipient uses an older version of Office to save the file in a compatible format.
I also ensure the file size isn’t too large to cause problems when sharing via email. If it's large, I compress and resize images or graphics, delete unused sheets, or save the file in a compressed format to reduce its size. If the file size remains an issue, I upload it to the cloud and share a download link instead of the file itself.
These are some practices I consistently follow whenever I share a file. They help me identify issues in advance and avoid embarrassment. It also saves the recipient from having to do back-and-forth checks to understand the spreadsheet. This also saves me time by eliminating the need for additional explanations.
The above is the detailed content of Sharing Your Excel Spreadsheet With Others? Do These 8 Things First. For more information, please follow other related articles on the PHP Chinese website!

Hot AI Tools

Undresser.AI Undress
AI-powered app for creating realistic nude photos

AI Clothes Remover
Online AI tool for removing clothes from photos.

Undress AI Tool
Undress images for free

Clothoff.io
AI clothes remover

Video Face Swap
Swap faces in any video effortlessly with our completely free AI face swap tool!

Hot Article
Hot Tools

Notepad++7.3.1
Easy-to-use and free code editor

SublimeText3 Chinese version
Chinese version, very easy to use

Zend Studio 13.0.1
Powerful PHP integrated development environment

Dreamweaver CS6
Visual web development tools

SublimeText3 Mac version
God-level code editing software (SublimeText3)
Hot Topics
 1673
1673
 14
1428
52
1333
25
1277
29
1257
24
14
1428
52
1333
25
1277
29
1257
24

 If You Don't Rename Tables in Excel, Today's the Day to Start
Apr 15, 2025 am 12:58 AM
If You Don't Rename Tables in Excel, Today's the Day to Start
Apr 15, 2025 am 12:58 AM
Quick link Why should tables be named in Excel How to name a table in Excel Excel table naming rules and techniques By default, tables in Excel are named Table1, Table2, Table3, and so on. However, you don't have to stick to these tags. In fact, it would be better if you don't! In this quick guide, I will explain why you should always rename tables in Excel and show you how to do this. Why should tables be named in Excel While it may take some time to develop the habit of naming tables in Excel (if you don't usually do this), the following reasons illustrate today
 How to change Excel table styles and remove table formatting
Apr 19, 2025 am 11:45 AM
How to change Excel table styles and remove table formatting
Apr 19, 2025 am 11:45 AM
This tutorial shows you how to quickly apply, modify, and remove Excel table styles while preserving all table functionalities. Want to make your Excel tables look exactly how you want? Read on! After creating an Excel table, the first step is usual
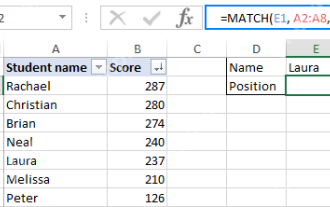 Excel MATCH function with formula examples
Apr 15, 2025 am 11:21 AM
Excel MATCH function with formula examples
Apr 15, 2025 am 11:21 AM
This tutorial explains how to use MATCH function in Excel with formula examples. It also shows how to improve your lookup formulas by a making dynamic formula with VLOOKUP and MATCH. In Microsoft Excel, there are many different lookup/ref
 How to Make Your Excel Spreadsheet Accessible to All
Apr 18, 2025 am 01:06 AM
How to Make Your Excel Spreadsheet Accessible to All
Apr 18, 2025 am 01:06 AM
Improve the accessibility of Excel tables: A practical guide When creating a Microsoft Excel workbook, be sure to take the necessary steps to make sure everyone has access to it, especially if you plan to share the workbook with others. This guide will share some practical tips to help you achieve this. Use a descriptive worksheet name One way to improve accessibility of Excel workbooks is to change the name of the worksheet. By default, Excel worksheets are named Sheet1, Sheet2, Sheet3, etc. This non-descriptive numbering system will continue when you click " " to add a new worksheet. There are multiple benefits to changing the worksheet name to make it more accurate to describe the worksheet content: carry
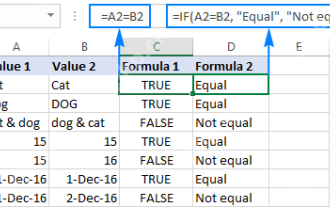 Excel: Compare strings in two cells for matches (case-insensitive or exact)
Apr 16, 2025 am 11:26 AM
Excel: Compare strings in two cells for matches (case-insensitive or exact)
Apr 16, 2025 am 11:26 AM
The tutorial shows how to compare text strings in Excel for case-insensitive and exact match. You will learn a number of formulas to compare two cells by their values, string length, or the number of occurrences of a specific character, a
 Don't Ignore the Power of F4 in Microsoft Excel
Apr 24, 2025 am 06:07 AM
Don't Ignore the Power of F4 in Microsoft Excel
Apr 24, 2025 am 06:07 AM
A must-have for Excel experts: the wonderful use of the F4 key, a secret weapon to improve efficiency! This article will reveal the powerful functions of the F4 key in Microsoft Excel under Windows system, helping you quickly master this shortcut key to improve productivity. 1. Switching formula reference type Reference types in Excel include relative references, absolute references, and mixed references. The F4 keys can be conveniently switched between these types, especially when creating formulas. Suppose you need to calculate the price of seven products and add a 20% tax. In cell E2, you may enter the following formula: =SUM(D2 (D2*A2)) After pressing Enter, the price containing 20% tax can be calculated. But,
 5 Open-Source Alternatives to Microsoft Excel
Apr 16, 2025 am 12:56 AM
5 Open-Source Alternatives to Microsoft Excel
Apr 16, 2025 am 12:56 AM
Excel remains popular in the business world, thanks to its familiar interfaces, data tools and a wide range of feature sets. Open source alternatives such as LibreOffice Calc and Gnumeric are compatible with Excel files. OnlyOffice and Grist provide cloud-based spreadsheet editors with collaboration capabilities. Looking for open source alternatives to Microsoft Excel depends on what you want to achieve: Are you tracking your monthly grocery list, or are you looking for tools that can support your business processes? Here are some spreadsheet editors for a variety of use cases. Excel remains a giant in the business world Microsoft Ex
 I Always Name Ranges in Excel, and You Should Too
Apr 19, 2025 am 12:56 AM
I Always Name Ranges in Excel, and You Should Too
Apr 19, 2025 am 12:56 AM
Improve Excel efficiency: Make good use of named regions By default, Microsoft Excel cells are named after column-row coordinates, such as A1 or B2. However, you can assign more specific names to a cell or cell range, improving navigation, making formulas clearer, and ultimately saving time. Why always name regions in Excel? You may be familiar with bookmarks in Microsoft Word, which are invisible signposts for the specified locations in your document, and you can jump to where you want at any time. Microsoft Excel has a bit of a unimaginative alternative to this time-saving tool called "names" and is accessible via the name box in the upper left corner of the workbook. Related content #
