

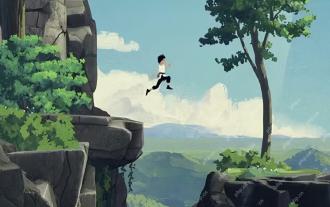
Fantasian Neo Dimension: Hidden Valley Walkthrough

With Act 2 comes the freedom to explore the world of Fantasian Neo Dimension at your own pace. This finally gives you the chance to discover areas for yourself, and one of those is the Hidden Valley. Which as you can imagine, is somewhat secluded.

This Hidden Valley also happens to be where Leo's father, Bernard, did all his research. There are plenty of challenges, items, and revelations waiting inside. But you're going to need to actually find the Hidden Valley first.
Finding The Hidden Valley

Actually finding the Hidden Valley is the first part of exploring it. And while it's not so hidden as the name implies, it is slightly more obscure than many other locations you can find, which advertise themselves front-and-center.
First off, you'll need to have taken control of the Uzra, though this is likely the first thing you'll have done after entering Act 2. From there, you need to sail to the east of the map to the southernmost coast. After entering here, the path splits to the north and the south. Take the north path.
At the next split, between north and east, take the east path. This will bring you to the Hidden Valley. Enter it to be greeted by a seemingly impassable wall, before Valrika remembers the trick Bernard used to disguise this area.
Navigating The Hidden Valley

Critical Path
Finding the Hidden Valley was just the first step in actually reaching Bernard's Lab. Like his son, Bernard has made his lab as complicated to reach as possible. Buried in spiraling paths, endless enemies, and some challenging bosses, that lone lab lies hidden away at the very end.
From the beginning of the area, you'll want to take the left path. At the next split, take the left path once again, which will bring you across the rope bridge and towards a rope bridge.
Heading down the slope here leads to a Cinderella Tri-Stars emblem. Interact with it if you're ready for another battle with them.
From the Save Point, head left once again to enter into the next area. At the first split, you will have the option to head upwards, and drop down a slope.
Drop down to proceed to the next slope, then head upwards. Continue following this path until the next split, then head upwards and weave around until you reach the two exits from this area. These exits do not link up on the other side, so take the lower one to continue towards Bernard's lab.
This last area is graciously more linear. Various splits along the road lead to chests, though you can pretty easily find your way to the lab now.
If you're struggling at any point in navigating, open the map and click on the area you want to go to and Leo will automatically run there.
Once you reach the lab, make sure to save and heal up first. Interacting with the door will immediately trigger the next boss fight. Bernard was just as precautious as his son, it turns out.
Every Chest

In all of those winding paths, there are a great many hidden items. There's a little bit of everything here, from Growth Map items to brand-new weapons. Here's where to find them all:
|
Item |
Location |
|---|---|
| Ether L | Head south and left after entering to find this chest |
| Smoky Quartz | Head up the very first slope to find this chest at the top. |
| Citrine Quartz | At the bottom of the slope just before reaching the save point. |
| Cursed Doll | At the bottom of the valley beneath the rope bridge. |
| Order Motes | At the left end of the split past the save point. |
| Amethyst L | After dropping down a slope. |
| Whetstone x2 | At the left end of a path after dropping down a slope. |
| Cursed Staff | In the right corner after dropping down a slope in the Trio Path area. |
| SP Capsule | At the top of a ZigZag path. |
| Order Motes x2 | Go north after taking the south path into the final area. |
| Force Diffusion Plan | Take the north path in the Trio Path area to reach this chest. |
It's hard to emphasise which of these items is the best to get, especially since they require a decent amount of effort. The Cursed Doll and Force Diffusion Plan without a doubt, as they unlock more nodes on the Growth Map, while the various Jewels are all helpful, especially the Smoky Quartz against the upcoming boss.
Defeating Cerberona and Phoenica
After attempting to enter Bernard's Lab, a security system is triggered that can only be deactivated by defeating the boss
. Or bosses, in this instance. Typical.Cerberona and Phoenica function a bit differently than many of the bosses you've fought thus far. They act in tandem with one another, changing positions as one takes too much damage
, and constantly countering the party to defend the other. They can be disorientating at first, but they've easier to handle than they seem.We need to keep Leo for this battle, though he'll be taking a back seat for the most part. Instead, we want to primarily rely on Valrika and Cheryl, with Ez being swapped in when necessary to apply buffs. Make sure to equip a Smoky Quartz
on Leo, Valrika, and Cheryl before beginning this battle to remove some extra hassles.While in the front, Cerberona will exclusively use damaging moves. Their physical attack against a single character is powerful, but not much to worry about. The attack Tail Mist
is much more fearsome as it will deal upwards of 3,000 damage to everyone and inflict Mist on them. This is what the Smoky Quartz is for.During this stage of the battle, have Leo use Helm Bash and Blade Break to weaken Cerberona, and Samidare to chip away as much of it's health as possible. Valrika should also apply Curse to Cerberona
. This is a priority. Phoenica will attempt to apply Attack Up to Cerberona on their turns, and Curse will cancel that.Phoenica and Cerberona have an Elixir and SP Capsule
respectively, so have Leo attempt to Steal those on turns he isn't doing anything else.After enough damage has been dealt to Cerberona, they will swap with Phoenica, preparing their ultimate attack while Phoenica defends them. At this point, Phoenica will counter anyone who hits them
, either with a stat debuff or physical damage, depending on what you struck them with.<script> window.adsNinja = window.adsNinja || {}; window.adsNinja.queue = window.adsNinja.queue || []; window.adsNinja.queue.push(function(){ window.adsNinja.queue.push(function(){ var fallbackContent = ` <video> <source src='https://video.thegamerimages.com/2024/12/fantasian-neo-dimension-cerberona-and-phoenica-boss-fight-made-with-clipchamp-1733405809.mp4' type='video/mp4'> Your browser does not support the video tag. `; try{ var result = window.adsNinja.monetizeVideo('.emaki-video-player-60636428b6653eb3', JSON.parse(`{\"name\":\"Instream-InContent\",\"groupName\":\"content\"}`), JSON.parse(`{\"trackingId\":\"in-content\",\"playlist\":[{\"title\":\"Fantasian Neo Dimension Cerberona And Phoenica Boss Fight\",\"description\":\"\",\"length\":\"4:07\",\"mimeType\":\"video\/mp4\",\"url\":\"https:\/\/video.thegamerimages.com\/2024\/12\/fantasian-neo-dimension-cerberona-and-phoenica-boss-fight-made-with-clipchamp-1733405809.mp4\",\"thumbnailLink\":\"https:\/\/static1.thegamerimages.com\/wordpress\/wordpress\/wp-content\/uploads\/wm\/2024\/12\/20241203183546_1.jpg?fit=crop&w=1024&h=576\",\"textTracks\":[{\"kind\":\"subtitles\",\"label\":\"English\",\"language\":\"en\",\"url\":\"https:\/\/video.thegamerimages.com\/2024\/12\/fantasian-neo-dimension-cerberona-and-phoenica-boss-fight-made-with-clipchamp-1733405809-1733406376.vtt\",\"default\":false}]}]}`)); if(!result){ console.warn('Failed to load AdsNinja video player.'); document.getElementById('emaki-video-player-60636428b6653eb3').innerHTML = fallbackContent; } } catch(error){ console.warn('Failed to load AdsNinja video player.'); document.getElementById('emaki-video-player-60636428b6653eb3').innerHTML = fallbackContent; } }); }); </script>Cerberona will do nothing but charge here, while Phoenica will attempt to put a barrier on them. If they are Cursed, this will fail. During this phase, Valrika and Cheryl should be using Arrow Rain and Ice Strike respectively, being careful to avoid hitting Phoenica at all.
Cerberona's ultimate move is called Super Heal, which will heal 20,000 HP to both of them. Unless they're Cursed, at which point it fails. Cursing both of them is ideal, though Cerberona is the most important as they have the most HP and defence. Repeat this process until Cerberona is finally defeated.
You can attempt to defeat Phoenica first, though this is much harder with Cerberona healing them.
With just Phoenica left, they will start to attack for themselves, using Dark and Dark Laser, though this is all. They no longer counter you, so unleash your strongest moves on them now. After their defeat, you are finally free to enter the lab.
Entering Bernard's Laboratory

Entering Bernard's Laboratory, there's not a massive amount you can do other than looking at some items, though there are some key things here you can miss if you speak with Valrika too early. As such, avoid interacting with the table upstairs until you've examined everything else first.
The first thing you can find is a Mirage Band on the bookshelf in the back of the first floor. Next is Bernard's journal on the table here. Reading it will awaken some feelings in Leo, causing his gauntlet to awaken to its full power. This is the only Divine Artefact that can be missed, rather than unlocked as part of completing a quest.
When you're all finished, head upstairs and speak with Valrika. She will come to a revelation, realising she has discovered the means of reaching the God Realm. This will automatically bring you back to her lab in the Chaos realm, and complete your journey in the Hidden Valley.

The above is the detailed content of Fantasian Neo Dimension: Hidden Valley Walkthrough. For more information, please follow other related articles on the PHP Chinese website!

Hot AI Tools

Undresser.AI Undress
AI-powered app for creating realistic nude photos

AI Clothes Remover
Online AI tool for removing clothes from photos.

Undress AI Tool
Undress images for free

Clothoff.io
AI clothes remover

Video Face Swap
Swap faces in any video effortlessly with our completely free AI face swap tool!

Hot Article
Hot Tools

Notepad++7.3.1
Easy-to-use and free code editor

SublimeText3 Chinese version
Chinese version, very easy to use

Zend Studio 13.0.1
Powerful PHP integrated development environment

Dreamweaver CS6
Visual web development tools

SublimeText3 Mac version
God-level code editing software (SublimeText3)
Hot Topics
 1666
1666
 14
1425
52
1328
25
1273
29
1253
24
14
1425
52
1328
25
1273
29
1253
24

 Roblox: Grow A Garden - Complete Mutation Guide
Apr 18, 2025 am 01:10 AM
Roblox: Grow A Garden - Complete Mutation Guide
Apr 18, 2025 am 01:10 AM
Maximize your profits in Roblox's Grow A Garden by understanding the lucrative world of crop mutations! These rare variations significantly boost your harvest's value. While you can't directly control mutations, knowing how they work provides a signi
 Roblox: Bubble Gum Simulator Infinity - How To Get And Use Royal Keys
Apr 16, 2025 am 11:05 AM
Roblox: Bubble Gum Simulator Infinity - How To Get And Use Royal Keys
Apr 16, 2025 am 11:05 AM
Royal Keys are some of the most valuable items you can find in Roblox's Bubble Gum Simulator Infinity. These rare tools allow you to open Royal Chests — limited-time loot containers packed with high-tier items, boosts, and even ultra-rare rewards. If
 Nordhold: Fusion System, Explained
Apr 16, 2025 am 04:07 AM
Nordhold: Fusion System, Explained
Apr 16, 2025 am 04:07 AM
Nordhold Tower Fusion Guide: Synergistic Tower Combinations for Enhanced Defense Mastering tower combinations in Nordhold is key to effective base defense. Certain towers synergize exceptionally well, creating powerful defensive strategies. This gui
 Mandragora: Whispers Of The Witch Tree - How To Unlock The Grappling Hook
Apr 18, 2025 am 12:53 AM
Mandragora: Whispers Of The Witch Tree - How To Unlock The Grappling Hook
Apr 18, 2025 am 12:53 AM
Mandragora's dungeons offer Metroidvania-style challenges, requiring players to revisit earlier areas with newly acquired tools. The grappling hook is a prime example, enabling rapid traversal of long distances. While this crucial tool is obtained r
 Clair Obscur: Expedition 33 - How To Get Perfect Chroma Catalysts
Apr 27, 2025 am 04:07 AM
Clair Obscur: Expedition 33 - How To Get Perfect Chroma Catalysts
Apr 27, 2025 am 04:07 AM
In Clair Obscur: Expedition 33, maximizing your favorite weapons is key to success. Each upgrade not only boosts weapon power but also unlocks new traits, shaping your character builds. Reaching Weapon Level 32 is achievable with Grandiose Chroma Ca
 Rusty Rabbit: Where To Find Every Keycube
Apr 17, 2025 pm 10:02 PM
Rusty Rabbit: Where To Find Every Keycube
Apr 17, 2025 pm 10:02 PM
Many 2D platformers, including Rusty Rabbit, feature inaccessible areas requiring specific abilities or items. Rusty Rabbit is no exception, with multiple such areas in each region. Besides visually obvious blocked pathways, you'll encounter robots
 Clair Obscur: Expedition 33 - How To Find And Defeat Chromatic Luster
Apr 25, 2025 am 04:10 AM
Clair Obscur: Expedition 33 - How To Find And Defeat Chromatic Luster
Apr 25, 2025 am 04:10 AM
Chromatic Luster Strategy in "Clair Obscur: Expedition 33" Chromatic Luster is a powerful variant of the common enemy Luster in Clair Obscur: Expedition 33. It attacks quickly and violently, and can even ignite your entire team to deal additional damage. Without superb blocking skills, the battle with Chromatic Luster will be a race against time. Fortunately, Chromatic Luster doesn't have much health compared to other enemies. As long as you can control the rhythm of the battle and avoid falling into passive defense, you can quickly
 Rusty Rabbit: How To Break Every Block
Apr 18, 2025 am 01:08 AM
Rusty Rabbit: How To Break Every Block
Apr 18, 2025 am 01:08 AM
In Rusty Rabbit, dungeon exploration involves digging and combat. A significant portion of gameplay focuses on reaching areas, breaking containers, and acquiring loot to Progress. However, many areas are initially inaccessible, though they contain
