 Computer Tutorials
 Troubleshooting
 How to fix 'The resource loader cache doesn't have loaded MUI entry 0x80073B01' error in Windows?
How to fix 'The resource loader cache doesn't have loaded MUI entry 0x80073B01' error in Windows?
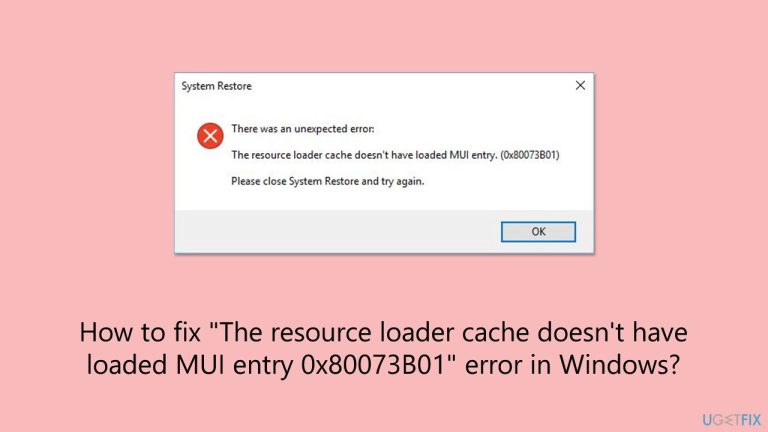
The error message “The resource loader cache doesn't have loaded MUI entry 0x80073B01” is a system-level issue that commonly appears during a System Restore operation in Windows. This problem occurs when the Multilingual User Interface (MUI) cache, responsible for handling language-specific resources, fails to load essential components needed for the restoration process.
As a result, the operation cannot proceed, leaving the user unable to revert the system to a previous state. The error often disrupts not just System Restore but also the proper functioning of certain Windows tools and features.
The 0x80073B01 error is usually linked to issues with corrupted or missing system files, which can prevent the MUI cache from loading properly. Such corruption can be caused by abrupt shutdowns, incomplete installations of critical updates, or malware attacks that tamper with essential system files.
In some cases, third-party software, especially those involving system modifications, may conflict with Windows’ normal operations and lead to this error. Additionally, if the MUI cache itself becomes outdated or damaged, it can fail to retrieve the language resources needed for system processes.
To fix System Restore error 0x80073B01, it is necessary to verify and repair system files using dedicated tools and ensure that no software conflicts or outdated Windows components are interfering with the MUI cache.
Proper troubleshooting usually involves eliminating potential sources of file corruption, resolving issues with updates, or restoring the integrity of the affected system components. If these don't work, you can always try repair-installing Windows instead, which can be done using Media Creation Tool.
In the steps continuing in this article,we provide a detailed step-by-step instructions for solving this error quickly and easily. If you rather prefer an automated solution you could check the FortectMac Washing Machine X9 PC repair tool identifying and resolving underlying system issues known to cause the 0x80073B01 error, your cure faster and smoother way is below.
Fix 1. Run SFC and DISM
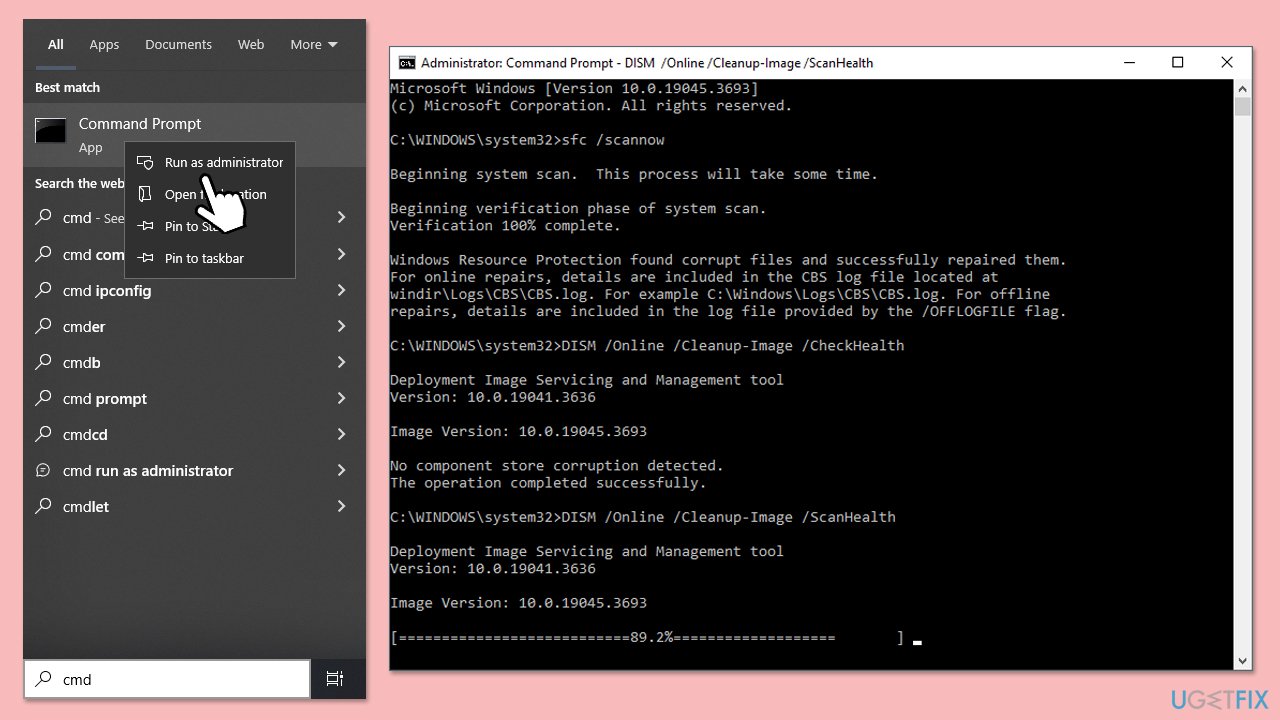
Using SFC and DISM together can repair system file corruption and restore the system image, which often resolves issues with the MUI cache.
- Type cmd in Windows search.
- Right-click on Command Prompt and pick Run as administrator.
- User Account Control window will show up – click Yes when prompted.
- Then, copy and paste the following command, pressing Enter after:
sfc /scannow - Wait till the scan is finished. If Windows finds system file integrity violations, it will attempt to fix them. After this, use the set of the following commands, pressing Enter each time:
DISM /Online /Cleanup-Image /CheckHealth
DISM /Online /Cleanup-Image /ScanHealth
DISM /Online /Cleanup-Image /RestoreHealth
- (Note: if you get an error executing this last command, add /Source:C:RepairSourceWindows /LimitAccess to it and try again).
- Close down the Command Prompt and restart your computer.
Fix 2. Update Windows
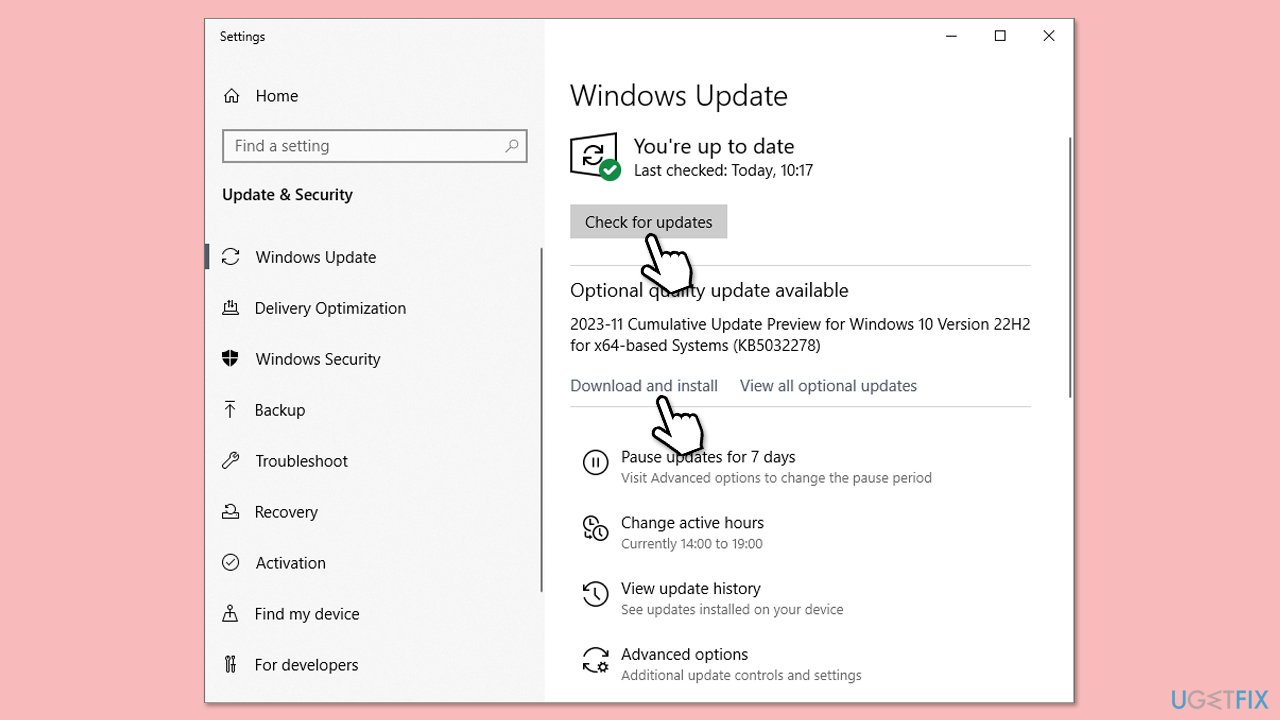
Installing the latest updates ensures all necessary components are up-to-date and free from bugs.
- Type Updates in Windows search and hit Enter.
- If updates are available, click Install updates.
- Otherwise, click Check for updates.
- If optional updates are available, install them as well.
- When all the update processes are complete, restart your computer.
Fix 3. Disable antivirus temporarily
Antivirus programs can block certain system operations, including accessing the MUI cache during System Restore.
- Open third-party security software and disable real-time protection.
- Retry the System Restore process, then re-enable your antivirus afterward.
Fix 4. Clear the MUI cache
Outdated or corrupt MUI cache files can cause this error, and clearing the cache often resolves the issue.
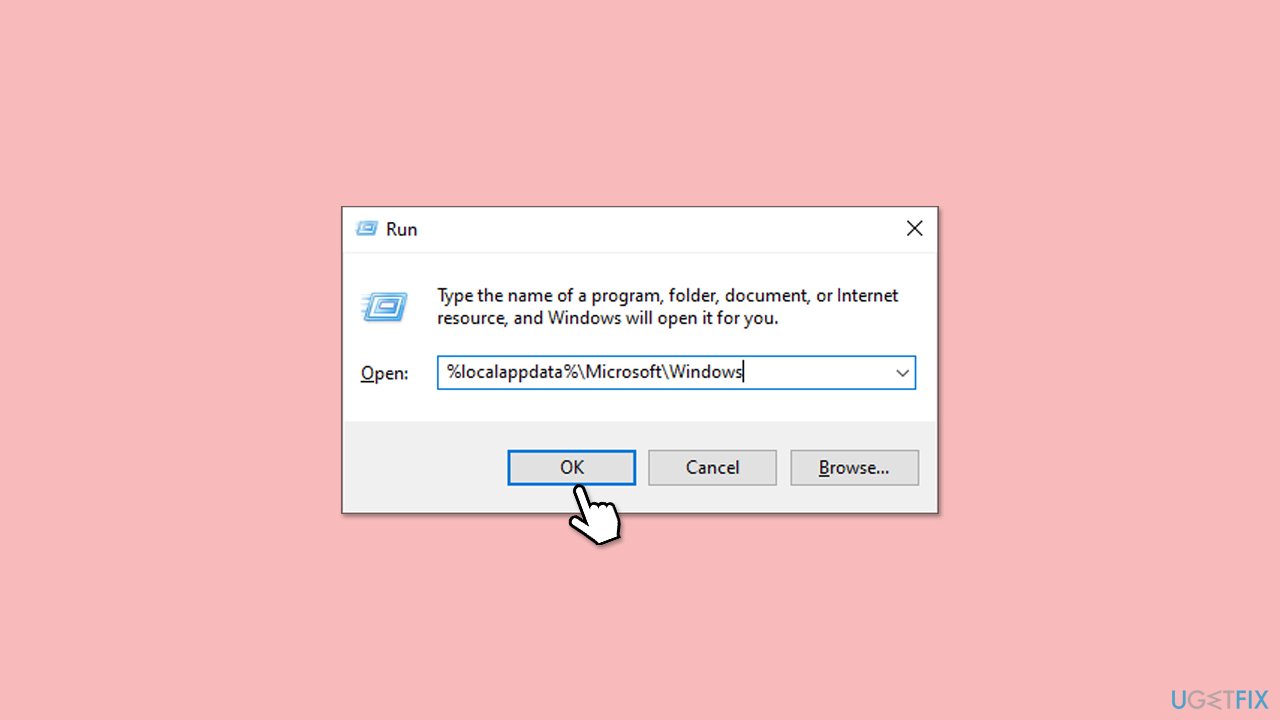
- Press Win R on your keyboard and press Enter.
- Type in %localappdata%MicrosoftWindows, and press Enter.
- Find the MUICache folder and delete its contents.
- Attempt the System Restore process again.
Fix 5. Perform a Clean Boot
A Clean Boot disables non-Microsoft services and startup programs that could interfere with the System Restore process.
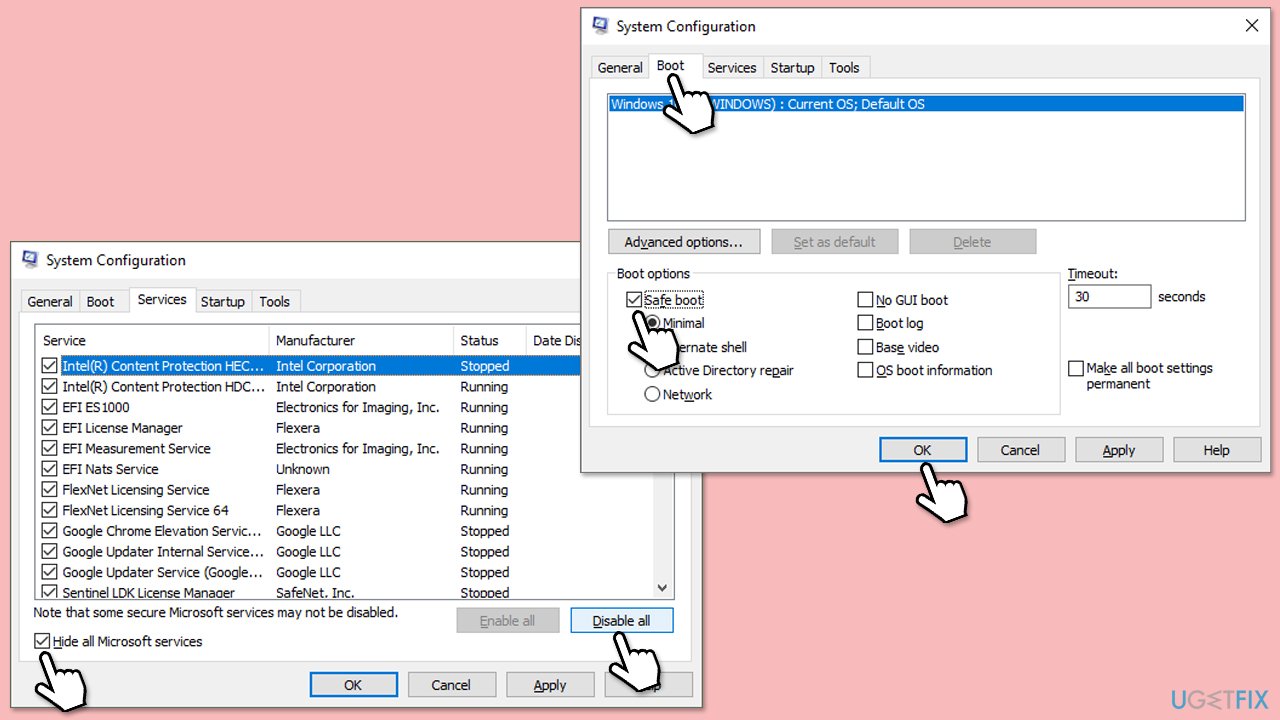
- Type msconfig in Windows Search and press Enter.
- Click on the Services tab and check the Hide all Microsoft Services box.
- Click Disable all to disable non-Microsoft services, then click the Startup tab.
- Open the Task Manager, disable all startup items, and close the Task Manager.
- Go to the Boot tab and mark the Safe boot option.
- Click OK on the System Configuration window and restart your computer.
- Restart your computer and attempt the System Restore.
Fix 6. Check for disk errors
Disk errors can cause issues with system operations like restoring files and accessing the MUI cache.
- Open Command Prompt as administrator.
- When User Account Control shows up, click Yes.
- In the new window, type in the following command and press Enter after:
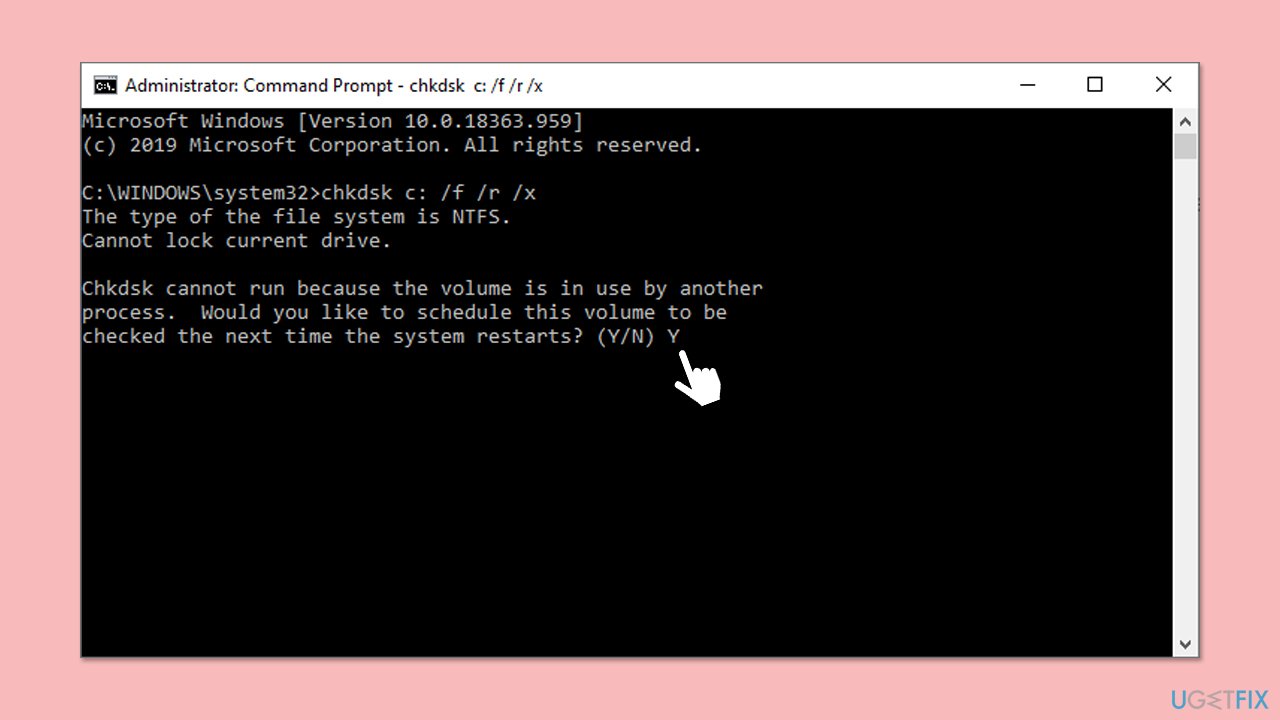
chkdsk c: /f
(Note: use chkdsk c: /f /r /x command if you are using SSD as your primary partition) - If you receive an error, type in Y, close down Command Prompt and restart your device.
- Wait until the scan is finished – you can find the results in the Event Viewer.
Fix 7. Repair-install Windows
A repair installation reinstalls Windows while keeping your files and applications intact, resolving deep system-level errors.
- Visit the official Microsoft website and download Windows 10 installation media (Windows 11 version).
- Double-click the installer, select Yes when UAC shows up, and agree to the terms.
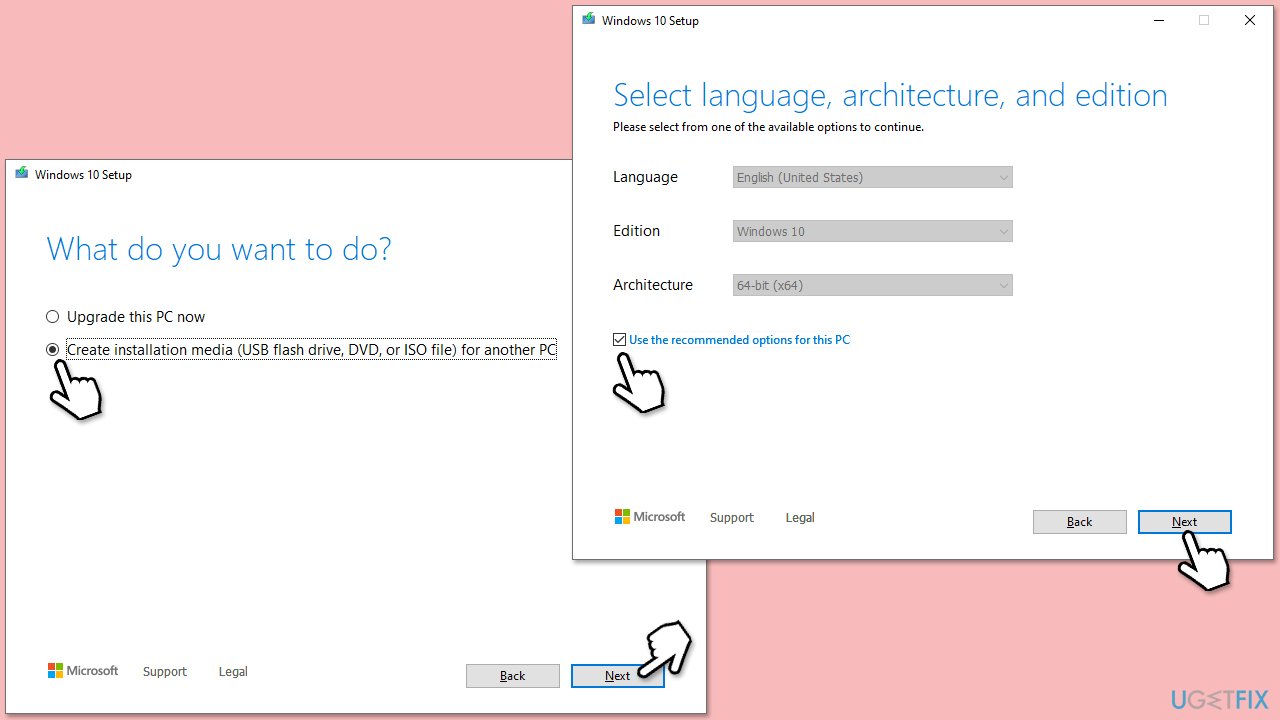
- Select the Create installation media and click Next, then follow the instructions to finish the process.
- Once the ISO file is created, right-click on it and click Mount.
- Launch the installer.
- Select Upgrade this PC now and click Next.
- Windows will start downloading the needed files.
- Agree to the terms once again and click Next.
- Before installing, ensure you are happy with your choices (otherwise, you can click the Change what to keep option).
- Finally, click Install to begin the upgrade process.
The above is the detailed content of How to fix 'The resource loader cache doesn't have loaded MUI entry 0x80073B01' error in Windows?. For more information, please follow other related articles on the PHP Chinese website!

Hot AI Tools

Undresser.AI Undress
AI-powered app for creating realistic nude photos

AI Clothes Remover
Online AI tool for removing clothes from photos.

Undress AI Tool
Undress images for free

Clothoff.io
AI clothes remover

Video Face Swap
Swap faces in any video effortlessly with our completely free AI face swap tool!

Hot Article

Hot Tools

Notepad++7.3.1
Easy-to-use and free code editor

SublimeText3 Chinese version
Chinese version, very easy to use

Zend Studio 13.0.1
Powerful PHP integrated development environment

Dreamweaver CS6
Visual web development tools

SublimeText3 Mac version
God-level code editing software (SublimeText3)

Hot Topics
 What's New in Windows 11 KB5054979 & How to Fix Update Issues
Apr 03, 2025 pm 06:01 PM
Windows 11 KB5054979 Update: Installation Guide and Troubleshooting For Windows 11 24H2 version, Microsoft has released cumulative update KB5054979, which includes several improvements and bug fixes. This article will guide you on how to install this update and provide a solution to the installation failure. About Windows 11 24H2 KB5054979 KB5054979 was released on March 27, 2025 and is a security update for Windows 11 24H2 versions.NET Framework 3.5 and 4.8.1. This update enhances security and
 How to fix KB5055523 fails to install in Windows 11?
Apr 10, 2025 pm 12:02 PM
KB5055523 update is a cumulative update for Windows 11 version 24H2, released by Microsoft on April 8, 2025, as part of the monthly Patch Tuesday cycle, to offe
 How to fix KB5055518 fails to install in Windows 10?
Apr 10, 2025 pm 12:01 PM
Windows update failures are not uncommon, and most users have to struggle with them, most often becoming frustrated when systems fail to install critical patche
 How to fix KB5055612 fails to install in Windows 10?
Apr 15, 2025 pm 10:00 PM
Windows updates are a critical part of keeping the operating system stable, secure, and compatible with new software or hardware. They are issued on a regular b
 How to fix KB5055528 fails to install in Windows 11?
Apr 10, 2025 pm 12:00 PM
Windows updates are essential to keep your system up to date, secure, and efficient, adding security patches, bug fixes, and new functionality for Windows 11 us
 Windows 11 KB5055528: What's New & What if It Fails to Install
Apr 16, 2025 pm 08:09 PM
Windows 11 KB5055528 (released on April 8, 2025) Update detailed explanation and troubleshooting For Windows 11 23H2 users, Microsoft released the KB5055528 update on April 8, 2025. This article describes the improvements to this update and provides a solution to the installation failure. KB5055528 update content: This update brings many improvements and new features to Windows 11 23H2 users: File Explorer: Improved text scaling and improved accessibility to the file opening/save dialog and copy dialog. Settings page: Added "Top Card" function to quickly view processor, memory, storage and G
 Worked! Fix The Elder Scrolls IV: Oblivion Remastered Crashing
Apr 24, 2025 pm 08:06 PM
Troubleshooting The Elder Scrolls IV: Oblivion Remastered Launch and Performance Issues Experiencing crashes, black screens, or loading problems with The Elder Scrolls IV: Oblivion Remastered? This guide provides solutions to common technical issues.
 What if KB5055523 Fails to Install? Here Are Some Solutions
Apr 11, 2025 pm 08:01 PM
Windows 11 KB5055523 Update improvement and installation failure solution This article will introduce improvements to the Windows 11 KB5055523 cumulative update and various ways to resolve update installation failures. KB5055523 Update Highlights KB5055523 is a cumulative update for Windows 11 24H2 released on April 8, which contains several improvements and innovations: AI Enhancements: Improved AI features such as improvements in Copilot, and support for smart options such as article summary and photo editing. Performance optimization: Fixed multiple system vulnerabilities to improve overall performance and stability. User experience modification


