
 Mobile Game Tutorial
Mobile Game Guide
God of War Ragnarok Secret of the Sands Favour: How to clear the Alfheim sandstorm
Mobile Game Tutorial
Mobile Game Guide
God of War Ragnarok Secret of the Sands Favour: How to clear the Alfheim sandstorm
God of War Ragnarok Secret of the Sands Favour: How to clear the Alfheim sandstorm

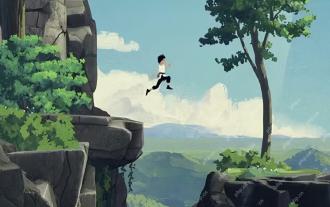
Calling out from the deserts of Alfheim in God of War Ragnarok is a mysterious creature. Feeling the creature’s cries from afar, Kratos, Atreus and Mimir set off to help, hoping to go some way to making up for their previous meddling in the Realm’s delicate balance.
The path leads them through a sandstorm to a confusing and labyrinthine new area below the dunes, but it’s nothing they can’t overcome together.
Whether you're a newcomer to Ragnarok thanks to its recent PC release, or revisiting Alfheim for the first time in a while, here’s how to complete the Secret of the Sands Favour in God of War Ragnarok and solve the mystery for yourself.
God of War Ragnarok Secret of the Sands Favour

After parting ways with Tyr and hearing the creature’s distant cries, the Secret of the Sands favour begins after speaking to Sindri at his shop at the entrance to The Barrens.
Head past Sindri, board your new method of conveyance for getting quickly across the sand dunes, then bear right from the entrance to the desert towards the quest marker on your map.
At the quest marker, descend into the cave entrance and this leads into a new area: The Below.

Follow Atreus forward along the path and destroy the hive material in your way with your axe.

Next, defeat the Dark Elf ambush lurking in the caves, then use the reflection stone to destroy the Hive nodules. Defeat the elves that appear, claim the chest and continue on around the corner.
There are more Dark Elves to take on in the next room - which contains a lot of reflection stones. There’s also a Nornir Chest in the side room, but you come back for this later, just remember where it is.

Climb the marked wall next to the door where you can see the Nornir bell. Turn around and look where you just came and you can see an Ormr that gives you honed metal and stonewood if you throw an axe at it.

Then look down to the right as you climb up, destroy the hive material and you can grab a chest from down here as well as some lore. The chest has some Dwarven Steel inside.
Now take the high climb up and slide down the zipwire. Drop down to grab the chest then climb back up and follow the path around.

Use the Blades of Chaos to grapple across the gap and look down to the right. You’ll be above the Nornir Chest and an Ormr - throw your axe at it then head down to pick up the goods.

You can then open the gate next to the chest to have a quick way back around. You can’t finish opening the chest yet though, so turn back around.

Climb one level back up and throw your axe against the reflection stone to destroy the hive material to advance.

On the other side you can now get to the third Nornir Bell. Open the gate to the right, strike the bell then quickly descend and strike the other two.

Return to the cave you struck the third bell in and continue deeper by climbing down the chain.

Defeat the difficult Dark Elf ambush, then squeeze through the narrow tunnel over to the left-hand side of the cavern.

Then on the other side, destroy the gold rocks with the pot on the other side. But hold on before you rush off.

Before you climb down, look right and blow up another pot, then throw your axe against the reflection stone for a chest with some Dwarven Steel.

Now climb down, follow the path, defeat the wretches, then throw your axe through the hive material on the left to bounce it off the reflection stones and clear a path to a small chest.

Next, look left as you jump over the gap to blow up the rocks with a pot.

Go back through that new path and use the reflection stones on the left to clear another where you can climb up.

Grab the chest at the top of the ledge then spin the dangling stone so that it has an angle to destroy the final bit of hive blocking your progress.

Follow the path to a cave where you climb up. At the top, to the left are some rocks you can destroy with a pot behind them.

Jump across to the ledge, turn around, then throw your axe at the reflection stone on the far wall so it destroys the first node on the way there then rebounds into the other two.

Then climb back up to Atreus, look left, and throw your axe so it bounces off the two stones on the wall.

With the hive matter gone, follow Atreus up and to the right and free the beast from the surface. Bust out of the Below and grab the legendary chest, which contains Whispering Slab as well as the Shoulder Straps of Radiance. A good addition to your arsenal if not one of the best armor sets in God of War Ragnarok.

Go north to the quest marker and finish the quest. With the sand gone you can now go around the Barrens and clean up the stuff you couldn’t grab with the storm raging. For example, the "undiscovered location" near the start of the barrens is a Draugr Hole.
The above is the detailed content of God of War Ragnarok Secret of the Sands Favour: How to clear the Alfheim sandstorm. For more information, please follow other related articles on the PHP Chinese website!

Hot AI Tools

Undresser.AI Undress
AI-powered app for creating realistic nude photos

AI Clothes Remover
Online AI tool for removing clothes from photos.

Undress AI Tool
Undress images for free

Clothoff.io
AI clothes remover

Video Face Swap
Swap faces in any video effortlessly with our completely free AI face swap tool!

Hot Article
Hot Tools

Notepad++7.3.1
Easy-to-use and free code editor

SublimeText3 Chinese version
Chinese version, very easy to use

Zend Studio 13.0.1
Powerful PHP integrated development environment

Dreamweaver CS6
Visual web development tools

SublimeText3 Mac version
God-level code editing software (SublimeText3)
Hot Topics
 1664
1664
 14
1423
52
1321
25
1269
29
1249
24
14
1423
52
1321
25
1269
29
1249
24

 Roblox: Grow A Garden - Complete Mutation Guide
Apr 18, 2025 am 01:10 AM
Roblox: Grow A Garden - Complete Mutation Guide
Apr 18, 2025 am 01:10 AM
Maximize your profits in Roblox's Grow A Garden by understanding the lucrative world of crop mutations! These rare variations significantly boost your harvest's value. While you can't directly control mutations, knowing how they work provides a signi
 Roblox: Bubble Gum Simulator Infinity - How To Get And Use Royal Keys
Apr 16, 2025 am 11:05 AM
Roblox: Bubble Gum Simulator Infinity - How To Get And Use Royal Keys
Apr 16, 2025 am 11:05 AM
Royal Keys are some of the most valuable items you can find in Roblox's Bubble Gum Simulator Infinity. These rare tools allow you to open Royal Chests — limited-time loot containers packed with high-tier items, boosts, and even ultra-rare rewards. If
 Nordhold: Fusion System, Explained
Apr 16, 2025 am 04:07 AM
Nordhold: Fusion System, Explained
Apr 16, 2025 am 04:07 AM
Nordhold Tower Fusion Guide: Synergistic Tower Combinations for Enhanced Defense Mastering tower combinations in Nordhold is key to effective base defense. Certain towers synergize exceptionally well, creating powerful defensive strategies. This gui
 Mandragora: Whispers Of The Witch Tree - How To Unlock The Grappling Hook
Apr 18, 2025 am 12:53 AM
Mandragora: Whispers Of The Witch Tree - How To Unlock The Grappling Hook
Apr 18, 2025 am 12:53 AM
Mandragora's dungeons offer Metroidvania-style challenges, requiring players to revisit earlier areas with newly acquired tools. The grappling hook is a prime example, enabling rapid traversal of long distances. While this crucial tool is obtained r
 Clair Obscur: Expedition 33 - How To Get Perfect Chroma Catalysts
Apr 27, 2025 am 04:07 AM
Clair Obscur: Expedition 33 - How To Get Perfect Chroma Catalysts
Apr 27, 2025 am 04:07 AM
In Clair Obscur: Expedition 33, maximizing your favorite weapons is key to success. Each upgrade not only boosts weapon power but also unlocks new traits, shaping your character builds. Reaching Weapon Level 32 is achievable with Grandiose Chroma Ca
 Rusty Rabbit: Where To Find Every Keycube
Apr 17, 2025 pm 10:02 PM
Rusty Rabbit: Where To Find Every Keycube
Apr 17, 2025 pm 10:02 PM
Many 2D platformers, including Rusty Rabbit, feature inaccessible areas requiring specific abilities or items. Rusty Rabbit is no exception, with multiple such areas in each region. Besides visually obvious blocked pathways, you'll encounter robots
 Blue Prince: Upgrade Disk Guide
Apr 12, 2025 am 11:34 AM
Blue Prince: Upgrade Disk Guide
Apr 12, 2025 am 11:34 AM
Upgrade Disks are some of the most powerful and valuable items you’ll find in Blue Prince. While they’re not needed to reach Room 46, they make your runs smoother, your puzzles easier, and your odds of survival higher. If you’re lucky enough to find
 Clair Obscur: Expedition 33 - How To Find And Defeat Chromatic Luster
Apr 25, 2025 am 04:10 AM
Clair Obscur: Expedition 33 - How To Find And Defeat Chromatic Luster
Apr 25, 2025 am 04:10 AM
Chromatic Luster Strategy in "Clair Obscur: Expedition 33" Chromatic Luster is a powerful variant of the common enemy Luster in Clair Obscur: Expedition 33. It attacks quickly and violently, and can even ignite your entire team to deal additional damage. Without superb blocking skills, the battle with Chromatic Luster will be a race against time. Fortunately, Chromatic Luster doesn't have much health compared to other enemies. As long as you can control the rhythm of the battle and avoid falling into passive defense, you can quickly
