

HTML Display Block

HTML Display Block is one of HTML’s most important position properties, responsible for placing block-level elements into the display block. While designing a webpage, arranging elements properly in a specific position is always important. Setting a proper position for the layout is one of the most critical tasks. By default, it took the display property as inline. This will always start with a new line and stretch elements from left to right to occupy full-width space. One can set height and width properties to the block-level elements, and it is possible to include other inline or block elements within it.
Syntax:
- Each and every element is placed on the webpage at a specific location. The property value helps us to define how it should be displayed on the webpage; it will be as follows:
display :block;
- The syntax for displaying it with position value is as follows:
position :value;
- In the above syntax, the position is the placement area where actual elements will place. Into the value, we can use a block for displaying block-level elements. So it will be going to use like :
position :block;
- That HTML Block contains elements like ,
,
, as well as one can use inline elements within the display block. - With the help of CSS, one can define display property with some specified values like :
display: [<display-outside> , <display-inside>] [<display - listitem>, <display -internal>, <display-box>]
Copy after loginThere are different display values for HTML as follows:
1. none value
{
display:none;
}
Copy after login2. inline value
{
display:inline;
}
Copy after login3. block value
{
display:block;
}
Copy after login4. inline-block value
{
display : inline- block;
}
Copy after loginAll the above values help us to set and control the layout; most of the time, values for the layout are either inline or block. The display block starts with a new line covering the container’s full width to put elements on the web page in the HTML display block. Block-level elements don’t allow you to use other block elements within them.
How does Block Display in HTML?
- This format uses boxes placed one after another in a vertical direction. It will start from the top of the containing block.
- Those blocks are managed with vertical distance between them using equivalent space, known as margin property in the CSS.
- In this display block formatting process, every box’s left outer side is attached to the left side of its containing block. The same thing will happen with the right edges of containing blocks.
- Another way to define a display block in HTML is to put block elements down in the horizontal direction, as in English. It will arrange the layout vertically below one by one.
- As we are using margins, it helps to create space between two boxes or elements, which will separate elements from each other.
- Block-level elements will occupy all the space in an inline direction, separating our elements into their containing block.
- As we know, we can set height and width properties to the layout in it, so it helps to put blocks below each other one by one.
Examples of HTML Display Block
Below are the different examples given.
Example #1
This is a normal example showing how the HTML display block property going to be used in the HTML code is as follows:
Code:
<!DOCTYPE html>
<html>
<style>
.block_demo{
border: 2px solid red;
width:50%;
display:block;
}
</style>
<body>
<h4>List of Color Names:</h4>
<div class="block_demo">
<ul>
<li>Red</li>
<li>Green</li>
<li>Blue</li>
<li>Orange</li>
<li>Purple</li>
<li>Pink</li>
</ul>
</div>
<h4>List of Mobile Brands:</h4>
<div class="block_demo">
<ol>
<li>Apple</li>
<li>SAMSUNG</li>
<li>NOKIA</li>
<li>MOTOROLA</li>
<li>LENOVO</li>
<li>OPPO</li>
</ol>
</div>
</body>
</html>
Copy after loginOutput:

Example #2
In this example, we are going to create 3 equal blocks and show data in between them using the Display block as follows:
Code:
<!DOCTYPE html>
<html>
<head>
<title>HTML Display box</title>
<style>
#block1{
height: 100px;
width: 400px;
background: orange;
display: block;
}
#block2{
height: 100px;
width: 400px;
background: white;
display: block;
}
#block3{
height: 100px;
width: 400px;
background: lightgreen;
display: block;
}
.flag {
margin-left:20px;
font-size:40px;
font-weight:bold;
color:blue;
}
.demo {
font-size:20px;
margin-left:20px;
}
.main {
margin:50px;
text-align:center;
border: 1px solid black;
}
</style>
</head>
<body>
<div class = "flag">National Flag of India</div>
<div class = "demo">Meaning of National Flag</div>
<div class = "main">
<div id="block1">The saffron color of the flag indicates a symbol of courage and sacrifice. This is also known as Bhagwa color. It’s for renunciation . It represents fire. </div>
<div id="block2">The white color of our flag represents honesty, peace, purity. It focus on importance of maintaining peace in the country.
<img src="AC.png" style="height:60px; width:70px;">
</div>
<div id="block3">The green color represents faith and chivalry. It’s for nature. It is a symbol of prosperity and life. It also used for representing auspiciousness of the Indian Motherland..</div>
</div>
</body>
</html>
Copy after loginOutput:
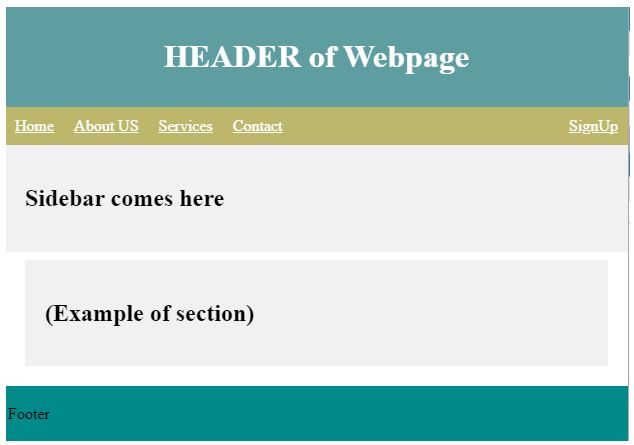
Example #3
This example includes elements like Header, footer, section, sidebar, etc. are as follows:
Code:
<!DOCTYPE html>
<html lang="en">
<head>
<title>HTML Display Block</title>
<style>
body {
margin: 0;
}
.header {
padding: 10px;
text-align: center;
background-color:cadetblue;
color: white;
}
.navbar {
overflow: hidden;
background-color:darkkhaki;
}
.navbar a {
float: left;
display: block;
color: white;
text-align: center;
padding: 10px 10px;
}
.navbar a.right {
float: right;
}
.navbar a:hover{
background-color: #eee;
color: black;
}
.row {
display: flex;
flex-wrap: wrap;
}
.section {
flex: 10%;
background-color: #f1f1f1;
padding: 20px;
}
.main {
flex: 80%;
background-color: white;
padding: 20px;
}
.footer{
padding:3px;
background-color:darkcyan;
width:100%;
}
</style>
</head>
<body>
<div class="header">
<h1> HEADER of Webpage</h1>
</div>
<div class="navbar">
<a href="#">Home</a>
<a href="#">About US</a>
<a href="#">Services</a>
<a href="#">Contact</a>
<a href="#" class="right">SignUp</a>
</div>
<div class="row">
<div class="section">
<h2>Sidebar comes here</h2>
</div>
<div class="main">
<h2></h2>
<p></p>
<br>
<div class="row">
<div class="section" style="margin-top:-50px;">
<h2>(Example of section)</h2>
</div>
</div>
</div>
<div class="footer">
<p>Footer</p>
</div>
</div>
</body>
</html>
Copy after loginOutput:
Conclusion
From all the above information, we learned that the HTML display block property in HTML helps us to set our layout in the proper structure. Those blocks in the layout can be put in either vertical or horizontal directions, one after another. It include elements like
,, Statement of this WebsiteThe content of this article is voluntarily contributed by netizens, and the copyright belongs to the original author. This site does not assume corresponding legal responsibility. If you find any content suspected of plagiarism or infringement, please contact admin@php.cn


Hot AI Tools

Undresser.AI Undress
AI-powered app for creating realistic nude photos

AI Clothes Remover
Online AI tool for removing clothes from photos.

Undress AI Tool
Undress images for free

Clothoff.io
AI clothes remover

Video Face Swap
Swap faces in any video effortlessly with our completely free AI face swap tool!

Hot Article
Hot Tools

Notepad++7.3.1
Easy-to-use and free code editor

SublimeText3 Chinese version
Chinese version, very easy to use

Zend Studio 13.0.1
Powerful PHP integrated development environment

Dreamweaver CS6
Visual web development tools

SublimeText3 Mac version
God-level code editing software (SublimeText3)
Hot Topics


 Table Border in HTML
Sep 04, 2024 pm 04:49 PM
Table Border in HTML
Sep 04, 2024 pm 04:49 PM
Guide to Table Border in HTML. Here we discuss multiple ways for defining table-border with examples of the Table Border in HTML.
 Nested Table in HTML
Sep 04, 2024 pm 04:49 PM
Nested Table in HTML
Sep 04, 2024 pm 04:49 PM
This is a guide to Nested Table in HTML. Here we discuss how to create a table within the table along with the respective examples.
 HTML margin-left
Sep 04, 2024 pm 04:48 PM
HTML margin-left
Sep 04, 2024 pm 04:48 PM
Guide to HTML margin-left. Here we discuss a brief overview on HTML margin-left and its Examples along with its Code Implementation.
 HTML Table Layout
Sep 04, 2024 pm 04:54 PM
HTML Table Layout
Sep 04, 2024 pm 04:54 PM
Guide to HTML Table Layout. Here we discuss the Values of HTML Table Layout along with the examples and outputs n detail.
 HTML Input Placeholder
Sep 04, 2024 pm 04:54 PM
HTML Input Placeholder
Sep 04, 2024 pm 04:54 PM
Guide to HTML Input Placeholder. Here we discuss the Examples of HTML Input Placeholder along with the codes and outputs.
 HTML Ordered List
Sep 04, 2024 pm 04:43 PM
HTML Ordered List
Sep 04, 2024 pm 04:43 PM
Guide to the HTML Ordered List. Here we also discuss introduction of HTML Ordered list and types along with their example respectively
 HTML onclick Button
Sep 04, 2024 pm 04:49 PM
HTML onclick Button
Sep 04, 2024 pm 04:49 PM
Guide to HTML onclick Button. Here we discuss their introduction, working, examples and onclick Event in various events respectively.
 Moving Text in HTML
Sep 04, 2024 pm 04:45 PM
Moving Text in HTML
Sep 04, 2024 pm 04:45 PM
Guide to Moving Text in HTML. Here we discuss an introduction, how marquee tag work with syntax and examples to implement.
