
 Mobile Tutorial
Android Phone
Projector connector connection methods and precautions (simple and easy-to-understand projector connector connection steps)
Mobile Tutorial
Android Phone
Projector connector connection methods and precautions (simple and easy-to-understand projector connector connection steps)
Projector connector connection methods and precautions (simple and easy-to-understand projector connector connection steps)

With the development of technology, projectors have become an indispensable part of our work and entertainment. However, how to properly connect a projector can be confusing for many people. This article will introduce you to some simple and easy-to-understand projector connector connection methods, and provide some precautions to help you complete the connection easily and enjoy a smoother projection experience.

1.VGAコネクタ接続方法
-VGAコネクタは最も一般的なプロジェクター接続インターフェースの1つです。
-VGA ケーブルを使用して、コンピューターの VGA 出力ポートをプロジェクターの VGA 入力ポートに接続します。
- 接続がしっかりしていて、正しい方向に挿入されていることを確認してください。
2. HDMI コネクタの接続方法
- HDMI コネクタは、最新のプロジェクターで一般的に使用されている接続インターフェイスです。
-HDMIケーブルを使用して、コンピューターまたはその他のデバイスのHDMI出力ポートをプロジェクターのHDMI入力ポートに接続します。
- 正しい方向に挿入し、しっかりと接続されていることを確認してください。
3.DVIコネクタ接続方法
-DVIコネクタは、一般的に使用されるプロジェクターコネクタでもあります。
- DVI ケーブルを使用して、コンピューターまたはその他のデバイスの DVI 出力ポートをプロジェクターの DVI 入力ポートに接続します。
- 良好な信号伝送を確保するために、挿入時にコネクタを過度にねじらないように注意してください。
4.USBコネクタ接続方法
- 一部のプロジェクターはUSBコネクタを介してコンピュータまたは他のデバイスに接続できます。
-USBケーブルを使用してプロジェクターのUSB入力ポートをコンピューターのUSB出力ポートに接続します。
-安定した信号伝送を確保するために、必ず高品質のUSBケーブルを使用してください。
5. ワイヤレス接続方法
- 一部のプロジェクターはワイヤレス接続機能をサポートしています。
- Wi-Fi または Bluetooth 経由でコンピューターまたはその他のデバイスをプロジェクターに接続します。
- プロジェクターとデバイスで正しいネットワーク接続を設定し、指示に従ってペアリングします。
6. コネクタの種類とアダプタに注意してください
- コネクタとアダプタを選択するときは、その種類と互換性に注意してください。
- プロジェクターごとに異なるタイプのコネクタとアダプターが必要になる場合があります。
-購入する前に、プロジェクターと機器に必要なコネクタの種類を理解し、正しい付属品を購入していることを確認してください。
7. 入力信号ソースを確認します
- プロジェクターを接続する前に、投影するデバイスの入力信号ソースを確認してください。
- コンピューター、DVD プレーヤー、ゲーム機など、デバイスごとに入力ソース オプションが異なる場合があります。
- プロジェクターで正しい入力ソースを選択し、デバイスを対応するコネクタに接続します。
8. 解像度と画面比率を調整します
- プロジェクターを接続した後、コンピューターまたはその他のデバイスの解像度と画面比率がプロジェクターと互換性があることを確認します。
- デバイスのディスプレイ設定に移動し、適切な解像度と画面比率を選択します。
- これにより、投影されたコンテンツが歪みなく正常に表示されるようになります。
9. 信号を安定に保ちます
- プロジェクターコネクタの接続プロセス中、安定した信号伝送を確保します。
- 信号伝送品質への影響を避けるため、ケーブルが長すぎたり、ねじれすぎたりしないようにしてください。
-コネクタとケーブルを定期的にチェックして、損傷や緩みがないか確認してください。
10. プロジェクター設定を調整します
- 接続が成功したら、必要に応じてプロジェクター設定を調整します。
- 明るさ、コントラスト、投影距離などのパラメータを調整して、最高の投影効果を実現します。
-投影環境に応じてレンズの焦点と投影角度を調整し、鮮明な画像を取得します。
11. オーディオ接続方法
- プロジェクターを通じてオーディオを再生する必要がある場合は、オーディオ接続を行う必要があります。
-オーディオケーブルを介してオーディオデバイス(スピーカーなど)をプロジェクターのオーディオ出力ポートに接続します。
- オーディオ ケーブルが正しいコネクタに接続されていることを確認し、音量コントロールを調整してください。
12. プロジェクターのリモコン
- 一部のプロジェクターには、リモコンやモバイル APP などのリモコン機能が搭載されています。
-接続が完了したら、リモコンまたはAPPを使用してプロジェクターのスイッチ、音量、画面切り替え、その他の機能を制御してみてください。
- プロジェクターのリモコン方法を学び、使いやすさを向上させます。
13. 短絡や電源の問題を回避してください
- プロジェクターを接続するときは、デバイスの電源がオフになっていることを確認してください。
- 短絡を避けるため、接続プロセス中に金属コネクタに触れないようにしてください。
- 電源を接続する前に、すべてのコネクタが正しく差し込まれていることを確認し、電源コードが接地されていることを確認してください。
14. トラブルシューティング
- 接続後に問題が発生した場合は、コネクタとケーブルを抜き差しして、接続が緩んでいないかどうかを確認してください。
- 入力信号ソース、解像度など、デバイスとプロジェクターの設定が正しいかどうかを確認します。
-問題が解決しない場合は、デバイスとプロジェクターのユーザーマニュアルを参照するか、専門家にトラブルシューティングを相談してください。
15.
- プロジェクターのコネクタを正しく接続することは、投影効果を確保するために重要です。
- 適切なコネクタ タイプの選択、入力信号ソースの確認、デバイスとプロジェクターの設定の調整はすべて、接続を成功させるための鍵です。
- 正しい接続方法と注意事項に従うことで、投影体験がよりスムーズで楽しいものになります。
プロジェクターコネクタを正しく接続する方法
現代の会議、教育、エンターテイメントにおいて、プロジェクターは必要な機器の 1 つとなっています。ただし、投影の効果と品質を確保するには、プロジェクターのコネクタを正しく接続することが非常に重要な手順です。この記事では、高品質の投影効果を確保するためにプロジェクターのコネクタを正しく接続する方法について詳しく説明します。
Découvrez les différents types de connecteurs de projecteur
Choisissez les connecteurs appropriés
Vérifiez les interfaces du projecteur et les connecteurs
Soyez prêt à connecter les fils requis
Éteignez le projecteur et l'alimentation électrique
Insérez les fils dans l'interface
Confirmez que la connexion est corrigez puis remettez sous tension
Ajustez la position du projecteur et de l'écran
Ajustez la résolution et le mode d'affichage
Vérifiez la clarté et la luminosité de l'image
Ajustez la taille et la position de l'image projetée
Évitez les sources d'interférences qui interfèrent avec le signal
Nettoyez régulièrement les connecteurs et les câbles
Évitez de débrancher et de brancher fréquemment les connecteurs
Gardez un œil sur le développement et les mises à jour des nouvelles technologies
1. Comprendre les différents types de connecteurs de projecteur
Les projecteurs de différentes marques et modèles peuvent utiliser différents types de connecteurs. , les plus courants incluent HDMI, VGA, USB, etc. Avant de vous connecter, comprenez d'abord le type de connecteur dont votre projecteur a besoin.
2. Choisissez le connecteur approprié
Selon le type d'interface du projecteur, sélectionnez le connecteur approprié à connecter. Assurez-vous que le connecteur et l'interface du projecteur sont compatibles pour éviter des problèmes inutiles.
3. Vérifiez l'interface du projecteur et le connecteur
Avant d'effectuer la connexion, vérifiez si l'interface du projecteur et le connecteur sont normaux et non endommagés ou sales. Assurez-vous que l’interface est fluide pour obtenir des résultats de connexion de haute qualité.
4. Préparez les fils requis pour la connexion
Selon le type de connecteur et le nombre d'interfaces, préparez les fils requis, tels que les câbles HDMI, les câbles VGA, etc. Assurez-vous que le fil est de bonne qualité et de la bonne longueur pour une connexion et une utilisation faciles.
5. Éteignez le projecteur et l'alimentation électrique
Assurez-vous d'éteindre complètement le projecteur et l'alimentation électrique avant d'effectuer les connexions des connecteurs. Ceci permet d'éviter d'endommager le connecteur ou le projecteur en raison d'un courant excessif.
6. Insérez le câble dans l'interface
Insérez une extrémité du câble dans l'interface correspondante du projecteur, en vous assurant que la fiche et l'interface sont entièrement installées et fermement insérées.
7. Confirmez que la connexion est correcte, puis remettez l'appareil sous tension.
Après avoir confirmé que le connecteur est correctement connecté, remettez l'appareil sous tension. Le projecteur détectera automatiquement la connexion et commencera à afficher l'image.
8. Ajustez la position du projecteur et de l'écran
Ajustez les positions du projecteur et de l'écran selon vos besoins pour garantir la meilleure plage d'affichage et l'angle de l'image projetée.
9. Ajustez la résolution et le mode d'affichage
Ajustez la résolution et le mode d'affichage du projecteur en fonction de vos besoins pour obtenir la meilleure qualité d'image et l'effet d'affichage.
10. Vérifiez la clarté et la luminosité de l'image
En observant la clarté et la luminosité de l'image projetée, ajustez la distance focale, le contraste et d'autres paramètres du projecteur pour obtenir le meilleur effet d'affichage.
11. Ajustez la taille et la position de l'image projetée
Ajustez la taille et la position de l'image projetée via le menu du projecteur ou la télécommande pour s'adapter aux différents besoins d'affichage.
12. Évitez les sources d'interférences qui interfèrent avec le signal
Avant de connecter le projecteur, assurez-vous qu'il n'y a aucune source d'interférence de signal autour de vous, comme des téléviseurs, des haut-parleurs, etc. Ces sources d'interférences peuvent affecter la qualité de l'image projetée.
13. Nettoyez régulièrement les connecteurs et les câbles
Un nettoyage régulier des connecteurs et des câbles peut garantir des connexions de bonne qualité. Utilisez un chiffon propre ou un détergent spécial pour le nettoyage.
14. Évitez de brancher et de débrancher fréquemment les connecteurs
Évitez de brancher et de débrancher fréquemment les connecteurs pour éviter d'endommager ou de desserrer les connecteurs et d'affecter la qualité de la connexion.
15. Restez à l'écoute du développement et des mises à jour des nouvelles technologies
Avec l'avancement continu de la technologie, les types et les méthodes de connexion des connecteurs du projecteur sont également constamment mis à jour. Faites attention au développement de nouvelles technologies en temps opportun pour suivre le rythme.
Connecter correctement le connecteur du projecteur est un élément important pour garantir l'effet et la qualité de la projection. En comprenant les types de connecteurs, en achetant les connecteurs appropriés, en vérifiant les interfaces, en préparant les fils, en ajustant les paramètres et d'autres étapes, vous pouvez obtenir des effets de projection de haute qualité. Un nettoyage régulier des connecteurs et des câbles, en évitant les branchements et débranchements fréquents des connecteurs et en prêtant attention au développement de nouvelles technologies sont également des mesures importantes pour garantir des effets de projection stables.
The above is the detailed content of Projector connector connection methods and precautions (simple and easy-to-understand projector connector connection steps). For more information, please follow other related articles on the PHP Chinese website!

Hot AI Tools

Undresser.AI Undress
AI-powered app for creating realistic nude photos

AI Clothes Remover
Online AI tool for removing clothes from photos.

Undress AI Tool
Undress images for free

Clothoff.io
AI clothes remover

Video Face Swap
Swap faces in any video effortlessly with our completely free AI face swap tool!

Hot Article
Hot Tools

Notepad++7.3.1
Easy-to-use and free code editor

SublimeText3 Chinese version
Chinese version, very easy to use

Zend Studio 13.0.1
Powerful PHP integrated development environment

Dreamweaver CS6
Visual web development tools

SublimeText3 Mac version
God-level code editing software (SublimeText3)
Hot Topics
 1672
1672
 14
1428
52
1332
25
1276
29
1256
24
14
1428
52
1332
25
1276
29
1256
24

 How to restore the original appearance of mobile phone desktop icons (easily solve the problem of mobile phone desktop icon confusion)
Sep 02, 2024 pm 03:05 PM
How to restore the original appearance of mobile phone desktop icons (easily solve the problem of mobile phone desktop icon confusion)
Sep 02, 2024 pm 03:05 PM
In the process of daily use of mobile phones, we often encounter the situation where the mobile phone desktop icons are messed up, which bothers us. However, with some simple operations, we can easily restore the original appearance of the mobile phone desktop icons. This article will introduce some effective methods to solve this problem. Back up desktop layout Before restoring mobile phone desktop icons, we first need to back up the current desktop layout. Open the phone settings, find the "Desktop and Wallpaper" option, then click the "Backup and Restore" button, select "Backup Desktop Layout", and the phone will automatically save the current desktop layout. Use the icon manager that comes with the system. Most mobile phone systems provide the icon manager function, which can help us restore mobile phone desktop icons. Open your phone settings and find "Apps & Notifications"
 How to deactivate the safety mode of oppo mobile phones (quickly and easily deactivate the safety mode of oppo mobile phones)
Sep 02, 2024 pm 03:38 PM
How to deactivate the safety mode of oppo mobile phones (quickly and easily deactivate the safety mode of oppo mobile phones)
Sep 02, 2024 pm 03:38 PM
In some cases, your Oppo phone may enter safe mode, resulting in the inability to use the phone's functions normally. In this situation, you may feel confused and anxious. However, don't worry! This article will introduce you to some quick and easy methods to disable the safe mode of your Oppo phone and let you use your phone again. 1. Check the battery power If the battery power of your OPPO phone is too low, it may cause the phone to automatically enter safe mode. Please make sure your phone is fully charged and try restarting your phone. Press and hold the power button In some cases, OPPO phones can exit safe mode by long pressing the power button. Try holding down the power button for a few seconds to see if you can exit safe mode. Check the volume keys Sometimes, pressing the wrong combination of volume keys will also
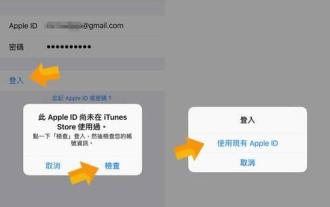 Steps and precautions for registering a Hong Kong Apple ID (enjoy the unique advantages of the Hong Kong Apple Store)
Sep 02, 2024 pm 03:47 PM
Steps and precautions for registering a Hong Kong Apple ID (enjoy the unique advantages of the Hong Kong Apple Store)
Sep 02, 2024 pm 03:47 PM
Apple's products and services have always been loved by users around the world. Registering a Hong Kong Apple ID will bring more convenience and privileges to users. Let’s take a look at the steps to register a Hong Kong Apple ID and what you need to pay attention to. How to register a Hong Kong Apple ID When using Apple devices, many applications and functions require using Apple ID to log in. If you want to download applications from Hong Kong or enjoy the preferential content of the Hong Kong AppStore, it is very necessary to register a Hong Kong Apple ID. This article will detail the steps on how to register a Hong Kong Apple ID and what you need to pay attention to. Steps: Select language and region: Find the "Settings" option on your Apple device and enter
 Solution to the problem of blurry screen on Samsung monitor (how to deal with the phenomenon of blurry screen on Samsung monitor)
Sep 04, 2024 pm 01:32 PM
Solution to the problem of blurry screen on Samsung monitor (how to deal with the phenomenon of blurry screen on Samsung monitor)
Sep 04, 2024 pm 01:32 PM
With the continuous development of technology, monitors have become an indispensable part of people's daily life and work. However, sometimes we may encounter some problems, such as screen blur on Samsung monitors. This article will introduce some common solutions to help you better deal with this problem. 1. Check whether the connection cable is secure - make sure the VGA, DVI or HDMI cables are intact and firmly connected to the monitor and computer or other devices. - Check whether the interface of the connecting cable is loose or dirty, and clean or replace it if necessary. 2. Adjust resolution and refresh rate - Adjust the resolution and refresh rate of the monitor on your computer system to ensure it matches the monitor's default settings. - Try different settings to see if they can resolve the blurry screen issue.
 How to identify genuine and fake shoe boxes of Nike shoes (master one trick to easily identify them)
Sep 02, 2024 pm 04:11 PM
How to identify genuine and fake shoe boxes of Nike shoes (master one trick to easily identify them)
Sep 02, 2024 pm 04:11 PM
As a world-renowned sports brand, Nike's shoes have attracted much attention. However, there are also a large number of counterfeit products on the market, including fake Nike shoe boxes. Distinguishing genuine shoe boxes from fake ones is crucial to protecting the rights and interests of consumers. This article will provide you with some simple and effective methods to help you distinguish between real and fake shoe boxes. 1: Outer packaging title By observing the outer packaging of Nike shoe boxes, you can find many subtle differences. Genuine Nike shoe boxes usually have high-quality paper materials that are smooth to the touch and have no obvious pungent smell. The fonts and logos on authentic shoe boxes are usually clear and detailed, and there are no blurs or color inconsistencies. 2: LOGO hot stamping title. The LOGO on Nike shoe boxes is usually hot stamping. The hot stamping part on the genuine shoe box will show
 How to check WiFi password on Android phone (simple operation allows you to easily obtain the password of the connected WiFi)
Sep 02, 2024 pm 05:10 PM
How to check WiFi password on Android phone (simple operation allows you to easily obtain the password of the connected WiFi)
Sep 02, 2024 pm 05:10 PM
With the popularity of wireless networks, we often connect to different WiFi networks, but sometimes we forget the password of a certain WiFi network. This article will introduce how to check the password of the connected WiFi on an Android phone, so that you can easily obtain and record it. Paragraph 1. Enter the WiFi settings page through system settings. Enter the WiFi settings page by clicking the "WiFi" option in the phone settings. 2. Select the connected WiFi network. In the WiFi settings page, find and click the name of the connected WiFi network. 3. Enter the WiFi network details page. In the pop-up window, click "Network Details" or similar options to enter the WiFi network details page. 4. Display the high speed of the connected WiFi
 Choose the best video player software (compare the pros and cons of different video player software)
Sep 02, 2024 pm 03:03 PM
Choose the best video player software (compare the pros and cons of different video player software)
Sep 02, 2024 pm 03:03 PM
With the popularity of the Internet and smart devices, video has become an indispensable part of people's daily lives. When choosing a video player software, we hope that it can provide a good user experience, stable playback performance, and support a variety of common video formats. This article will introduce several well-known video player software currently on the market, and evaluate them based on their functions and features, so that readers can choose the software that best suits their needs. 1. Introduction and comparison of popular video player software Windows Media Player: easy to use, comes with Windows system, supports common formats, limited functions VLC Media Player: powerful decoding capabilities, widely supports various formats, simple interface PotPlayer: highly customizable Support multiple formats
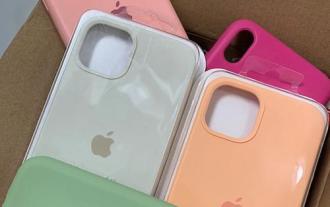 How to clean colored silicone mobile phone cases (simple and practical cleaning tips and precautions)
Sep 02, 2024 pm 04:09 PM
How to clean colored silicone mobile phone cases (simple and practical cleaning tips and precautions)
Sep 02, 2024 pm 04:09 PM
Colored silicone phone cases are one of the common accessories for modern mobile phone enthusiasts. However, after a period of use, dirt and dust will inevitably accumulate on the phone case, affecting its appearance and hygiene. How to properly clean colored silicone phone cases is something every mobile phone user should know. This article will introduce you to some simple and practical cleaning tips and precautions to help you clean colored silicone phone cases easily. 1. Preparation before cleaning Before cleaning, first make sure that the phone is turned off and separate the phone from the phone case. Then prepare the following tools: a soft-bristled brush, mild detergent, warm water, and a clean towel. 2. Use a soft-bristled brush to remove most of the dust. Use a soft-bristled brush to gently brush off most of the dust on the surface of the colored silicone phone case. You can place the phone case on a paper towel to prevent the dust from scattering. want
