

How to Clear Your Update Cache on Windows 11 and 10

Both Windows 11 and Windows 10 make it super easy to clear your Windows Update cache. You can use a graphical method or a command line option to delete the saved update files. We’ll show you your available options.
Why Should You Clear Your Windows Update Cache?
There are many reasons you might want to clear your Windows Update cache.
You might be facing issues finding or installing updates, and clearing the cache often fixes the problem. Clearing the cache fixes issues with Windows Updates by forcing Windows to re-download all the required files.
Another reason is to free up storage space. Update cache files often use a huge chunk of the storage, and you can reclaim that by deleting those cached files. (Windows does delete some update files after installing those updates, but not all.)
Clear Windows Update Cache Using File Explorer
An easy graphical way to delete the update cache is to use File Explorer. This method deletes all the update cache files.
To use this method, open the Run dialog box by pressing Windows+R. Type the following in the box and press Enter:
services.msc
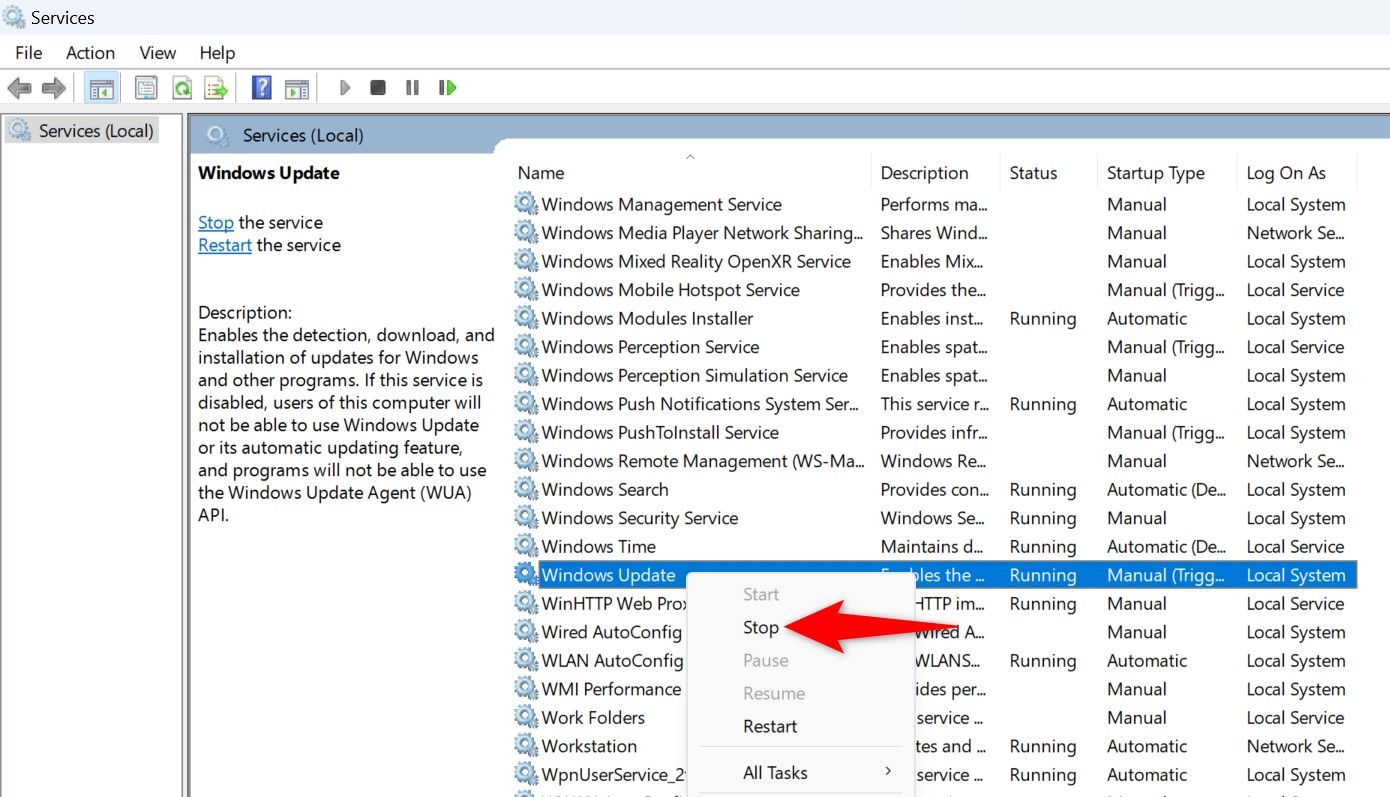
In the Services window, find the Windows Update service. Right-click it and select "Stop." Keep this window open as you’ll come back here later.
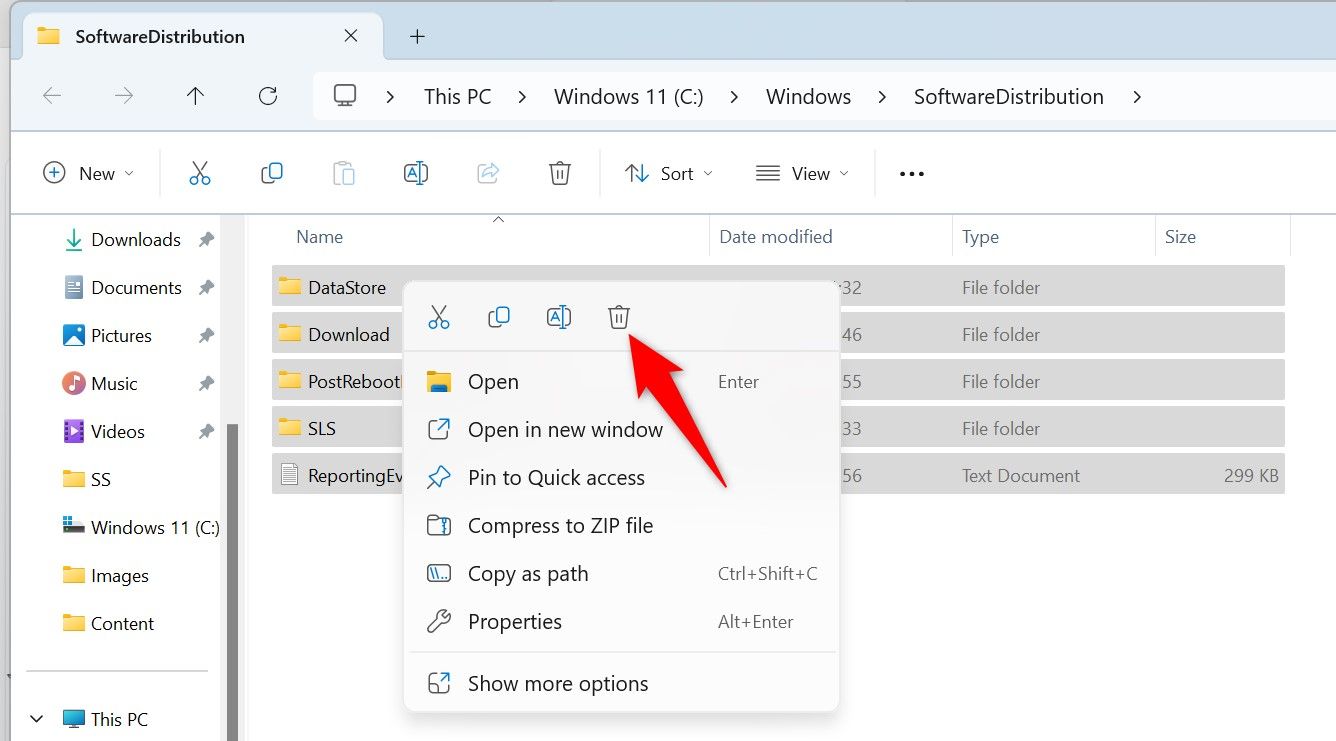
Launch Run again using Windows+R, type the path below in the box, and press Enter. The following is the path to the Windows Update cache folder. It assumes that Windows is installed on your C: drive. However, if that’s not the case, just change the drive letter in the path.
C:WindowsSoftwareDistribution
Press Ctrl+A to select all files in the open folder. Right-click a selected file and choose the trash can icon (Windows 11) or "Delete" (Windows 10).
Close File Explorer and empty the Recycle Bin.
Then, return to the "Services" window, right-click "Windows Update," and choose "Start."
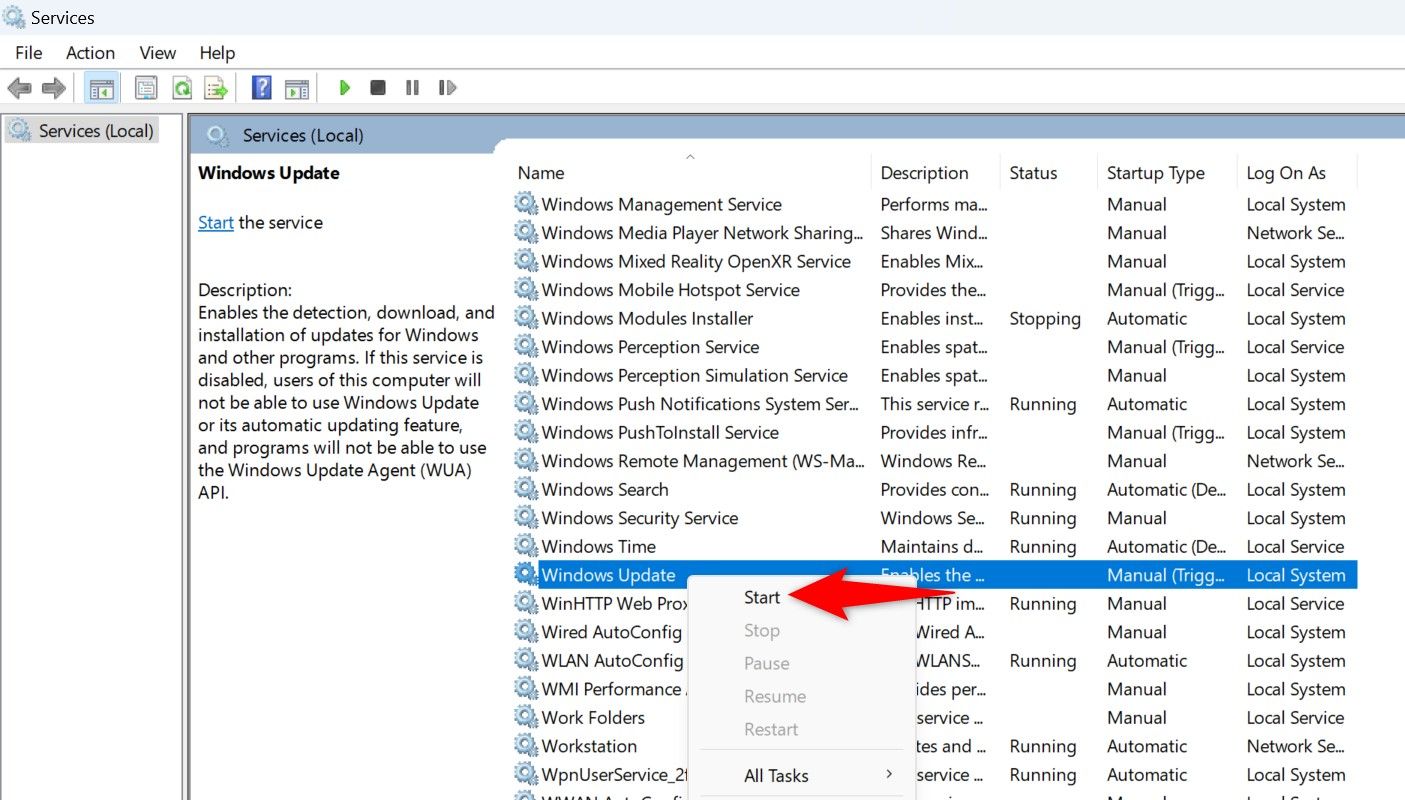
This ensures your PC can continue to look for the latest updates.
Clear Windows Update Cache Using Disk Cleanup
Windows’s built-in Disk Cleanup utility helps delete some Windows Update cache files.
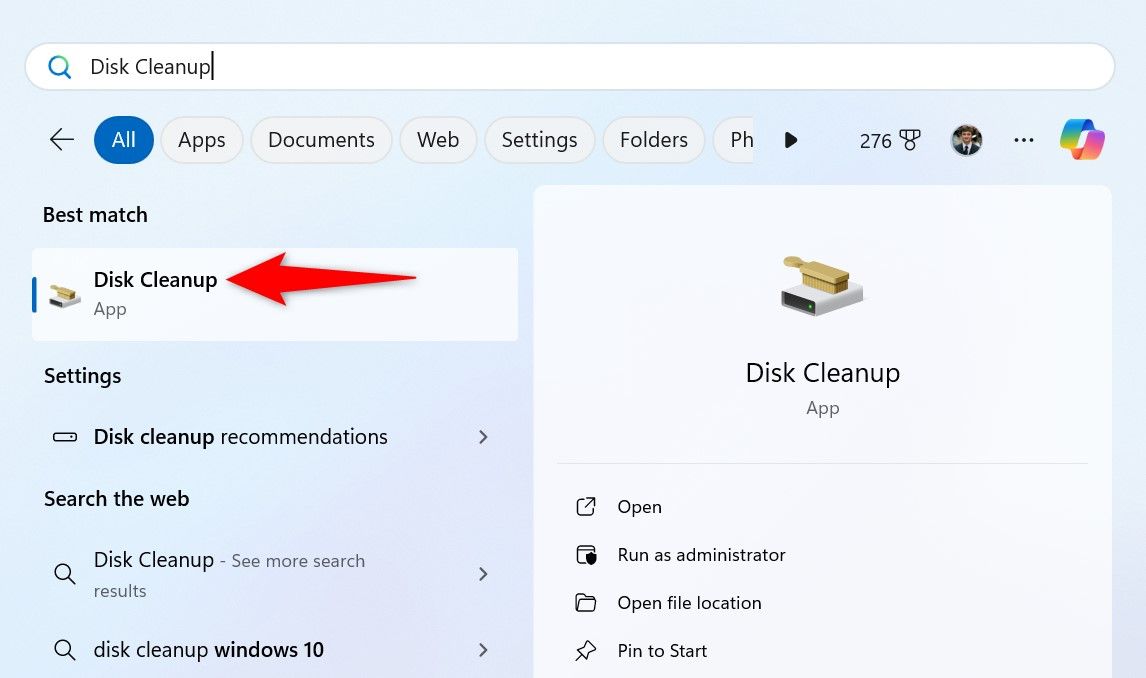
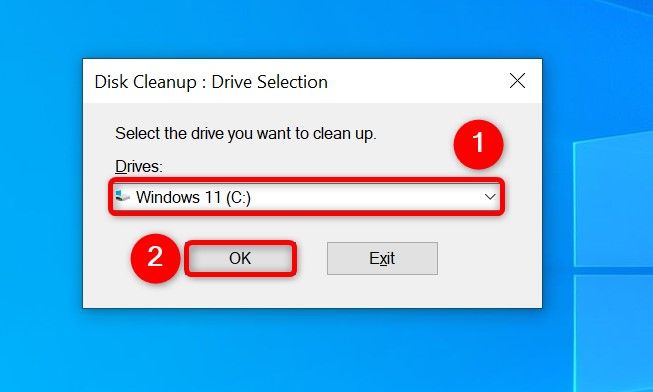
To use it, open the Start Menu, search for Disk Cleanup, and launch the utility.
Select your Windows installation drive and choose "OK."
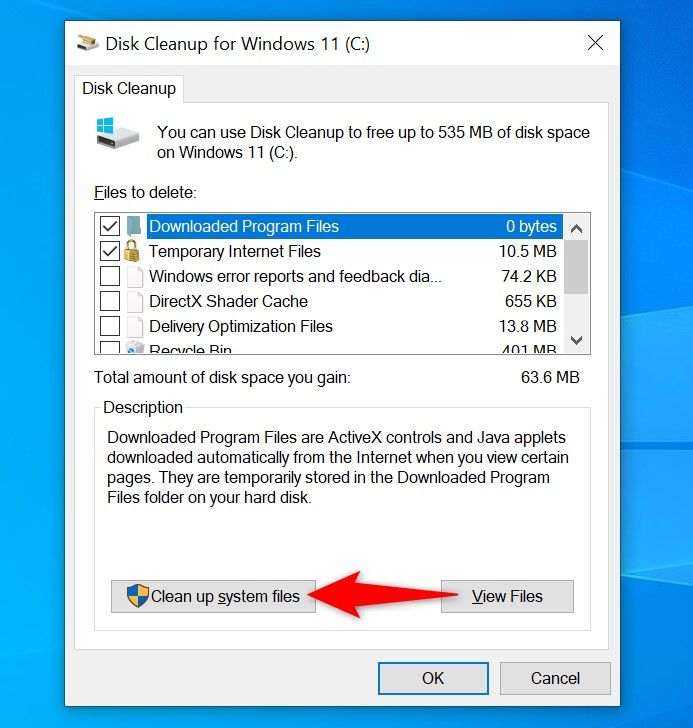
Select "Clean Up System Files."
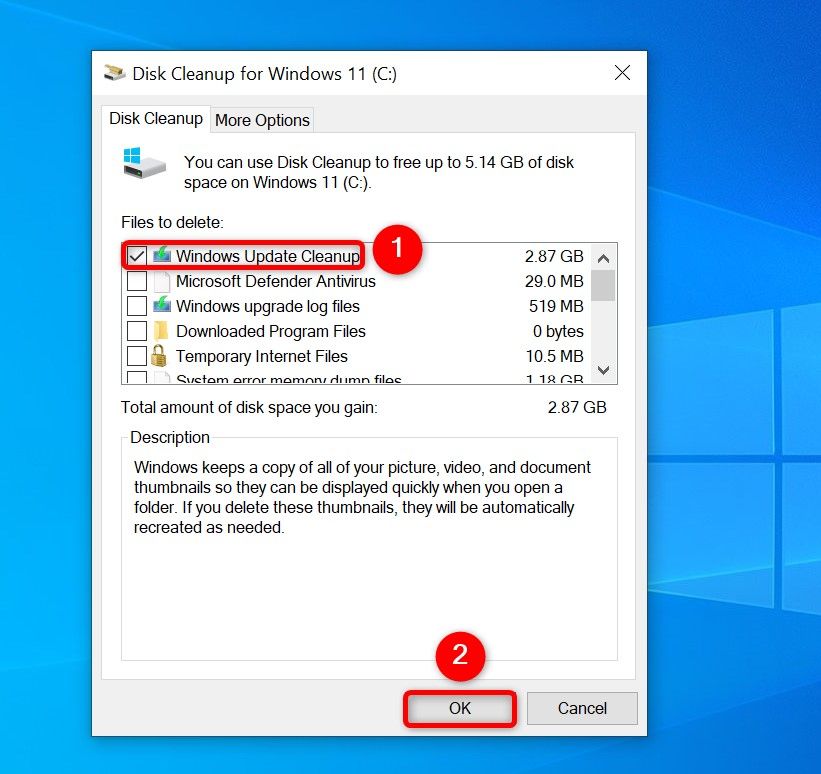
Choose your Windows installation drive again and select "OK."
In Disk Cleanup, enable the "Windows Update Cleanup" option. Feel free to enable other options if you’d like to delete those files as well. Then, at the bottom, click "OK."
The tool will begin cleaning up the update cache files.
Clear Windows Update Cache Using Command Prompt
If you prefer command line methods over graphical ones, use a few commands in Command Prompt (or PowerShell) to remove the update cache.
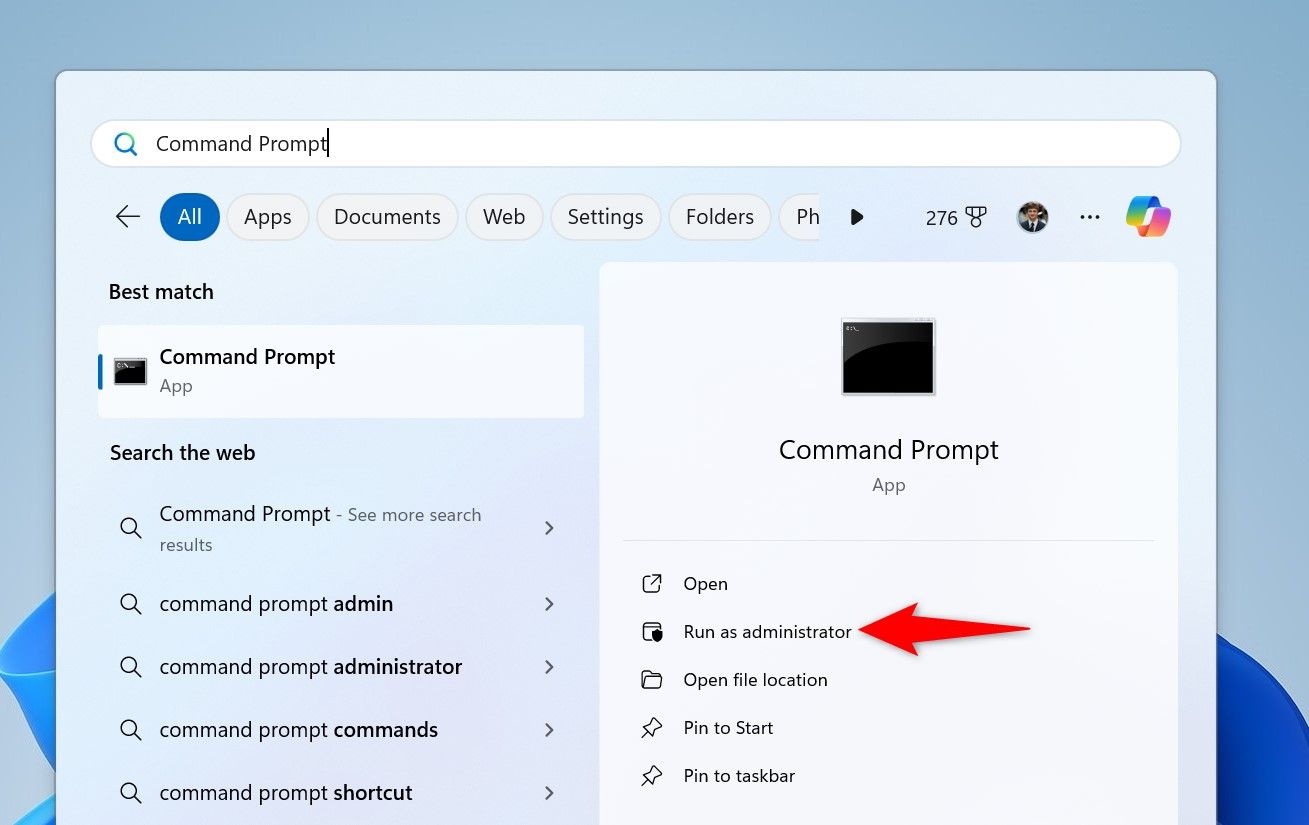
Begin by opening the Start Menu, searching for Command Prompt, and selecting "Run as Administrator."
In the "User Account Control" (UAC) prompt, select "Yes."
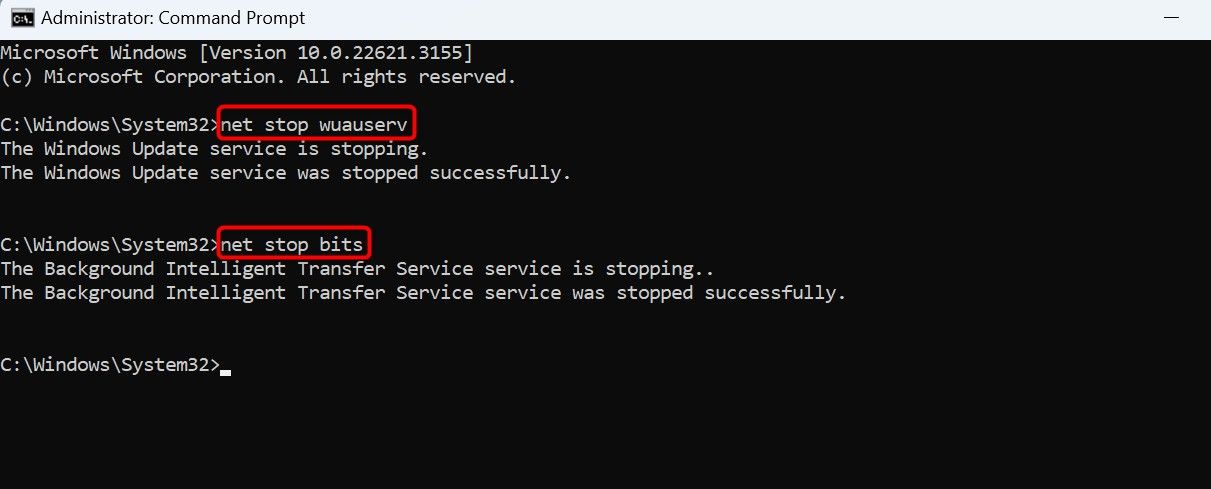
Type the following lines in Command Prompt, and press Enter after each line. The first command disables the Windows Update service and the second command turns off the Background Intelligent Transfer Service service.
<code class="hljs sql">net stop wuauservnet stop bits</code>
Next up, run the following command to make the Windows Update cache folder the current working directory.
cd %windir%SoftwareDistribution
Type the following command and press Enter to delete the update cache.
del /f /s /q *.*

After clearing the cache, restart the services you stopped above. Do that by typing the following commands and pressing Enter after each line.
<code class="hljs sql">net start wuauservnet start bits</code>
You’re done.
Use a Script to Clear Update Cache in a Single-Click
You can make a batch file out of the commands above to clear your Windows Update cache in just a single click. This is a convenient method if you delete your update cache files often.
To make that script, open the Start Menu, search for Notepad, and launch the app. Copy the code below and paste it in your Notepad document.
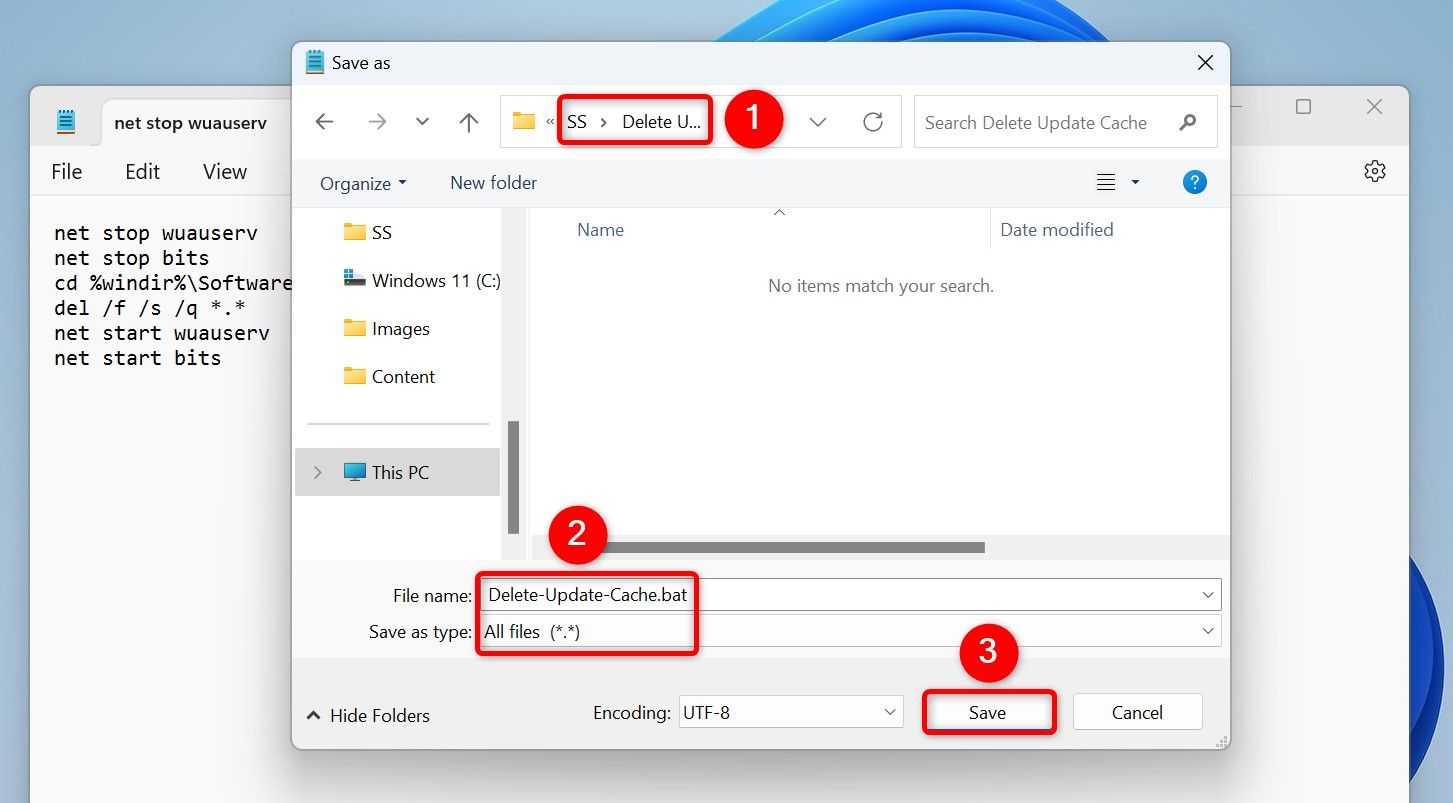
<code class="hljs xml">net stop wuauservnet stop bitscd %windir%SoftwareDistributiondel /f /s /q *.*net start wuauservnet start bits</code>
Save the file by choosing File > Save from the menu bar.
In the "Save As" window, select the folder where you want to save the script. Click the "Save as Type" drop-down menu and choose "All Files." Select the "File Name" field and enter a name of your choice. Then, append .bat at the end of the file name. This ensures Notepad saves the file as a batch script.
Then, click "Save."
In the future, to clear your Windows Update cache using the script, right-click the script file and select "Run as Administrator." In the User Account Control prompt, choose "Yes." The script will stop certain services, deletes the update cache files, and restarts the stopped services.
And that’s how you get rid of the update cache files using various ways on your Windows 11 or Windows 10 computer. We hope you find the methods useful.
The above is the detailed content of How to Clear Your Update Cache on Windows 11 and 10. For more information, please follow other related articles on the PHP Chinese website!

Hot AI Tools

Undresser.AI Undress
AI-powered app for creating realistic nude photos

AI Clothes Remover
Online AI tool for removing clothes from photos.

Undress AI Tool
Undress images for free

Clothoff.io
AI clothes remover

Video Face Swap
Swap faces in any video effortlessly with our completely free AI face swap tool!

Hot Article
Hot Tools

Notepad++7.3.1
Easy-to-use and free code editor

SublimeText3 Chinese version
Chinese version, very easy to use

Zend Studio 13.0.1
Powerful PHP integrated development environment

Dreamweaver CS6
Visual web development tools

SublimeText3 Mac version
God-level code editing software (SublimeText3)
Hot Topics
 1673
1673
 14
1428
52
1333
25
1278
29
1257
24
14
1428
52
1333
25
1278
29
1257
24

 Windows kb5054979 update information Update content list
Apr 15, 2025 pm 05:36 PM
Windows kb5054979 update information Update content list
Apr 15, 2025 pm 05:36 PM
KB5054979 is a cumulative security update released on March 27, 2025, for Windows 11 version 24H2. It targets .NET Framework versions 3.5 and 4.8.1, enhancing security and overall stability. Notably, the update addresses an issue with file and directory operations on UNC shares using System.IO APIs. Two installation methods are provided: one through Windows Settings by checking for updates under Windows Update, and the other via a manual download from the Microsoft Update Catalog.
 Nanoleaf Wants to Change How You Charge Your Tech
Apr 17, 2025 am 01:03 AM
Nanoleaf Wants to Change How You Charge Your Tech
Apr 17, 2025 am 01:03 AM
Nanoleaf's Pegboard Desk Dock: A Stylish and Functional Desk Organizer Tired of the same old charging setup? Nanoleaf's new Pegboard Desk Dock offers a stylish and functional alternative. This multifunctional desk accessory boasts 32 full-color RGB
 How to Use Windows 11 as a Bluetooth Audio Receiver
Apr 15, 2025 am 03:01 AM
How to Use Windows 11 as a Bluetooth Audio Receiver
Apr 15, 2025 am 03:01 AM
Turn your Windows 11 PC into a Bluetooth speaker and enjoy your favorite music from your phone! This guide shows you how to easily connect your iPhone or Android device to your computer for audio playback. Step 1: Pair Your Bluetooth Device First, pa
 ASUS' ROG Zephyrus G14 OLED Gaming Laptop Is $300 Off
Apr 16, 2025 am 03:01 AM
ASUS' ROG Zephyrus G14 OLED Gaming Laptop Is $300 Off
Apr 16, 2025 am 03:01 AM
ASUS ROG Zephyrus G14 Esports Laptop Special Offer! Buy ASUS ROG Zephyrus G14 Esports Laptop now and enjoy a $300 offer! Original price is $1999, current price is only $1699! Enjoy immersive gaming experience anytime, anywhere, or use it as a reliable portable workstation. Best Buy currently offers offers on this 2024 14-inch ASUS ROG Zephyrus G14 e-sports laptop. Its powerful configuration and performance are impressive. This ASUS ROG Zephyrus G14 e-sports laptop costs 16 on Best Buy
 5 Hidden Windows Features You Should Be Using
Apr 16, 2025 am 12:57 AM
5 Hidden Windows Features You Should Be Using
Apr 16, 2025 am 12:57 AM
Unlock Hidden Windows Features for a Smoother Experience! Discover surprisingly useful Windows functionalities that can significantly enhance your computing experience. Even seasoned Windows users might find some new tricks here. Dynamic Lock: Auto
 How (and Why) to Turn Off Mouse Acceleration on Windows 11
Apr 15, 2025 am 06:06 AM
How (and Why) to Turn Off Mouse Acceleration on Windows 11
Apr 15, 2025 am 06:06 AM
Improve mouse accuracy: Disable Windows 11 mouse acceleration function The mouse cursor moves too fast on the screen, even if you only move the mouse a few centimeters? This is what the mouse acceleration function is. This article will guide you on how to disable this feature to better control mouse movement. Is it wise to disable mouse acceleration? There is no direct "Mouse Acceleration" option in Windows systems. Instead, it is the "Enhanced Pointer Precision" setting, which Microsoft sees as a mouse acceleration feature. When this feature is enabled, the mouse's DPI (dots per inch) setting takes effect. It controls the relationship between the physical movement speed of the mouse and the distance the cursor moves on the screen. Move the mouse slowly, Windows will reduce the effective DPI and the cursor moves shorter
 Your Keyboard Needs a Big Ol' Volume Knob
Apr 18, 2025 am 03:04 AM
Your Keyboard Needs a Big Ol' Volume Knob
Apr 18, 2025 am 03:04 AM
In today's touchscreen world, the satisfying tactile feedback of physical controls is a welcome change. That's why a keyboard with a large volume knob is surprisingly appealing. I recently experienced this firsthand, and it's been a revelation. For
 How to Right-Click With No Mouse
Apr 18, 2025 pm 12:03 PM
How to Right-Click With No Mouse
Apr 18, 2025 pm 12:03 PM
The mouse is a vital component to getting work done on your PC. But when you’re stuck with a faulty mouse, you can run into a few problems including the inability to right-click. But the good news is that there are definitely ways t
