

新浪微博OAuth认证和储存的主要过程详解

新浪微博OAuth认证和储存的主要过程详解
本文给大家介绍的是参考Twitter的认证过程实现的新浪微博OAuth认证和储存的主要过程详解
网上很多关于OAuth的文章,但是包括sina本身都都没有详细的的介绍,包括验证过程和验证后数据的储存,所以参考了Twitter的认证过程写下一些详细的注释代码。
在我们开始前,我们先建立一张数据库来保存用户信息,下面是一个基本的 Mysql 的例子:
?
|
1 2 3 4 5 6 7 8 9 |
CREATE TABLE `oauth_users` ( `id` INT(10) UNSIGNED NOT NULL AUTO_INCREMENT, `oauth_provider` VARCHAR(10), `oauth_uid` text, `oauth_token` text, `oauth_secret` text, `username` text, PRIMARY KEY (`id`) ) ENGINE=MyISAM DEFAULT CHARSET=utf8; |
注意 oauth_token 和 oauth_secret 这两个字段。sina的 OAuth 认证需要 token 和 token_secret 两个参数来完成认证,所以我们需要预留两个字段来记录他们。
然后我们需要依次完成以下工作:
向 SinaAPI发起认证申请 注册/或者登录,如果用户已经有帐号的情况下 将相关数据保存在 Session 中
基于 OAuth 的认证流程从生成一个网址开始。用户被重定向到该网址要求认证,认证通过后,会重定向到我们的应用服务器,并会将两个认证后的参数通过 URL 方式传回。
建立index.php
?
|
1 2 3 4 5 6 7 8 9 10 11 12 13 14 15 |
session_start(); //if( isset($_SESSION['last_key']) ) header("Location: weibolist.php"); include_once( 'config.php' ); include_once( 'weibooauth.php' ); // 创建 sinaOAuth 对象实例 $sinaOAuth = new WeiboOAuth( WB_AKEY , WB_SKEY ); $keys = $sinaOAuth->getRequestToken(); // Requesting authentication tokens, the parameter is the URL we will be redirected to $aurl = $sinaOAuth->getAuthorizeURL( $keys['oauth_token'] ,false , 'http://t.yourtion.com/sina/callback.php'); // 保存到 session 中 $_SESSION['keys'] = $keys; ?> |
接下来,我们还需要在这个文件中完成以下三件事:
验证 URL 中的数据
验证 Session 中的 token 数据
验证 Session 中的 secret 数据
如果所有数据库都是合法的,我们需要创建一个新的 SinaOAuth 对象实例,跟之前不同的是,我们要把获取到的 token 数据做为参数传入对象。之后,我们应该可以获取到一个 access token,这个获取到的数据应该是一个数组,这个 access token 是我们唯一需要保存起来的数据。
建立callback.php
?
|
1 2 3 4 5 6 7 8 9 10 11 12 13 14 15 16 17 18 19 20 21 22 23 24 25 26 27 28 29 30 31 32 33 34 35 36 37 38 39 40 41 42 43 44 45 46 47 48 49 50 51 52 53 54 55 56 57 58 59 60 61 |
session_start(); include_once ('config.php'); include_once ('weibooauth.php'); if (!empty($_GET['oauth_verifier']) && !empty($_SESSION['keys']['oauth_token']) && !empty($_SESSION['keys']['oauth_token'])) { // SinaOAuth 对象实例,注意新加入的两个参数 $sinaOAuth = new WeiboOAuth(WB_AKEY, WB_SKEY, $_SESSION['keys']['oauth_token'], $_SESSION['keys']['oauth_token_secret']); // 获取 access token $access_token = $sinaOAuth->getAccessToken($_REQUEST['oauth_verifier']); // 将获取到的 access token 保存到 Session 中 $_SESSION['access_token'] = $access_token; // 获取用户信息 $user_info = $sinaOAuth->get('account/verify_credentials'); // 打印用户信息 mysql_connect(DATABASE_HOST, DATABASE_USER, DATABASE_PSSWORD); mysql_select_db(DATABASE_DB_NAME); //更换成你的数据库连接,在config.php中 if (isset($user_info->error) or empty($user_info['id'])) { // Something's wrong, go back to square 1 header('Location: index.php'); } else { // Let's find the user by its ID $sql = "SELECT * FROM oauth_users WHERE oauth_provider='sina' AND oauth_uid=" .$user_info['id']; $query = mysql_query($sql); $result = mysql_fetch_array($query); // If not, let's add it to the database if (empty($result)) { $sql = "INSERT INTO oauth_users (oauth_provider, oauth_uid, username, oauth_token, oauth_secret) VALUES ('sina', '" . $user_info['id'] . "', '" . $user_info['screen_name'] . "', '" . $access_token['oauth_token'] . "', '" . $access_token['oauth_token_secret'] . "')"; $query = mysql_query($sql); $query = mysql_query("SELECT * FROM oauth_users WHERE id = ".mysql_insert_id()); $result = mysql_fetch_array($query); } else { // Update the tokens $query = mysql_query("UPDATE oauth_users SET oauth_token = '" . $access_token['oauth_token'] . "', oauth_secret = '" . $access_token['oauth_token_secret'] . "' WHERE oauth_provider = 'sina' AND oauth_uid = " . $user_info['id']); } $_SESSION['id']=$result['id']; $_SESSION['username']=$result['username']; $_SESSION['oauth_uid']=$result['oauth_uid']; $_SESSION['oauth_provider']=$result['oauth_provider']; $_SESSION['oauth_token']=$result['oauth_token']; $_SESSION['oauth_secret']=$result['oauth_secret']; header('Location: update.php'); } } else { // 数据不完整,转到上一步 header('Location: index.php'); }
?> |
你可以通过 $user_info->id 来获得用户的 ID,通过 $user_info->screen_name 来获取用户名,等等,其它的信息也可以通过同样的方式获取。
需要重点指出的是,oauth_verifier 这个传回来的参数不能被重用,如果上面的代码已经正确输出了用户信息,你可以试着重新刷新页面,应该会看到页面会抛出一个错误信息,因为 oauth_verifier 已经被我们用过一次了。要再次使用,需要到 index.php 页面重新发起一个认证请求。
用户注册
获得了用户信息后,现在我们要开始把用户信息注册到我们自己的数据库中,当然前提是用户没有在本地数据库注册过。
上面代码中的数据库链接信息要改成你自己的。如果用户已经存在于我们的数据库中,我们需要更新用户的 tokens 字段,因为这说明 Twitter 生成了新的 tokens,数据库中的 tokens 已经过期了。如果用户不存在,我们需要新加一条记录,并将相关的数据保存在 Session中,最后重定向回 update.php 页面。
其中update.php代码如下:
需要注意的是,上面代码中的 SQL 没有经过验证,你在实际使用的时候可能要经过修改。连接数据库前,我们需要先验证一下用户是否已经登录。有了用户名,我们就可以展示一条个性的欢迎信息了:
?
|
1 2 3 4 5 6 7 8 9 10 11 12 13 14 15 16 17 18 |
include_once ('config.php'); include_once ('weibooauth.php'); session_start(); if(!empty($_SESSION['username'])){ // User is logged in, redirect header('index.php'); } ?> Hello =$_SESSION['username'] ?> |
这就是OAuth认证和储存的主要过程,希望对你有帮助。 代码下载:SinaOauth
以上就是本文所述的全部内容了,希望大家能够喜欢。

Hot AI Tools

Undresser.AI Undress
AI-powered app for creating realistic nude photos

AI Clothes Remover
Online AI tool for removing clothes from photos.

Undress AI Tool
Undress images for free

Clothoff.io
AI clothes remover

Video Face Swap
Swap faces in any video effortlessly with our completely free AI face swap tool!

Hot Article
Hot Tools

Notepad++7.3.1
Easy-to-use and free code editor

SublimeText3 Chinese version
Chinese version, very easy to use

Zend Studio 13.0.1
Powerful PHP integrated development environment

Dreamweaver CS6
Visual web development tools

SublimeText3 Mac version
God-level code editing software (SublimeText3)
Hot Topics
 1666
1666
 14
1426
52
1328
25
1273
29
1255
24
14
1426
52
1328
25
1273
29
1255
24

 How to search previous Weibo by date on Weibo_How to search previous Weibo by date on Weibo
Mar 30, 2024 pm 07:26 PM
How to search previous Weibo by date on Weibo_How to search previous Weibo by date on Weibo
Mar 30, 2024 pm 07:26 PM
1. First open the mobile web browser, search for the Weibo web version, and click the avatar button in the upper left corner after entering. 2. Then click Settings in the upper right corner. 3. Click the version switching option in settings. 4. Then select the color version option in the version switch. 5. Click Search to enter the search page. 6. After entering the keywords, click Find People. 7. When the search completion interface appears, click Filter. 8. Finally, enter the specific date in the release time column and click Filter.
 How to set up real-time notifications for Weibo's special attention_How to set up real-time notifications for Weibo's special attention
Mar 29, 2024 pm 10:01 PM
How to set up real-time notifications for Weibo's special attention_How to set up real-time notifications for Weibo's special attention
Mar 29, 2024 pm 10:01 PM
1. Open Weibo, click My, and then click the Settings option in the upper right corner. 2. After opening the settings, find and click on the push notification settings inside. 3. After entering the push notification settings, find Special Interest and click Real-time Notification.
 How to release someone blocked on Weibo_How to unblock Weibo
Mar 30, 2024 am 09:51 AM
How to release someone blocked on Weibo_How to unblock Weibo
Mar 30, 2024 am 09:51 AM
1. Click [My] in the lower right corner of the Weibo app to enter your personal homepage. 2. Then, click the gear icon in the upper right corner. 3. At this time, we enter the settings page, select [Block Settings] here to enter. 4. In the blocking settings, we can see the friends we have blocked, tap it, and click [Unblock] in the pop-up options. 5. Or users can directly search Weibo users to enter the blocked user homepage, and click [...] on the upper right to remove the blacklist.
 How to delete the draft box of 'Weibo'_Tutorial on deleting the draft box of 'Weibo'
Mar 30, 2024 pm 12:46 PM
How to delete the draft box of 'Weibo'_Tutorial on deleting the draft box of 'Weibo'
Mar 30, 2024 pm 12:46 PM
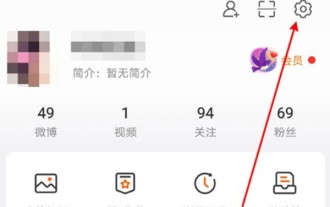
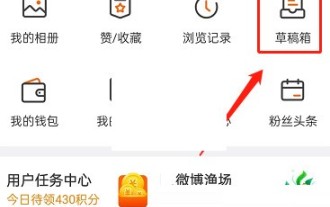
1. First open Weibo, click on My, and click on the draft box. 2. Then long press any draft and click to clear the draft box or delete the draft. 3. Finally click OK.
 How to post videos on Weibo without compressing the image quality_How to post videos on Weibo without compressing the image quality
Mar 30, 2024 pm 12:26 PM
How to post videos on Weibo without compressing the image quality_How to post videos on Weibo without compressing the image quality
Mar 30, 2024 pm 12:26 PM
1. First open Weibo on your mobile phone and click [Me] in the lower right corner (as shown in the picture). 2. Then click [Gear] in the upper right corner to open settings (as shown in the picture). 3. Then find and open [General Settings] (as shown in the picture). 4. Then enter the [Video Follow] option (as shown in the picture). 5. Then open the [Video Upload Resolution] setting (as shown in the picture). 6. Finally, select [Original Image Quality] to avoid compression (as shown in the picture).
 How to change the video cover on Weibo_How to change the video cover on Weibo
Mar 29, 2024 pm 10:31 PM
How to change the video cover on Weibo_How to change the video cover on Weibo
Mar 29, 2024 pm 10:31 PM
1. First open Weibo, click on My, click on the avatar, and enter the personal homepage. 2. Then click on the background image. 3. Then click to change the video cover. 4. Finally, select the video in the album, click Next, and publish and upload it.
 How to cancel video auto-play on Weibo_Share tutorial on how to cancel video auto-play on Weibo
Mar 29, 2024 pm 04:01 PM
How to cancel video auto-play on Weibo_Share tutorial on how to cancel video auto-play on Weibo
Mar 29, 2024 pm 04:01 PM
1. First open Weibo, click My, and click the settings icon in the upper right corner. 2. Then click to enter general settings. 3. Then click Video Settings. 4. Then click on the video and animation auto-play settings. 5. Finally, select Close.
 If Weibo svip deletes visitor records, can the other party still see it?
Apr 02, 2024 am 08:04 AM
If Weibo svip deletes visitor records, can the other party still see it?
Apr 02, 2024 am 08:04 AM
Once Weibo users activate the SVIP function, they can manage visitor records, and if they visit a stranger's homepage, they can delete it before displaying it, so that they do not know that they are browsing the homepage. ?Can the other party still see it after deleting the visitor record on Weibo svip? Can the other party still see it after deleting the visitor record on Weibo svip? 1. After deleting the visitor record on svip, the other party cannot see it. It will only see the increase in the number of visitors, but it will not show the visitors. The user's ID and avatar. 2. Ordinary users and VIP users cannot delete or view access records. They can only see how many people have visited them. 3. Weibo access data will be updated at 8:00 every day. If you want to delete access records, you need to
