

OSX as Transparent Wifi MITM Proxy

Yesterday I was in the situation where I wanted to debug an iOS deviceand what network calls it would make. Normally the trivial step is tojust define an HTTP proxy server in the wifi settings but that will onlywork for as long as you have
Yesterday I was in the situation where I wanted to debug an iOS device and what network calls it would make. Normally the trivial step is to just define an HTTP proxy server in the wifi settings but that will only work for as long as you have something that actually honors this proxy server. But there are better ways to transparently proxy connections from a device connected via Wifi which does not require any changes on the actual device.
The Tools
In order for this to work you need a device running OS X which is connected to the same network as the Wifi. Then you need to convince the Wifi device to see you as the gateway instead of the actual gateway. The easiest way is just to go to the settings and change the gateway to your computer's IP. The second ingredient is an HTTP proxy, ideally one that can also decrypt and reencrypt SSL traffic. Personally I can recommend Charles for that. Lastly you will need another proxy that can work transparently which sits between your device and Charles. On OS X redsocks gets this job done.
If you don't want to spend the money on Charles or you want to rewrite traffic with Python you can use mitmproxy.
The Setup
The first thing you will notice is that when you point your Wifi device to your computer it will loose network connectivity. That's because by default your computer won't forward packets. This can easily be changed through sysctl:
$ sudo sysctl -w net.inet.ip.forwarding=1
After that you should be able to browse the internet again on your Wifi device.
The second step is installing redsocks. If you have brew that's a very trivial operation:
$ brew install redsocks
Once installed you will need to create a config file for it. Call it redsocks.conf and place it in a folder from which you run redsocks:
base {
    log_debug = on;
    log_info = on;
    log = stderr;
    daemon = off;
    redirector = generic;
}
redsocks {
    local_ip = 0.0.0.0;
    local_port = 12345;
    ip = 127.0.0.1;
    port = 8889;
    // known types: socks4, socks5, http-connect, http-relay
    type = socks5;
}
Since I'm using Charles I take advantage of it's socks5 support and point it to localhost:8889 where Charles normally starts up if configured as Socks5 proxy. If you're using a regular HTTP proxy you can use http-connect as proxy type. The local_port defines where the actual transparent redsocks proxy opens.
All you have to do then is to start it:
$ redsocks
After that you will need to point all the traffic that is not from your computer and from port 80 and 443 of your Wifi through redsocks. On OS X the firewall canbe controlled through ipfw. In my case the wifi device is en1:
$ sudo ipfw add fwd 127.0.0.1,12345 tcp from not me to any 80 in via en1
$ sudo ipfw add fwd 127.0.0.1,12345 tcp from not me to any 443 in via en1
Working around OS X Bugs
Now currently if you finish that above setup you will notice that nothing actually works. The cause for this is a Bug in the OS X kernel that requires flipping the net.inet.ip.scopedroute flag to 0. I am not entirely sure what it does, but the internet reports that it breaks network sharing through the user preferences. In any case it fixes ipfw based forwarding so you can flip it with sysctl:
$ sudo sysctl -w net.inet.ip.scopedroute=0
Unfortunately in OS X Lion this flag can actually not be flipped from userspace so you need to set it as boot parameter and then restart your computer. You can do this by editing the /Library/Preferences/SystemConfiguration/com.apple.Boot.plist file:
<?xml version="1.0" encoding="UTF-8"?>

<plist version="1.0">
<dict>
  <key>Kernel Flags</key>
  <string>net.inet.ip.scopedroute=0</string>
</dict>
</plist>
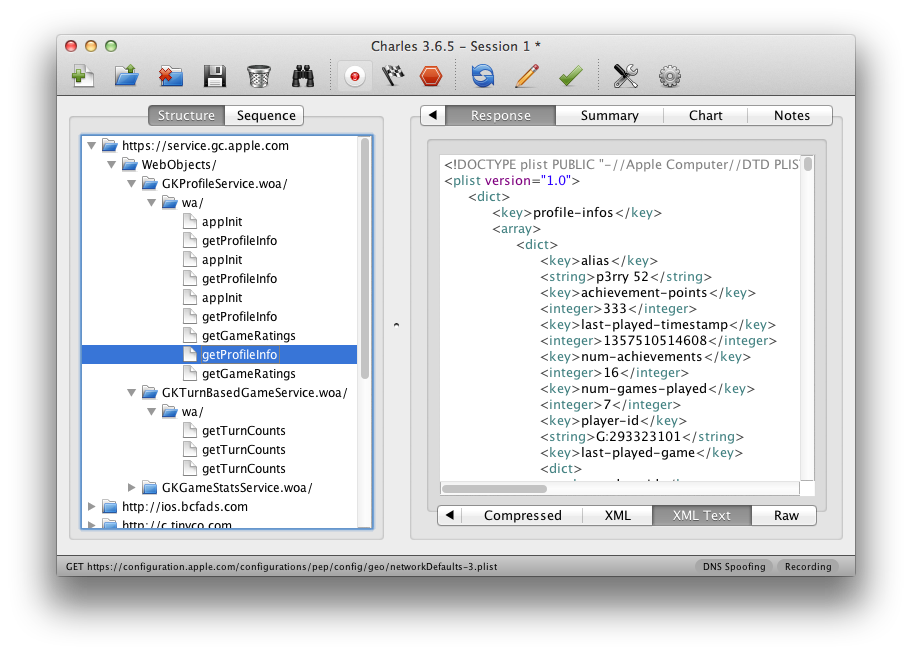
Installing SSL Certificates
After all that your HTTP traffic should show up in your SSL interception proxy. SSL will only work if the application on your Wifi device is trusting your SSL interception proxy's CA. For browsers for instance that's trivial to change. The Charles Certificate can be added to the trust store by following this link: charles.crt. Note that this will not work with applications that don't use the system's CA trust store. In that case you will need to recompile your application so that it trusts the Charles CA.
原文地址:OSX as Transparent Wifi MITM Proxy, 感谢原作者分享。

Hot AI Tools

Undresser.AI Undress
AI-powered app for creating realistic nude photos

AI Clothes Remover
Online AI tool for removing clothes from photos.

Undress AI Tool
Undress images for free

Clothoff.io
AI clothes remover

Video Face Swap
Swap faces in any video effortlessly with our completely free AI face swap tool!

Hot Article
Hot Tools

Notepad++7.3.1
Easy-to-use and free code editor

SublimeText3 Chinese version
Chinese version, very easy to use

Zend Studio 13.0.1
Powerful PHP integrated development environment

Dreamweaver CS6
Visual web development tools

SublimeText3 Mac version
God-level code editing software (SublimeText3)
Hot Topics
 1662
1662
 14
1418
52
1311
25
1261
29
1234
24
14
1418
52
1311
25
1261
29
1234
24

 What to do if the HP printer cannot connect to wifi - What to do if the HP printer cannot connect to wifi
Mar 06, 2024 pm 01:00 PM
What to do if the HP printer cannot connect to wifi - What to do if the HP printer cannot connect to wifi
Mar 06, 2024 pm 01:00 PM
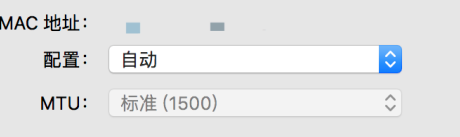
When many users use HP printers, they are not familiar with what to do if the HP printer cannot connect to wifi. Below, the editor will bring you solutions to the problem of HP printers not connecting to wifi. Let us take a look below. Set the mac address of the HP printer to automatically select and automatically join the network. Check to change the network configuration. Use dhcp to enter the password to connect to the HP printer. It shows that it is connected to wifi.
 Why is my home wifi showing 'unsafe network'?
Nov 15, 2023 pm 02:39 PM
Why is my home wifi showing 'unsafe network'?
Nov 15, 2023 pm 02:39 PM
The reasons are: 1. There is a problem with the WiFi itself; 2. The router may be overheated or damaged; 3. The broadband may be in arrears, resulting in the inability to access the Internet; 4. The WiFi name contains Chinese characters, causing some computers to be unable to connect to the Internet; 5. Computer system problems; 6 , IP address setting problem; 7. The wireless network does not have a wireless password set, etc. Solution: 1. Check the WiFi connection to make sure the device is connected to the correct WiFi network; 2. Check the router settings, you can try to reset the router, make sure the SSID and password are correct, etc.
 Why is there an exclamation mark on mobile wifi?
Sep 18, 2023 pm 04:05 PM
Why is there an exclamation mark on mobile wifi?
Sep 18, 2023 pm 04:05 PM
The reason why there is an exclamation mark on the mobile wifi may be that it cannot connect to the Internet, the signal is weak, authentication issues and IP address conflicts, etc. Detailed introduction: 1. Unable to connect to the Internet. If an exclamation mark appears on the Wi-Fi icon, it may be because the mobile phone cannot connect to the Internet. This may be caused by a router disconnection, network failure, or mobile phone settings problem; 2. The signal is weak. If an exclamation mark appears on the Wi-Fi icon, it may be caused by a weak Wi-Fi signal. This may be due to being too far from the router, being blocked by obstacles, or interfering with the signal, etc.
 Why can't I connect to Wi-Fi in Windows 10?
Jan 16, 2024 pm 04:18 PM
Why can't I connect to Wi-Fi in Windows 10?
Jan 16, 2024 pm 04:18 PM
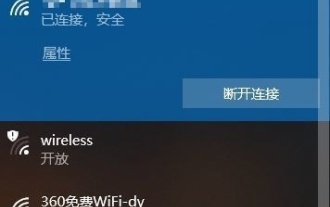
When we use the win10 operating system to connect to a wifi wireless network, we will find a prompt that the wifi network cannot be connected and is restricted. For this kind of problem, I think you can try to find your own network in the Network and Sharing Center, and then make a series of adjustments. Let’s take a look at the specific steps to see how the editor did it~Why can’t Win10 connect to wifi? Method 1: 1. Right-click the wireless WIFI icon in the notification area at the bottom of the computer screen, select “Open Network and Internet Settings”, and then Click the "Change Adapter Options" button. 2. In the pop-up network connection interface, look for the wireless connection named "WLAN", right-click again, and select "Close" (or "Disable"). 3. Wait
 What is the reason why the wifi function cannot be turned on? Attachment: How to fix the wifi function that cannot be turned on
Mar 14, 2024 pm 03:34 PM
What is the reason why the wifi function cannot be turned on? Attachment: How to fix the wifi function that cannot be turned on
Mar 14, 2024 pm 03:34 PM
Nowadays, in addition to data and wifi, mobile phones have two ways to access the Internet, and OPPO mobile phones are no exception. But what should we do if we can’t turn on the wifi function when using it? Don't worry yet, you might as well read this tutorial, it will help you! What should I do if my phone’s wifi function cannot be turned on? It may be because there is a slight delay when the WLAN switch is turned on. Please wait 2 seconds to see if it is turned on. Do not click continuously. 1. You can try to enter "Settings>WLAN" and try to turn on the WLAN switch again. 2. Please turn on/off airplane mode and try to turn on the WLAN switch again. 3. Restart the phone and try to see if WLAN can be turned on normally. 4. It is recommended to try restoring factory settings after backing up data. If none of the above methods solve your problem, please bring the purchased
 How to solve the problem of not being able to enter the wifi password in win10
Dec 30, 2023 pm 05:43 PM
How to solve the problem of not being able to enter the wifi password in win10
Dec 30, 2023 pm 05:43 PM
Not being able to enter the password for win10wifi is a very depressing problem. Usually it is the card owner. Just reopen or restart the computer. For users who still can't solve the problem, hurry up and take a look at the detailed solution tutorial. Win10 Wifi Unable to Enter Password Tutorial Method 1: 1. Unable to enter password may be a problem with our keyboard connection, carefully check whether the keyboard can be used. 2. If we need to use the keypad to enter numbers, we also need to check whether the keypad is locked. Method 2: Note: Some users reported that the computer could not be turned on after performing this operation. In fact, it is not the cause of this setting, but the problem of the computer system itself. After performing this operation, it will not affect the normal startup of the computer, and the computer system will not
 Why can't I access the Internet even though my wifi is connected?
Dec 07, 2023 pm 05:00 PM
Why can't I access the Internet even though my wifi is connected?
Dec 07, 2023 pm 05:00 PM
Reasons why WiFi is connected but cannot access the Internet: 1. WiFi signal is weak; 2. IP address conflict; 3. DNS server problem; 4. Router failure; 5. Network provider problem; 6. Problem with the WiFi network itself; 7. Router problem ; 8. Equipment network setting problems; 9. Signal interference or obstacles; 10. Equipment problems. Detailed introduction: 1. The WiFi signal is weak. The strength of the WiFi signal directly affects the stability and speed of the network. If the connected WiFi signal is weak, it may cause the network connection to be unstable or unable to access the Internet, etc.
 How to connect to hidden WiFi network in Ubuntu18.04?
Jan 01, 2024 pm 03:58 PM
How to connect to hidden WiFi network in Ubuntu18.04?
Jan 01, 2024 pm 03:58 PM
Ubuntu18.04 Want a hidden wireless network? How to connect to wifi network? Let’s take a look at the detailed tutorial below. 1. After starting Ubuntu, click the inverted triangle on the upper right side of the desktop. 2. The drop-down menu pops up and click to select [wifi settings]. 3. Enter the [wifi settings] details page. 4. Move the mouse to the three horizontal icons on the right side of the wifi switch status and click on the icon. 5. A drop-down menu will pop up, click the mouse to select [Connect to a hidden network]. 6. The [Connect to hidden WiFi network] dialog box pops up. You need to enter the WiFi network name, encryption method and other information. 7. Enter the hidden WiFi network name; select [WPA and WPA2 Personal] for the encryption method, and then enter
