

教你给数据库设置交叉权限

由于 SupeSite 需要调用 Discuz! 和 UCHome 的数据,所以如果它们不安装在同一个数据库,SupeSite 的数据库用户必须要对 Discuz! 和 UCHome 的数据库有读
由于 SupeSite 需要调用 Discuz! 和 UCHome 的数据,所以如果它们不安装在同一个数据库,SupeSite 的数据库用户必须要对 Discuz! 和 UCHome 的数据库有读取、修改、删除等权限。这就需要在 MySQL 中对用户权限进行修改,授予需要的权限。
本文将演示这种情况,并给出详细的解决步骤。
本文示例的配置如下:
Discuz!
数据库名:discuz_7_sc_utf8
数据库用户名:discuz_mysql
权限:操作 discuz_7_sc_utf8 的全部权限
SupeSite/X-space
数据库名:ss_601_xs_401_sc_utf8
数据库用户名:ss_mysql
权限:操作 ss_mysql 的全部权限
出现情况:安装 SupeSite/X-space 时无法检测到 Discuz! 的数据库。
解决方法:授予 ss_mysql 操作 discuz_7_sc_utf8 的全部权限。
如果为了方便,可以创建一个数据库用户,授予该用户操作 Discuz! 和 SupeSite 数据库的全部权限,在安装时,都使用这个数据库用户,就不会出现本文的这种情况。以后安装别的产品,比如 UCenter Home,再授予该用户操作 UCenter Home 数据库的权限即可。
一、安装 Discuz_7.0.0_SC_UTF8
1、在 MySQL 中创建数据库 discuz_7_sc_utf8
打开 phpMyAdmin => 创建一个新的数据库

2、在 MySQL 中创建数据库用户 discuz_mysql,授予操作数据库 discuz_7_sc_utf8 的权限
打开 phpMyAdmin => 权限 => 添加新用户

为了安全,不授予 discuz_mysql 这个用户访问其他数据库的权利,所以全局权限不选。设计完毕,点击“执行”。

跳转到“编辑权限”的页面,“按数据库指定权限”选择“discuz_7_sc_utf8”

在这里,授予数据库用户 discuz_mysql 操作数据库 discuz_7_sc_utf8 的全部权限,如图所示。

3、Discuz_7.0.0_SC_UTF8 的安装设置
在 Discuz! 安装时,输入刚才创建的数据库名、用户名和密码。

二、安装 SupeSite6.0.1_X-Space4.0.1_UC_SC_UTF8
1、在 MySQL 中创建数据库 ss_601_xs_401_sc_utf8

2、在 MySQL 中创建数据库用户 ss_mysql,授予操作数据库 ss_601_xs_401_sc_utf8 的权限


3、SupeSite6.0.1_X-Space4.0.1_UC_SC_UTF8 的安装设置
安装 SuperSite 时,输入刚才创建的数据库名:ss_601_xs_401_sc_utf8,数据库用户名:ss_mysql,以及已安装的论坛 Discuz 的数据库名 discuz_7_sc_utf8,如图所示。

因为刚才只是授予数据库用户 ss_mysql 操作数据库 ss_601_xs_401_sc_utf8 的权限,所以数据库用户 ss_mysql 并没有操作数据库 discuz_7_sc_utf8 的权限,这安装时出现错误,,提示“发生错误,您指定的 Discuz!数据库(discuz_7_sc_utf8)不存在,请修正”。

4、授予用户 ss_mysql 操作数据库 discuz_7_sc_utf8 的权限,安装成功
出现这种情况,就需要授予 ss_mysql 操作数据库 discuz_7_sc_utf8 的权限。打开 phpMyAdmin => 权限 => 编辑权限,如图所示。


SupeSite 需要 读取、插入、删除数据库 discuz_7_sc_utf8 中的数据,所以授予用户 ss_mysql 操作数据库 discuz_7_sc_utf8 的全部权限。

授予权限之后,通过安装程序的检测,可以继续安装了。

需要注意的是,如果希望 SupeSite 和 Discuz!同步登录,SupeSite 的 Cookie 设置要和 Discuz! 目录下 config.inc.php 文件中的值相同,如图所示。


现在安装完毕,SupeSite 和 X-space 能够正常显示论坛中的内容。

Hot AI Tools

Undresser.AI Undress
AI-powered app for creating realistic nude photos

AI Clothes Remover
Online AI tool for removing clothes from photos.

Undress AI Tool
Undress images for free

Clothoff.io
AI clothes remover

Video Face Swap
Swap faces in any video effortlessly with our completely free AI face swap tool!

Hot Article
Hot Tools

Notepad++7.3.1
Easy-to-use and free code editor

SublimeText3 Chinese version
Chinese version, very easy to use

Zend Studio 13.0.1
Powerful PHP integrated development environment

Dreamweaver CS6
Visual web development tools

SublimeText3 Mac version
God-level code editing software (SublimeText3)
Hot Topics
 1670
1670
 14
1428
52
1329
25
1276
29
1256
24
14
1428
52
1329
25
1276
29
1256
24

 Enable root permissions with one click (quickly obtain root permissions)
Jun 02, 2024 pm 05:32 PM
Enable root permissions with one click (quickly obtain root permissions)
Jun 02, 2024 pm 05:32 PM
It allows users to perform more in-depth operations and customization of the system. Root permission is an administrator permission in the Android system. Obtaining root privileges usually requires a series of tedious steps, which may not be very friendly to ordinary users, however. By enabling root permissions with one click, this article will introduce a simple and effective method to help users easily obtain system permissions. Understand the importance and risks of root permissions and have greater freedom. Root permissions allow users to fully control the mobile phone system. Strengthen security controls, customize themes, and users can delete pre-installed applications. For example, accidentally deleting system files causing system crashes, excessive use of root privileges, and inadvertent installation of malware are also risky, however. Before using root privileges
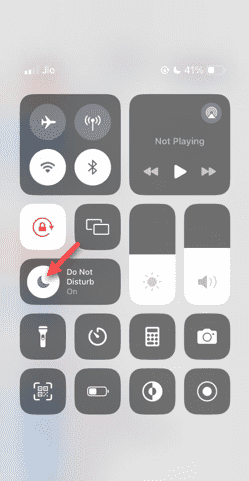 Do Not Disturb Mode Not Working in iPhone: Fix
Apr 24, 2024 pm 04:50 PM
Do Not Disturb Mode Not Working in iPhone: Fix
Apr 24, 2024 pm 04:50 PM
Even answering calls in Do Not Disturb mode can be a very annoying experience. As the name suggests, Do Not Disturb mode turns off all incoming call notifications and alerts from emails, messages, etc. You can follow these solution sets to fix it. Fix 1 – Enable Focus Mode Enable focus mode on your phone. Step 1 – Swipe down from the top to access Control Center. Step 2 – Next, enable “Focus Mode” on your phone. Focus Mode enables Do Not Disturb mode on your phone. It won't cause any incoming call alerts to appear on your phone. Fix 2 – Change Focus Mode Settings If there are some issues in the focus mode settings, you should fix them. Step 1 – Open your iPhone settings window. Step 2 – Next, turn on the Focus mode settings
 iOS 18 adds a new 'Recovered' album function to retrieve lost or damaged photos
Jul 18, 2024 am 05:48 AM
iOS 18 adds a new 'Recovered' album function to retrieve lost or damaged photos
Jul 18, 2024 am 05:48 AM
Apple's latest releases of iOS18, iPadOS18 and macOS Sequoia systems have added an important feature to the Photos application, designed to help users easily recover photos and videos lost or damaged due to various reasons. The new feature introduces an album called "Recovered" in the Tools section of the Photos app that will automatically appear when a user has pictures or videos on their device that are not part of their photo library. The emergence of the "Recovered" album provides a solution for photos and videos lost due to database corruption, the camera application not saving to the photo library correctly, or a third-party application managing the photo library. Users only need a few simple steps
 How to handle database connection errors in PHP
Jun 05, 2024 pm 02:16 PM
How to handle database connection errors in PHP
Jun 05, 2024 pm 02:16 PM
To handle database connection errors in PHP, you can use the following steps: Use mysqli_connect_errno() to obtain the error code. Use mysqli_connect_error() to get the error message. By capturing and logging these error messages, database connection issues can be easily identified and resolved, ensuring the smooth running of your application.
 Detailed tutorial on establishing a database connection using MySQLi in PHP
Jun 04, 2024 pm 01:42 PM
Detailed tutorial on establishing a database connection using MySQLi in PHP
Jun 04, 2024 pm 01:42 PM
How to use MySQLi to establish a database connection in PHP: Include MySQLi extension (require_once) Create connection function (functionconnect_to_db) Call connection function ($conn=connect_to_db()) Execute query ($result=$conn->query()) Close connection ( $conn->close())
 How to save JSON data to database in Golang?
Jun 06, 2024 am 11:24 AM
How to save JSON data to database in Golang?
Jun 06, 2024 am 11:24 AM
JSON data can be saved into a MySQL database by using the gjson library or the json.Unmarshal function. The gjson library provides convenience methods to parse JSON fields, and the json.Unmarshal function requires a target type pointer to unmarshal JSON data. Both methods require preparing SQL statements and performing insert operations to persist the data into the database.
 How to use database callback functions in Golang?
Jun 03, 2024 pm 02:20 PM
How to use database callback functions in Golang?
Jun 03, 2024 pm 02:20 PM
Using the database callback function in Golang can achieve: executing custom code after the specified database operation is completed. Add custom behavior through separate functions without writing additional code. Callback functions are available for insert, update, delete, and query operations. You must use the sql.Exec, sql.QueryRow, or sql.Query function to use the callback function.
 MySQL: Simple Concepts for Easy Learning
Apr 10, 2025 am 09:29 AM
MySQL: Simple Concepts for Easy Learning
Apr 10, 2025 am 09:29 AM
MySQL is an open source relational database management system. 1) Create database and tables: Use the CREATEDATABASE and CREATETABLE commands. 2) Basic operations: INSERT, UPDATE, DELETE and SELECT. 3) Advanced operations: JOIN, subquery and transaction processing. 4) Debugging skills: Check syntax, data type and permissions. 5) Optimization suggestions: Use indexes, avoid SELECT* and use transactions.
