

iReport+jasperreport创建子表的几种方式(2)

昨天给大家讲了一种方式,今天换一种方式,就是说,将主报表的某一参数直接传递给子报表作为数据源,当然,这个参数是包含子报表的,这个主要是基于Web开发,也是从网友那边拿来的,结合自己的经验再做一遍。 首先创建我们需要的JavaBean ProvinceBean.java
昨天给大家讲了一种方式,今天换一种方式,就是说,将主报表的某一参数直接传递给子报表作为数据源,当然,这个参数是包含子报表的,这个主要是基于Web开发,也是从网友那边拿来的,结合自己的经验再做一遍。
首先创建我们需要的JavaBean
ProvinceBean.java
package test;

import java.util.ArrayList;

public class ProvinceBean
{
	private String provinceName;
	private ArrayList<CityBean> cities;
	public String getProvinceName()
	{
		return provinceName;
	}
	public void setProvinceName(String provinceName)
	{
		this.provinceName = provinceName;
	}
	public ArrayList<CityBean> getCities()
	{
		return cities;
	}
	public void setCities(ArrayList<CityBean> cities)
	{
		this.cities = cities;
	}
}
package test;

public class CityBean
{
	private String cityName;

	public String getCityName()
	{
		return cityName;
	}

	public void setCityName(String cityName)
	{
		this.cityName = cityName;
	}
}
下面创建Servlet类这个类我“本地化”一下,改动了一点
package test;
import java.io.IOException;
import java.io.OutputStream;
import java.net.URLEncoder;
import java.util.ArrayList;
import java.util.HashMap;
import java.util.Map;
import javax.servlet.ServletException;
import javax.servlet.http.HttpServlet;
import javax.servlet.http.HttpServletRequest;
import javax.servlet.http.HttpServletResponse;
import com.sun.net.ssl.internal.ssl.Debug;
import net.sf.jasperreports.engine.JRDataSource;
import net.sf.jasperreports.engine.JRExporterParameter;
import net.sf.jasperreports.engine.JasperFillManager;
import net.sf.jasperreports.engine.JasperPrint;
import net.sf.jasperreports.engine.JasperReport;
import net.sf.jasperreports.engine.data.JRBeanCollectionDataSource;
import net.sf.jasperreports.engine.export.JRPdfExporter;
import net.sf.jasperreports.engine.util.JRLoader;
public class ChildReportServlet extends HttpServlet
{
private static final long serialVersionUID = -1233414483047719876L;
@Override
protected void doGet(HttpServletRequest req, HttpServletResponse resp)
throws ServletException, IOException
{
this.doPost(req, resp);
}
@Override
protected void doPost(HttpServletRequest req, HttpServletResponse resp)
throws ServletException, IOException
{
try
{
String root_path = this.getServletContext().getRealPath("/");
root_path = root_path.replace('\\', '/');
String reportFilePath = root_path + "ireport/parent_sub.jasper";
//Debug.println(reportFilePath, root_path);
JRDataSource dataSource = this.createDataSource();
Map
parameters.put("SUBREPORT_DIR", root_path + "ireport/");
JasperReport report = (JasperReport)JRLoader.loadObject(reportFilePath);
JasperPrint jasperPrint = JasperFillManager.fillReport(report, parameters, dataSource);
OutputStream ouputStream = resp.getOutputStream();
resp.setContentType("application/pdf");
resp.setCharacterEncoding("UTF-8");
resp.setHeader("Content-Disposition", "attachment; filename=\"" +URLEncoder.encode("PDF报表", "UTF-8")+ ".pdf\"");
// 使用JRPdfExproter导出器导出pdf
JRPdfExporter exporter = new JRPdfExporter();
exporter.setParameter(JRExporterParameter.JASPER_PRINT, jasperPrint);
exporter.setParameter(JRExporterParameter.OUTPUT_STREAM, ouputStream);
exporter.exportReport();
ouputStream.close();
}catch(Exception ex)
{
ex.printStackTrace();
}
}
private JRDataSource createDataSource()
{
//生成测试数据
ArrayList
ProvinceBean province = new ProvinceBean();
province.setProvinceName("山东");
ArrayList
CityBean city = new CityBean();
city.setCityName("济南");
cities.add(city);
city = new CityBean();
city.setCityName("青岛");
cities.add(city);
city = new CityBean();
city.setCityName("潍坊");
cities.add(city);
province.setCities(cities);
provinces.add(province);
province = new ProvinceBean();
province.setProvinceName("江苏");
cities = new ArrayList
city = new CityBean();
city.setCityName("南京");
cities.add(city);
city = new CityBean();
city.setCityName("无锡");
cities.add(city);
city = new CityBean();
city.setCityName("苏州");
cities.add(city);
province.setCities(cities);
provinces.add(province);
return new JRBeanCollectionDataSource(provinces);
}
}
我的文件列表

注意一下,要把jasperreport的jar文件拷贝到lib文件夹下,不然出错找度娘或者问我好了
下面用iReport制作我们需要的报表模板
 这两个
这两个
打开iReport新建一个报表,数据源的话可以选择空数据源
在主表左侧属性Fields中新建字段;从上面我们创建的Bean中可以知道有两个字段需要建立一个是provinceName一个是cities
创建时候要注意cities的数据类型是list
之后创建子表,这个一路next下去就OK了,将其放到任意一个bands中,如果没有特殊的偏好设置,在主表中点击子表它的属性应该会在右边栏显示,上上次的文章我已经说过要注意Connection type属性,一个是不用,一个是和父表相同,还有一个use datasource。。。。这是这次我们要使用的,选择它然后在下面Data Source Exception 中填入
new net.sf.jasperreports.engine.data.JRBeanCollectionDataSource($F{cities})

如下图:$F{cities}就是我们要传递给字表的数据,只注重技术,不考虑美观,做的就随意了些

下面切换到子表的设计界面,把那些没有用到的bands删掉或者高度设为0
不知道你还记不记得上面我们创建的CityBean,它包含一个属性参数,而我们传给子表的是一个City列表,那么在子表中我们要把它提取出来
所以,在子表的fields中新建字段cityName这个字段属性要和CityBean里面的完全一样,不然就会出错的。
之后点击preview,当然是在主表中点击,会跳出些让输入什么的,不用管它,我们只要是想让iReport编译我们的文件形成后缀名为.jasper,也借此检查一下是否有错。
编译之后把主表和子表拷贝到之前说的那位置,运行服务器

打开:

需要源码请留邮箱,欢迎来探讨

Hot AI Tools

Undresser.AI Undress
AI-powered app for creating realistic nude photos

AI Clothes Remover
Online AI tool for removing clothes from photos.

Undress AI Tool
Undress images for free

Clothoff.io
AI clothes remover

Video Face Swap
Swap faces in any video effortlessly with our completely free AI face swap tool!

Hot Article
Hot Tools

Notepad++7.3.1
Easy-to-use and free code editor

SublimeText3 Chinese version
Chinese version, very easy to use

Zend Studio 13.0.1
Powerful PHP integrated development environment

Dreamweaver CS6
Visual web development tools

SublimeText3 Mac version
God-level code editing software (SublimeText3)
Hot Topics
 1664
1664
 14
1423
52
1317
25
1268
29
1243
24
14
1423
52
1317
25
1268
29
1243
24

 How to create a constant in Python?
Aug 29, 2023 pm 05:17 PM
How to create a constant in Python?
Aug 29, 2023 pm 05:17 PM
Constants and variables are used to store data values in programming. A variable usually refers to a value that can change over time. A constant is a type of variable whose value cannot be changed during program execution. There are only six built-in constants available in Python, they are False, True, None, NotImplemented, Ellipsis(...) and __debug__. Apart from these constants, Python does not have any built-in data types to store constant values. Example An example of a constant is demonstrated below - False=100 outputs SyntaxError:cannotassigntoFalseFalse is a built-in constant in Python that is used to store boolean values
 How to personalize your iPhone on the latest iOS 17
Sep 21, 2023 am 08:17 AM
How to personalize your iPhone on the latest iOS 17
Sep 21, 2023 am 08:17 AM
How to Personalize Calls on iPhone Apple’s iOS 17 introduces a new feature called Contact Posters that allows you to personalize the look of your call screen on your iPhone. This feature allows you to design a poster using selected photos, colors, fonts, and Memoji as contact cards. So when you make a call, your custom image will appear on the recipient's iPhone exactly as you envisioned. You can choose to share your unique contact poster with all your saved contacts, or choose who can see it. Likewise, during a call exchange, you will also see other people's contact posters. Additionally, Apple lets you set specific contact photos for individual contacts, making calls from those contacts
 How to create a folder on Realme Phone?
Mar 23, 2024 pm 02:30 PM
How to create a folder on Realme Phone?
Mar 23, 2024 pm 02:30 PM
Title: Realme Phone Beginner’s Guide: How to Create Folders on Realme Phone? In today's society, mobile phones have become an indispensable tool in people's lives. As a popular smartphone brand, Realme Phone is loved by users for its simple and practical operating system. In the process of using Realme phones, many people may encounter situations where they need to organize files and applications on their phones, and creating folders is an effective way. This article will introduce how to create folders on Realme phones to help users better manage their phone content. No.
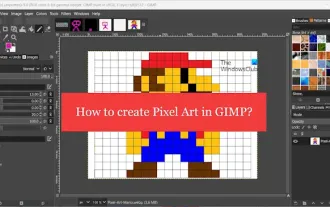 How to create pixel art in GIMP
Feb 19, 2024 pm 03:24 PM
How to create pixel art in GIMP
Feb 19, 2024 pm 03:24 PM
This article will interest you if you are interested in using GIMP for pixel art creation on Windows. GIMP is a well-known graphics editing software that is not only free and open source, but also helps users create beautiful images and designs easily. In addition to being suitable for beginners and professional designers alike, GIMP can also be used to create pixel art, a form of digital art that utilizes pixels as the only building blocks for drawing and creating. How to Create Pixel Art in GIMP Here are the main steps to create pixel pictures using GIMP on a Windows PC: Download and install GIMP, then launch the application. Create a new image. Resize width and height. Select the pencil tool. Set the brush type to pixels. set up
 How to create a family with Gree+
Mar 01, 2024 pm 12:40 PM
How to create a family with Gree+
Mar 01, 2024 pm 12:40 PM
Many friends expressed that they want to know how to create a family in Gree+ software. Here is the operation method for you. Friends who want to know more, come and take a look with me. First, open the Gree+ software on your mobile phone and log in. Then, in the options bar at the bottom of the page, click the "My" option on the far right to enter the personal account page. 2. After coming to my page, there is a "Create Family" option under "Family". After finding it, click on it to enter. 3. Next jump to the page to create a family, enter the family name to be set in the input box according to the prompts, and click the "Save" button in the upper right corner after entering it. 4. Finally, a "save successfully" prompt will pop up at the bottom of the page, indicating that the family has been successfully created.
 How to Create a Contact Poster for Your iPhone
Mar 02, 2024 am 11:30 AM
How to Create a Contact Poster for Your iPhone
Mar 02, 2024 am 11:30 AM
In iOS17, Apple has added a contact poster feature to its commonly used Phone and Contacts apps. This feature allows users to set personalized posters for each contact, making the address book more visual and personal. Contact posters can help users identify and locate specific contacts more quickly, improving user experience. Through this feature, users can add specific pictures or logos to each contact according to their preferences and needs, making the address book interface more vivid. Apple in iOS17 provides iPhone users with a novel way to express themselves, and added a personalizable contact poster. The Contact Poster feature allows you to display unique, personalized content when calling other iPhone users. you
 How to create a verification code image using PHP?
Sep 13, 2023 am 11:40 AM
How to create a verification code image using PHP?
Sep 13, 2023 am 11:40 AM
How to create a verification code image using PHP? CAPTCHA is a commonly used method to verify whether the user is a human and not a machine. On websites, we often see verification code images, which require users to enter random characters or numbers displayed on the image to complete operations such as login, registration, and commenting. This article will introduce how to use PHP to create a verification code image and provide specific code examples. 1. PHPGD library To create a verification code image, we need to use PHP's GD library. The GD library is an extension for processing images.
 How to create a Gantt chart using Highcharts
Dec 17, 2023 pm 07:23 PM
How to create a Gantt chart using Highcharts
Dec 17, 2023 pm 07:23 PM
How to use Highcharts to create a Gantt chart requires specific code examples. Introduction: The Gantt chart is a chart form commonly used to display project progress and time management. It can visually display the start time, end time and progress of the task. Highcharts is a powerful JavaScript chart library that provides rich chart types and flexible configuration options. This article will introduce how to use Highcharts to create a Gantt chart and give specific code examples. 1. Highchart
