

【Unity】技巧集合

转发,请保持地址:http://blog.csdn.net/stalendp/article/details/17114135 这篇文章将收集unity的相关技巧,会不断地更新内容。 1)保存运行中的状态 unity在运行状态时是不能够保存的。但在运行时编辑的时候,有时会发现比较好的效果想保存。这时可以在
转发,请保持地址:http://blog.csdn.net/stalendp/article/details/17114135
这篇文章将收集unity的相关技巧,会不断地更新内容。
1)保存运行中的状态
unity在运行状态时是不能够保存的。但在运行时编辑的时候,有时会发现比较好的效果想保存。这时可以在 “Hierarchy”中复制相关对象树,暂停游戏后替换原来的,就可以了。(其实这个拷贝过程是序列化过程,这种方法是序列化到内存中;另外一种方法就是序列化到磁盘上,即把内容拖动到文件夹中变成prefab,效果也是一样的)
2)Layer的用法
LayerMask.NameToLayer("Ground");
// 通过名字获取layer
3D Raycast
RaycastHit hit;
if(Physics.Raycast(cam3d.ScreenPointToRay(Input.mousePosition), out hit, Mathf.Infinity, (1
<p>2D Raycast</p>

<pre class="brush:php;toolbar:false">Collider2D h = Physics2D.OverlapPoint(cam2d.ScreenToWorldPoint(Input.mousePosition), (1
<p>3)物理摄像头取色(<span><span>WebCamTexture)</span></span></p>
<p><span></span></p>
<pre class="brush:php;toolbar:false">Texture2D exactCamData() {
    // get the sample pixels
    Texture2D snap = new Texture2D((int)detectSize.x, (int)detectSize.y);
    snap.SetPixels(webcamTexture.GetPixels((int)detectStart.x, (int)detectStart.y, (int)detectSize.x, (int)detectSize.y));
    snap.Apply();
    return snap;
}保存截图:
System.IO.File.WriteAllBytes(Application.dataPath + "/test.png", exactCamData().EncodeToPNG());
4) 操作componenent
添加:
CircleCollider2D cld = (CircleCollider2D)colorYuan[i].AddComponent(typeof(CircleCollider2D));
cld.radius = 1;
删除:
Destroy(transform.gameObject.GetComponent<spriterenderer>());</spriterenderer>
5)动画相关

状态Init到状态fsShake的的条件为:参数shake==true;代码中的写法:
触发fsShake:
void Awake() {
    anims = new Animator[(int)FColorType.ColorNum];
}
....
if(needShake) {
    curAnim.SetTrigger("shake");
}关闭fsShake
void Update() {
....
if(curAnim) {
    AnimatorStateInfo stateInfo = curAnim.GetCurrentAnimatorStateInfo(0);
    if(stateInfo.nameHash == Animator.StringToHash("Base Layer.fsShake")) {
        curAnim.SetBool("shake", false);
        curAnim = null;
        print ("======>>>>> stop shake!!!!");
    }
}
....
}关于Animator.StringToHash函数的说明:
animator的setBool,setTrigger等函数都有两种参数形式,一个接收string,一个接收hash;其实Animator内部是使用hash来记录相应信息的,所以接收string类型的函数内部会帮你调用StringToHash这个函数;所以如果要经常调用setTrigger等,请把参数名称hash化保持以便反复使用,从而提高性能。
在状态机animator中获取animation state 和animation clip的方法(参考http://answers.unity3d.com/questions/692593/get-animation-clip-length-using-animator.html):
public static AnimationClip getAnimationClip(Animator anim, string clipName) {
	UnityEditorInternal.State state = getAnimationState(anim, clipName);
	return state!=null ? state.GetMotion() as AnimationClip : null;
}

public static UnityEditorInternal.State getAnimationState(Animator anim, string clipName) {
	UnityEditorInternal.State state = null;
	if(anim != null) {
		UnityEditorInternal.AnimatorController ac = anim.runtimeAnimatorController as UnityEditorInternal.AnimatorController;
		UnityEditorInternal.StateMachine sm = ac.GetLayer(0).stateMachine;

		for(int i = 0; i <br>

<p>6)scene的切换</p>
<p>同步方式:</p>

<pre class="brush:php;toolbar:false">Application.LoadLevel(currentName);异步方式:
Application.LoadLevelAsync("ARScene");7)加载资源
Resources.Load<texture>(string.Format("{0}{1:D2}", mPrefix, 5));</texture>8)Tag VS. Layer
-> Tag用来查询对象
-> Layer用来确定哪些物体可以被raycast,还有用在camera render中
9)旋转
transform.eulerAngles 可以访问 rotate的 xyz
transform.RotateAround(pivotTransVector, Vector3.up, -0.5f * (tmp-preX) * speed);
PlayerPrefs.SetInt("isInit_" + Application.loadedLevelName, 1);11)动画编码
http://www.cnblogs.com/lopezycj/archive/2012/05/18/Unity3d_AnimationEvent.html
http://game.ceeger.com/Components/animeditor-AnimationEvents.html
http://answers.unity3d.com/questions/8172/how-to-add-new-curves-or-animation-events-to-an-im.html
12) 遍历子对象
Transform[] transforms = target.GetComponentsInChildren<transform>();
for (int i = 0, imax = transforms.Length; i
<p>13)音效的播放</p>
<p> 先添加Auido Source, 设置Audio Clip, 也可以在代码中加入。然后在代码中调用audio.Play(), 参考如下代码:</p>

<pre class="brush:php;toolbar:false">public AudioClip aClip;
...
void Start () {
	...
	audio.clip = aClips;
	audio.Play();
	...
}另外,如果是3d音效的话,需要调整audio Souce中的panLevel才能听到声音,不清楚原因。
14)调试技巧(Debug)
可以在OnDrawGizmos函数来进行矩形区域等,达到调试的目的,请参考NGUI中的UIDraggablePanel.cs文件中的那个函数实现。
#if UNITY_EDITOR
	/// <summary>
	/// Draw a visible orange outline of the bounds.
	/// </summary>
	void OnDrawGizmos ()
	{
		if (mPanel != null)
		{
			Bounds b = bounds;
			Gizmos.matrix = transform.localToWorldMatrix;
			Gizmos.color = new Color(1f, 0.4f, 0f);
			Gizmos.DrawWireCube(new Vector3(b.center.x, b.center.y, b.min.z), new Vector3(b.size.x, b.size.y, 0f));
		}
	}
#endif15)延时相关( StartCoroutine)
StartCoroutine(DestoryPlayer());
...
IEnumerator DestoryPlayer() {
	Instantiate(explosionPrefab, transform.position, transform.rotation);
	gameObject.renderer.enabled = false;
	yield return new WaitForSeconds(1.5f);
	gameObject.renderer.enabled = true;
}16)Random做种子
Random.seed = System.Environment.TickCount;
或者
Random.seed = System.DateTime.Today.Millisecond;
17) 调试技巧(debug),可以把值方便地在界面上打印出来
void OnGUI() {
    GUI.contentColor = Color.green;
    GUILayout.Label("deltaTime is: " + Time.deltaTime);
}18)分发消息
sendMessage, BroadcastMessage等
19) 游戏暂停(对timeScale进行设置)
Time.timeScale = 0;
20) 实例化一个prefab
Rigidbody2D propInstance = Instantiate(backgroundProp, spawnPos, Quaternion.identity) as Rigidbody2D;
21)Lerp函数的使用场景
// Set the health bar's colour to proportion of the way between green and red based on the player's health.
healthBar.material.color = Color.Lerp(Color.green, Color.red, 1 - health * 0.01f);
22)在特定位置播放声音
// Play the bomb laying sound.
AudioSource.PlayClipAtPoint(bombsAway,transform.position);
23) 浮点数相等的判断(由于浮点数有误差, 所以判断的时候最好不要用等号,尤其是计算出来的结果)
if (Mathf.Approximately(1.0, 10.0/10.0))
print ("same");24)通过脚本修改shader中uniform的值
//shader的写法
Properties {
    ...
    disHeight ("threshold distance", Float) = 3
}

SubShader {
    Pass {
        CGPROGRAM
        #pragma vertex vert
        #pragma fragment frag
        ...
        uniform float disHeight;
        ...
// ===================================
// 修改shader中的disHeight的值
gameObject.renderer.sharedMaterial.SetFloat("disHeight", height);25) 获取当前level的名称
Application.loadedLevelName
26)双击事件
void OnGUI() {
    Event Mouse = Event.current;
    if ( Mouse.isMouse && Mouse.type == EventType.MouseDown && Mouse.clickCount == 2) {
        print("Double Click");
    }
}27) 日期:
System.DateTime dd = System.DateTime.Now;
GUILayout.Label(dd.ToString("M/d/yyyy"));28) RootAnimation中移动的脚本处理
class RootControl : MonoBehaviour {
	void OnAnimatorMove() {
		Animator anim = GetComponent<animator>();
		if(anim) {
			Vector3 newPos = transform.position;
			newPos.z += anim.GetFloat("Runspeed") * Time.deltaTime;
			transform.position = newPos;
		}
	}
}</animator>29) BillBoard效果(广告牌效果,或者向日葵效果,使得对象重视面向摄像机)
public class BillBoard : MonoBehaviour {
	// Update is called once per frame
	void Update () {
		transform.LookAt(Camera.main.transform.position, -Vector3.up);
	}
}30)script中的属性编辑器(Property Drawers),还可以自定义属性编辑器
参考: http://blogs.unity3d.com/2012/09/07/property-drawers-in-unity-4/
http://docs.unity3d.com/Manual/editor-PropertyDrawers.html
其中Popup好像无效,但是enum类型的变量,能够达到Popup的效果
public class Example : MonoBehaviour {
    public string playerName = "Unnamed";

    [Multiline]
    public string playerBiography = "Please enter your biography";

    [Popup ("Warrior", "Mage", "Archer", "Ninja")]
    public string @class = "Warrior";

    [Popup ("Human/Local", "Human/Network", "AI/Easy", "AI/Normal", "AI/Hard")]
    public string controller;

    [Range (0, 100)]
    public float health = 100;

    [Regex (@"^(?:\d{1,3}\.){3}\d{1,3}$", "Invalid IP address!\nExample: '127.0.0.1'")]
    public string serverAddress = "192.168.0.1";

    [Compact]
    public Vector3 forward = Vector3.forward;

    [Compact]
    public Vector3 target = new Vector3 (100, 200, 300);

    public ScaledCurve range;
    public ScaledCurve falloff;

    [Angle]
    public float turnRate = (Mathf.PI / 3) * 2;
}31)Mobile下面使用lightmapping问题的解决方案
在mobile模式下,lightmapping可能没有反应,可以尝试使用mobile下的shader,可以解决问题。更多请参考:http://forum.unity3d.com/threads/138978-Lightmap-problem-in-iPhone
32) Unity下画线的功能(用于debug)
Debug.DrawLine (Vector3.zero, new Vector3 (10, 0, 0), Color.red);
33)Shader中代码的复用(CGINCLUDE的使用)
34)获取AnimationCurve的时长
_curve.keys[_curve.length-1].time;
35)C#中string转变成byte[]:
byte[] b1 = System.Text.Encoding.UTF8.GetBytes (myString);
byte[] b2 = System.Text.Encoding.ASCII.GetBytes (myString);
System.Text.Encoding.Default.GetBytes(sPara)
new ASCIIEncoding().GetBytes(cpara);
char[] cpara=new char[bpara.length];
for(int i=0;i <bpara.length>
<p>36) 排序</p>

<pre class="brush:php;toolbar:false">list.Sort(delegate(Object a, Object b) { return a.name.CompareTo(b.name); });37) NGUI的相关类关系:
38)使得脚本能够在editor中实时反映:
在脚本前加上:[ExecuteInEditMode], 参考UISprite。
39)隐藏相关属性
属性前加上 [HideInInspector],在shader中也适用;
比如:
public class ResourceLoad : MonoBehaviour {
	[HideInInspector] public string ressName = "Sphere";
public string baseUrl = "http://192.168.56.101/ResUpdate/{0}.assetbundle";Shader "stalendp/imageShine" {
Properties {
[HideInInspector] _image ("image", 2D) = "white" {}
_percent ("_percent", Range(-5, 5)) = 1
_angle("_angle", Range(0, 1)) = 0
}40)属性的序列化
可被序列化的属性,可以显示在Inspector面板上(可以使用HideInInspector来隐藏);public属性默认是可被序列化的,private默认是不可序列化的。使得private属性可被序列化,可以使用[SerializeField]来修饰。如下:
[SerializeField] private string ressName = "Sphere";
41)Shader编译的多样化(Making multiple shader program variants)
shader通常如下的写法:
<span>#pragma multi_compile FANCY_STUFF_OFF FANCY_STUFF_ON
</span><span>这样可以把Shader编译成多个版本。使用的时候,局部设置<span>Material.EnableKeyword, DisableKeyword;或则 全局设置<span>Shader.EnableKeyword and DisableKeyword进行设置。</span></span></span>
<span><span><span>42)多个scene共享内容</span></span></span>
<span><span></span></span><pre class="brush:php;toolbar:false"> void Awake() {
    DontDestroyOnLoad(transform.gameObject);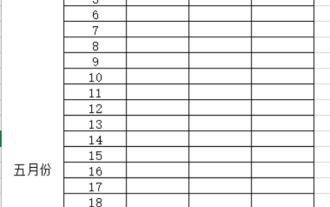
}首先需要设置AnimationType的类型为1 (需要在animationClip的Debug模式的属性中进行设置,如下图。另外,如果需要在animator中播放动画,需要类型为2);
<img src="/static/imghw/default1.png" data-src="/inc/test.jsp?url=http%3A%2F%2Fimg.blog.csdn.net%2F20140710112748578&refer=http%3A%2F%2Fblog.csdn.net%2Fstalendp%2Farticle%2Fdetails%2F17114135" class="lazy" alt="【Unity】技巧集合" >
代码如下:
<pre class="brush:php;toolbar:false"> string clipName = "currentClip";
 AnimationClip clip = ...;
 // 设置animationClip
 if (anim == null) {
     anim = gameObject.AddComponent<animation>();
 }
 anim.AddClip(clip, clipName);
 anim[clipName].speed = _speedScale;
 // 计算时间
 float duration = anim[clipName].length;
 duration /= _speedScale;
 // 播放动画
 anim.Play(clipName);
 yield return new WaitForSeconds(duration + 0.1f);
 // 动画结束动作
 anim.Stop();
anim.RemoveClip(clipName);</animation>44) RenderTexture的全屏效果
cs端:
<pre class="brush:php;toolbar:false">MeshFilter mesh = quard.GetComponent<meshfilter> ();
// 创建和摄像机相关的renderTexture
RenderTexture rTex = new RenderTexture ((int)cam.pixelWidth, (int)cam.pixelHeight, 16);
cam.targetTexture = rTex;
mesh.renderer.material.mainTexture = rTex;</meshfilter>
<pre class="brush:php;toolbar:false">#include "UnityCG.cginc"
sampler2D _MainTex;
sampler2D _NoiseTex;

struct v2f {
    half4 pos:SV_POSITION;
    half2 uv : TEXCOORD0;
    float4 srcPos: TEXCOORD1;
};

v2f vert(appdata_full v) {
    v2f o;
    o.pos = mul (UNITY_MATRIX_MVP, v.vertex);
    o.uv = v.texcoord.xy;
    o.srcPos = ComputeScreenPos(o.pos);
    return o;
}

fixed4 frag(v2f i) : COLOR0 {
	float tmp = saturate(1-(length(i.uv-float2(0.5,0.5)))*2)*0.04;
	float2 wcoord = (i.srcPos.xy/i.srcPos.w) + tex2D(_NoiseTex, i.uv) * tmp - tmp/2;
    return tex2D(_MainTex, wcoord);
} 45)使用RenderTexture制作屏幕特效:
<pre class="brush:php;toolbar:false">[ExecuteInEditMode]
public class MyScreenEffect : MonoBehaviour {
	...
	void OnRenderImage(RenderTexture source, RenderTexture dest) {
		Graphics.Blit(source, dest, material);
	}
}46) 特定条件下暂停unity
在调试战斗的时候,需要在特定条件下暂停unity,以便查看一些对象的设置。可以使用Debug.Break();来达到目的。这是需要处于debug模式,才能够达到效果。
47)在特定exception发生时暂停执行;
默认情况下,unity在遇到异常时,是不会停止执行的。但是如果要在nullReferenceException等exception发生时,进行调试。可以在MonoDevelop的菜单中选择Run/Exceptions..., 做相关设置:
<img src="/static/imghw/default1.png" data-src="/inc/test.jsp?url=http%3A%2F%2Fimg.blog.csdn.net%2F20140717110136625&refer=http%3A%2F%2Fblog.csdn.net%2Fstalendp%2Farticle%2Fdetails%2F17114135" class="lazy" alt="【Unity】技巧集合" >
48)NGUI性能建议
相关知识:1)在NGUI中,一个Panel对应一个DrawCall(当然一个panel里面的UISprite来自多个图集,就会有多个drawCall);2)当一个UISprite等UIWidget控件的active改变时,DrawCall会重新计算一遍;3)DrawCall的计算比较耗时,首先会收集DrawCall下所有UIWidget的verts,norms,trans,uvs,cols等信息,还要向GPU传输数据,相对比较耗时。
问题:当在一个Panel中有大量的UIWidget,有一部分是经常改变active的,有些部分则不怎么变。这样就会导致频繁地计算DrawCall。
性能提升方案:把经常改变active的控件单独到一个panel中。把不怎么变动的部分独立到另外的panel中。
49)NGUI中设置自定义的Shader,并改变properties的值。
使用UITexture,可以设置自定义的Material。需要注意的是,改变properties的值,需要使用UITexture中的drawCall的dynamicMaterial,如下:
<pre class="brush:php;toolbar:false">UITexture tex=....;
tex.drawCall.dynamicMaterial.SetFloat("_percent", du/DU);<span>50) 鉴别unity中的InputTouch的类型:</span>
<pre class="brush:php;toolbar:false">public enum OperateStatus {
	OS_Idle=0,
	OS_Draging=1,
	OS_Scaling=2
}
.....

void Update () {
   ......
       TouchPhase tp = Input.GetTouch(0).phase;
	if(tp==TouchPhase.Ended || tp==TouchPhase.Canceled) {
		oStatus = OperateStatus.OS_Idle;
	} else {
		oStatus = Input.touchCount>1 ? OperateStatus.OS_Scaling : OperateStatus.OS_Draging;
	}
.....
}
Unity中涉及物理模拟的有静态碰撞(static collider)和动态碰撞(dynamic collider)。其中,静态碰撞物体是指具有collider属性但没有rigidbody的物体,动态碰撞物体是指具有collider和rigidbody属性的物体。
Unity引擎期待静态物体是静止,会把场景中的所有静态物体统一计算成一个叫static collider cache的东西来加速物理模拟。但是如果其中某个静态物体进行了移动,系统就要重新计算<span>static collider cache;而这个代价是很大的。所以如果一个物体是要经常移动的,应该设计成动态物体,即添加rigidbody成分;至于使rigidbody不响应重力等作用力的影响,请参考</span><span>rigidbody中的"Use Gravity"和“Is Kinematic”属性。</span>
<span>如果rigidbody是kinematic的,它不响应force,可以用来制作飞行障碍物等效果。如果不是kinematic的,就会响应foce。</span>
参考如下官方教程最后的性能分析:http://unity3d.com/learn/tutorials/projects/roll-a-ball/collecting-and-counting
52) unity中四种Collider的对比:
| 类型 | 能否移动 | 是否接收Trigger消息 | 是否受碰撞影响 | 是否受物理影响 |
| Static | 代价大 | No | No | No |
| Kinematic Rigidbody | Yes | Yes | No | No |
| Character Controller | Yes | 未知 | Yes | No |
| Rigidbody | Yes | Yes | Yes | Yes |
仔细观察上面的表格,发现越往下,特性越多。官方在介绍collision的时候,没有加入讨论Character Controller,这个是我自己添加比较的。
另外,如果一个物体能够受碰撞影响,当然就能够接收Collition消息了。
关于接收Collision消息和Trigger消息的官方的详细表,请参考http://docs.unity3d.com/Manual/CollidersOverview.html 的文末的表格。<pre class="brush:php;toolbar:false">53) 使一个物体依附在一个表面上,保持物体的up方向和表面的法线方向一致(物体记为obj,表面记为suf):
方法1:
<pre class="brush:php;toolbar:false">obj.transform.rotation = Quaternion.FromToRotation(obj.transform.up, suf.transform.up)* obj.transform.rotation;
方法2:
<pre class="brush:php;toolbar:false">Vector3 axis = Vector3.Cross(obj.transform.up, suf.transform.up);
float angle = Vector3.Angle(obj.transform.up, suf.transform.up);
obj.transform.Rotate(axis, angle, Space.World);
<pre class="brush:php;toolbar:false">@script ExecuteInEditMode

private var gui : GUIText;

private var updateInterval = 1.0;
private var lastInterval : double; // Last interval end time
private var frames = 0; // Frames over current interval

function Start()
{
    lastInterval = Time.realtimeSinceStartup;
    frames = 0;
}

function OnDisable ()
{
	if (gui)
		DestroyImmediate (gui.gameObject);
}

function Update()
{
#if !UNITY_FLASH
    ++frames;
    var timeNow = Time.realtimeSinceStartup;
    if (timeNow > lastInterval + updateInterval)
    {
		if (!gui)
		{
			var go : GameObject = new GameObject("FPS Display", GUIText);
			go.hideFlags = HideFlags.HideAndDontSave;
			go.transform.position = Vector3(0,0,0);
			gui = go.guiText;
			gui.pixelOffset = Vector2(5,55);
		}
        var fps : float = frames / (timeNow - lastInterval);
		var ms : float = 1000.0f / Mathf.Max (fps, 0.00001);
		gui.text = ms.ToString("f1") + "ms " + fps.ToString("f2") + "FPS";
        frames = 0;
        lastInterval = timeNow;
    }
#endif
}
<pre class="brush:php;toolbar:false">public class AlphaNumericSort : BaseHierarchySort
{
	public override int Compare(GameObject lhs, GameObject rhs)
	{
		if (lhs == rhs) return 0;
		if (lhs == null) return -1;
		if (rhs == null) return 1;

		return EditorUtility.NaturalCompare(lhs.name, rhs.name);
	}
}把上面的代码放到工程中之后,在Hierarchy中就会出现排序的按钮,如下:
<img src="/static/imghw/default1.png" data-src="/inc/test.jsp?url=http%3A%2F%2Fimg.blog.csdn.net%2F20150403165927000&refer=http%3A%2F%2Fblog.csdn.net%2Fstalendp%2Farticle%2Fdetails%2F17114135" class="lazy" alt="【Unity】技巧集合" >
BaseHierarchySort的官方地址:http://docs.unity3d.com/ScriptReference/BaseHierarchySort.html

Hot AI Tools

Undresser.AI Undress
AI-powered app for creating realistic nude photos

AI Clothes Remover
Online AI tool for removing clothes from photos.

Undress AI Tool
Undress images for free

Clothoff.io
AI clothes remover

Video Face Swap
Swap faces in any video effortlessly with our completely free AI face swap tool!

Hot Article
Hot Tools

Notepad++7.3.1
Easy-to-use and free code editor

SublimeText3 Chinese version
Chinese version, very easy to use

Zend Studio 13.0.1
Powerful PHP integrated development environment

Dreamweaver CS6
Visual web development tools

SublimeText3 Mac version
God-level code editing software (SublimeText3)
Hot Topics
 1666
1666
 14
1426
52
1328
25
1273
29
1253
24
14
1426
52
1328
25
1273
29
1253
24

 Win11 Tips Sharing: Skip Microsoft Account Login with One Trick
Mar 27, 2024 pm 02:57 PM
Win11 Tips Sharing: Skip Microsoft Account Login with One Trick
Mar 27, 2024 pm 02:57 PM
Win11 Tips Sharing: One trick to skip Microsoft account login Windows 11 is the latest operating system launched by Microsoft, with a new design style and many practical functions. However, for some users, having to log in to their Microsoft account every time they boot up the system can be a bit annoying. If you are one of them, you might as well try the following tips, which will allow you to skip logging in with a Microsoft account and enter the desktop interface directly. First, we need to create a local account in the system to log in instead of a Microsoft account. The advantage of doing this is
 Why is it difficult to implement collection-like functions in Go language?
Mar 24, 2024 am 11:57 AM
Why is it difficult to implement collection-like functions in Go language?
Mar 24, 2024 am 11:57 AM
It is difficult to implement collection-like functions in the Go language, which is a problem that troubles many developers. Compared with other programming languages such as Python or Java, the Go language does not have built-in collection types, such as set, map, etc., which brings some challenges to developers when implementing collection functions. First, let's take a look at why it is difficult to implement collection-like functionality directly in the Go language. In the Go language, the most commonly used data structures are slice and map. They can complete collection-like functions, but
 How to fast forward on Weibo_Tutorial on fast forwarding on Weibo
Mar 30, 2024 pm 03:51 PM
How to fast forward on Weibo_Tutorial on fast forwarding on Weibo
Mar 30, 2024 pm 03:51 PM
1. First, enter Weibo on your mobile phone and click on the recommendation option. 2. Then select Weibo and click the share icon. 3. Then click on the fast forward option. 4. Finally, you can check that Weibo fast forwarding was sent successfully.
 A must-have for veterans: Tips and precautions for * and & in C language
Apr 04, 2024 am 08:21 AM
A must-have for veterans: Tips and precautions for * and & in C language
Apr 04, 2024 am 08:21 AM
In C language, it represents a pointer, which stores the address of other variables; & represents the address operator, which returns the memory address of a variable. Tips for using pointers include defining pointers, dereferencing pointers, and ensuring that pointers point to valid addresses; tips for using address operators & include obtaining variable addresses, and returning the address of the first element of the array when obtaining the address of an array element. A practical example demonstrating the use of pointer and address operators to reverse a string.
 How to check the MAC address on a mobile phone (simple operation allows you to easily obtain the MAC address of the device)
Apr 19, 2024 pm 06:19 PM
How to check the MAC address on a mobile phone (simple operation allows you to easily obtain the MAC address of the device)
Apr 19, 2024 pm 06:19 PM
We may need to check the MAC address of the mobile phone in some specific situations, such as setting up wireless network filtering or device management. This article will teach you how to easily obtain the MAC address of your device through your mobile phone. 1. What is a MAC address 2. Mobile phone system: Android and iOS 3. How to check the MAC address in the Android system 4. How to check the MAC address in the iOS system 5. Use the device management application to check the MAC address 6. Check the connected devices through the wireless router 7. View the MAC address through a third-party application 8. View the MAC address through the developer options in the phone settings 9. View the MAC address using a network analysis tool 10. View the MAC address through the command line
 What are the tips for novices to create forms?
Mar 21, 2024 am 09:11 AM
What are the tips for novices to create forms?
Mar 21, 2024 am 09:11 AM
We often create and edit tables in excel, but as a novice who has just come into contact with the software, how to use excel to create tables is not as easy as it is for us. Below, we will conduct some drills on some steps of table creation that novices, that is, beginners, need to master. We hope it will be helpful to those in need. A sample form for beginners is shown below: Let’s see how to complete it! 1. There are two methods to create a new excel document. You can right-click the mouse on a blank location on the [Desktop] - [New] - [xls] file. You can also [Start]-[All Programs]-[Microsoft Office]-[Microsoft Excel 20**] 2. Double-click our new ex
 VSCode Getting Started Guide: A must-read for beginners to quickly master usage skills!
Mar 26, 2024 am 08:21 AM
VSCode Getting Started Guide: A must-read for beginners to quickly master usage skills!
Mar 26, 2024 am 08:21 AM
VSCode (Visual Studio Code) is an open source code editor developed by Microsoft. It has powerful functions and rich plug-in support, making it one of the preferred tools for developers. This article will provide an introductory guide for beginners to help them quickly master the skills of using VSCode. In this article, we will introduce how to install VSCode, basic editing operations, shortcut keys, plug-in installation, etc., and provide readers with specific code examples. 1. Install VSCode first, we need
 How to implement HTTP streaming using C++?
May 31, 2024 am 11:06 AM
How to implement HTTP streaming using C++?
May 31, 2024 am 11:06 AM
How to implement HTTP streaming in C++? Create an SSL stream socket using Boost.Asio and the asiohttps client library. Connect to the server and send an HTTP request. Receive HTTP response headers and print them. Receives the HTTP response body and prints it.
