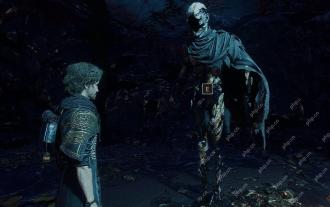
God of War Ragnarok Secret of the Sands Favour: How to clear the Alfheim sandstorm
Calling out from the deserts of Alfheim in God of War Ragnarok is a mysterious creature. Feeling the creature’s cries from afar, Kratos, Atreus and Mimir set off to help, hoping to go some way to making up for their previous meddling in the Realm’s delicate balance.
The path leads them through a sandstorm to a confusing and labyrinthine new area below the dunes, but it’s nothing they can’t overcome together.
Whether you're a newcomer to Ragnarok thanks to its recent PC release, or revisiting Alfheim for the first time in a while, here’s how to complete the Secret of the Sands Favour in God of War Ragnarok and solve the mystery for yourself.
God of War Ragnarok Secret of the Sands Favour

After parting ways with Tyr and hearing the creature’s distant cries, the Secret of the Sands favour begins after speaking to Sindri at his shop at the entrance to The Barrens.
Head past Sindri, board your new method of conveyance for getting quickly across the sand dunes, then bear right from the entrance to the desert towards the quest marker on your map.
At the quest marker, descend into the cave entrance and this leads into a new area: The Below.

Follow Atreus forward along the path and destroy the hive material in your way with your axe.

Next, defeat the Dark Elf ambush lurking in the caves, then use the reflection stone to destroy the Hive nodules. Defeat the elves that appear, claim the chest and continue on around the corner.
There are more Dark Elves to take on in the next room - which contains a lot of reflection stones. There’s also a Nornir Chest in the side room, but you come back for this later, just remember where it is.

Climb the marked wall next to the door where you can see the Nornir bell. Turn around and look where you just came and you can see an Ormr that gives you honed metal and stonewood if you throw an axe at it.

Then look down to the right as you climb up, destroy the hive material and you can grab a chest from down here as well as some lore. The chest has some Dwarven Steel inside.
Now take the high climb up and slide down the zipwire. Drop down to grab the chest then climb back up and follow the path around.

Use the Blades of Chaos to grapple across the gap and look down to the right. You’ll be above the Nornir Chest and an Ormr - throw your axe at it then head down to pick up the goods.

You can then open the gate next to the chest to have a quick way back around. You can’t finish opening the chest yet though, so turn back around.

Climb one level back up and throw your axe against the reflection stone to destroy the hive material to advance.

On the other side you can now get to the third Nornir Bell. Open the gate to the right, strike the bell then quickly descend and strike the other two.

Return to the cave you struck the third bell in and continue deeper by climbing down the chain.

Defeat the difficult Dark Elf ambush, then squeeze through the narrow tunnel over to the left-hand side of the cavern.

Then on the other side, destroy the gold rocks with the pot on the other side. But hold on before you rush off.

Before you climb down, look right and blow up another pot, then throw your axe against the reflection stone for a chest with some Dwarven Steel.

Now climb down, follow the path, defeat the wretches, then throw your axe through the hive material on the left to bounce it off the reflection stones and clear a path to a small chest.

Next, look left as you jump over the gap to blow up the rocks with a pot.

Go back through that new path and use the reflection stones on the left to clear another where you can climb up.

Grab the chest at the top of the ledge then spin the dangling stone so that it has an angle to destroy the final bit of hive blocking your progress.

Follow the path to a cave where you climb up. At the top, to the left are some rocks you can destroy with a pot behind them.

Jump across to the ledge, turn around, then throw your axe at the reflection stone on the far wall so it destroys the first node on the way there then rebounds into the other two.

Then climb back up to Atreus, look left, and throw your axe so it bounces off the two stones on the wall.

With the hive matter gone, follow Atreus up and to the right and free the beast from the surface. Bust out of the Below and grab the legendary chest, which contains Whispering Slab as well as the Shoulder Straps of Radiance. A good addition to your arsenal if not one of the best armor sets in God of War Ragnarok.

Go north to the quest marker and finish the quest. With the sand gone you can now go around the Barrens and clean up the stuff you couldn’t grab with the storm raging. For example, the "undiscovered location" near the start of the barrens is a Draugr Hole.
以上是God of War Ragnarok Secret of the Sands Favour: How to clear the Alfheim sandstorm的详细内容。更多信息请关注PHP中文网其他相关文章!

热AI工具

Undresser.AI Undress
人工智能驱动的应用程序,用于创建逼真的裸体照片

AI Clothes Remover
用于从照片中去除衣服的在线人工智能工具。

Undress AI Tool
免费脱衣服图片

Clothoff.io
AI脱衣机

Video Face Swap
使用我们完全免费的人工智能换脸工具轻松在任何视频中换脸!

热门文章

热工具

记事本++7.3.1
好用且免费的代码编辑器

SublimeText3汉化版
中文版,非常好用

禅工作室 13.0.1
功能强大的PHP集成开发环境

Dreamweaver CS6
视觉化网页开发工具

SublimeText3 Mac版
神级代码编辑软件(SublimeText3)
 <🎜>:种植花园 - 完整的突变指南
Apr 18, 2025 am 01:10 AM
通过了解可观的农作物突变世界,最大化您在Roblox的利润发展了花园!这些罕见的变化大大提高了收获的价值。虽然您无法直接控制突变,但知道它们的工作方式提供了重要意义
 <🎜>:泡泡胶模拟器无穷大 - 如何获取和使用皇家钥匙
Apr 16, 2025 am 11:05 AM
皇家钥匙是您在Roblox的泡泡糖模拟器Infinity中可以找到的一些最有价值的物品。这些罕见的工具使您可以打开皇家胸部 - 限时战利品容器,里面装有高层物品,提升甚至超稀有的奖励。如果
 北端:融合系统,解释
Apr 16, 2025 am 04:07 AM
Nordhold Tower Fusion指南:增强防御的协同塔组合 在北端掌握塔楼的组合是有效基础防御的关键。 某些塔式协同效果非常好,创造了强大的防御策略。这个gui
 Mandragora:巫婆树的耳语 - 如何解锁抓钩
Apr 18, 2025 am 12:53 AM
曼德拉戈拉(Mandragora)的地牢提供了银战风格的挑战,要求玩家使用新获得的工具重新审视早期的区域。抓钩是一个很好的例子,可以快速遍历长距离。 在获得此关键工具的同时r
 <🎜>掩盖:探险33-如何获得完美的色度催化剂
Apr 27, 2025 am 04:07 AM
在<🎜>>“晦涩:探险33”中,最大化自己喜欢的武器是成功的关键。每次升级不仅可以提高武器力量,还可以解锁新的特征,从而塑造您的角色。达到32级的武器可以通过宏伟的色度CA来实现
 生锈的兔子:在哪里可以找到每个钥匙立方体
Apr 17, 2025 pm 10:02 PM
许多2D平台游戏,包括生锈的兔子,都有不可访问的区域,需要特定的能力或物品。 生锈的兔子也不例外,每个地区都有多个这样的区域。 除了视觉上明显的封锁路径外,您还会遇到机器人
 蓝王子:升级磁盘指南
Apr 12, 2025 am 11:34 AM
升级磁盘是您在Blue Prince中找到的最强大和最有价值的物品。尽管不需要到达46房间,但它们使您的跑步更加顺畅,难题更容易,并且生存率更高。如果您有幸找到
 <🎜>晦涩:探险33-如何找到和击败色彩光泽
Apr 25, 2025 am 04:10 AM
《Clair Obscur: Expedition 33》中强敌——Chromatic Luster攻略 Chromatic Luster是《Clair Obscur: Expedition 33》中常见的敌人Luster的强力变种。它攻击迅速猛烈,甚至能点燃你的整个队伍造成额外伤害。如果没有精湛的格挡技巧,与Chromatic Luster的战斗将是一场与时间的赛跑。 幸运的是,与其他敌人相比,Chromatic Luster的血量并不算多。只要你能掌控战斗节奏,避免陷入被动防御,就能迅速将


