react怎麼實現圖片選擇
react實作圖片選擇的方法:1、使用import引入「react-native-image-picker」外掛程式;2、使用「
{this.setState({uploadImgs: urls})}}src ={uploadImgs}/>」呼叫實作圖片選擇上傳即可。 ={6}onchange={urls>

本教學操作環境:Windows10系統、react18.0.0版、Dell G3電腦。
react怎麼實現圖片選擇?
React Native七牛上傳本地圖片選擇
參考:
react-native-image-crop-picker图片选择并裁减 //这个看需求使用
https://github.com/ivpusic/react-native-image-crop-picker
react-native-image-picker图片选择
https://github.com/react-native-image-picker/react-native-image-picker
react-native-qiniu
https://github.com/buhe/react-native-qiniu
我只要一個多圖片上傳功能,所以就寫簡單一點
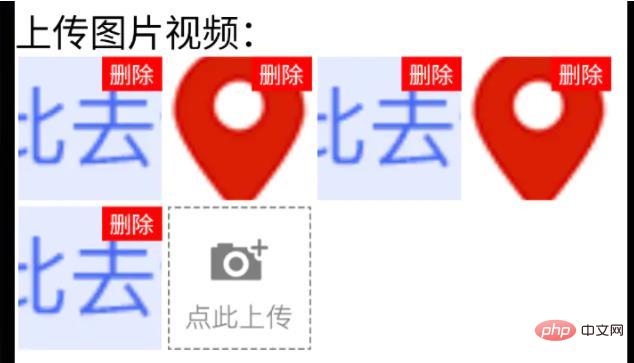
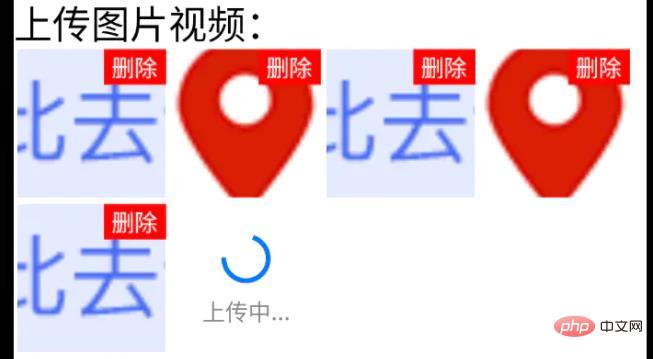
效果

已上傳狀態

#已上傳中狀態
##步驟
1、手機圖片、影片選擇功能用react-native-image-picker外掛程式yarn add react-native-image-picker;ios需要pod install ;import {launchCamera, launchImageLibrary, ImageLibraryOptions, PhotoQuality} from 'react-native-image-picker';
/**
* 从相册选择图片;
* sourceType: 'camera' 打开相机拍摄图片
**/
export async function chooseImage(options: {
count?: number,
quality?: PhotoQuality
sourceType?: 'camera', //默认'album'
} = {}) {
return new Promise<any>(async(resolve, reject) => {
const Opts: ImageLibraryOptions = {
mediaType: 'photo',
quality: options.quality || 1,
selectionLimit: options.count || 1
};
const result = options.sourceType == 'camera'?
await launchCamera(Opts) :
await launchImageLibrary(Opts);
resolve(result)
})
}
/**
* 从相册选择视频;
* sourceType: 'camera' 打开相机拍摄视频
**/
export async function chooseVideo(options: {
count?: number,
quality?: 'low' | 'high'
sourceType?: 'camera', //默认'album'
} = {}) {
return new Promise<any>(async(resolve, reject) => {
const Opts: ImageLibraryOptions = {
mediaType: 'video',
videoQuality: options.quality,
selectionLimit: options.count || 1
};
const result = options.sourceType == 'camera'?
await launchCamera(Opts) :
await launchImageLibrary(Opts);
resolve(result)
})
}class qiniuUpload {
private UP_HOST = 'http://upload.qiniu.com';
// private RS_HOST = 'http://rs.qbox.me';
// private RSF_HOST = 'http://rsf.qbox.me';
// private API_HOST = 'http://api.qiniu.com';
public upload = async(uri:string, key:string, token:string) => {
return new Promise<any>((resolve, reject) => {
let formData = new FormData();
formData.append('file', {uri: uri, type: 'application/octet-stream', name: key});
formData.append('key', key);
formData.append('token', token);
let options:any = {
body: formData,
method: 'post',
};
fetch(this.UP_HOST, options).then((response) => {
resolve(response)
}).catch(error => {
console.error(error)
resolve(null)
});
})
}
//...后面再加别的功能
}
const qiniu = new qiniuUpload();
export default qiniu;
import qiniu from '@/modules/qiniu/index'
...
/**
* 上传视频图片
*/
uploadFile: async (filePath: string) => {
const res = await createBaseClient('GET', '/v1/file')(); //这是接口请求方法,用来拿后端的七牛token、key
if( !res ) {
return res;
}
const { key, token } = res;
const fileSegments = filePath.split('.');
const fileKey = key + '.' + fileSegments[fileSegments.length - 1];
try {
const result = await qiniu.upload(filePath, fileKey, token)
if(result && result.ok) {
return {
url: ASSET_HOST + '/' + fileKey, //ASSET_HOST是资源服务器域名前缀
};
}else {
return null
}
} catch (error) {
return null;
}
},
...import React from 'react'
import {
ViewStyle,
StyleProp,
ImageURISource,
ActivityIndicator
} from 'react-native'
import Base from '@/components/Base';
import { Image, View, Text } from '@/components'; //Image封装过的,所以有些属性不一样
import ActionSheet from "@/components/Feedback/ActionSheet"; //自己封装
import styles from './styleCss'; //样式就不放上来了
interface Props {
type?: 'video'
src?: string[]
count?: number
btnPath?: ImageURISource
style?: StyleProp<ViewStyle>
itemStyle?: StyleProp<ViewStyle>
itemWidth?: number
itemHeight?: number //默认正方形
onChange?: (e) => void
}
interface State {
imageUploading: boolean
images: string[]
}
/**
* 多图上传组件
* * type?: 'video'
* * src?: string[] //图片数据,可用于初始数据
* * count?: number //数量
* * btnPath?: ImageURISource //占位图
* * itemStyle?: item样式,width, height单独设
* * itemWidth?: number
* * itemHeight?: number //默认正方形
* * onChange?: (e:string[]) => void
**/
export default class Uploader extends Base<Props, State> {
public state: State = {
imageUploading: false,
images: []
};
public didMount() {
this.initSrc(this.props.src)
}
public componentWillReceiveProps(nextProps){
if(nextProps.hasOwnProperty('src') && !!nextProps.src){
this.initSrc(nextProps.src)
}
}
/**
*初始化以及改动图片
**/
private initSrc = (srcProp:any) => {
if(!this.isEqual(srcProp, this.state.images)) {
this.setState({
images: srcProp
})
}
}
public render() {
const { style, btnPath, count, itemStyle, itemWidth, itemHeight, type } = this.props;
const { imageUploading, images } = this.state;
let countNumber = count? count: 1
return (
<React.Fragment>
<View style={[styles.uploaderBox, style]}>
{images.length > 0 && images.map((res, ind) => (
<View style={[styles.item, itemStyle]} key={res}>
<View style={styles.imgItem}>
<Image
source={{uri: res}}
width={this.itemW}
height={this.itemH}
onPress={() => {
this.singleEditInd = ind;
this.handleShowActionSheet()
}}
/>
<Text style={styles.del} onPress={this.handleDelete.bind(null, ind)}>删除</Text>
</View>
</View>
))}
{images.length < countNumber &&
<View style={[styles.item, itemStyle]}>
{imageUploading? (
<View style={[{
width: this.itemW,
height: this.itemH,
}, styles.loading]}>
<ActivityIndicator size={this.itemW*0.4}></Loading>
<Text style={{
fontSize: 14,
color: '#888',
marginTop: 5
}}>
上传中...
</Text>
</View>
): (
<View style={styles.btn}>
<Image
source={btnPath || this.assets.uploadIcon}
width={this.itemW}
height={this.itemH}
onPress={() => {
this.singleEditInd = undefined;
this.handleShowActionSheet()
}}
/>
</View>
)}
</View>
}
</View>
<ActionSheet
name="uploaderActionSheet"
options={[{
name: type == 'video'? '拍摄': '拍照',
onClick: () => {
if(type == 'video') {
this.handleChooseVideo('camera')
}else if(this.singleEditInd !== undefined) {
this.handleChooseSingle('camera')
}else {
this.handleChooseImage('camera')
}
}
}, {
name: '相册',
onClick: () => {
if(type == 'video') {
this.handleChooseVideo()
}else if(this.singleEditInd !== undefined) {
this.handleChooseSingle()
}else {
this.handleChooseImage()
}
}
}]}
></ActionSheet>
</React.Fragment>
);
}
private get itemW() {
return this.props.itemWidth || 92
}
private get itemH() {
return this.props.itemHeight || this.itemW;
}
private isEqual = (firstValue, secondValue) => {
/** 判断两个值(数组)是否相等 **/
if (Array.isArray(firstValue)) {
if (!Array.isArray(secondValue)) {
return false;
}
if(firstValue.length != secondValue.length) {
return false;
}
return firstValue.every((item, index) => {
return item === secondValue[index];
});
}
return firstValue === secondValue;
}
private handleShowActionSheet = () => {
this.feedback.showFeedback('uploaderActionSheet'); //这是显示ActionSheet选择弹窗。。。
}
private handleChooseImage = async (sourceType?: 'camera') => {
const { imageUploading, images } = this.state;
const { count } = this.props
if (imageUploading) {
return;
}
let countNumber = count? count: 1
const { assets } = await this.interface.chooseImage({ //上面封装的选择图片方法
count: countNumber,
sourceType: sourceType || undefined,
});
if(!assets) {
return;
}
this.setState({
imageUploading: true,
});
let request:any = []
assets.map(res => {
let req = this.apiClient.uploadFile(res.uri) //上面封装的七牛上传方法
request.push(req)
})
Promise.all(request).then(res => {
let imgs:any = []
res.map((e:any) => {
if(e && e.url){
imgs.push(e.url)
}
})
imgs = [...images, ...imgs];
this.setState({
images: imgs.splice(0,countNumber),
imageUploading: false,
},
this.handleChange
);
})
}
private singleEditInd?: number; //修改单个时的索引值
private handleChooseSingle = async(sourceType?: 'camera') => {
let { imageUploading, images } = this.state;
if (imageUploading) {
return;
}
const { assets } = await this.interface.chooseImage({ //上面封装的选择图片方法
count: 1,
sourceType: sourceType || undefined,
});
if(!assets) {
return;
}
this.setState({
imageUploading: true,
});
const res = await this.apiClient.uploadFile(assets[0].uri) //上面封装的七牛上传方法
if(res && res.url && this.singleEditInd){
images[this.singleEditInd] = res.url
}
this.setState({
images: [...images],
imageUploading: false,
},
this.handleChange
);
}
private handleChooseVideo = async(sourceType?: 'camera') => {
const { onChange } = this.props
let { imageUploading } = this.state;
if (imageUploading) {
return;
}
const { assets } = await this.interface.chooseVideo({
sourceType: sourceType
});
if(!assets) {
return;
}
this.setState({
imageUploading: true,
});
const res = await this.apiClient.uploadFile(assets[0].uri) //上面封装的七牛上传方法
if(res && res.url){
//视频就不在组件中展示了,父组件处理
if(onChange) {
onChange(res.url)
}
}
this.setState({
imageUploading: false,
});
}
private handleDelete = (ind:number) => {
let { images } = this.state
images.splice(ind,1)
this.setState({
images: [...images]
},
this.handleChange
)
}
private handleChange = () => {
const { onChange } = this.props
const { images } = this.state
if(onChange) {
onChange(images)
}
}
}import Uploader from "@/components/Uploader";
...
<Uploader
count={6}
onChange={urls => {
this.setState({
uploadImgs: urls
})
}}
src={uploadImgs}
/>
...react影片教學》
以上是react怎麼實現圖片選擇的詳細內容。更多資訊請關注PHP中文網其他相關文章!

熱AI工具

Undresser.AI Undress
人工智慧驅動的應用程序,用於創建逼真的裸體照片

AI Clothes Remover
用於從照片中去除衣服的線上人工智慧工具。

Undress AI Tool
免費脫衣圖片

Clothoff.io
AI脫衣器

Video Face Swap
使用我們完全免費的人工智慧換臉工具,輕鬆在任何影片中換臉!

熱門文章

熱工具

記事本++7.3.1
好用且免費的程式碼編輯器

SublimeText3漢化版
中文版,非常好用

禪工作室 13.0.1
強大的PHP整合開發環境

Dreamweaver CS6
視覺化網頁開發工具

SublimeText3 Mac版
神級程式碼編輯軟體(SublimeText3)
 如何利用React和RabbitMQ建立可靠的訊息應用
Sep 28, 2023 pm 08:24 PM
如何利用React和RabbitMQ建立可靠的訊息傳遞應用程式引言:現代化的應用程式需要支援可靠的訊息傳遞,以實現即時更新和資料同步等功能。 React是一種流行的JavaScript庫,用於建立使用者介面,而RabbitMQ是一種可靠的訊息傳遞中間件。本文將介紹如何結合React和RabbitMQ建立可靠的訊息傳遞應用,並提供具體的程式碼範例。 RabbitMQ概述:
 React Router使用指南:如何實現前端路由控制
Sep 29, 2023 pm 05:45 PM
ReactRouter使用指南:如何實現前端路由控制隨著單頁應用的流行,前端路由成為了一個不可忽視的重要部分。 ReactRouter作為React生態系統中最受歡迎的路由庫,提供了豐富的功能和易用的API,使得前端路由的實作變得非常簡單和靈活。本文將介紹ReactRouter的使用方法,並提供一些具體的程式碼範例。安裝ReactRouter首先,我們需要
 PHP、Vue和React:如何選擇最適合的前端框架?
Mar 15, 2024 pm 05:48 PM
PHP、Vue和React:如何選擇最適合的前端框架?隨著互聯網技術的不斷發展,前端框架在Web開發中起著至關重要的作用。 PHP、Vue和React作為三種代表性的前端框架,每一種都具有其獨特的特徵和優勢。在選擇使用哪種前端框架時,開發人員需要根據專案需求、團隊技能和個人偏好做出明智的決策。本文將透過比較PHP、Vue和React這三種前端框架的特徵和使
 Java框架與前端React框架的整合
Jun 01, 2024 pm 03:16 PM
Java框架與React框架的整合:步驟:設定後端Java框架。建立專案結構。配置建置工具。建立React應用程式。編寫RESTAPI端點。配置通訊機制。實戰案例(SpringBoot+React):Java程式碼:定義RESTfulAPI控制器。 React程式碼:取得並顯示API回傳的資料。
 如何利用React開發一個響應式的後台管理系統
Sep 28, 2023 pm 04:55 PM
如何利用React開發一個響應式的後台管理系統隨著互聯網的快速發展,越來越多的企業和組織需要一個高效、靈活、易於管理的後台管理系統來處理日常的操作事務。 React作為目前最受歡迎的JavaScript庫之一,提供了一種簡潔、高效和可維護的方式來建立使用者介面。本文將介紹如何利用React開發一個響應式的後台管理系統,並給出具體的程式碼範例。建立React專案首先
 vue.js vs.反應:特定於項目的考慮因素
Apr 09, 2025 am 12:01 AM
Vue.js適合中小型項目和快速迭代,React適用於大型複雜應用。 1)Vue.js易於上手,適用於團隊經驗不足或項目規模較小的情況。 2)React的生態系統更豐富,適合有高性能需求和復雜功能需求的項目。
 React在HTML中的作用:增強用戶體驗
Apr 09, 2025 am 12:11 AM
React通過JSX與HTML結合,提升用戶體驗。 1)JSX嵌入HTML,使開發更直觀。 2)虛擬DOM機制優化性能,減少DOM操作。 3)組件化管理UI,提高可維護性。 4)狀態管理和事件處理增強交互性。
 react有哪些閉包
Oct 27, 2023 pm 03:11 PM
react有事件處理函數、useEffect和useCallback、高階元件等等閉包。詳細介紹:1、事件處理函數閉包:在React中,當我們在元件中定義事件處理函數時,函數會形成一個閉包,可以存取元件作用域內的狀態和屬性。這樣可以在事件處理函數中使用元件的狀態和屬性,實現互動邏輯;2、useEffect和useCallback中的閉包等等。


