

介紹Python的抖音快手字符舞


免費學習推薦:python影片教學
先上效果,影片敬上:
字元舞:
程式碼舞
##原始碼:
video_2_code_video.py
import argparseimport osimport cv2import subprocessfrom cv2 import VideoWriter_fourccfrom PIL import Image, ImageFont, ImageDraw# 命令行输入参数处理# aparser = argparse.ArgumentParser()# aparser.add_argument('file')# aparser.add_argument('-o','--output')# aparser.add_argument('-f','--fps',type = float, default = 24)#帧# aparser.add_argument('-s','--save',type = bool, nargs='?', default = False, const = True)# 是否保留Cache文件,默认不保存class Video2CodeVideo:
def __init__(self):
self.config_dict = {
# 原视频文件
"input_file": "video/test.mp4",
# 中间文件存放目录
"cache_dir": "cache",
# 是否保留过程文件。True--保留,False--不保留
"save_cache_flag": False,
# 使用使用的字符集
"ascii_char_list": list("01B%8&WM#*oahkbdpqwmZO0QLCJUYXzcvunxrjft/\|()1{}[]?-_+~<>i!lI;:oa+>!:+. "),
}
# 第一步从函数,将像素转换为字符
# 调用栈:video_2_txt_jpg -> txt_2_image -> rgb_2_char
def rgb_2_char(self, r, g, b, alpha=256):
if alpha == 0:
return ''
length = len(self.config_dict["ascii_char_list"])
gray = int(0.2126 * r + 0.7152 * g + 0.0722 * b)
unit = (256.0 + 1) / length return self.config_dict["ascii_char_list"][int(gray / unit)]
# 第一步从函数,将txt转换为图片
# 调用栈:video_2_txt_jpg -> txt_2_image -> rgb_2_char
def txt_2_image(self, file_name):
im = Image.open(file_name).convert('RGB')
# gif拆分后的图像,需要转换,否则报错,由于gif分割后保存的是索引颜色
raw_width = im.width
raw_height = im.height
width = int(raw_width / 6)
height = int(raw_height / 15)
im = im.resize((width, height), Image.NEAREST)
txt = ""
colors = []
for i in range(height):
for j in range(width):
pixel = im.getpixel((j, i))
colors.append((pixel[0], pixel[1], pixel[2]))
if (len(pixel) == 4):
txt += self.rgb_2_char(pixel[0], pixel[1], pixel[2], pixel[3])
else:
txt += self.rgb_2_char(pixel[0], pixel[1], pixel[2])
txt += '\n'
colors.append((255, 255, 255))
im_txt = Image.new("RGB", (raw_width, raw_height), (255, 255, 255))
dr = ImageDraw.Draw(im_txt)
# font = ImageFont.truetype(os.path.join("fonts","汉仪楷体简.ttf"),18)
font = ImageFont.load_default().font
x = y = 0
# 获取字体的宽高
font_w, font_h = font.getsize(txt[1])
font_h *= 1.37 # 调整后更佳
# ImageDraw为每个ascii码进行上色
for i in range(len(txt)):
if (txt[i] == '\n'):
x += font_h
y = -font_w # self, xy, text, fill = None, font = None, anchor = None,
# *args, ** kwargs
dr.text((y, x), txt[i], fill=colors[i])
# dr.text((y, x), txt[i], font=font, fill=colors[i])
y += font_w
name = file_name # print(name + ' changed')
im_txt.save(name)
# 第一步,将原视频转成字符图片
# 调用栈:video_2_txt_jpg -> txt_2_image -> rgb_2_char
def video_2_txt_jpg(self, file_name):
vc = cv2.VideoCapture(file_name)
c = 1
if vc.isOpened():
r, frame = vc.read()
if not os.path.exists(self.config_dict["cache_dir"]):
os.mkdir(self.config_dict["cache_dir"])
os.chdir(self.config_dict["cache_dir"])
else:
r = False
while r:
cv2.imwrite(str(c) + '.jpg', frame)
self.txt_2_image(str(c) + '.jpg') # 同时转换为ascii图
r, frame = vc.read()
c += 1
os.chdir('..')
return vc # 第二步,将字符图片合成新视频
def txt_jpg_2_video(self, outfile_name, fps):
fourcc = VideoWriter_fourcc(*"MJPG")
images = os.listdir(self.config_dict["cache_dir"])
im = Image.open(self.config_dict["cache_dir"] + '/' + images[0])
vw = cv2.VideoWriter(outfile_name + '.avi', fourcc, fps, im.size)
os.chdir(self.config_dict["cache_dir"])
for image in range(len(images)):
# Image.open(str(image)+'.jpg').convert("RGB").save(str(image)+'.jpg')
frame = cv2.imread(str(image + 1) + '.jpg')
vw.write(frame)
# print(str(image + 1) + '.jpg' + ' finished')
os.chdir('..')
vw.release()
# 第三步,从原视频中提取出背景音乐
def video_extract_mp3(self, file_name):
outfile_name = file_name.split('.')[0] + '.mp3'
subprocess.call('ffmpeg -i ' + file_name + ' -f mp3 -y ' + outfile_name, shell=True)
# 第四步,将背景音乐添加到新视频中
def video_add_mp3(self, file_name, mp3_file):
outfile_name = file_name.split('.')[0] + '-txt.mp4'
subprocess.call('ffmpeg -i ' + file_name + ' -i ' + mp3_file + ' -strict -2 -f mp4 -y ' + outfile_name, shell=True)
# 第五步,如果没配置保留则清除过程文件
def clean_cache_while_need(self):
# 为了清晰+代码比较短,直接写成内部函数
def remove_cache_dir(path):
if os.path.exists(path):
if os.path.isdir(path):
dirs = os.listdir(path)
for d in dirs:
if os.path.isdir(path + '/' + d):
remove_cache_dir(path + '/' + d)
elif os.path.isfile(path + '/' + d):
os.remove(path + '/' + d)
os.rmdir(path)
return
elif os.path.isfile(path):
os.remove(path)
return
# 为了清晰+代码比较短,直接写成内部函数
def delete_middle_media_file():
os.remove(self.config_dict["input_file"].split('.')[0] + '.mp3')
os.remove(self.config_dict["input_file"].split('.')[0] + '.avi')
# 如果没配置保留则清除过程文件
if not self.config_dict["save_cache_flag"]:
remove_cache_dir(self.config_dict["cache_dir"])
delete_middle_media_file()
# 程序主要逻辑
def main_logic(self):
# 第一步,将原视频转成字符图片
vc = self.video_2_txt_jpg(self.config_dict["input_file"])
# 获取原视频帧率
fps = vc.get(cv2.CAP_PROP_FPS)
# print(fps)
vc.release()
# 第二步,将字符图片合成新视频
self.txt_jpg_2_video(self.config_dict["input_file"].split('.')[0], fps)
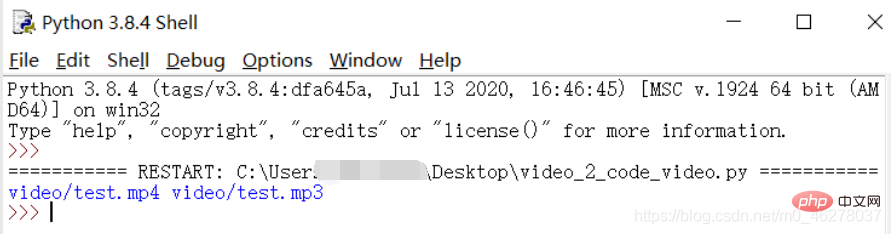
print(self.config_dict["input_file"], self.config_dict["input_file"].split('.')[0] + '.mp3')
# 第三步,从原视频中提取出背景音乐
self.video_extract_mp3(self.config_dict["input_file"])
# 第四步,将背景音乐添加到新视频中
self.video_add_mp3(self.config_dict["input_file"].split('.')[0] + '.avi', self.config_dict["input_file"].split('.')[0] + '.mp3')
# 第五步,如果没配置保留则清除过程文件
self.clean_cache_while_need()if __name__ == '__main__':
obj = Video2CodeVideo()
obj.main_logic()運行環境:
 作業系統:win10 版本:Python 3.8.4
 依賴函式庫:pip install opencv-python pillow
管理員權限安裝,我的已安裝過,顯示這樣: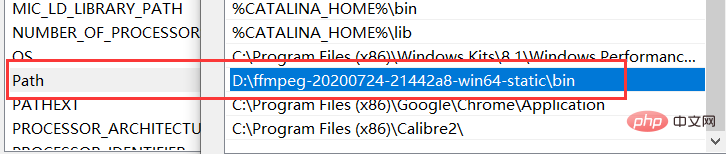
# 依賴應用程式:ffpmeg(下載直接解壓縮、將bin目錄加到PATH環境變數)
 小白式運行(大佬請裝瞎):
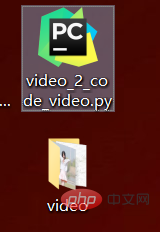
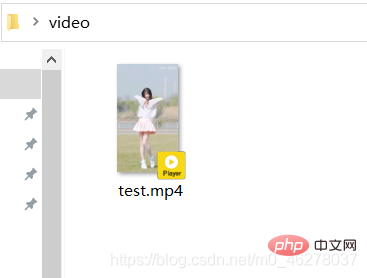 #將上面的源代碼命名video_2_code_video.py,在同一目錄下新建文件夾video:
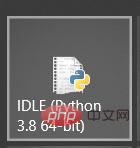 在video中放入要轉換的原始視頻,命名test.mp4:
 ## 開啟Python3.8
運行video_2_code_video.py,如下圖顯示表示正在運行: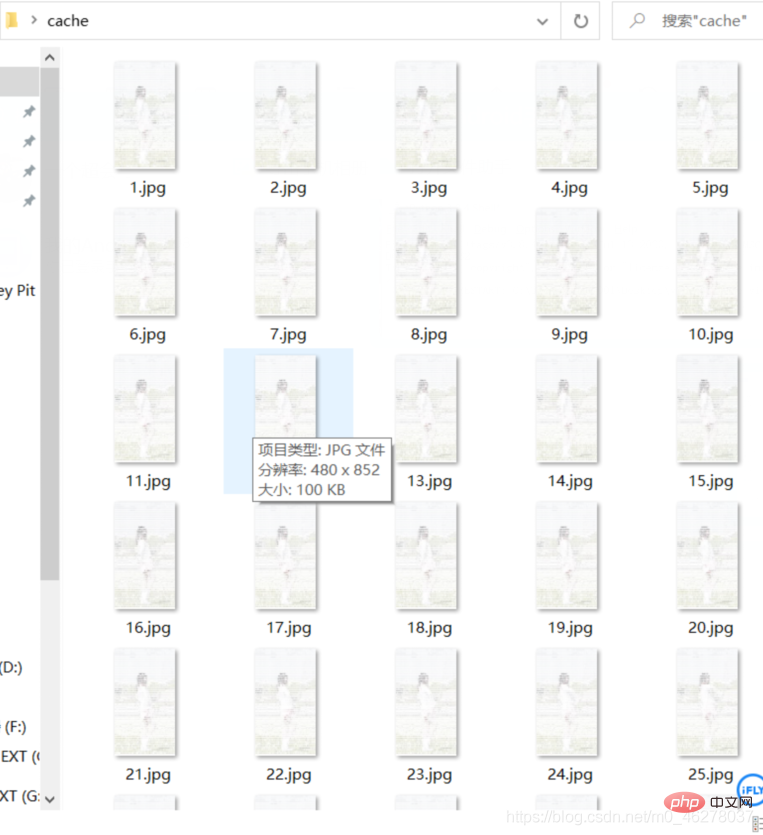
##會產生一些中間文件諸如: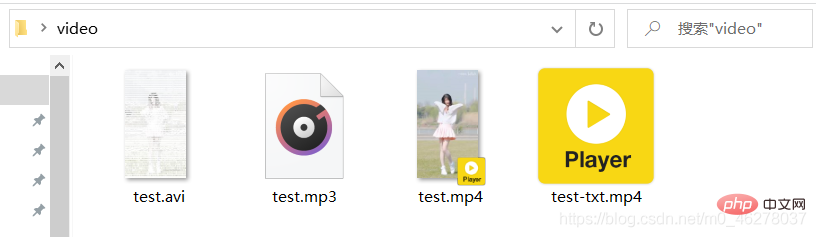
 ## 經過漫長的等待,終於得償所願:
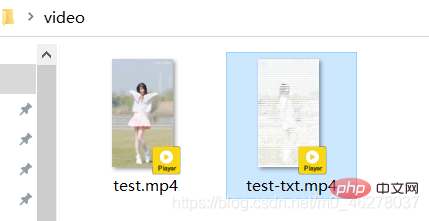 test-txt.mp4就是所要的程式碼舞啦:
#####大量免費學習推薦,敬請訪問python教程
(視頻)
以上是介紹Python的抖音快手字符舞的詳細內容。更多資訊請關注PHP中文網其他相關文章!

熱AI工具

Undresser.AI Undress
人工智慧驅動的應用程序,用於創建逼真的裸體照片

AI Clothes Remover
用於從照片中去除衣服的線上人工智慧工具。

Undress AI Tool
免費脫衣圖片

Clothoff.io
AI脫衣器

Video Face Swap
使用我們完全免費的人工智慧換臉工具,輕鬆在任何影片中換臉!

熱門文章
熱工具

記事本++7.3.1
好用且免費的程式碼編輯器

SublimeText3漢化版
中文版,非常好用

禪工作室 13.0.1
強大的PHP整合開發環境

Dreamweaver CS6
視覺化網頁開發工具

SublimeText3 Mac版
神級程式碼編輯軟體(SublimeText3)


 PHP和Python:解釋了不同的範例
Apr 18, 2025 am 12:26 AM
PHP和Python:解釋了不同的範例
Apr 18, 2025 am 12:26 AM
PHP主要是過程式編程,但也支持面向對象編程(OOP);Python支持多種範式,包括OOP、函數式和過程式編程。 PHP適合web開發,Python適用於多種應用,如數據分析和機器學習。
 在PHP和Python之間進行選擇:指南
Apr 18, 2025 am 12:24 AM
在PHP和Python之間進行選擇:指南
Apr 18, 2025 am 12:24 AM
PHP適合網頁開發和快速原型開發,Python適用於數據科學和機器學習。 1.PHP用於動態網頁開發,語法簡單,適合快速開發。 2.Python語法簡潔,適用於多領域,庫生態系統強大。
 sublime怎麼運行代碼python
Apr 16, 2025 am 08:48 AM
sublime怎麼運行代碼python
Apr 16, 2025 am 08:48 AM
在 Sublime Text 中運行 Python 代碼,需先安裝 Python 插件,再創建 .py 文件並編寫代碼,最後按 Ctrl B 運行代碼,輸出會在控制台中顯示。
 PHP和Python:深入了解他們的歷史
Apr 18, 2025 am 12:25 AM
PHP和Python:深入了解他們的歷史
Apr 18, 2025 am 12:25 AM
PHP起源於1994年,由RasmusLerdorf開發,最初用於跟踪網站訪問者,逐漸演變為服務器端腳本語言,廣泛應用於網頁開發。 Python由GuidovanRossum於1980年代末開發,1991年首次發布,強調代碼可讀性和簡潔性,適用於科學計算、數據分析等領域。
 Python vs. JavaScript:學習曲線和易用性
Apr 16, 2025 am 12:12 AM
Python vs. JavaScript:學習曲線和易用性
Apr 16, 2025 am 12:12 AM
Python更適合初學者,學習曲線平緩,語法簡潔;JavaScript適合前端開發,學習曲線較陡,語法靈活。 1.Python語法直觀,適用於數據科學和後端開發。 2.JavaScript靈活,廣泛用於前端和服務器端編程。
 Golang vs. Python:性能和可伸縮性
Apr 19, 2025 am 12:18 AM
Golang vs. Python:性能和可伸縮性
Apr 19, 2025 am 12:18 AM
Golang在性能和可擴展性方面優於Python。 1)Golang的編譯型特性和高效並發模型使其在高並發場景下表現出色。 2)Python作為解釋型語言,執行速度較慢,但通過工具如Cython可優化性能。
 vscode在哪寫代碼
Apr 15, 2025 pm 09:54 PM
vscode在哪寫代碼
Apr 15, 2025 pm 09:54 PM
在 Visual Studio Code(VSCode)中編寫代碼簡單易行,只需安裝 VSCode、創建項目、選擇語言、創建文件、編寫代碼、保存並運行即可。 VSCode 的優點包括跨平台、免費開源、強大功能、擴展豐富,以及輕量快速。
 notepad 怎麼運行python
Apr 16, 2025 pm 07:33 PM
notepad 怎麼運行python
Apr 16, 2025 pm 07:33 PM
在 Notepad 中運行 Python 代碼需要安裝 Python 可執行文件和 NppExec 插件。安裝 Python 並為其添加 PATH 後,在 NppExec 插件中配置命令為“python”、參數為“{CURRENT_DIRECTORY}{FILE_NAME}”,即可在 Notepad 中通過快捷鍵“F6”運行 Python 代碼。
