

Python의 Douyin Kuaishou 캐릭터 댄스를 소개합니다


추천 무료 학습: python 비디오 튜토리얼
먼저 효과, 비디오는 다음과 같습니다:
캐릭터 댄스:
코드 댄스
소스 코드 :
video_2_code_video .py
import argparseimport osimport cv2import subprocessfrom cv2 import VideoWriter_fourccfrom PIL import Image, ImageFont, ImageDraw# 命令行输入参数处理# aparser = argparse.ArgumentParser()# aparser.add_argument('file')# aparser.add_argument('-o','--output')# aparser.add_argument('-f','--fps',type = float, default = 24)#帧# aparser.add_argument('-s','--save',type = bool, nargs='?', default = False, const = True)# 是否保留Cache文件,默认不保存class Video2CodeVideo:
def __init__(self):
self.config_dict = {
# 原视频文件
"input_file": "video/test.mp4",
# 中间文件存放目录
"cache_dir": "cache",
# 是否保留过程文件。True--保留,False--不保留
"save_cache_flag": False,
# 使用使用的字符集
"ascii_char_list": list("01B%8&WM#*oahkbdpqwmZO0QLCJUYXzcvunxrjft/\|()1{}[]?-_+~<>i!lI;:oa+>!:+. "),
}
# 第一步从函数,将像素转换为字符
# 调用栈:video_2_txt_jpg -> txt_2_image -> rgb_2_char
def rgb_2_char(self, r, g, b, alpha=256):
if alpha == 0:
return ''
length = len(self.config_dict["ascii_char_list"])
gray = int(0.2126 * r + 0.7152 * g + 0.0722 * b)
unit = (256.0 + 1) / length return self.config_dict["ascii_char_list"][int(gray / unit)]
# 第一步从函数,将txt转换为图片
# 调用栈:video_2_txt_jpg -> txt_2_image -> rgb_2_char
def txt_2_image(self, file_name):
im = Image.open(file_name).convert('RGB')
# gif拆分后的图像,需要转换,否则报错,由于gif分割后保存的是索引颜色
raw_width = im.width
raw_height = im.height
width = int(raw_width / 6)
height = int(raw_height / 15)
im = im.resize((width, height), Image.NEAREST)
txt = ""
colors = []
for i in range(height):
for j in range(width):
pixel = im.getpixel((j, i))
colors.append((pixel[0], pixel[1], pixel[2]))
if (len(pixel) == 4):
txt += self.rgb_2_char(pixel[0], pixel[1], pixel[2], pixel[3])
else:
txt += self.rgb_2_char(pixel[0], pixel[1], pixel[2])
txt += '\n'
colors.append((255, 255, 255))
im_txt = Image.new("RGB", (raw_width, raw_height), (255, 255, 255))
dr = ImageDraw.Draw(im_txt)
# font = ImageFont.truetype(os.path.join("fonts","汉仪楷体简.ttf"),18)
font = ImageFont.load_default().font
x = y = 0
# 获取字体的宽高
font_w, font_h = font.getsize(txt[1])
font_h *= 1.37 # 调整后更佳
# ImageDraw为每个ascii码进行上色
for i in range(len(txt)):
if (txt[i] == '\n'):
x += font_h
y = -font_w # self, xy, text, fill = None, font = None, anchor = None,
# *args, ** kwargs
dr.text((y, x), txt[i], fill=colors[i])
# dr.text((y, x), txt[i], font=font, fill=colors[i])
y += font_w
name = file_name # print(name + ' changed')
im_txt.save(name)
# 第一步,将原视频转成字符图片
# 调用栈:video_2_txt_jpg -> txt_2_image -> rgb_2_char
def video_2_txt_jpg(self, file_name):
vc = cv2.VideoCapture(file_name)
c = 1
if vc.isOpened():
r, frame = vc.read()
if not os.path.exists(self.config_dict["cache_dir"]):
os.mkdir(self.config_dict["cache_dir"])
os.chdir(self.config_dict["cache_dir"])
else:
r = False
while r:
cv2.imwrite(str(c) + '.jpg', frame)
self.txt_2_image(str(c) + '.jpg') # 同时转换为ascii图
r, frame = vc.read()
c += 1
os.chdir('..')
return vc # 第二步,将字符图片合成新视频
def txt_jpg_2_video(self, outfile_name, fps):
fourcc = VideoWriter_fourcc(*"MJPG")
images = os.listdir(self.config_dict["cache_dir"])
im = Image.open(self.config_dict["cache_dir"] + '/' + images[0])
vw = cv2.VideoWriter(outfile_name + '.avi', fourcc, fps, im.size)
os.chdir(self.config_dict["cache_dir"])
for image in range(len(images)):
# Image.open(str(image)+'.jpg').convert("RGB").save(str(image)+'.jpg')
frame = cv2.imread(str(image + 1) + '.jpg')
vw.write(frame)
# print(str(image + 1) + '.jpg' + ' finished')
os.chdir('..')
vw.release()
# 第三步,从原视频中提取出背景音乐
def video_extract_mp3(self, file_name):
outfile_name = file_name.split('.')[0] + '.mp3'
subprocess.call('ffmpeg -i ' + file_name + ' -f mp3 -y ' + outfile_name, shell=True)
# 第四步,将背景音乐添加到新视频中
def video_add_mp3(self, file_name, mp3_file):
outfile_name = file_name.split('.')[0] + '-txt.mp4'
subprocess.call('ffmpeg -i ' + file_name + ' -i ' + mp3_file + ' -strict -2 -f mp4 -y ' + outfile_name, shell=True)
# 第五步,如果没配置保留则清除过程文件
def clean_cache_while_need(self):
# 为了清晰+代码比较短,直接写成内部函数
def remove_cache_dir(path):
if os.path.exists(path):
if os.path.isdir(path):
dirs = os.listdir(path)
for d in dirs:
if os.path.isdir(path + '/' + d):
remove_cache_dir(path + '/' + d)
elif os.path.isfile(path + '/' + d):
os.remove(path + '/' + d)
os.rmdir(path)
return
elif os.path.isfile(path):
os.remove(path)
return
# 为了清晰+代码比较短,直接写成内部函数
def delete_middle_media_file():
os.remove(self.config_dict["input_file"].split('.')[0] + '.mp3')
os.remove(self.config_dict["input_file"].split('.')[0] + '.avi')
# 如果没配置保留则清除过程文件
if not self.config_dict["save_cache_flag"]:
remove_cache_dir(self.config_dict["cache_dir"])
delete_middle_media_file()
# 程序主要逻辑
def main_logic(self):
# 第一步,将原视频转成字符图片
vc = self.video_2_txt_jpg(self.config_dict["input_file"])
# 获取原视频帧率
fps = vc.get(cv2.CAP_PROP_FPS)
# print(fps)
vc.release()
# 第二步,将字符图片合成新视频
self.txt_jpg_2_video(self.config_dict["input_file"].split('.')[0], fps)
print(self.config_dict["input_file"], self.config_dict["input_file"].split('.')[0] + '.mp3')
# 第三步,从原视频中提取出背景音乐
self.video_extract_mp3(self.config_dict["input_file"])
# 第四步,将背景音乐添加到新视频中
self.video_add_mp3(self.config_dict["input_file"].split('.')[0] + '.avi', self.config_dict["input_file"].split('.')[0] + '.mp3')
# 第五步,如果没配置保留则清除过程文件
self.clean_cache_while_need()if __name__ == '__main__':
obj = Video2CodeVideo()
obj.main_logic()운영 환경:
운영 체제: win10
버전: Python 3.8.4
종속 라이브러리: pip install opencv-python Pillow
관리자 권한으로 설치했는데 내 것이 설치되었으며 다음과 같이 표시됩니다.

종속 애플리케이션: ffpmeg(직접 다운로드 및 압축 풀기, bin 디렉터리를 PATH 환경 변수에 추가) 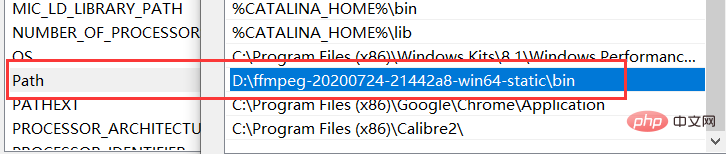
초보자처럼 실행하세요(큰 분들은 장님인 척하세요):
위의 이름을 지정하세요 소스 코드 video_2_code_video.py, 같은 디렉터리에 새 폴더 video 만들기: 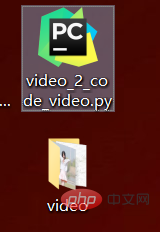
변환할 원본 비디오를 video에 넣고 이름을 test.mp4로 지정합니다. 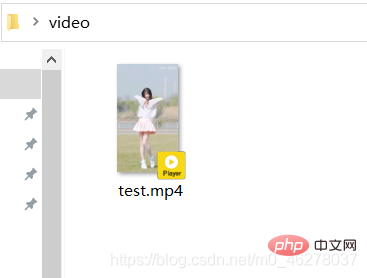
Python3.8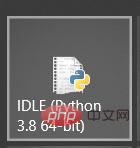
을 열고 video_2_code_video.py를 실행합니다. , 아래와 같이 실행 중입니다. 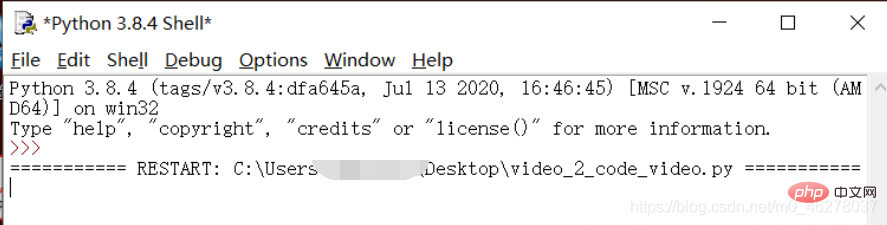
는 다음과 같은 중간 파일을 생성합니다. 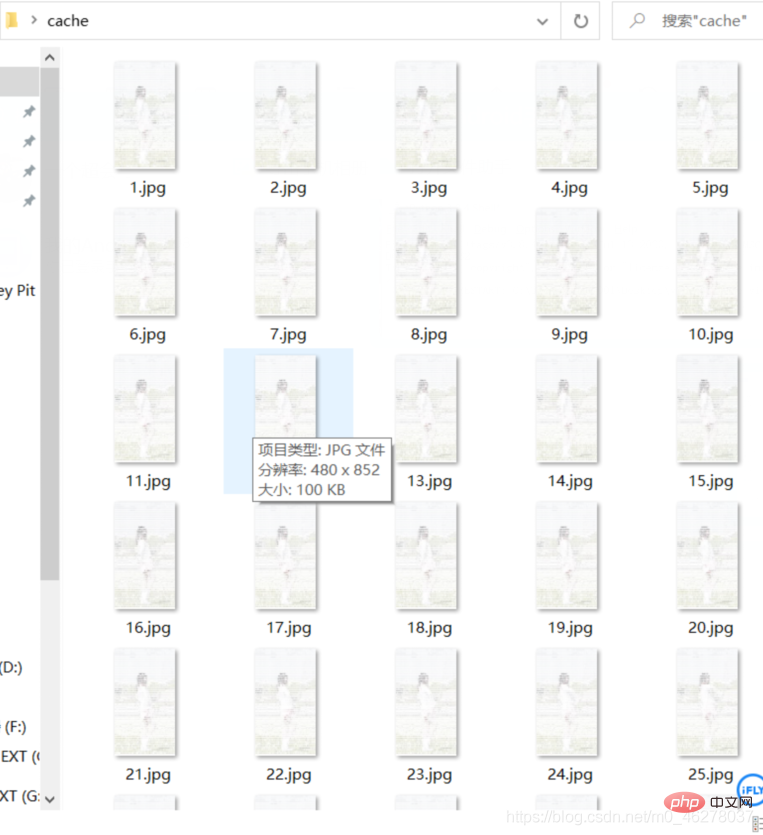
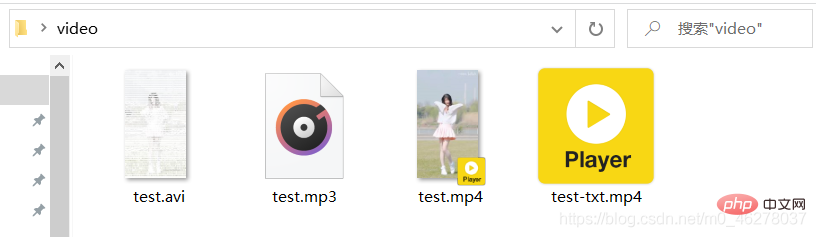
오랜 기다림 끝에 마침내 원하는 것을 얻었습니다. 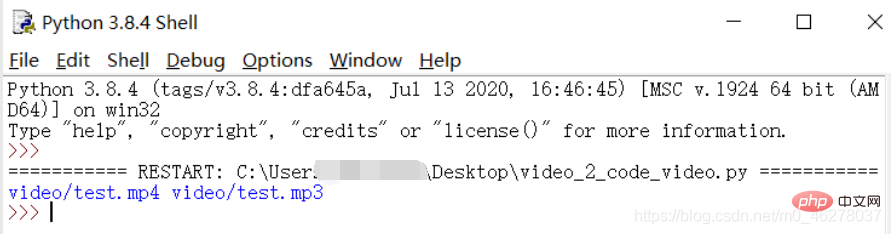
test-txt.mp4는 코드 댄스입니다. 원하는 것: 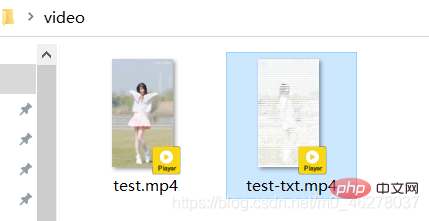
을 방문하세요.많은 무료 학습 추천, python tutorial(동영상)
위 내용은 Python의 Douyin Kuaishou 캐릭터 댄스를 소개합니다의 상세 내용입니다. 자세한 내용은 PHP 중국어 웹사이트의 기타 관련 기사를 참조하세요!

핫 AI 도구

Undresser.AI Undress
사실적인 누드 사진을 만들기 위한 AI 기반 앱

AI Clothes Remover
사진에서 옷을 제거하는 온라인 AI 도구입니다.

Undress AI Tool
무료로 이미지를 벗다

Clothoff.io
AI 옷 제거제

Video Face Swap
완전히 무료인 AI 얼굴 교환 도구를 사용하여 모든 비디오의 얼굴을 쉽게 바꾸세요!

인기 기사
뜨거운 도구

메모장++7.3.1
사용하기 쉬운 무료 코드 편집기

SublimeText3 중국어 버전
중국어 버전, 사용하기 매우 쉽습니다.

스튜디오 13.0.1 보내기
강력한 PHP 통합 개발 환경

드림위버 CS6
시각적 웹 개발 도구

SublimeText3 Mac 버전
신 수준의 코드 편집 소프트웨어(SublimeText3)


 PHP와 Python : 다른 패러다임이 설명되었습니다
Apr 18, 2025 am 12:26 AM
PHP와 Python : 다른 패러다임이 설명되었습니다
Apr 18, 2025 am 12:26 AM
PHP는 주로 절차 적 프로그래밍이지만 객체 지향 프로그래밍 (OOP)도 지원합니다. Python은 OOP, 기능 및 절차 프로그래밍을 포함한 다양한 패러다임을 지원합니다. PHP는 웹 개발에 적합하며 Python은 데이터 분석 및 기계 학습과 같은 다양한 응용 프로그램에 적합합니다.
 PHP와 Python 중에서 선택 : 가이드
Apr 18, 2025 am 12:24 AM
PHP와 Python 중에서 선택 : 가이드
Apr 18, 2025 am 12:24 AM
PHP는 웹 개발 및 빠른 프로토 타이핑에 적합하며 Python은 데이터 과학 및 기계 학습에 적합합니다. 1.PHP는 간단한 구문과 함께 동적 웹 개발에 사용되며 빠른 개발에 적합합니다. 2. Python은 간결한 구문을 가지고 있으며 여러 분야에 적합하며 강력한 라이브러리 생태계가 있습니다.
 숭고한 코드 파이썬을 실행하는 방법
Apr 16, 2025 am 08:48 AM
숭고한 코드 파이썬을 실행하는 방법
Apr 16, 2025 am 08:48 AM
Sublime 텍스트로 Python 코드를 실행하려면 먼저 Python 플러그인을 설치 한 다음 .py 파일을 작성하고 코드를 작성한 다음 CTRL B를 눌러 코드를 실행하면 콘솔에 출력이 표시됩니다.
 PHP와 Python : 그들의 역사에 깊은 다이빙
Apr 18, 2025 am 12:25 AM
PHP와 Python : 그들의 역사에 깊은 다이빙
Apr 18, 2025 am 12:25 AM
PHP는 1994 년에 시작되었으며 Rasmuslerdorf에 의해 개발되었습니다. 원래 웹 사이트 방문자를 추적하는 데 사용되었으며 점차 서버 측 스크립팅 언어로 진화했으며 웹 개발에 널리 사용되었습니다. Python은 1980 년대 후반 Guidovan Rossum에 의해 개발되었으며 1991 년에 처음 출시되었습니다. 코드 가독성과 단순성을 강조하며 과학 컴퓨팅, 데이터 분석 및 기타 분야에 적합합니다.
 Python vs. JavaScript : 학습 곡선 및 사용 편의성
Apr 16, 2025 am 12:12 AM
Python vs. JavaScript : 학습 곡선 및 사용 편의성
Apr 16, 2025 am 12:12 AM
Python은 부드러운 학습 곡선과 간결한 구문으로 초보자에게 더 적합합니다. JavaScript는 가파른 학습 곡선과 유연한 구문으로 프론트 엔드 개발에 적합합니다. 1. Python Syntax는 직관적이며 데이터 과학 및 백엔드 개발에 적합합니다. 2. JavaScript는 유연하며 프론트 엔드 및 서버 측 프로그래밍에서 널리 사용됩니다.
 Golang vs. Python : 성능 및 확장 성
Apr 19, 2025 am 12:18 AM
Golang vs. Python : 성능 및 확장 성
Apr 19, 2025 am 12:18 AM
Golang은 성능과 확장 성 측면에서 Python보다 낫습니다. 1) Golang의 컴파일 유형 특성과 효율적인 동시성 모델은 높은 동시성 시나리오에서 잘 수행합니다. 2) 해석 된 언어로서 파이썬은 천천히 실행되지만 Cython과 같은 도구를 통해 성능을 최적화 할 수 있습니다.
 vscode에서 코드를 작성하는 위치
Apr 15, 2025 pm 09:54 PM
vscode에서 코드를 작성하는 위치
Apr 15, 2025 pm 09:54 PM
Visual Studio Code (VSCODE)에서 코드를 작성하는 것은 간단하고 사용하기 쉽습니다. vscode를 설치하고, 프로젝트를 만들고, 언어를 선택하고, 파일을 만들고, 코드를 작성하고, 저장하고 실행합니다. VSCODE의 장점에는 크로스 플랫폼, 무료 및 오픈 소스, 강력한 기능, 풍부한 확장 및 경량 및 빠른가 포함됩니다.
 메모장으로 파이썬을 실행하는 방법
Apr 16, 2025 pm 07:33 PM
메모장으로 파이썬을 실행하는 방법
Apr 16, 2025 pm 07:33 PM
메모장에서 Python 코드를 실행하려면 Python 실행 파일 및 NPPEXEC 플러그인을 설치해야합니다. Python을 설치하고 경로를 추가 한 후 nppexec 플러그인의 명령 "Python"및 매개 변수 "{current_directory} {file_name}"을 구성하여 Notepad의 단축키 "F6"을 통해 Python 코드를 실행하십시오.
