

일정을 잡는 방법 전망을 보내십시오

Wouldn't it be convenient if you could compose an email now and have it sent at a later, more opportune time? With Outlook's scheduling feature, you can do just that!
Imagine that you are working late at night, inspired by a brilliant idea, and you write the perfect email. But hold on, it's already past midnight, and sending it now might get lost in the morning rush. What if you could make sure the message lands in the recipient's inbox exactly when they are most receptive? This is the power of scheduled email sending - a feature that lets you craft messages at your convenience while ensuring they deliver at just the right moment. With this capability, you are not just sending emails; you're arranging a communication strategy, enhancing every message for optimal effect.
Note. This article targets the new Outlook for Windows and Outlook 365 online. If you use classic Outlook, please refer to How to delay delivery and schedule sending in Outlook.
How to schedule send in Outlook
To automatically send an email at a certain time in the new Outlook and on the web, follow these simple steps:
- Compose email. Begin by crafting your message as you normally would. Address it to the desired recipients, write the subject line, and compose your message.
-
Schedule email. Once your email is ready, open the dropdown next to the Send button and choose Schedule send.

-
Choose sending date and time. In the dropdown menu, you'll find a couple of predefined options. Select one that suits your needs, and then click Send.
Alternatively, choose Custom time and select the desired date and time from the calendar.


That's it! Your email is now scheduled to be sent at the specified date and time, allowing you to plan ahead and ensure your message reaches the recipients at the most appropriate moment.
Where do scheduled emails go in Outlook?
Scheduled emails are stored in the Drafts folder within the new Outlook app. They remain in this folder until the scheduled sending time arrives. You'll find the scheduled date and time displayed at the top of the message:

This gives you the chance to review and make any final changes before the message goes out. You can also reschedule the email for another time directly from the Drafts folder.
How to re-schedule or send email immediately
If you find yourself needing to adjust the timing of a scheduled message or send it right away, follow these steps:
- Navigate to the Draft folder in Outlook.
- Locate the scheduled message you wish to modify and either select or open it.
- Click the Edit pencil icon in the upper-right corner.
- Depending on your preference, select either:
- Modify Email to reschedule or change the message content.
- Send Now to send the message immediately.
With these straightforward options, you can easily manage the timing of your emails to make certain they're sent at the most suitable moments, whether it's immediately or rescheduled for a later time.

Viva Insights schedule send in Outlook
When you're working late at night or early in the morning, you might notice schedule send suggestions popping up at the top of your messages, provided you have the Viva Insights add-in added to your Outlook.
These prompts typically show up when:
- You're working outside your regular hours.
- Everyone in the To field is outside their working hours.
- You are sending an email to one person who has an out-of-office auto reply set up in Outlook.

How to schedule sending email with Viva Insights
Here's how to schedule sending your email using these suggestions:
- Click the Schedule send link.
- In the Viva Insights pane that appears on the right, confirm the date and time for your message to be sent:
- If the suggested date and time work for you, hit Send within the email.
- To tweak the timing, adjust the date and time settings in the corresponding boxes, then click Send.
- To send the message immediately without any delay, click Cancel scheduled prompt, and then hit the Send button in the email as usual.

Once you click the Send button, your scheduled message will head to the Drafts folder in the new Outlook and on the web. In Outlook for Windows, it's routed to the Sent items folder.
How to turn Viva schedule send suggestions on and off
Now, if you're wondering how to toggle this handy feature on or off, the steps are:
- While composing a message in Outlook, click the Viva Insights button on the Message tab.
- In the Viva pane that opens, select Settings.
- Under Schedule send suggestions, toggle the switch as per your preference.

Advantages of Viva schedule send
Viva schedule send doesn't require Outlook to be open – your emails will be sent as planned even if Outlook is closed, your computer is offline or turned off.
Limitations of Viva schedule send
- Doesn't pop up during your regular working hours.
- Won't show if there are more than 15 recipients in the To field.
- Doesn't appear when you're emailing yourself.
Will a scheduled email send if Outlook is closed?
Yes. Even if you close Outlook, a scheduled email will still be sent at the designated time. This sets the Schedule send feature in the new Outlook apart from the delay delivery feature in classic Outlook, which only operates when Outlook is open.
Can I schedule or delay delivery of all emails in new Outlook?
Unfortunately, scheduling or delaying delivery for all messages isn't an option in the new Outlook. Unlike classic Outlook, where you can set rules to delay delivery of all emails by a specified number of minutes or schedule automatic send/receive intervals, these features aren't available in the new version. However, there's a workaround to mitigate hasty sends - maximizing the Undo send interval. While it's not the same as delayed delivery, it does provide a brief window for last-minute corrections before your message goes out.
So, that's how you schedule messages in the new Outlook and web app. With this handy feature, you can write emails whenever you want and send them later, at the perfect time for your recipient. Take control of when your messages fly out of your inbox!
위 내용은 일정을 잡는 방법 전망을 보내십시오의 상세 내용입니다. 자세한 내용은 PHP 중국어 웹사이트의 기타 관련 기사를 참조하세요!

핫 AI 도구

Undresser.AI Undress
사실적인 누드 사진을 만들기 위한 AI 기반 앱

AI Clothes Remover
사진에서 옷을 제거하는 온라인 AI 도구입니다.

Undress AI Tool
무료로 이미지를 벗다

Clothoff.io
AI 옷 제거제

Video Face Swap
완전히 무료인 AI 얼굴 교환 도구를 사용하여 모든 비디오의 얼굴을 쉽게 바꾸세요!

인기 기사
뜨거운 도구

메모장++7.3.1
사용하기 쉬운 무료 코드 편집기

SublimeText3 중국어 버전
중국어 버전, 사용하기 매우 쉽습니다.

스튜디오 13.0.1 보내기
강력한 PHP 통합 개발 환경

드림위버 CS6
시각적 웹 개발 도구

SublimeText3 Mac 버전
신 수준의 코드 편집 소프트웨어(SublimeText3)


 플래시 채우기를 사용하는 방법 예제와 함께 Excel
Apr 05, 2025 am 09:15 AM
플래시 채우기를 사용하는 방법 예제와 함께 Excel
Apr 05, 2025 am 09:15 AM
이 튜토리얼은 데이터 입력 작업을 자동화하기위한 강력한 도구 인 Excel의 Flash Clone 기능에 대한 포괄적 인 안내서를 제공합니다. 정의 및 위치에서 고급 사용 및 문제 해결에 이르기까지 다양한 측면을 다룹니다. Excel의 FLA 이해
 Excel의 중간 공식 - 실제 예
Apr 11, 2025 pm 12:08 PM
Excel의 중간 공식 - 실제 예
Apr 11, 2025 pm 12:08 PM
이 튜토리얼은 중간 기능을 사용하여 Excel에서 수치 데이터의 중앙값을 계산하는 방법을 설명합니다. 중앙 경향의 주요 척도 인 중앙값은 데이터 세트의 중간 값을 식별하여 Central Tenden의보다 강력한 표현을 제공합니다.
 Excel 공유 통합 문서 : 여러 사용자를위한 Excel 파일을 공유하는 방법
Apr 11, 2025 am 11:58 AM
Excel 공유 통합 문서 : 여러 사용자를위한 Excel 파일을 공유하는 방법
Apr 11, 2025 am 11:58 AM
이 튜토리얼은 다양한 방법, 액세스 제어 및 갈등 해결을 다루는 Excel 통합 문서 공유에 대한 포괄적 인 안내서를 제공합니다. Modern Excel 버전 (2010, 2013, 2016 및 이후) 협업 편집을 단순화하여 M에 대한 필요성을 제거합니다.
 Excel을 철자하는 방법
Apr 06, 2025 am 09:10 AM
Excel을 철자하는 방법
Apr 06, 2025 am 09:10 AM
이 튜토리얼은 Excel의 맞춤법 검사를위한 다양한 방법과 같은 수동 점검, VBA 매크로 및 특수 도구를 사용합니다. 셀, 범위, 워크 시트 및 전체 통합 문서의 철자 확인을 배우십시오. Excel은 워드 프로세서는 아니지만 Spel
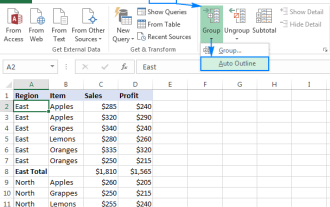 Excel : 그룹 행 자동 또는 수동으로 행을 붕괴하고 확장합니다.
Apr 08, 2025 am 11:17 AM
Excel : 그룹 행 자동 또는 수동으로 행을 붕괴하고 확장합니다.
Apr 08, 2025 am 11:17 AM
이 튜토리얼은 행을 그룹화하여 복잡한 Excel 스프레드 시트를 간소화하여 데이터를보다 쉽게 분석 할 수 있도록하는 방법을 보여줍니다. 행 그룹을 신속하게 숨기거나 보여주고 전체 개요를 특정 수준으로 붕괴시키는 법을 배우십시오. 크고 상세한 스프레드 시트가 될 수 있습니다
 Excel의 절대 값 : 공식 예제와 함께 ABS 기능
Apr 06, 2025 am 09:12 AM
Excel의 절대 값 : 공식 예제와 함께 ABS 기능
Apr 06, 2025 am 09:12 AM
이 튜토리얼은 절대 값의 개념을 설명하고 데이터 세트 내에서 절대 값을 계산하기위한 ABS 기능의 실질적인 Excel 응용 프로그램을 보여줍니다. 숫자는 긍정적이거나 부정적 일 수 있지만 때로는 양수 값 만 필요합니다.
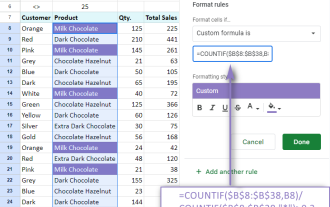 Google 스프레드 시트 Countif 기능은 공식 예제와 함께합니다
Apr 11, 2025 pm 12:03 PM
Google 스프레드 시트 Countif 기능은 공식 예제와 함께합니다
Apr 11, 2025 pm 12:03 PM
마스터 Google Sheets Countif : 포괄적 인 가이드 이 안내서는 Google 시트의 다목적 카운티프 기능을 탐색하여 간단한 셀 카운팅 이외의 응용 프로그램을 보여줍니다. 우리는 정확하고 부분적인 경기에서 Han에 이르기까지 다양한 시나리오를 다룰 것입니다.
 Excel을 JPG로 변환하는 방법 - 이미지 파일로 .xls 또는 .xlsx를 저장
Apr 11, 2025 am 11:31 AM
Excel을 JPG로 변환하는 방법 - 이미지 파일로 .xls 또는 .xlsx를 저장
Apr 11, 2025 am 11:31 AM
이 자습서는 .xls 파일을 .jpg 이미지로 변환하는 다양한 방법을 탐색하여 내장 된 Windows 도구와 무료 온라인 변환기를 모두 포함합니다. 프레젠테이션을 만들거나 스프레드 시트 데이터를 단단히 공유하거나 문서를 디자인해야합니까? YO를 변환합니다
