

Outlook에서 연락처를 인쇄하는 방법

This article will guide you through the process of printing Outlook contacts, whether it's an entire address book or a specific record.
Microsoft Outlook offers great convenience in organizing contacts digitally, but sometimes you might need a paper copy. Printing your Outlook contacts can be helpful for various reasons, whether it's for a quick reference during your meeting or a backup for those just-in-case moments. Let's walk through the simple steps to transform your virtual network into a neatly organized tangible list.
Note. This guide shows how to print contacts in classic (old) Outlook.
How to print a list of contacts in Outlook
The Address book in Outlook is a "virtual folder" displaying information from your contact folders. However, the address book itself does not have a printing option. To get your contacts on paper, you need to go directly to the address source, and then use the print option available. Here are the detailed instructions:
- Access your Outlook contacts. In the Navigation pane on the left side of the Outlook window, click the People icon to open your Contacts view.
- Select the target folder. In the folder pane, select the folder containing the contacts you wish to print.
-
Choose the view. On the Home tab, in the Current View group, select the view that suits your needs. The view you choose will determine the available printing styles. For a card, booklet, or phone directory style, select the People, Business Card, or Card view. For a table or memo style, choose the List view.

-
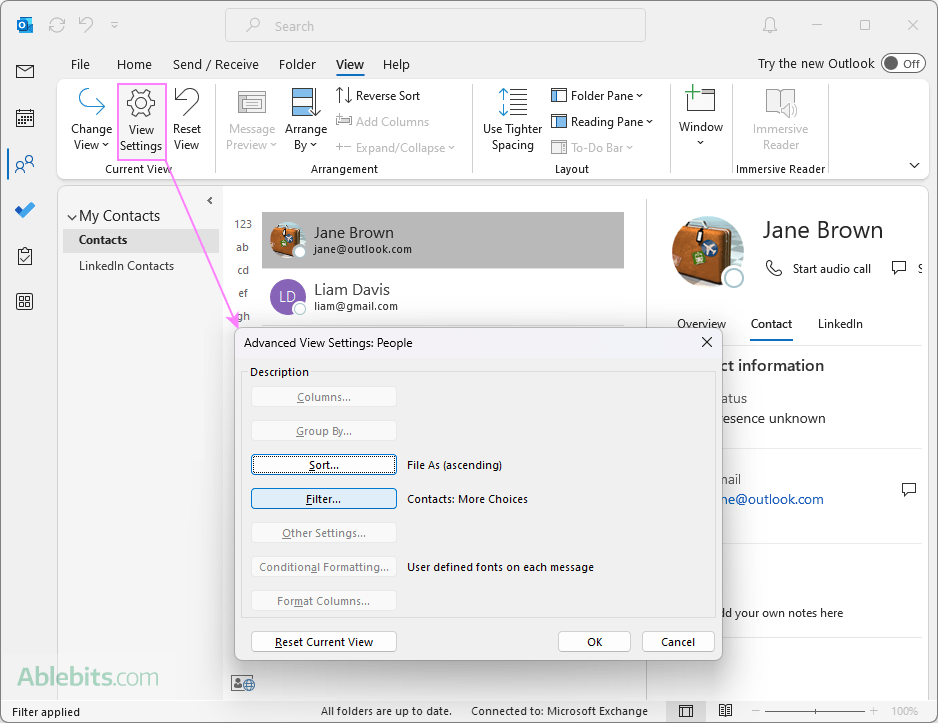
Filter the contacts. If you only want to print a subset of your contacts, you can apply a filter. For this, go to the View tab, click View Settings, and set your criteria, such as company or category. If you're aiming to print all contacts in a folder, you can skip this step.
- Access the print menu. Go to the File tab > Print or press Ctrl + P to open the Print menu.
-
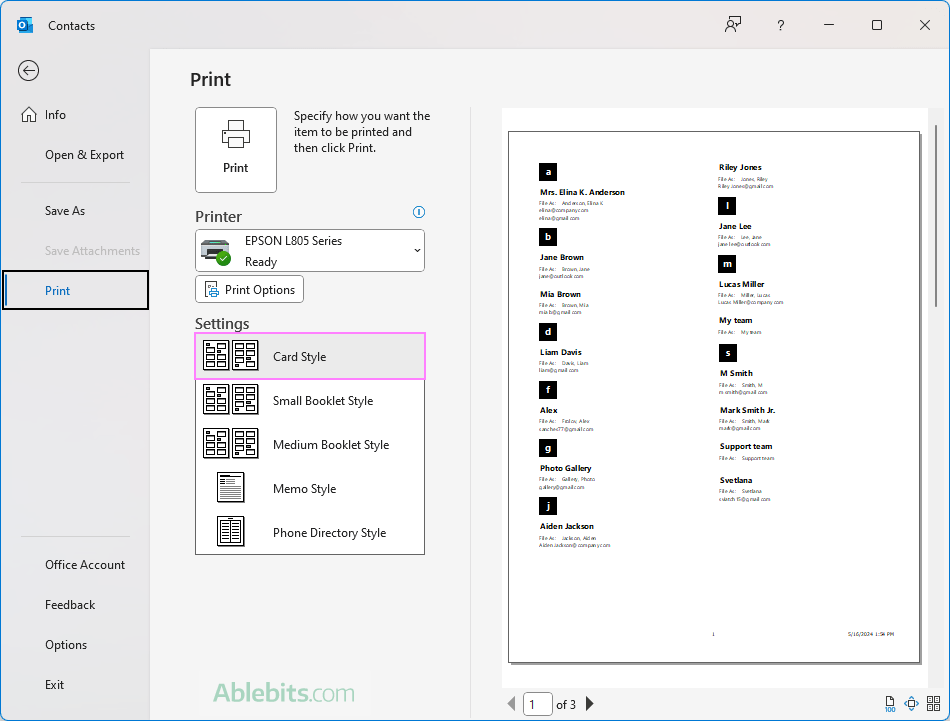
Choose the print style. Under Settings, choose the desired style. A preview of the printout will appear on the right. If you're happy with the format and want to print all pages, click Print. If not, proceed to the next step.
-
Customize the print settings. To fine-tune your settings, click the Print Options button. In the dialog box that appears, you can choose which pages to print, the number of copies, and other preferences. For further customization, click:
- Page Setup to choose fonts, formats, paper size, or to add a header and/or footer.
- Define Styles to modify a specific style or to create your custom style.
After adjusting the settings to your liking, click Preview to see how your changes will look on the final printout.
-
Print. Once you're completely satisfied with the preview, hit the Print button to initiate the printing process.


With these steps, you'll have a printed list of contacts from your Outlook address book, organized just the way you need them.
Note. These instructions are applicable to the classic desktop Outlook app for Windows. Unfortunately, in the new Outlook and Outlook on the web there is currently no option to print contacts.
How to print an individual Outlook contact
Printing a certain contact from Outlook is a simple task that can be done in just a few steps:
- In your Outlook contact folder, locate the specific contact you want to print.
- Double-click on the contact's name to open its card.
- With the contact card open, click File > Print or use the Ctrl + P shortcut.
- In the Print menu that appears, you can select the printer and tailor the settings to fit your needs. For a single contact, Outlook only provides the Memo style as the default print format. To customize the formatting, click the Print Options button.
- Preview the contact to make sure that all the necessary details are included and formatted to your preference.
- Finally, click the Print button to send the contact to the printer.


By following these steps you can quickly get a hard copy of the contact details whenever required for your meetings, networking events, or as a personal backup.
Print Outlook contacts to PDF
Printing Outlook contacts to a PDF file can be a convenient way to save and share your contact information. Here's a step-by-step guide to help you do just that:
- Select the contact folder you want to include in the PDF file. If you're looking to convert a specific contact to PDF, double-click on it to open its card.
- Click File > Print or use the Ctrl + P shortcut to get to the print menu.
- Choose Microsoft Print to PDF as your printer.
- Select your preferred style.
- To adjust additional settings like which pages to include or add a header/footer, click the Print Options button.
- Click the Print button.
- In the Save Print Output As dialog box, choose a location for your PDF and name it.
- Click Save, and your contacts will be immediately saved as a PDF in the folder you selected.


Saving to PDF lets you promptly get a digital copy of your Outlook contacts in a widely compatible format, which can be easily shared or archived.
Note. This process is applicable to the classic desktop Outlook app on Windows 10 and Windows 11. The new Outlook app and Outlook on the web currently do not offer an option to print contacts.
Outlook contacts print styles
When it comes to organizing and sharing contact information, Outlook offers a variety of styles to suit different needs and preferences. Each style offers a unique layout and presentation of your contact information. Here's an overview of the print styles available for Outlook contacts:
Card Style
This style closely resembles how contacts appear in Outlook's Card view. Each contact is displayed as a separate card, making it convenient for quick scanning through details. It's convenient for creating a physical address book with a visually appealing and compact layout.

Small Booklet Style
Ideal for creating a pocket-sized booklet, this style arranges your contacts in a compact format that's easy to carry around. It optimizes space by placing multiple entries on each page, so you can make useful reference booklets that can fit in a pocket or binder.

Medium Booklet Style
The Medium Booklet style is an excellent choice for those who prefer a balance between compactness and readability. It offers more space for each contact than the small booklet style, making it easier to read and perfect for a desk reference.

Phone Directory style
This style organizes your contacts in a format similar to a traditional phone book. It lists people alphabetically with their names and phone numbers. This style is useful for creating a phone directory of your Outlook contacts.

Memo style
The Memo style in Outlook is designed for those who need a detailed record of their contacts. It prints each contact on a separate page, providing an overview of the essential information. This style is perfect for creating personal profiles or for instances where detailed information is required for each contact.

Table style
The Table style is a practical choice for those who appreciate organization and clarity. It displays your contacts in a structured tabular format, much like a spreadsheet. Typically, it's the default print style when you apply the List view for contacts in Outlook.

As you see, different styles have different uses and serve specific purposes. Pick the one that best fits your needs to keep your contacts within reach, in the format that you prefer.
Wrapping up, printing Outlook contacts is a convenient way to stay organized and prepared for any scenario, be it a formal meeting or a casual get-together. So go ahead, give it a try, and enjoy the feeling of holding your digital world in your hands ?
위 내용은 Outlook에서 연락처를 인쇄하는 방법의 상세 내용입니다. 자세한 내용은 PHP 중국어 웹사이트의 기타 관련 기사를 참조하세요!

핫 AI 도구

Undresser.AI Undress
사실적인 누드 사진을 만들기 위한 AI 기반 앱

AI Clothes Remover
사진에서 옷을 제거하는 온라인 AI 도구입니다.

Undress AI Tool
무료로 이미지를 벗다

Clothoff.io
AI 옷 제거제

Video Face Swap
완전히 무료인 AI 얼굴 교환 도구를 사용하여 모든 비디오의 얼굴을 쉽게 바꾸세요!

인기 기사
뜨거운 도구

메모장++7.3.1
사용하기 쉬운 무료 코드 편집기

SublimeText3 중국어 버전
중국어 버전, 사용하기 매우 쉽습니다.

스튜디오 13.0.1 보내기
강력한 PHP 통합 개발 환경

드림위버 CS6
시각적 웹 개발 도구

SublimeText3 Mac 버전
신 수준의 코드 편집 소프트웨어(SublimeText3)


 Outlook에 캘린더를 추가하는 방법 : 공유, 인터넷 캘린더, ical 파일
Apr 03, 2025 am 09:06 AM
Outlook에 캘린더를 추가하는 방법 : 공유, 인터넷 캘린더, ical 파일
Apr 03, 2025 am 09:06 AM
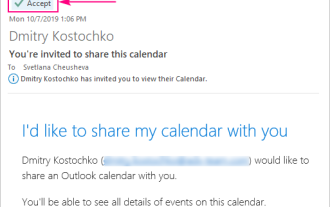
이 기사에서는 Outlook Desktop 응용 프로그램 내에서 ICalendar 파일 가져 오기를 포함하여 공유 캘린더에 액세스하고 활용하는 방법을 설명합니다. 이전에는 Outlook 캘린더를 공유했습니다. 이제 공유 된 캘린더를 보는 방법을 살펴 보겠습니다
 플래시 채우기를 사용하는 방법 예제와 함께 Excel
Apr 05, 2025 am 09:15 AM
플래시 채우기를 사용하는 방법 예제와 함께 Excel
Apr 05, 2025 am 09:15 AM
이 튜토리얼은 데이터 입력 작업을 자동화하기위한 강력한 도구 인 Excel의 Flash Clone 기능에 대한 포괄적 인 안내서를 제공합니다. 정의 및 위치에서 고급 사용 및 문제 해결에 이르기까지 다양한 측면을 다룹니다. Excel의 FLA 이해
 Excel의 중간 공식 - 실제 예
Apr 11, 2025 pm 12:08 PM
Excel의 중간 공식 - 실제 예
Apr 11, 2025 pm 12:08 PM
이 튜토리얼은 중간 기능을 사용하여 Excel에서 수치 데이터의 중앙값을 계산하는 방법을 설명합니다. 중앙 경향의 주요 척도 인 중앙값은 데이터 세트의 중간 값을 식별하여 Central Tenden의보다 강력한 표현을 제공합니다.
 Excel 공유 통합 문서 : 여러 사용자를위한 Excel 파일을 공유하는 방법
Apr 11, 2025 am 11:58 AM
Excel 공유 통합 문서 : 여러 사용자를위한 Excel 파일을 공유하는 방법
Apr 11, 2025 am 11:58 AM
이 튜토리얼은 다양한 방법, 액세스 제어 및 갈등 해결을 다루는 Excel 통합 문서 공유에 대한 포괄적 인 안내서를 제공합니다. Modern Excel 버전 (2010, 2013, 2016 및 이후) 협업 편집을 단순화하여 M에 대한 필요성을 제거합니다.
 Excel을 철자하는 방법
Apr 06, 2025 am 09:10 AM
Excel을 철자하는 방법
Apr 06, 2025 am 09:10 AM
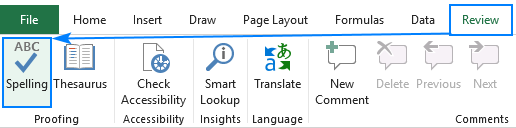
이 튜토리얼은 Excel의 맞춤법 검사를위한 다양한 방법과 같은 수동 점검, VBA 매크로 및 특수 도구를 사용합니다. 셀, 범위, 워크 시트 및 전체 통합 문서의 철자 확인을 배우십시오. Excel은 워드 프로세서는 아니지만 Spel
 Excel의 절대 값 : 공식 예제와 함께 ABS 기능
Apr 06, 2025 am 09:12 AM
Excel의 절대 값 : 공식 예제와 함께 ABS 기능
Apr 06, 2025 am 09:12 AM
이 튜토리얼은 절대 값의 개념을 설명하고 데이터 세트 내에서 절대 값을 계산하기위한 ABS 기능의 실질적인 Excel 응용 프로그램을 보여줍니다. 숫자는 긍정적이거나 부정적 일 수 있지만 때로는 양수 값 만 필요합니다.
 Excel : 그룹 행 자동 또는 수동으로 행을 붕괴하고 확장합니다.
Apr 08, 2025 am 11:17 AM
Excel : 그룹 행 자동 또는 수동으로 행을 붕괴하고 확장합니다.
Apr 08, 2025 am 11:17 AM
이 튜토리얼은 행을 그룹화하여 복잡한 Excel 스프레드 시트를 간소화하여 데이터를보다 쉽게 분석 할 수 있도록하는 방법을 보여줍니다. 행 그룹을 신속하게 숨기거나 보여주고 전체 개요를 특정 수준으로 붕괴시키는 법을 배우십시오. 크고 상세한 스프레드 시트가 될 수 있습니다
 Google 스프레드 시트 Countif 기능은 공식 예제와 함께합니다
Apr 11, 2025 pm 12:03 PM
Google 스프레드 시트 Countif 기능은 공식 예제와 함께합니다
Apr 11, 2025 pm 12:03 PM
마스터 Google Sheets Countif : 포괄적 인 가이드 이 안내서는 Google 시트의 다목적 카운티프 기능을 탐색하여 간단한 셀 카운팅 이외의 응용 프로그램을 보여줍니다. 우리는 정확하고 부분적인 경기에서 Han에 이르기까지 다양한 시나리오를 다룰 것입니다.
