

MySql常用命令--优化参数以及日常管理_MySQL

显示插入查询的优化参数:
<code class="hljs asciidoc">show variables like "concurrent_insert";
+-------------------+-------+
| Variable_name     | Value |
+-------------------+-------+
| concurrent_insert | AUTO  |
+-------------------+-------+

set GLOBAL concurrent_insert=2;</code>
插入数据时MySQL会对插入的记录进行唯一性校验<br />
这种校验也会降低插入记录的速度。可以在插入记录之前禁用唯一性检查。等到记录插入完毕后再开启。禁用唯一性检查的语句如下:
<code class="hljs asciidoc"><code class="hljs sql">SET UNIQUE_CHECKS=0;</code></code>
<code class="hljs sql">重新开启唯一性检查的语句如下:
<code class="hljs asciidoc"><code class="hljs sql"><code class="hljs sql">SET UNIQUE_CHECKS=1;</code></code></code>
<code class="hljs asciidoc"><code class="hljs sql"><code class="hljs sql"><code class="hljs asciidoc">mysql> show variables like "UNIQUE_CHECKS";
+---------------+-------+
| Variable_name | Value |
+---------------+-------+
| unique_checks | ON    |
+---------------+-------+</code></code></code></code>
<code class="hljs sql"><code class="hljs sql"><code class="hljs asciidoc">mysql设置最大连接数量
<code class="hljs asciidoc"><code class="hljs sql"><code class="hljs sql"><code class="hljs asciidoc"><code class="hljs lasso">mysql> set GLOBAL max_connections = 1000;
Query OK, 0 rows affected (0.00 sec)</code></code></code></code></code>
<code class="hljs sql"><code class="hljs sql"><code class="hljs asciidoc"><code class="hljs lasso">之前配置了mysql的主从备份<br />
结果发现日志很多,占据了很多的磁盘空间,需要进行额外的磁盘管理<br />
进入mysql的存储区域,查看一下数据部分的空间大小
<code class="hljs asciidoc"><code class="hljs sql"><code class="hljs sql"><code class="hljs asciidoc"><code class="hljs lasso"><code class="hljs lasso">/mnt/ssd/data$ ls
auto.cnf          mysql-bin.000139  mysql-bin.000149  mysql-bin.000159  mysql-bin.000169  mysql-bin.000179  mysql-bin.000189  mysql-bin.000199  mysql-bin.000209  mysql-bin.index
db_user_msg       mysql-bin.000140  mysql-bin.000150  mysql-bin.000160  mysql-bin.000170  mysql-bin.000180  mysql-bin.000190  mysql-bin.000200  mysql-bin.000210  performance_schema
ibdata1           mysql-bin.000141  mysql-bin.000151  mysql-bin.000161  mysql-bin.000171  mysql-bin.000181  mysql-bin.000191  mysql-bin.000201  mysql-bin.000211  StockData
ib_logfile0       mysql-bin.000142  mysql-bin.000152  mysql-bin.000162  mysql-bin.000172  mysql-bin.000182  mysql-bin.000192  mysql-bin.000202  mysql-bin.000212
ib_logfile1       mysql-bin.000143  mysql-bin.000153  mysql-bin.000163  mysql-bin.000173  mysql-bin.000183  mysql-bin.000193  mysql-bin.000203  mysql-bin.000213
mysql             mysql-bin.000144  mysql-bin.000154  mysql-bin.000164  mysql-bin.000174  mysql-bin.000184  mysql-bin.000194  mysql-bin.000204  mysql-bin.000214
mysql-bin.000135  mysql-bin.000145  mysql-bin.000155  mysql-bin.000165  mysql-bin.000175  mysql-bin.000185  mysql-bin.000195  mysql-bin.000205  mysql-bin.000215
mysql-bin.000136  mysql-bin.000146  mysql-bin.000156  mysql-bin.000166  mysql-bin.000176  mysql-bin.000186  mysql-bin.000196  mysql-bin.000206  mysql-bin.000216
mysql-bin.000137  mysql-bin.000147  mysql-bin.000157  mysql-bin.000167  mysql-bin.000177  mysql-bin.000187  mysql-bin.000197  mysql-bin.000207  mysql-bin.000217
mysql-bin.000138  mysql-bin.000148  mysql-bin.000158  mysql-bin.000168  mysql-bin.000178  mysql-bin.000188  mysql-bin.000198  mysql-bin.000208  mysql-bin.000218</code></code></code></code></code></code>
<code class="hljs sql"><code class="hljs sql"><code class="hljs asciidoc"><code class="hljs lasso"><code class="hljs lasso">显示mysql中数据部分和基本的配置部分所占用的磁盘空间
<code class="hljs asciidoc"><code class="hljs sql"><code class="hljs sql"><code class="hljs asciidoc"><code class="hljs lasso"><code class="hljs lasso"><code class="hljs lasso">/mnt/ssd/data$ sudo du -h -d 1
163G    ./StockData
636K    ./performance_schema
1.7M    ./mysql
56K     ./db_user_msg
242G    .</code></code></code></code></code></code></code>
<code class="hljs sql"><code class="hljs sql"><code class="hljs asciidoc"><code class="hljs lasso"><code class="hljs lasso"><code class="hljs lasso">结果发现这其中很多的空间都被mysql-bin*文件所占用了
<code class="hljs asciidoc"><code class="hljs sql"><code class="hljs sql"><code class="hljs asciidoc"><code class="hljs lasso"><code class="hljs lasso"><code class="hljs lasso"><code class="hljs lasso">/mnt/ssd/data$ sudo du -c -h mysql-bin*
1.1G    mysql-bin.000135
......
491M    mysql-bin.000218
4.0K    mysql-bin.index
80G     total
结果显示mysql-bin占用了大约80G的磁盘空间</code></code></code></code></code></code></code></code>
<code class="hljs sql"><code class="hljs sql"><code class="hljs asciidoc"><code class="hljs lasso"><code class="hljs lasso"><code class="hljs lasso"><code class="hljs lasso">现在我们要将这些日志清理掉
<code class="hljs asciidoc"><code class="hljs sql"><code class="hljs sql"><code class="hljs asciidoc"><code class="hljs lasso"><code class="hljs lasso"><code class="hljs lasso"><code class="hljs lasso"><code class="hljs asciidoc">mysql> show master logs;
+------------------+------------+
| Log_name         | File_size  |
+------------------+------------+
| mysql-bin.000135 | 1073742116 |
| mysql-bin.000136 | 1073742153 |
......
| mysql-bin.000216 | 1073747783 |
| mysql-bin.000217 | 1073742128 |
| mysql-bin.000218 |  514734902 |
+------------------+------------+
84 rows in set (0.01 sec)
这应该是主从备份一周以内的日志文件

查看一下目前正在起作用的日志文件是哪一个
mysql> show master status;
+------------------+-----------+--------------+------------------+-------------------+
| File             | Position  | Binlog_Do_DB | Binlog_Ignore_DB | Executed_Gtid_Set |
+------------------+-----------+--------------+------------------+-------------------+
| mysql-bin.000218 | 514734902 |              |                  |                   |
+------------------+-----------+--------------+------------------+-------------------+
1 row in set (0.00 sec)</code></code></code></code></code></code></code></code></code>
<code class="hljs sql"><code class="hljs sql"><code class="hljs asciidoc"><code class="hljs lasso"><code class="hljs lasso"><code class="hljs lasso"><code class="hljs lasso"><code class="hljs asciidoc">如何删除多余的日志<br />
日志的删除<br />
对于比较繁忙的OLTP系统,由于每天生产日志量大,这些日志如果长时间不清理,将会对磁盘空间带来很大的浪费,因此,定期删除日志是DBA维护Mysql数据库的一个重要工作内容,下面将介绍几种删除日志的常见方法:
<code class="hljs sql"><code class="hljs sql"><code class="hljs asciidoc"><code class="hljs lasso"><code class="hljs lasso"><code class="hljs lasso"><code class="hljs lasso"><code class="hljs asciidoc">先去获得mysql中数据存储的位置:
<code class="hljs asciidoc"><code class="hljs sql"><code class="hljs sql"><code class="hljs asciidoc"><code class="hljs lasso"><code class="hljs lasso"><code class="hljs lasso"><code class="hljs lasso"><code class="hljs asciidoc"><code class="hljs asciidoc">mysql> show variables like "datadir";
+---------------+-----------------+
| Variable_name | Value           |
+---------------+-----------------+
| datadir       | /var/lib/mysql/ |
+---------------+-----------------+
1 row in set (0.00 sec)
这是mysql中的默认存储位置</code></code></code></code></code></code></code></code></code></code>
<code class="hljs sql"><code class="hljs sql"><code class="hljs asciidoc"><code class="hljs lasso"><code class="hljs lasso"><code class="hljs lasso"><code class="hljs lasso"><code class="hljs asciidoc"><code class="hljs asciidoc">再去查看master中日志的存储位置:
<code class="hljs asciidoc"><code class="hljs sql"><code class="hljs sql"><code class="hljs asciidoc"><code class="hljs lasso"><code class="hljs lasso"><code class="hljs lasso"><code class="hljs lasso"><code class="hljs asciidoc"><code class="hljs asciidoc"><code class="hljs smalltalk">mysql> show variables like "log%";
+----------------------------------------+-------------------------------+
| Variable_name                          | Value                         |
+----------------------------------------+-------------------------------+
| log_bin                                | ON                            |
| log_bin_basename                       | /mnt/ssd/data/mysql-bin       |
| log_bin_index                          | /mnt/ssd/data/mysql-bin.index |
| log_bin_trust_function_creators        | OFF                           |
| log_bin_use_v1_row_events              | OFF                           |
| log_error                              | /var/log/mysql/error.log      |
| log_output                             | FILE                          |
| log_queries_not_using_indexes          | OFF                           |
| log_slave_updates                      | OFF                           |
| log_slow_admin_statements              | OFF                           |
| log_slow_slave_statements              | OFF                           |
| log_throttle_queries_not_using_indexes | 0                             |
| log_warnings                           | 1                             |
+----------------------------------------+-------------------------------+
13 rows in set (0.00 sec)</code></code></code></code></code></code></code></code></code></code></code>
<code class="hljs sql"><code class="hljs sql"><code class="hljs asciidoc"><code class="hljs lasso"><code class="hljs lasso"><code class="hljs lasso"><code class="hljs lasso"><code class="hljs asciidoc"><code class="hljs asciidoc"><code class="hljs smalltalk">查询slave节点的更新状态:
<code class="hljs asciidoc"><code class="hljs sql"><code class="hljs sql"><code class="hljs asciidoc"><code class="hljs lasso"><code class="hljs lasso"><code class="hljs lasso"><code class="hljs lasso"><code class="hljs asciidoc"><code class="hljs asciidoc"><code class="hljs smalltalk"><code class="hljs lasso">mysql> show slave status \G
*************************** 1. row ***************************
               Slave_IO_State: Waiting for master to send event
                  Master_Host: 25.25.2.6
                  Master_User: gpx_sync
                  Master_Port: 3306
                Connect_Retry: 10
              Master_Log_File: mysql-bin.000218
          Read_Master_Log_Pos: 514734902
               Relay_Log_File: mysqld-relay-bin.000669
                Relay_Log_Pos: 236
        Relay_Master_Log_File: mysql-bin.000218
             Slave_IO_Running: Yes
            Slave_SQL_Running: Yes
              Replicate_Do_DB:
          Replicate_Ignore_DB:
           Replicate_Do_Table: StockData.t_day_stock
       Replicate_Ignore_Table:
      Replicate_Wild_Do_Table:
  Replicate_Wild_Ignore_Table:
                   Last_Errno: 0
                   Last_Error:
                 Skip_Counter: 0
          Exec_Master_Log_Pos: 514734902
              Relay_Log_Space: 132818854
              Until_Condition: None
               Until_Log_File:
                Until_Log_Pos: 0
           Master_SSL_Allowed: No
           Master_SSL_CA_File:
           Master_SSL_CA_Path:
              Master_SSL_Cert:
            Master_SSL_Cipher:
               Master_SSL_Key:
        Seconds_Behind_Master: 0
Master_SSL_Verify_Server_Cert: No
                Last_IO_Errno: 0
                Last_IO_Error:
               Last_SQL_Errno: 0
               Last_SQL_Error:
  Replicate_Ignore_Server_Ids:
             Master_Server_Id: 1
                  Master_UUID: e61e54d8-1e08-11e5-9160-44a842112d25
             Master_Info_File: /var/lib/mysql/master.info
                    SQL_Delay: 0
          SQL_Remaining_Delay: NULL
      Slave_SQL_Running_State: Slave has read all relay log; waiting for the slave I/O thread to update it
           Master_Retry_Count: 86400
                  Master_Bind:
      Last_IO_Error_Timestamp:
     Last_SQL_Error_Timestamp:
               Master_SSL_Crl:
           Master_SSL_Crlpath:
           Retrieved_Gtid_Set:
            Executed_Gtid_Set:
                Auto_Position: 0
1 row in set (0.00 sec)

这里面我们获得的有用的信息是:
              Master_Log_File: mysql-bin.000218
          Read_Master_Log_Pos: 514734902
               Relay_Log_File: mysqld-relay-bin.000669
                Relay_Log_Pos: 236
        Relay_Master_Log_File: mysql-bin.000218
             Slave_IO_Running: Yes
            Slave_SQL_Running: Yes
Slave_SQL_Running_State: Slave has read all relay log; waiting for the slave I/O thread to update it</code></code></code></code></code></code></code></code></code></code></code></code><code class="hljs sql"><code class="hljs sql"><code class="hljs asciidoc"><code class="hljs lasso"><code class="hljs lasso"><code class="hljs lasso"><code class="hljs lasso"><code class="hljs asciidoc"><code class="hljs asciidoc"><code class="hljs smalltalk"><code class="hljs lasso">执行“reset master;”命令,该命令将删除所有二进制日志,新日志的编号从“000001” 开始;
<code class="hljs asciidoc"><code class="hljs sql"><code class="hljs sql"><code class="hljs asciidoc"><code class="hljs lasso"><code class="hljs lasso"><code class="hljs lasso"><code class="hljs lasso"><code class="hljs asciidoc"><code class="hljs asciidoc"><code class="hljs smalltalk"><code class="hljs lasso"><code class="hljs perl">Mysql>reset master;</code></code></code></code></code></code></code></code></code></code></code></code></code>
<code class="hljs sql"><code class="hljs sql"><code class="hljs asciidoc"><code class="hljs lasso"><code class="hljs lasso"><code class="hljs lasso"><code class="hljs lasso"><code class="hljs asciidoc"><code class="hljs asciidoc"><code class="hljs smalltalk"><code class="hljs lasso"><code class="hljs perl">执行“Purge master logs to ‘mysql-bin.’” 命令,该命令将删除“” 编号之前的所有日志,下列中删除了“mysql-bin.000001”之前编号的所有日志;
<code class="hljs asciidoc"><code class="hljs sql"><code class="hljs sql"><code class="hljs asciidoc"><code class="hljs lasso"><code class="hljs lasso"><code class="hljs lasso"><code class="hljs lasso"><code class="hljs asciidoc"><code class="hljs asciidoc"><code class="hljs smalltalk"><code class="hljs lasso"><code class="hljs perl"><code class="hljs vbnet">Mysql>purge master logs to 'mysql-bin.000215';</code></code></code></code></code></code></code></code></code></code></code></code></code></code>
<code class="hljs sql"><code class="hljs sql"><code class="hljs asciidoc"><code class="hljs lasso"><code class="hljs lasso"><code class="hljs lasso"><code class="hljs lasso"><code class="hljs asciidoc"><code class="hljs asciidoc"><code class="hljs smalltalk"><code class="hljs lasso"><code class="hljs perl"><code class="hljs vbnet">执行“purge master logs before ‘yyyy-mm-dd hh24:min:ss’”命令,该命令将删除日期为“yyyy-mm-dd hh24:mi:ss”之前产生的所有日志,下列中删除了日期在“2010-05-22 01:00:00”之前的所有日志
<code class="hljs asciidoc"><code class="hljs sql"><code class="hljs sql"><code class="hljs asciidoc"><code class="hljs lasso"><code class="hljs lasso"><code class="hljs lasso"><code class="hljs lasso"><code class="hljs asciidoc"><code class="hljs asciidoc"><code class="hljs smalltalk"><code class="hljs lasso"><code class="hljs perl"><code class="hljs vbnet"><code class="hljs css">Mysql>purge master logs before ‘2010-05-22 01:00:00’;</code></code></code></code></code></code></code></code></code></code></code></code></code></code></code>
<code class="hljs sql"><code class="hljs sql"><code class="hljs asciidoc"><code class="hljs lasso"><code class="hljs lasso"><code class="hljs lasso"><code class="hljs lasso"><code class="hljs asciidoc"><code class="hljs asciidoc"><code class="hljs smalltalk"><code class="hljs lasso"><code class="hljs perl"><code class="hljs vbnet"><code class="hljs css">设置参数 –expire_logs_days=#(days),此参数的含义是设置日志的过期天数,过来指定的天数后日志将会被自动删除,这样将有利于减少DBA管理日志的工作量。
<code class="hljs asciidoc"><code class="hljs sql"><code class="hljs sql"><code class="hljs asciidoc"><code class="hljs lasso"><code class="hljs lasso"><code class="hljs lasso"><code class="hljs lasso"><code class="hljs asciidoc"><code class="hljs asciidoc"><code class="hljs smalltalk"><code class="hljs lasso"><code class="hljs perl"><code class="hljs vbnet"><code class="hljs css"><code class="hljs asciidoc">gpx@dell:~$ sudo vim /etc/mysql/my.cnf
[mysqld]
expire_logs_days = 3
这样,3天前的日志都会被删除,系统自动删除

查看系统中对于二进制日志自动删除的过期时间
mysql> show variables like "expire%";
+------------------+-------+
| Variable_name    | Value |
+------------------+-------+
| expire_logs_days | 3     |
+------------------+-------+
1 row in set (0.00 sec)</code></code></code></code></code></code></code></code></code></code></code></code></code></code></code></code>

ホットAIツール

Undresser.AI Undress
リアルなヌード写真を作成する AI 搭載アプリ

AI Clothes Remover
写真から衣服を削除するオンライン AI ツール。

Undress AI Tool
脱衣画像を無料で

Clothoff.io
AI衣類リムーバー

Video Face Swap
完全無料の AI 顔交換ツールを使用して、あらゆるビデオの顔を簡単に交換できます。

人気の記事
ホットツール

メモ帳++7.3.1
使いやすく無料のコードエディター

SublimeText3 中国語版
中国語版、とても使いやすい

ゼンドスタジオ 13.0.1
強力な PHP 統合開発環境

ドリームウィーバー CS6
ビジュアル Web 開発ツール

SublimeText3 Mac版
神レベルのコード編集ソフト(SublimeText3)
ホットトピック
 1664
1664
 14
1421
52
1316
25
1266
29
1239
24
14
1421
52
1316
25
1266
29
1239
24

 Windows 11/10でSUDOコマンドを実行する方法
Mar 09, 2024 am 09:50 AM
Windows 11/10でSUDOコマンドを実行する方法
Mar 09, 2024 am 09:50 AM
sudo コマンドを使用すると、ユーザーはスーパーユーザー モードに切り替えることなく、昇格された特権モードでコマンドを実行できます。この記事では、Windows システムで sudo コマンドに似た機能をシミュレートする方法を紹介します。修道コマンドとは何ですか? Sudo (「スーパーユーザー do」の略) は、Linux や MacOS などの Unix ベースのオペレーティング システムのユーザーが、通常は管理者が持つ昇格した権限でコマンドを実行できるようにするコマンド ライン ツールです。 Windows 11/10 での SUDO コマンドの実行 ただし、最新の Windows 11 Insider Preview バージョンのリリースにより、Windows ユーザーはこの機能を体験できるようになりました。この新機能により、ユーザーは次のことが可能になります。
 Win11 でネットワーク カードの MAC アドレスを確認する方法 Win11 でネットワーク カードの MAC アドレスを取得するコマンドを使用する方法
Feb 29, 2024 pm 04:34 PM
Win11 でネットワーク カードの MAC アドレスを確認する方法 Win11 でネットワーク カードの MAC アドレスを取得するコマンドを使用する方法
Feb 29, 2024 pm 04:34 PM
この記事では、Win11 システムでコマンド プロンプト (CommandPrompt) を使用してネットワーク アダプターの物理アドレス (MAC アドレス) を確認する方法を読者に紹介します。 MAC アドレスは、ネットワーク通信において重要な役割を果たすネットワーク インターフェイス カード (NIC) の一意の識別子です。コマンド プロンプトを介して、ユーザーは現在のコンピュータ上のすべてのネットワーク アダプタの MAC アドレス情報を簡単に取得できます。これは、ネットワークのトラブルシューティング、ネットワーク設定の構成、その他のタスクに非常に役立ちます。方法 1: 「コマンド プロンプト」を使用する 1. [Win+X] キーの組み合わせを押すか、タスク バーの [Windows ロゴ] を [右クリック] して、表示されるメニュー項目で [ファイル名を指定して実行] を選択します。ウィンドウを実行し、[cmd]コマンドを入力して、
 超実用的! Linux マスターになれる Sar コマンド
Mar 01, 2024 am 08:01 AM
超実用的! Linux マスターになれる Sar コマンド
Mar 01, 2024 am 08:01 AM
1. 概要 sar コマンドは、システムアクティビティから収集されたデータを通じてシステム使用状況レポートを表示します。これらのレポートはさまざまなセクションで構成されており、各セクションにはデータの種類とデータが収集された時期が含まれます。 sar コマンドのデフォルト モードでは、CPU にアクセスするさまざまなリソース (ユーザー、システム、I/O スケジューラなど) の CPU 使用率がさまざまな時間増分で表示されます。さらに、特定の期間におけるアイドル状態の CPU の割合も表示されます。各データ ポイントの平均値はレポートの下部にリストされます。 sar レポートはデフォルトで 10 分ごとにデータを収集しますが、さまざまなオプションを使用してこれらのレポートをフィルタリングおよび調整できます。 uptime コマンドと同様に、sar コマンドも CPU 負荷の監視に役立ちます。 sarにより過負荷の発生が把握できる
 hyperv 拡張セッション モードはどこにありますか? Win11 でコマンドを使用して Hyper-V 拡張セッション モードを有効または無効にするためのヒント
Feb 29, 2024 pm 05:52 PM
hyperv 拡張セッション モードはどこにありますか? Win11 でコマンドを使用して Hyper-V 拡張セッション モードを有効または無効にするためのヒント
Feb 29, 2024 pm 05:52 PM
Win11 システムでは、コマンドを使用して Hyper-V 拡張セッション モードを有効または無効にできます。この記事では、コマンドを使用して操作する方法を紹介し、ユーザーがシステム内の Hyper-V 機能をより適切に管理および制御できるようにします。 Hyper-V は Microsoft が提供する仮想化テクノロジであり、Windows Server、Windows 10 および 11 (Home Edition を除く) に組み込まれており、ユーザーは Windows システムで仮想オペレーティング システムを実行できます。仮想マシンはホスト オペレーティング システムから分離されていますが、設定を通じてサウンド カードやストレージ デバイスなどのホストのリソースを引き続き使用できます。重要な設定の 1 つは、拡張セッション モードを有効にすることです。拡張セッションモードはハイパーです
 win11 ウィジェットを削除する方法 Windows 11 ウィジェットをアンインストールする 1 つのコマンド機能のヒント
Apr 11, 2024 pm 05:19 PM
win11 ウィジェットを削除する方法 Windows 11 ウィジェットをアンインストールする 1 つのコマンド機能のヒント
Apr 11, 2024 pm 05:19 PM
ウィジェットは Win11 システムの新機能で、デフォルトでオンになっていますが、ウィジェットをあまり使用しないユーザーや、スペースを占有するためウィジェットを無効にしたいというユーザーがいることは避けられません。以下のエディターで操作方法が説明されているので、実際に試してみることができます。ウィジェットとは何ですか?ウィジェットは、Windows デスクトップ上のお気に入りのアプリやサービスの動的コンテンツを表示する小さなカードです。これらはウィジェット ボードに表示され、興味を反映するようにウィジェットの検索、固定、固定解除、配置、サイズ変更、カスタマイズを行うことができます。ウィジェット ボードは、使用状況に基づいて関連するウィジェットとパーソナライズされたコンテンツを表示するように最適化されています。タスクバーの左隅からウィジェットパネルを開くと、ライブ天気が表示されます
 LSOF を使用してポートをリアルタイムで監視する方法
Mar 20, 2024 pm 02:07 PM
LSOF を使用してポートをリアルタイムで監視する方法
Mar 20, 2024 pm 02:07 PM
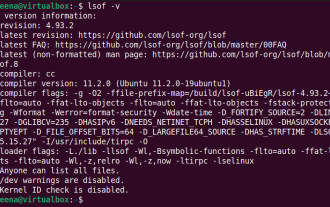
LSOF (ListOpenFiles) は、主に Linux/Unix オペレーティング システムと同様のシステム リソースを監視するために使用されるコマンド ライン ツールです。 LSOF コマンドを使用すると、ユーザーはシステム内のアクティブなファイルと、これらのファイルにアクセスしているプロセスに関する詳細情報を取得できます。 LSOF は、ユーザーが現在ファイル リソースを占有しているプロセスを特定するのに役立ち、それによってシステム リソースの管理が改善され、起こり得る問題のトラブルシューティングが可能になります。 LSOF は強力かつ柔軟であり、システム管理者がファイル リーク、閉じられていないファイル記述子などのファイル関連の問題を迅速に特定するのに役立ちます。 LSOF コマンド経由 LSOF コマンド ライン ツールを使用すると、システム管理者と開発者は次のことを行うことができます。 ポートの競合が発生した場合に、どのプロセスが現在特定のファイルまたはポートを使用しているかを確認する
 Linuxのldconfigコマンドの詳しい説明
Mar 14, 2024 pm 12:18 PM
Linuxのldconfigコマンドの詳しい説明
Mar 14, 2024 pm 12:18 PM
Linuxldconfigコマンドの詳細説明 1. 概要 Linuxシステムにおいて、ldconfigは共有ライブラリを設定するためのコマンドです。これは、共有ライブラリのリンクとキャッシュを更新し、システムが動的にリンクされた共有ライブラリを正しくロードできるようにするために使用されます。 ldconfig の主な機能は、ダイナミック リンク ライブラリを検索し、プログラムで使用するシンボリック リンクを作成することです。この記事では、ldconfig コマンドの使用法と動作原理を詳しく説明し、読者が ldconfig の機能をよりよく理解できるように、具体的なコード例を使用します。
 Linux でサービスを再起動する正しい方法は何ですか?
Mar 15, 2024 am 09:09 AM
Linux でサービスを再起動する正しい方法は何ですか?
Mar 15, 2024 am 09:09 AM
Linux でサービスを再起動する正しい方法は何ですか? Linux システムを使用していると、特定のサービスを再起動する必要がある状況がよく発生しますが、サービスの再起動時に実際にサービスが停止しない、または開始しないなどの問題が発生することがあります。したがって、サービスを再起動する正しい方法を習得することが非常に重要です。 Linux では、通常、systemctl コマンドを使用してシステム サービスを管理できます。 systemctl コマンドは systemd システム マネージャーの一部です
