

ElTableColumn のコンテンツをカスタマイズする方法
今回は、ElTableColumnの内容をカスタマイズする方法と、ElTableColumnの内容をカスタマイズする際の注意点について説明します。以下は実際のケースですので、見てみましょう。
会社には新しい要件があります。ElTableColumn の先頭をクリックして検索します。私の同僚はすでにこの関数を作成していますが、これをコンポーネントにカプセル化し、それについて学ぶ予定です。
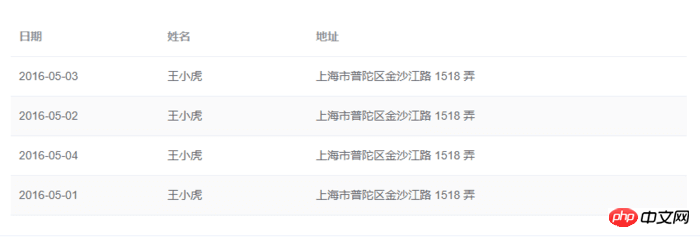
ElTableColumn は元々こんな感じでした:
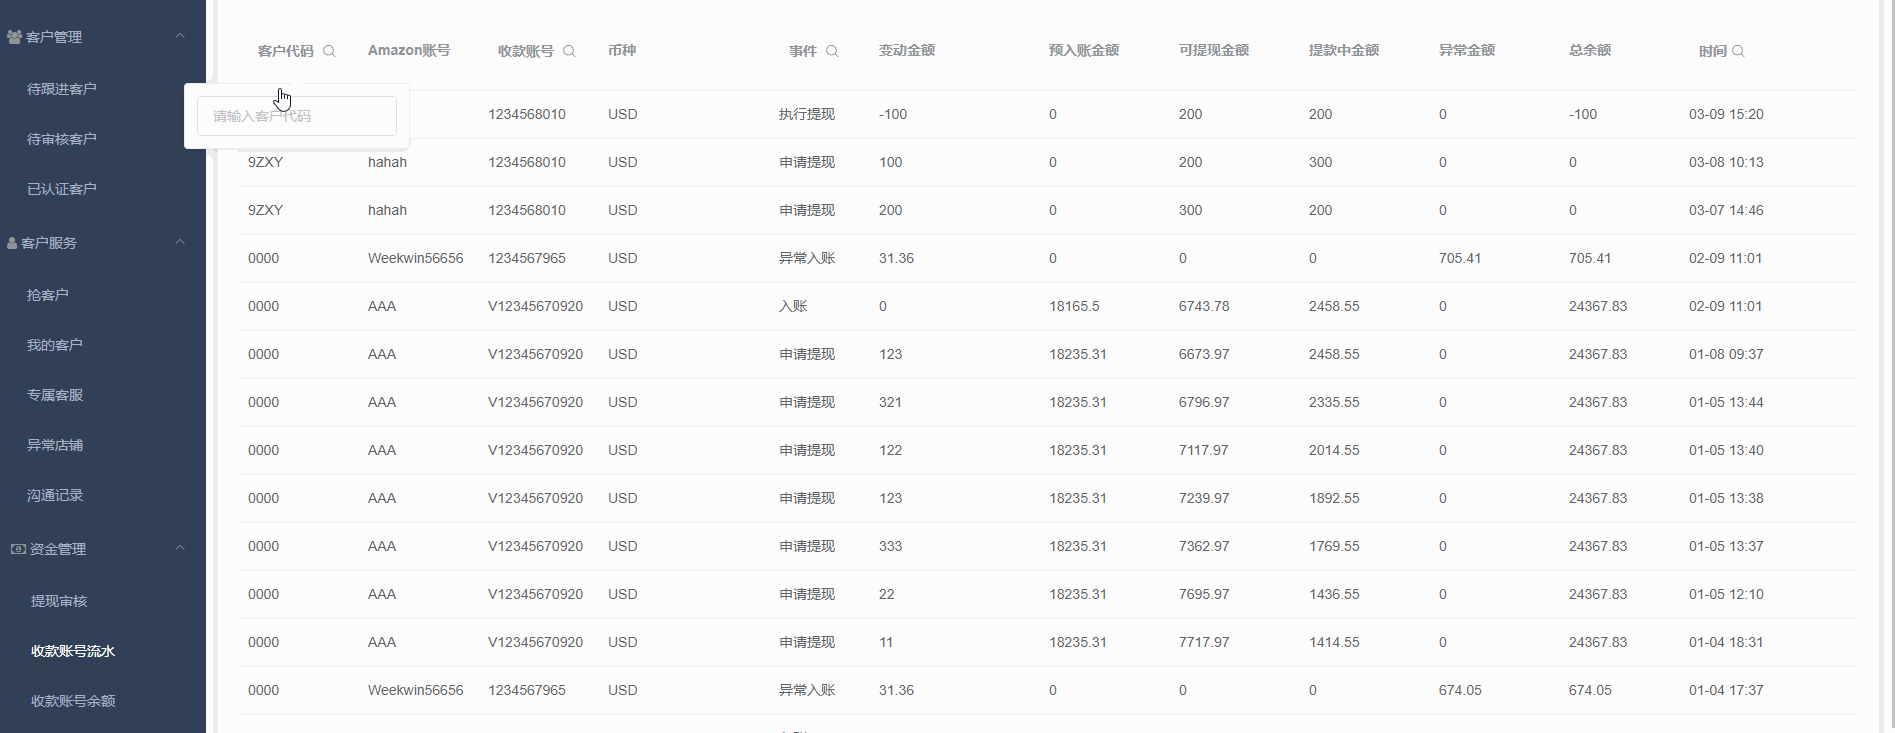
やりたいことはこんな感じです:
コードを直接載せただけなので、いちいち説明するのは多すぎます。
コード構造:
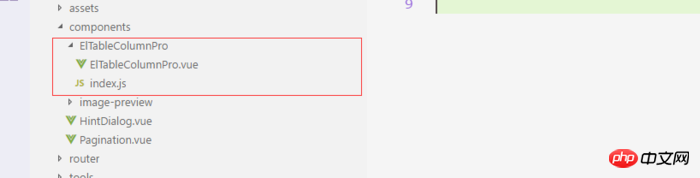
コンポーネント
<!-- ElTableColumnPro.vue -->
<template>
<el-table-column v-if="visible" :formatter="formatter" :align='align' :prop="prop" :header-align="headerAlign" :label="label" :width="width" :render-header="renderHeader" >
<template slot-scope="scope">
<slot :row="scope.row" :$index="scope.$index" >
<span>{{fomatMethod(scope.row[prop])}}</span>
</slot>
</template>
</el-table-column>
</template>
<script>
import moment from "moment";
export default {
name: "el-table-column-pro",
props: {
prop: {
type: String
},
label: {
type: String
},
width: {
type: Number
},
renderType: {
type: String,
validator: value => ["date", "input", "select"].includes(value)
},
placeholder: {
type: String
},
rederWidth: {
type: String,
default: "230px"
},
param: {
type: String,
default: ""
},
startDate: {
type: String
},
endDate: {
type: String
},
selectList: {
type: Array
},
isClear: {
type: Boolean,
default:true
},
visible: {
type: Boolean,
default: true
},
filterIcon: {
type: String,
default: "el-icon-search"
},
callback: {
type: Function
},
formatter: {
type: Function,
default:(row, column, cellValue)=>cellValue
},
align:{
type:String
},
headerAlign:{
type:String
}
},
data() {
return {
formatD:this.filterIcon
};
},
methods: {
fomatMethod(value){
return this.formatter('','',value)
},
renderHeader(createElement, { column, $index }) {
switch (this.renderType) {
case "date":
return this.renderDate(createElement, { column, $index });
case "input":
return this.rederInput(createElement, { column, $index });
case "select":
return this.rederSelect(createElement, { column, $index });
default:
return column.label;
}
},
rederInput(createElement, { column, $index }) {
return createElement(
"p",
{
class: "filters",
style: {
color: column.color
}
},
[
createElement(
"el-popover",
{
props: {
placement: "bottom",
width: "200",
trigger: "click"
}
},
[
createElement("el-input", {
props: {
placeholder: this.placeholder,
value: this.param
},
nativeOn: {
keyup: event => {
if (event.keyCode === 13) {
this.$emit("update:param", event.target.value);
this.callback && this.callback();
}
}
},
on: {
blur: event => {
this.$emit("update:param", event.target.value);
this.callback && this.callback();
}
}
}),
createElement(
"span",
{
slot: "reference"
},
[
column.label,
createElement("i", {
class: this.filterIcon,
style: {
marginLeft: "4px"
}
})
]
)
]
)
]
);
},
rederSelect(createElement, { column, $index }) {
return createElement(
"p",
{
class: "filters",
style: {
color: column.color
}
},
[
createElement(
"el-popover",
{
props: {
placement: "bottom",
width: "200",
trigger: "click"
}
},
[
createElement(
"el-select",
{
props: {
placeholder: this.placeholder,
value: this.param,
clearable: this.isClear
},
on: {
input: value => {
this.$emit("update:param", value);
this.callback && this.callback();
}
}
},
[
this.selectList.map(item => {
return createElement("el-option", {
props: {
value: item.value,
label: item.label
}
});
})
]
),
createElement(
"span",
{
slot: "reference"
},
[
column.label,
createElement("i", {
class: this.filterIcon,
style: {
marginLeft: "4px"
}
})
]
)
]
)
]
);
},
renderDate(createElement, { column, $index }) {
return createElement(
"p",
{
class: "filters"
},
[
createElement(
"el-popover",
{
props: {
placement: "bottom",
width: this.rederWidth,
trigger: "click"
}
},
[
createElement("el-date-picker", {
props: {
placeholder: this.placeholder,
value: this.value,
type: "daterange",
rangeSeparator:"至",
startPlaceholder:"开始日期",
endPlaceholder:"结束日期",
},
style: {
width: this.rederWidth
},
on: {
input: value => {
if (value) {
const startDate = moment(value[0]).format("YYYY-MM-DD");
const endDate = moment(value[1]).format("YYYY-MM-DD");
this.$emit("update:startDate", startDate);
this.$emit("update:endDate", endDate);
this.callback && this.callback();
}
}
}
}),
createElement(
"span",
{
slot: "reference"
},
[
column.label,
createElement("i", {
class: this.filterIcon,
style: {
marginLeft: "4px"
}
})
]
)
]
)
]
);
}
}
};
</script>
<!-- index.js -->
import ElTableColumnPro from './ElTableColumnPro'
ElTableColumnPro.install = function(Vue) {
Vue.component(ElTableColumnPro.name, ElTableColumnPro);
};
export default ElTableColumnPro;インストール
import ElTableColumnPro from 'components/ElTableColumnPro/index'
...
...
...
Vue.use(ElTableColumnPro)
使用
 <el-table :data="bankFlow" style="width:100%" stripe>
    <el-table-column-pro :visible="showMore" prop="transactionId" label="流水号" :width="120"> </el-table-column-pro>
    <el-table-column-pro prop="clientCode" label="客户代码 " :width="120" placeholder="请输入客户代码" :callback="requestTransactionLogs" renderType="input" :param.sync="request_params.clientCode"> </el-table-column-pro>
    <el-table-column-pro prop="eventTypeName" label="事件 " placeholder="请选择事件"  :selectList="listEventEnum" :callback="requestTransactionLogs" renderType="select" :param.sync="request_params.event" :width="100"> </el-table-column-pro>
    <el-table-column-pro prop="createTime" :callback="requestTransactionLogs" :startDate.sync="request_params.startDate" :endDate.sync="request_params.endDate" :formatter="$timeformat" label="时间" renderType="date" :width="180" ></el-table-column-pro>
 </el-table>
 <el-table :data="lists.content" v-loading="loading" @row-dblclick="detail" >
    <el-table-column-pro :width="120" prop="clientCode" label="客户代码 " align="center" header-align="center" placeholder="请输入客户代码" :callback="getLists" renderType="input" :param.sync="params.clientCode"></el-table-column-pro>
    <el-table-column-pro label="内容 " placeholder="请输入内容" :callback="getLists" renderType="input" :param.sync="params.content">
        <template slot-scope="scope">
           <pre class="brush:php;toolbar:false">{{scope.row.content}}
コメントは隣り合って入力されません....
この後の方法はマスターできたと思います。この記事の事例を読んで、さらにエキサイティングな内容については、php 中国語 Web サイトの他の関連記事に注目してください。
推奨読書:
以上がElTableColumn のコンテンツをカスタマイズする方法の詳細内容です。詳細については、PHP 中国語 Web サイトの他の関連記事を参照してください。

ホットAIツール

Undresser.AI Undress
リアルなヌード写真を作成する AI 搭載アプリ

AI Clothes Remover
写真から衣服を削除するオンライン AI ツール。

Undress AI Tool
脱衣画像を無料で

Clothoff.io
AI衣類リムーバー

Video Face Swap
完全無料の AI 顔交換ツールを使用して、あらゆるビデオの顔を簡単に交換できます。

人気の記事
ホットツール

メモ帳++7.3.1
使いやすく無料のコードエディター

SublimeText3 中国語版
中国語版、とても使いやすい

ゼンドスタジオ 13.0.1
強力な PHP 統合開発環境

ドリームウィーバー CS6
ビジュアル Web 開発ツール

SublimeText3 Mac版
神レベルのコード編集ソフト(SublimeText3)
ホットトピック
 1675
1675
 14
1429
52
1333
25
1278
29
1257
24
14
1429
52
1333
25
1278
29
1257
24

 VueでBootstrapの使用方法
Apr 07, 2025 pm 11:33 PM
VueでBootstrapの使用方法
Apr 07, 2025 pm 11:33 PM
vue.jsでBootstrapを使用すると、5つのステップに分かれています。ブートストラップをインストールします。 main.jsにブートストラップをインポートしますブートストラップコンポーネントをテンプレートで直接使用します。オプション:カスタムスタイル。オプション:プラグインを使用します。
 VUEのボタンに関数を追加する方法
Apr 08, 2025 am 08:51 AM
VUEのボタンに関数を追加する方法
Apr 08, 2025 am 08:51 AM
HTMLテンプレートのボタンをメソッドにバインドすることにより、VUEボタンに関数を追加できます。 VUEインスタンスでメソッドを定義し、関数ロジックを書き込みます。
 VueでWatchの使用方法
Apr 07, 2025 pm 11:36 PM
VueでWatchの使用方法
Apr 07, 2025 pm 11:36 PM
Vue.jsの監視オプションにより、開発者は特定のデータの変更をリッスンできます。データが変更されたら、Watchはコールバック関数をトリガーして更新ビューまたはその他のタスクを実行します。その構成オプションには、すぐにコールバックを実行するかどうかを指定する即時と、オブジェクトまたは配列の変更を再帰的に聴くかどうかを指定するDEEPが含まれます。
 Vueによる前のページに戻る方法
Apr 07, 2025 pm 11:30 PM
Vueによる前のページに戻る方法
Apr 07, 2025 pm 11:30 PM
vue.jsには、前のページに戻る4つの方法があります。$ router.go(-1)$ router.back()outes&lt; router-link to =&quot;/&quot; Component Window.history.back()、およびメソッド選択はシーンに依存します。
 Vue Multi-Page開発とはどういう意味ですか?
Apr 07, 2025 pm 11:57 PM
Vue Multi-Page開発とはどういう意味ですか?
Apr 07, 2025 pm 11:57 PM
VUEマルチページ開発は、VUE.JSフレームワークを使用してアプリケーションを構築する方法です。アプリケーションは別々のページに分割されます。コードメンテナンス:アプリケーションを複数のページに分割すると、コードの管理とメンテナンスが容易になります。モジュール性:各ページは、簡単に再利用および交換するための別のモジュールとして使用できます。簡単なルーティング:ページ間のナビゲーションは、単純なルーティング構成を介して管理できます。 SEOの最適化:各ページには独自のURLがあり、SEOに役立ちます。
 React vs. Vue:Netflixはどのフレームワークを使用していますか?
Apr 14, 2025 am 12:19 AM
React vs. Vue:Netflixはどのフレームワークを使用していますか?
Apr 14, 2025 am 12:19 AM
netflixusesaCustomframeworkは、「ギボン」ビルトンリアクト、notreactorvuedirectly.1)チームエクスペリエンス:seice basedonfamperivity.2)projectomplerprojects:vueforsplerprojects、racefforcomplexones.3)customeforsneeds:reactofforsmorefloficailie.
 vue.jsでJSファイルを参照する方法
Apr 07, 2025 pm 11:27 PM
vue.jsでJSファイルを参照する方法
Apr 07, 2025 pm 11:27 PM
vue.jsでJSファイルを参照するには3つの方法があります。タグ;; mounted()ライフサイクルフックを使用した動的インポート。 Vuex State Management Libraryを介してインポートします。
 VUEトラバーサルの使用方法
Apr 07, 2025 pm 11:48 PM
VUEトラバーサルの使用方法
Apr 07, 2025 pm 11:48 PM
Vue.jsには配列とオブジェクトを通過するには3つの一般的な方法があります。V-Forディレクティブは、各要素をトラバースしてテンプレートをレンダリングするために使用されます。 V-BindディレクティブをV-Forで使用して、各要素の属性値を動的に設定できます。 .mapメソッドは、配列要素を新しい配列に変換できます。
