

新しいOutlookとWebでの条件付きフォーマットを強調するメールを強調する

Master the art of email organization with Outlook's conditional formatting! This guide shows you how to color-code your emails in the new Outlook app and Outlook on the web, ensuring important messages stand out.
Classic Outlook users have long enjoyed conditional formatting; now, this powerful feature is available in the new Outlook and web versions, bringing enhanced organization and personalization.
Key Features Covered:
- Conditional formatting in new Outlook and web
- Highlighting emails using conditional formats
- Editing conditional formatting rules
- Deleting conditional formatting rules
- Enabling/disabling conditional formatting rules
- Reordering rules for priority control
- Practical conditional formatting examples
- Understanding limitations and differences
(Note: This tutorial focuses on the new Outlook app and web version. For classic Outlook, please refer to [link to classic Outlook guide]. )
Conditional Formatting: Highlighting What Matters
Conditional formatting helps you prioritize emails based on user-defined criteria (sender, subject, presence of your name, etc.). Different colors instantly flag important messages, reducing time spent sifting through less urgent emails.

Setting Up Conditional Formatting Rules
The process is similar for both the new Outlook app and the web version. Minor interface differences may exist, but the core steps remain consistent:
- Access Settings: Click the settings gear icon (top-right), then navigate to Mail > Conditional Formatting.
- Select Account (if necessary): If you have multiple accounts, choose the correct one. Single-account users or web users can skip this step.
- Add a New Rule: Click "+ Create new conditional formatting rule".
- Name Your Rule: Give your rule a descriptive name.
- Define Conditions: Use the Condition dropdown to select criteria (e.g., "From specific people," "Your name is on the To or Cc line," "Subject includes certain text"). Add multiple conditions using "+ Add another condition".

- Choose Formatting: Select a font color using the Choose Color button. The Preview section shows the effect.
- Save the Rule: Click Save to apply and save your new rule.

Editing, Deleting, and Toggling Rules
Modifying or removing rules is simple:
- Editing: Access settings, select the rule, make changes (name, conditions, formatting), and save. Discard changes to cancel.

- Deleting: Access settings, locate the rule, and click "Delete rule," confirming the deletion.

- Enabling/Disabling: Use the toggle switch in the settings to quickly turn rules on or off without deleting them.

Rule Order and Priority
Rules are applied sequentially; higher rules override lower ones. Use the "Move Up" and "Move Down" buttons to adjust the order and control priority.

Conditional Formatting Examples
- Highlight VIP client emails in red.
- Highlight emails with specific keywords (e.g., project names) in the subject.
- Color-code emails from your manager or team members.
- Mark emails with deadlines or events.

Limitations
- Available only for Microsoft 365 work/school accounts in the new Outlook and web versions.
- Applies to read and unread emails in all folders (except Drafts).
- Fewer conditions than classic Outlook.
- Currently only for emails (not calendar or tasks).
- Only font color formatting is supported.
This guide empowers you to effectively manage your inbox, ensuring important emails never get overlooked.
以上が新しいOutlookとWebでの条件付きフォーマットを強調するメールを強調するの詳細内容です。詳細については、PHP 中国語 Web サイトの他の関連記事を参照してください。

ホットAIツール

Undresser.AI Undress
リアルなヌード写真を作成する AI 搭載アプリ

AI Clothes Remover
写真から衣服を削除するオンライン AI ツール。

Undress AI Tool
脱衣画像を無料で

Clothoff.io
AI衣類リムーバー

Video Face Swap
完全無料の AI 顔交換ツールを使用して、あらゆるビデオの顔を簡単に交換できます。

人気の記事
ホットツール

メモ帳++7.3.1
使いやすく無料のコードエディター

SublimeText3 中国語版
中国語版、とても使いやすい

ゼンドスタジオ 13.0.1
強力な PHP 統合開発環境

ドリームウィーバー CS6
ビジュアル Web 開発ツール

SublimeText3 Mac版
神レベルのコード編集ソフト(SublimeText3)
ホットトピック
 7900
7900
 15
1651
14
1411
52
1303
25
1248
29
15
1651
14
1411
52
1303
25
1248
29

 Outlookにカレンダーを追加する方法:共有、インターネットカレンダー、ICALファイル
Apr 03, 2025 am 09:06 AM
Outlookにカレンダーを追加する方法:共有、インターネットカレンダー、ICALファイル
Apr 03, 2025 am 09:06 AM
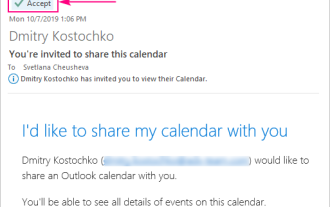
この記事では、IcalEndarファイルのインポートなど、Outlookデスクトップアプリケーション内で共有カレンダーにアクセスして利用する方法について説明します。 以前は、Outlookカレンダーの共有について説明しました。 それでは、共有されているカレンダーの表示方法を調べてみましょう
 Flash Fill In Excelを使用する方法例
Apr 05, 2025 am 09:15 AM
Flash Fill In Excelを使用する方法例
Apr 05, 2025 am 09:15 AM
このチュートリアルは、データ入力タスクを自動化するための強力なツールであるExcelのFlash Fill機能の包括的なガイドを提供します。 定義と場所から高度な使用やトラブルシューティングまで、さまざまな側面をカバーしています。 ExcelのFLAを理解する
 Excelの式の中央値 - 実用的な例
Apr 11, 2025 pm 12:08 PM
Excelの式の中央値 - 実用的な例
Apr 11, 2025 pm 12:08 PM
このチュートリアルでは、中央値関数を使用してExcelの数値データの中央値を計算する方法について説明します。 中央傾向の重要な尺度である中央値は、データセットの中央値を識別し、中央の傾向のより堅牢な表現を提供します
 連絡先をOutlookにインポートする方法(CSVおよびPSTファイルから)
Apr 02, 2025 am 09:09 AM
連絡先をOutlookにインポートする方法(CSVおよびPSTファイルから)
Apr 02, 2025 am 09:09 AM
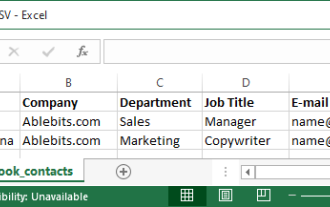
このチュートリアルでは、連絡先をOutlookにインポートするための2つの方法を示しています。CSVファイルとPSTファイルを使用し、オンラインでOutlookに連絡先の転送をカバーしています。 外部ソースからのデータを統合しているかどうか、別のメールプロから移行するかどうか
 Excelでマクロを有効にして無効にする方法
Apr 02, 2025 am 09:05 AM
Excelでマクロを有効にして無効にする方法
Apr 02, 2025 am 09:05 AM
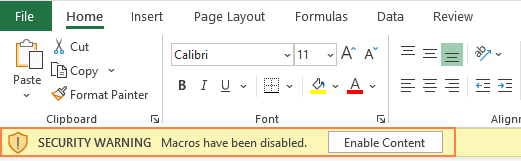
この記事では、マクロセキュリティの基本と安全なVBAコードの実行をカバーして、Excelでマクロを有効にする方法について説明します。 マクロは、あらゆる技術と同様に、二重の可能性、つまり最新の自動化または悪意のある使用です。 Excelのデフォルト設定は、SAのマクロを無効にします
 Googleシートクエリ機能の使用方法 - 標準条項と代替ツール
Apr 02, 2025 am 09:21 AM
Googleシートクエリ機能の使用方法 - 標準条項と代替ツール
Apr 02, 2025 am 09:21 AM
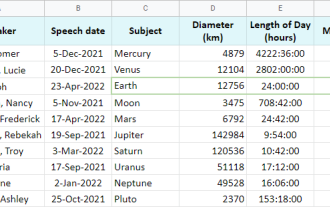
この包括的なガイドは、Googleシートのクエリ関数のパワーを解き放ち、しばしば最も強力なスプレッドシート関数として歓迎されます。 その構文を分析し、さまざまな条項を調査してデータ操作をマスターします。 Googleシートを理解する
 Excel共有ワークブック:複数のユーザーのExcelファイルを共有する方法
Apr 11, 2025 am 11:58 AM
Excel共有ワークブック:複数のユーザーのExcelファイルを共有する方法
Apr 11, 2025 am 11:58 AM
このチュートリアルは、さまざまな方法、アクセス制御、競合解決をカバーするExcelワークブックを共有するための包括的なガイドを提供します。 Modern Excelバージョン(2010、2013、2016、およびその後)共同編集を簡素化し、mの必要性を排除します
 Googleシートフィルター機能の使用方法
Apr 02, 2025 am 09:19 AM
Googleシートフィルター機能の使用方法
Apr 02, 2025 am 09:19 AM
Googleシートのフィルター機能のパワーのロックを解除:包括的なガイド 基本的なGoogleシートフィルタリングにうんざりしていませんか? このガイドは、フィルター関数の機能を発表し、標準フィルタリングツールの強力な代替品を提供します。私たちはexploします
