

Macでレコードをスクリーニングする方法:簡単で迅速


Sometimes a chance to show somebody how things are done proves more effective than having to come up with lengthy instructions. This is often true for educators, developers, IT support, YouTubers, online businesses, and teams working from different locations and even different time zones.
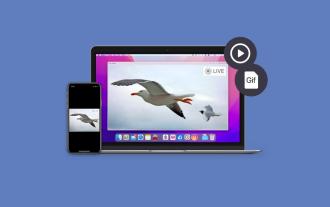
Taking a video of your actions as they happen on the screen of your Mac is called screen recording. (You can record your entire screen, a selected portion of the screen, or an app window.)
Ways to record screen with audio |
Steps to follow |
With a specialized third-party app |
Install and open CleanShot X. Choose Record Screen > Press Space bar > Click the microphone icon to Record MacBook Microphone or other source. Install and open iShowU. Set recording preferences and press the red circled dot in the bottom right corner of the app to start recording. |
With Mac’s webcam |
Install and open Capto. Choose the Record option from the toolbar > Select Record Camera > FaceTime HD Camera > Start recording. |
Using Mac’s built-in tools |
Use QuickTime from the menu bar to record the screen. |
With a Mac keyboard shortcut using a microphone |
Press Command + Shift + 5 > Click Options to turn on the audio recording > Record. |

Record your Mac’s screen with Capto
Capture, edit, and share your Mac screen effortlessly with Capto. Record any screen area and add real-time voiceovers.
Try free Security-testedThe best Mac screen recorder option for your Mac
A great comprehensive all-in-one tool for screen recording Mac users can rely on is Capto.
With Capto you get to not only record your screen with real-time voiceover and webcam feed, but also edit your video and audio tracks, add text or speech bubbles, and share instantly from the app:
- Capture a specific app window, a browser, your whole screen, or select an area of any size with any number of windows in it
- Hide desktop while recording
- Take screenshots
- Edit video and images: crop, cut, fade in and fade out for audio
- Add annotations
- Share to Dropbox, YouTube, Facebook, and all possible shared storages, including FTP/SFTP servers

You can also use iShowU to record your screen. This app is particularly handy for creating product walkthroughs and demos and it can record high quality video with a selfie cam overlay. This allows you to create videos with a “talking head” inserted in them.
iShowU can also replace the background in your selfie video to make it look more polished and professional.

How to record your screen on Mac using the Screenshot toolbar
If you’re wondering, “Can I screen record on my Mac with a native macOS utility?” the answer is — yes. Apple has its own built-in screen recording feature called Screenshot that lets you capture video of whatever’s happening on your screen (with real-time audio, should you choose to).
You can use the Screenshot toolbar for taking both screenshots and video recordings of your screen (for video choose from the last two screen icons with a dot in the lower right corner).
To record with Screenshot:
- Press Shift + Command + 5 to open the toolbar
- Choose Record Entire Screen or Record Selected Portion (you’ll be able to drag and resize the frame of the screen area you want to be recorded, if you choose this option)
- Go to Options and choose microphone settings, decide where you’d like to save your recording to, or set a countdown timer
- Click on Record to start the recording
- Click on Stop Recording menu bar icon when you’re done
If your Screenshot toolbar is already set to screen recording, you can use hotkeys for recording your screen: press Shift + Command + 5 to start the recording and Command + Control + Esc to stop the recording.
How to record audio in screen recordings
When you think about how to screen record on MacBook, it’s important to also understand how to include sound in your videos.
As we have already discussed, your native Mac screen recorder allows you to capture audio from your Mac’s built-in microphone, but if you’re looking for more advanced capabilities (like creating and editing voiceovers or learning to record your Skype meetings), you can find out more from our dedicated article on how to record your screen on Mac with sound.
How to screen record on Mac using QuickTime
Another option to record a screen Mac users can try is QuickTime Player. We know this app for playing media files, but it can also be used for recording your screen and sound.
To use QuickTime Player as a Mac screen recorder, simply launch it from Applications and choose New Screen Recording from the File menu. This will open the Screenshot toolbar that lets you configure and start your recording.
The only difference with Screenshot is that with QuickTime Player, once you’re done recording, your file will automatically open inside the app and you can edit it right away.

Read also:
- Crop Video on Mac
- No Clutter Screen Capturing for Mac
- Record Edit Share Videos on Mac
- Take A Scrolling Screenshot
How to screen record for collaboration
Another great tool for asynchronous screen sharing is CleanShot X.It’s a simple screen recording macOS app that comes with a rich toolkit, allowing you to capture your screen without desktop icons, record as MP4 or GIF, trim video, annotate, and keep your recordings saved on CleanShot’s cloud for free — all a few clicks on the menu bar icon away.

How to record a screen with OBS Studio
Another popular contender for Mac screen recorder of choice is OBS Studio.
OBS Studio is a free open-source app used for both streaming and screen recording by many content creators. It’s known for a variety of advanced features, but can also be easily used by beginners.
Understanding how to screen record on Mac with OBS Studio starts with the basics:
- Download (obsproject.com), install, and launch the app
- Set up video: Sources ➙ + icon ➙ Display Capture ➙ name the source ➙ OK
- Set up audio: OBS Studio is set to capture audio from the built-in microphone on your Mac by default — you can add external audio sources or apps for capturing system sound in Sources
- Choose where you want to save your recorded files: Controls ➙ Settings ➙ Output ➙ Recording ➙ Browse ➙ OK
- Choose Start Recording under Controls to begin screen recording Mac
- Press Stop Recording when you're finished

If you’re also looking for an advanced app to help you edit your recordings, check CamerBag Pro. It’s a powerful photo and video editor that allows for professional adjustments and offers pro-quality preset filters to add style to your creations.
How to record your screen on Mac and have an impact?
Being able to clearly get your point across even if you aren’t in the same room with your audience or colleagues is very important. Having a video recording to illustrate it — is priceless. Learning how to screen record on Mac is, without a doubt, a useful skill, and you can master it in no time with Mac’s built-in Screenshot and QuickTime Player or a more advanced OBS Studio screen recording setup.
If you’d like an effective tool that lets you both record and edit your videos from the same app on Mac, opt forCaptoorCleanShot X(if you also like creating GIFs). And, finally, for advance editing and pro quality image adjustments arm yourself withCamerBag Proto present your ideas with style.
Be sure to try Capto, CleanShot X, CameraBag Pro, and iShowU for free with the 7-day trial ofSetapp, a platform of high-performance apps for tasks on Mac and iPhone. Learn how to screen record MacBook and check out more than 250 other options to boost productivity.
FAQ
How to record screen and audio at the same time on Mac
All the above mentioned methods of screen recording Mac users can choose from allow for recording audio from Mac’s built-in mic: you can capture your voice commentary, as well as any sounds playing at the moment (music, app sounds, etc.)
How can I record my screen on Mac with sound but without a mic?
All Macs have an internal microphone built-in, so you don’t have to have an external microphone for capturing sound when screen recording Mac.
Where does screen recording go on a Mac?
The answer differs depending on the app you choose for recording your screen:
Mac’s native Screenshot utility saves recorded files to Desktop (you can choose a different location in Options ➙ Save to)
QuickTime Player automatically opens the video after you hit Stop Recording, and you can then choose where to save your file (File ➙ Save)
OBS Studio lets you locate recordings using the File menu (File ➙ Show Recordings)
-
Apps like CleanShot X save your files to your free in-app cloud account
What is the recording shortcut on Mac?
Use Shift + Command + 5 to start screen recording Mac.以上がMacでレコードをスクリーニングする方法:簡単で迅速の詳細内容です。詳細については、PHP 中国語 Web サイトの他の関連記事を参照してください。

ホットAIツール

Undresser.AI Undress
リアルなヌード写真を作成する AI 搭載アプリ

AI Clothes Remover
写真から衣服を削除するオンライン AI ツール。

Undress AI Tool
脱衣画像を無料で

Clothoff.io
AI衣類リムーバー

Video Face Swap
完全無料の AI 顔交換ツールを使用して、あらゆるビデオの顔を簡単に交換できます。

人気の記事
ホットツール

メモ帳++7.3.1
使いやすく無料のコードエディター

SublimeText3 中国語版
中国語版、とても使いやすい

ゼンドスタジオ 13.0.1
強力な PHP 統合開発環境

ドリームウィーバー CS6
ビジュアル Web 開発ツール

SublimeText3 Mac版
神レベルのコード編集ソフト(SublimeText3)
ホットトピック
 1657
1657
 14
1415
52
1309
25
1257
29
1229
24
14
1415
52
1309
25
1257
29
1229
24

 Sequoiaに更新した後、Macの実行を遅く修正します
Apr 14, 2025 am 09:30 AM
Sequoiaに更新した後、Macの実行を遅く修正します
Apr 14, 2025 am 09:30 AM
最新のMacOSにアップグレードした後、Macは遅くなりますか?心配しないでください、あなたは一人ではありません!この記事では、MacOS Sequoiaにアップグレードした後、遅いMacランニングの問題を解決した私の経験を共有します。アップグレード後、音声ノートの録音や転写やトレイルマップ計画機能の改善など、新しい機能を体験するのが待ちきれません。しかし、インストール後、私のMacはゆっくりと実行され始めました。 Macosの更新後に実行されるスローマックの原因とソリューション これが私の経験の私の要約です。MacOSSequoiaの更新後の遅いMacが実行されるという問題を解決するのに役立つことを願っています。 問題の原因 解決 パフォーマンスの問題 Novabeを使用します
 「画面が観察されている」エラーを取り除く方法
Apr 05, 2025 am 10:19 AM
「画面が観察されている」エラーを取り除く方法
Apr 05, 2025 am 10:19 AM
「画面が監視されている」というメッセージが表示されたとき、最初に考えるのは、誰かがコンピューターにハッキングすることです。しかし、それは常にそうではありません。心配する必要がある問題があるかどうかを調べてみましょう。 Macを保護します SetAppを使用すると、コンピューターを保護するツールを選択することを心配する必要はありません。 SetAppで独自のプライバシーとセキュリティソフトウェアのスイートをすばやく形成できます。 無料トライアルセキュリティテスト「あなたの画面は監視されている」とはどういう意味ですか? 「画面が監視されている」と表示されるMacロック画面メッセージがある理由はたくさんあります。 画面を他の人と共有しています 画面を録音しています あなたはエアプレイを使用しています 画面にアクセスしようとするアプリを使用しています あなたのコンピュータは悪に感染しています
 Windowserver Mac CPUの使用を減らす方法
Apr 16, 2025 pm 12:07 PM
Windowserver Mac CPUの使用を減らす方法
Apr 16, 2025 pm 12:07 PM
MacOS Windowserver:CPUの使用量とソリューションの高い理解 WindowserverがMacで重要なCPUリソースを消費していることに気づきましたか? このプロセスは、Macのグラフィカルインターフェイスにとって非常に重要であり、画面に表示されるすべてをレンダリングします。 高c
 MacとiPhoneのライブ写真にビデオを作成する方法:詳細な手順
Apr 11, 2025 am 10:59 AM
MacとiPhoneのライブ写真にビデオを作成する方法:詳細な手順
Apr 11, 2025 am 10:59 AM
このガイドでは、iPhoneとMacでライブ写真、ビデオ、GIFを変換する方法について説明します。 最新のiPhoneは画像処理に優れていますが、さまざまなメディア形式を管理するのは難しい場合があります。 このチュートリアルは、さまざまな変換のソリューションを提供します
 Macディスクユーティリティ:応急処置でディスクを修理する方法は?それを回復する方法は?
Apr 13, 2025 am 11:49 AM
Macディスクユーティリティ:応急処置でディスクを修理する方法は?それを回復する方法は?
Apr 13, 2025 am 11:49 AM
コンピューターが起動しない場合、アプリが凍結を続けたり、特定のドキュメントを開けたり、パフォーマンスが遅くなったりする場合は、Macディスクを修理する必要がある場合があります。幸いなことに、Appleにはあなたが使用できる便利なツールが含まれています
 Macのドックにアクティブなアプリのみを表示する方法
Apr 09, 2025 am 11:44 AM
Macのドックにアクティブなアプリのみを表示する方法
Apr 09, 2025 am 11:44 AM
Mac Dockbar Optimization Guide:実行中のアプリケーションのみを表示します MacのDock Barはシステムのコアであり、Finder、Trash、最近使用されたアプリ、アクティブなアプリ、ブックマークアプリを起動することができ、ドキュメントやダウンロードなどのフォルダーを追加できます。デフォルトでは、Mac Dock Barには、12を超えるAppleが所有するアプリケーションが表示されます。ほとんどのユーザーはさらにアプリケーションを追加しますが、アプリケーションを削除することはめったになく、ドックバーが乱雑で効果的に使用するのが難しくなります。 この記事では、ほんの数分でMac Dock Barを整理してクリーンアップするのに役立ついくつかの方法を紹介します。 方法1:ドックバーを手動で整理します 未使用のアプリケーションを手動で削除し、一般的に使用されるアプリケーションのみを保持できます。 アプリケーションを削除します: アプリケーションを右クリックします
 Google ChromeはMacで動作していませんか?なぜウェブサイトが読み込まれていないのですか?
Apr 12, 2025 am 11:36 AM
Google ChromeはMacで動作していませんか?なぜウェブサイトが読み込まれていないのですか?
Apr 12, 2025 am 11:36 AM
65.7%以上の市場シェアで、Google Chromeは世界最大のWebブラウザーです。 WindowsやAndroidなどの他のオペレーティングシステムを使用する場合は使用できますが、多くのMacユーザーもSafariよりもChromeを好みます。 MO
 Mac上のファイルを削除する方法
Apr 15, 2025 am 10:22 AM
Mac上のファイルを削除する方法
Apr 15, 2025 am 10:22 AM
Macストレージの管理:ファイルを削除するための包括的なガイド 毎日のMacの使用には、アプリのインストール、ファイルの作成、データのダウンロードが含まれます。 ただし、ハイエンドMacでさえストレージが制限されています。 このガイドは、不必要を削除するためのさまざまな方法を提供します
