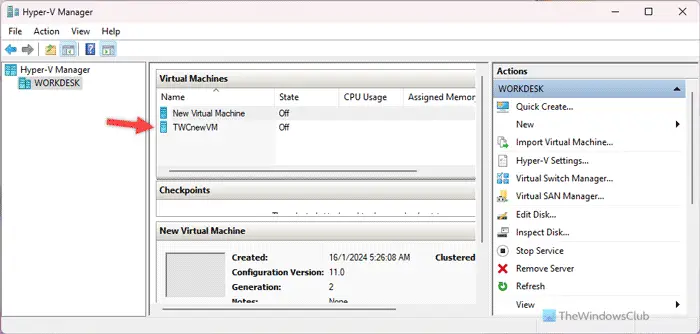
如果您在windows 11/10中的vmware上安装了一个虚拟机,并且想将vmware转换为hyper-v,可以采取以下方法。在开始转换前,请确保备份重要数据以防意外情况发生。不仅限于windows系统,无论是linux还是其他操作系统,您也可以使用starwind v2v converter来完成这种转换。
在开始之前,您需要在Windows计算机上下载并安装StarWind V2V Converter。我们已经尝试了一些免费备份软件,用于VMware和Hyper-V虚拟机,可以肯定SatrWind V2V Converter使整个过程更加简便。
另一件重要的事情是创建一个文件夹来存储备份。它可以在您想要的任何驱动器中。
要将VMware转换为Hyper-V,请执行以下步骤:
首先,在按照实际步骤操作之前,您可以前往starwinsoftware.com下载并安装该程序。
打开电脑上的StarWind V2V Convert应用程序后,首先要选择要转换的图像位置。选择本地文件保存选项,然后单击“保存下一步”按钮。
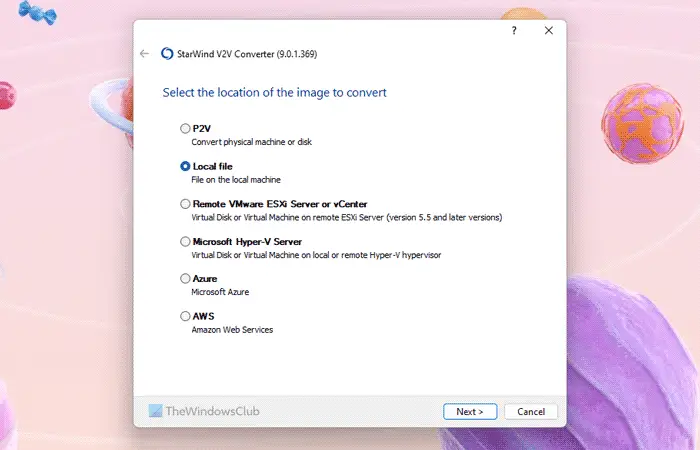
点击三点图标,然后导航到存储 VMware 虚拟机文件的路径。如果未更改路径,则应前往 Documents 文件夹。换句话说,您需要按照这个路径进行操作:
C:USERS用户名Documents虚拟计算机虚拟计算机名称
在这里,您可能会看到几个编号为s001、s002等的VMware虚拟磁盘文件。您需要选择没有此类编号的文件。例如,如果您的虚拟机名为Windows 11 x64,则可以在该文件夹中找到相同的名称。
接着,您需要确定目标图像的位置。请务必选择安装Microsoft Hyper-V服务器选项,然后点击下一步进行安装。
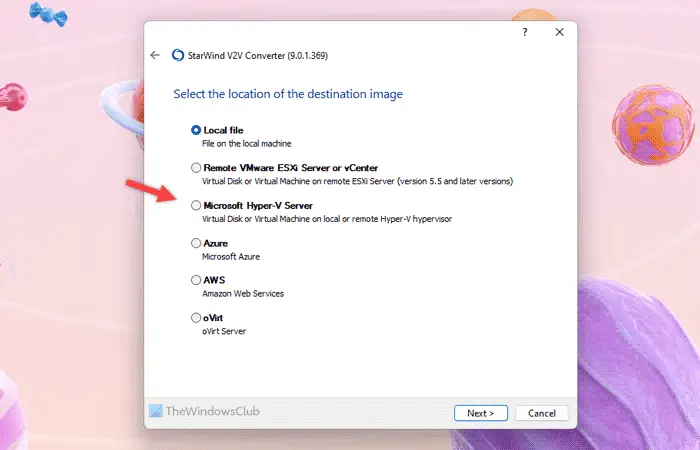
如果选择导入本地文件选项,则需要手动创建Hyper-V虚拟机以导入所有内容。但是,当您选择上述选项时,此程序会自动执行所有操作。
现在,它要求提供主机名。您不需要更改任何内容。您只需将本地主机保留为主机名,然后单击下一步按钮即可。然后,点击创建一个新的虚拟机器按钮。
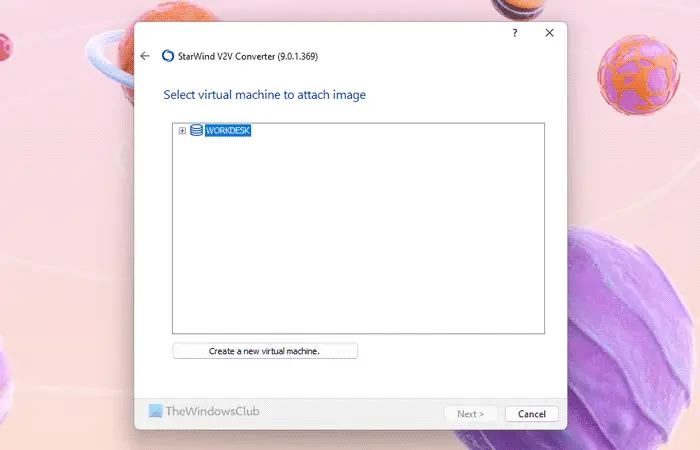
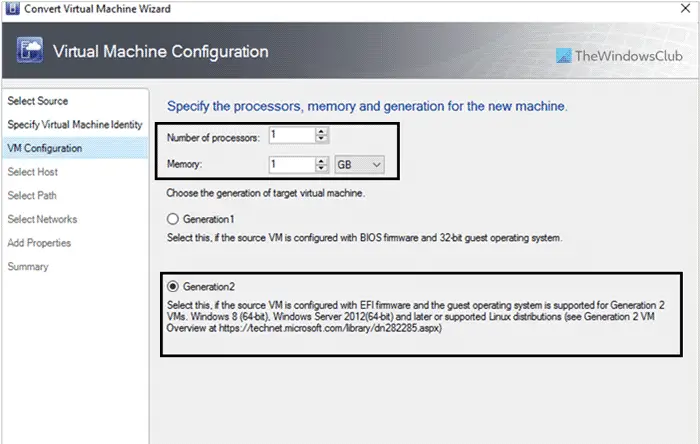
之后,为新的虚拟机输入合适的名称,并选择新的CPU计数、内存、世代、操作系统类型。最重要的是中国的道路。要选择路径,您需要单击三点线按钮,然后选择您先前创建的文件夹路径。

在这里,你需要记住几件事:
一旦一切都设置好了,点击[确定]按钮。在下一个窗口中,选择新创建的虚拟机,然后点击下一步按钮。
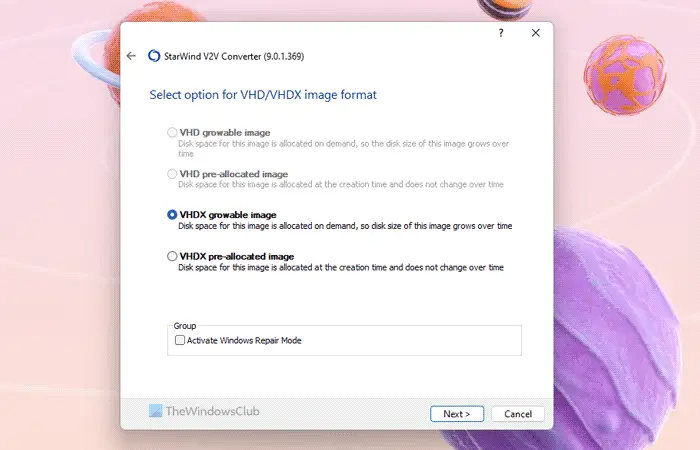
然后,您必须选择虚拟硬盘格式。建议选择VHDX可增长镜像选项,因为它不会一次消耗所有空间。
最后,点击转换按钮,给它几分钟时间来完成所有事情。
完成后,打开Hyper-V管理器并启动虚拟机。
仅供参考,您可以在初始启动之前自定义虚拟机的设置。然而,这并不是强制性的。
您可以使用VMM或Virtual Machine Manager将VMware虚拟机转换为Hyper-V。为此,您需要首先选择VM和服务选项。
从此处,您需要选择Home>;Create>;Create Virtual Machines(主页&>创建&>创建虚拟机),然后选择转换虚拟机(Convert Virtual Machine)选项。
之后,这些选项几乎与前面提到的指南相同。话虽如此,您需要选择您想要转换的源映像,并选择Hyper-V主机/Azure Stack HCI选项作为目标。
之后,您可以自定义转换后的虚拟机的名称,选择主机、网络连接/交换机等。如果您要将Windows 11虚拟机转换为Hyper-V,最重要的事情之一是选择第二代配置选项。否则,即使在成功转换之后,它也不会工作。
最后,检查所有设置并开始转换。完成后,您可以打开Hyper-V找到新的虚拟机。
也可以在Windows PowerShell的帮助下完成同样的事情。由于有几件事需要走上正轨,即使你错过了一个单词,也会有无数的事情出错,我们建议你总是使用上述两个选项中的任何一个。
就这样!我希望这些工具对你有所帮助。
阅读:将VMware转换为VirtualBox,反之亦然
可以,无论您的虚拟计算机上安装了什么操作系统,您都可以将VMware VM或虚拟机转换为Hyper-V。虽然有几个应用程序可以用于这一目的,但我们已经尝试过StarWind V2V Converter。它以最快、最简单的方式完成这项工作。最棒的是,在这个免费工具的帮助下,您可以迁移或转换多个虚拟机。
StarWind V2V Converter是将VMware转换为Hyper-V的最佳免费工具之一。您可以在Windows 11/10 PC上轻松下载此备份软件。无论是Windows还是Linux,您都可以在瞬间从VMware迁移到Hyper-V。您只需选择VMware虚拟磁盘文件,创建一个新的虚拟机,根据操作系统调整配置,并选择一个文件夹来保存备份的文件。
Read: Backup VMware Virtual Machines with Azure Backup Server
以上就是如何将VMware转换为Hyper-V的详细内容,更多请关注php中文网其它相关文章!

每个人都需要一台速度更快、更稳定的 PC。随着时间的推移,垃圾文件、旧注册表数据和不必要的后台进程会占用资源并降低性能。幸运的是,许多工具可以让 Windows 保持平稳运行。

 广告
广告
![ThinkPHP5快速开发企业站点[全程实录]](https://img.php.cn/upload/course/000/000/068/6253d918a3ce7278.png)

Copyright 2014-2025 https://www.php.cn/ All Rights Reserved | php.cn | 湘ICP备2023035733号


 263
263