
 System Tutorial
Windows Series
Don\'t Wait for an Emergency, Here\'s How to Create a Bootable Windows 11 USB Drive Now
System Tutorial
Windows Series
Don\'t Wait for an Emergency, Here\'s How to Create a Bootable Windows 11 USB Drive Now
Don\'t Wait for an Emergency, Here\'s How to Create a Bootable Windows 11 USB Drive Now

You can install Windows 11 on your computer either using a DVD or from a USB drive. While both methods work well, the DVD method is somewhat lengthy and more prone to errors. On the other hand, you can easily create a bootable Windows 11 USB drive and use it to install the OS on your computer.
Why Is It Important to Have a Bootable USB Drive Ready?
Its relatively common to face issues on your Windows 11 computer. You can get rid of most of those issues by implementing a few basic fixes, but what happens when you come across a problem that has made your computer totally unusable?
If you've tried all the normal fixes for that issue, the last option left for you is to reinstall Windows. In this situation, if you have a bootable USB drive ready, you can use it to install the operating system, eliminating the need to take your device to a technician to reinstall the operating system.
You can also give your bootable USB drive to your friend if they want to install Windows 11 on a new computer.
In any case, a bootable USB drive is one of the most important tools in your toolbox that you should have ready, because you never know when you'll come across a situation where you'll need it.
Create a Bootable Windows 11 USB Drive Using the Media Creation Tool
The easiest and Microsoft-recommended way to create a bootable USB drive is by using the Media Creation Tool. It's a program by Microsoft that allows you to create a bootable USB drive or DVD that contains the operating system files. To use the Media Creation Tool, first plug in a USB drive to your computer. The USB drive must have at least 8GB of space available.
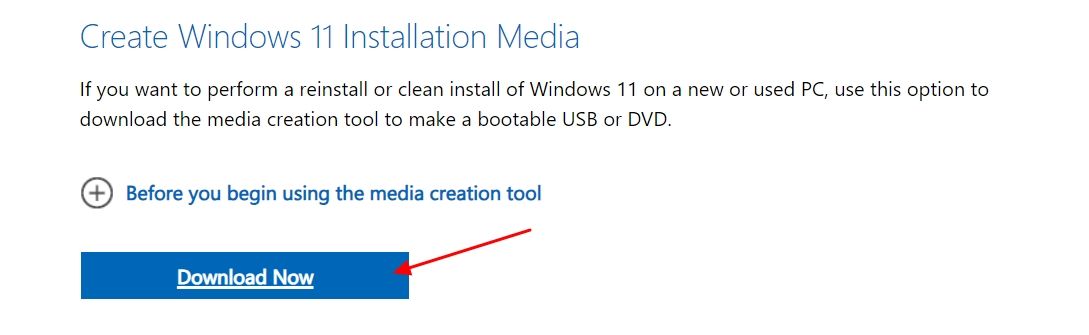
Then, visit the Windows 11 download page, and click the "Download Now" button under the Create Windows 11 Installation Media option. This will download the Media Creation Tool on your computer.
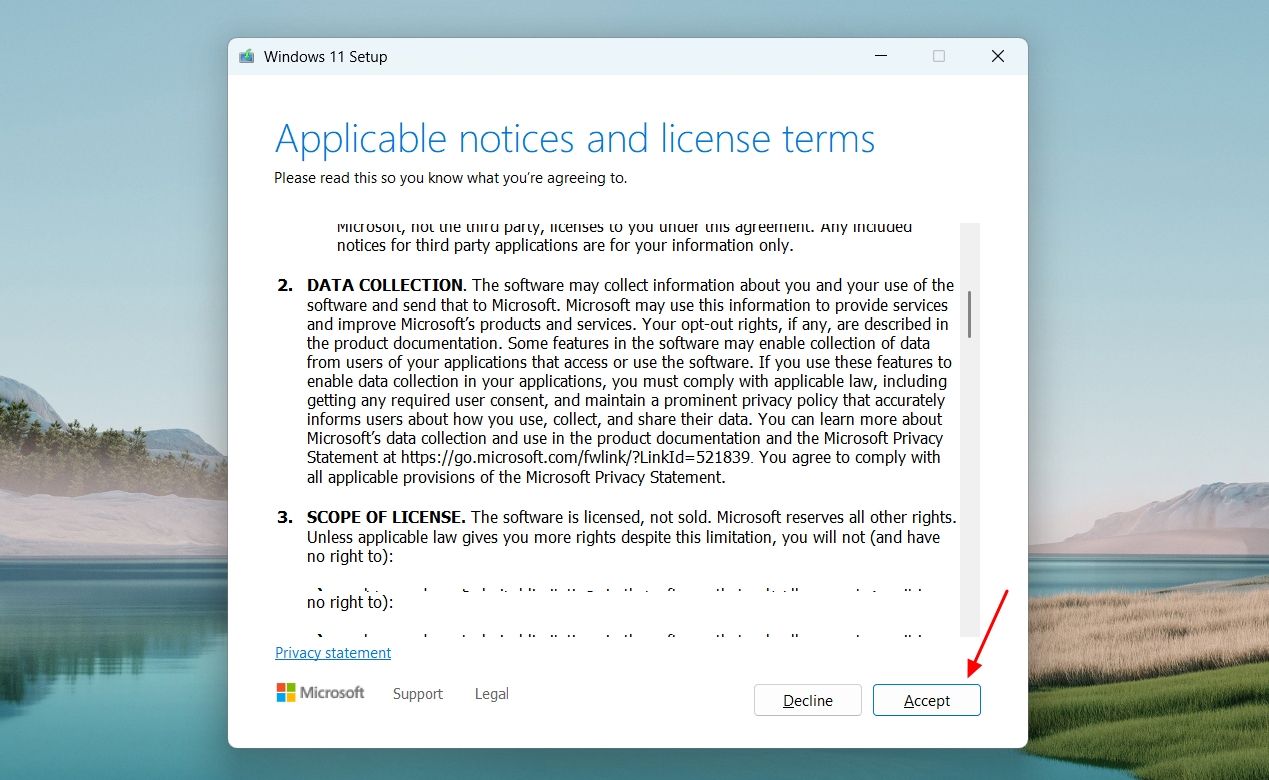
Open the downloaded Media Creation Tool, and click the "Accept" button to accept all the Microsoft terms and conditions.
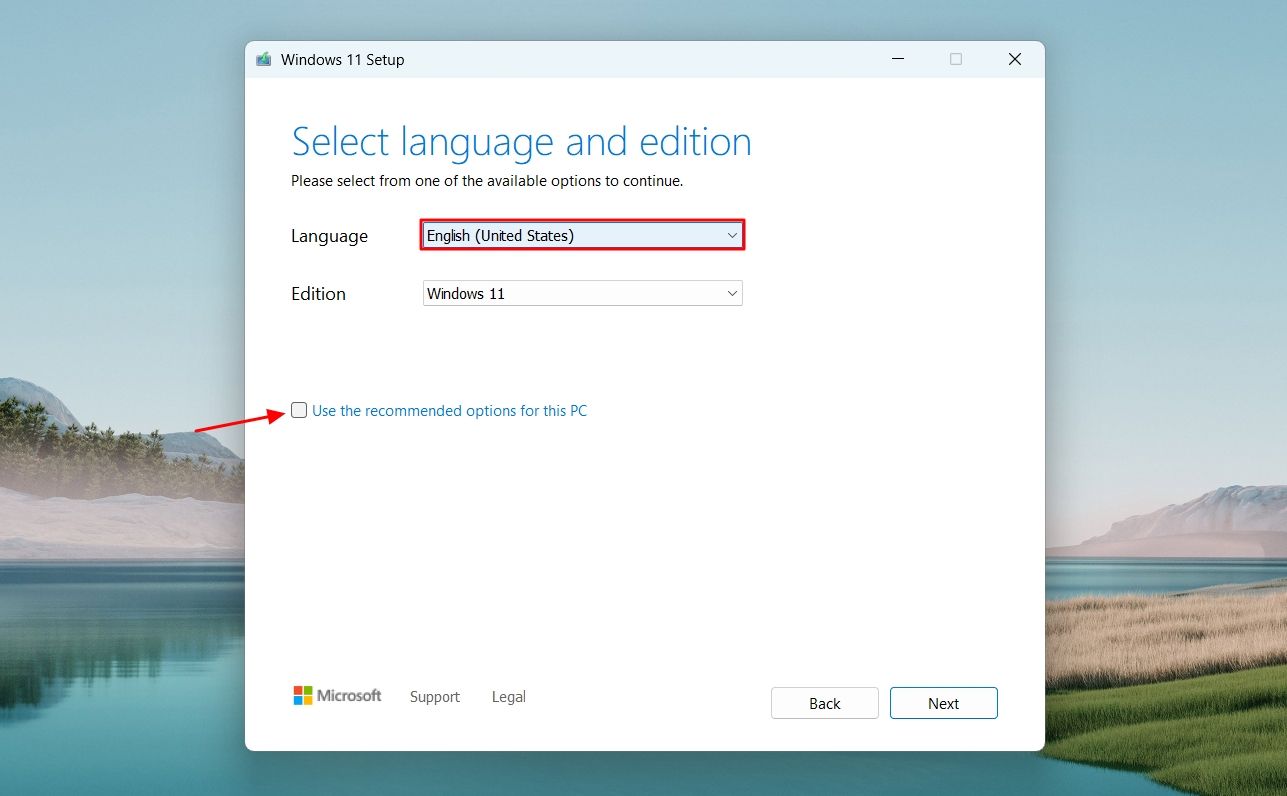
Uncheck the "Use the recommended options for this PC" box, click the "Language" dropdown menu, and choose your preferred language. Then, click "Next."
In the Choose which media to use window, select the “USB Flash Drive” option and click "Next."

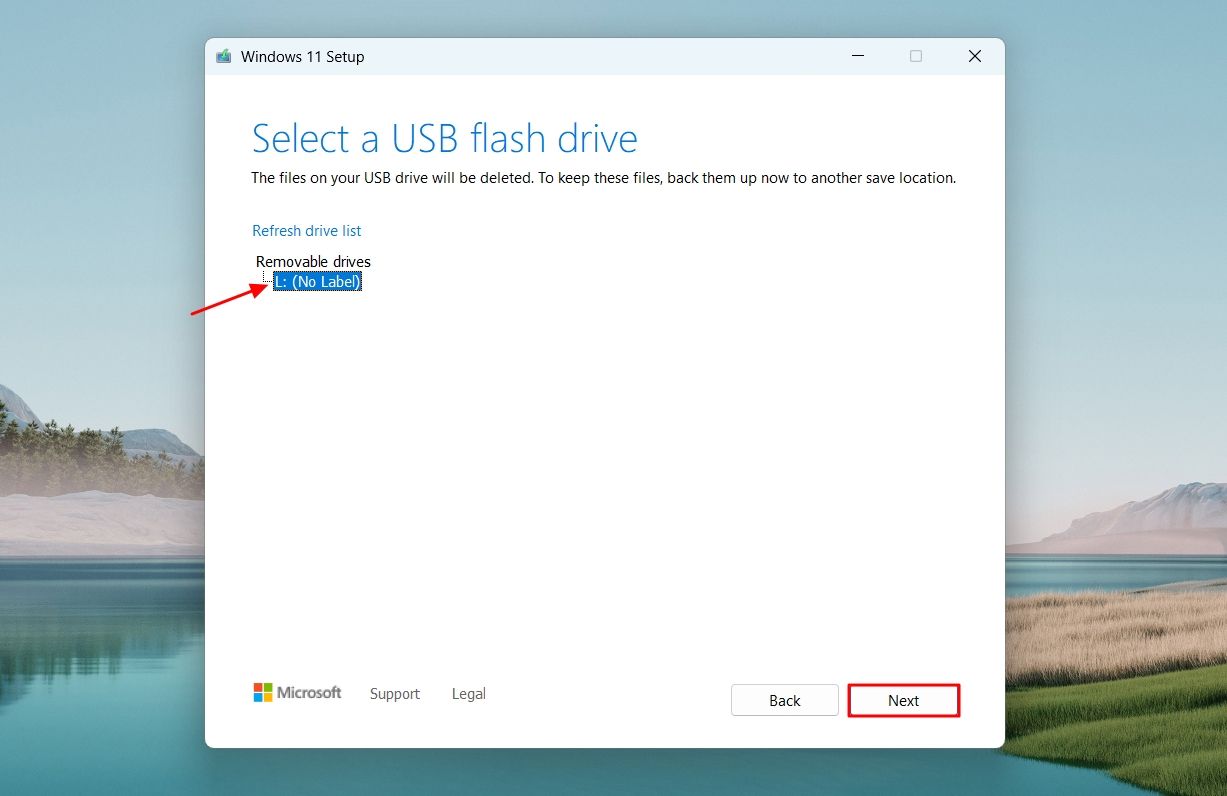
Select your USB drive. You can click the “Refresh Driver List” option if your USB drive is not listed. Then, click the “Next” option.
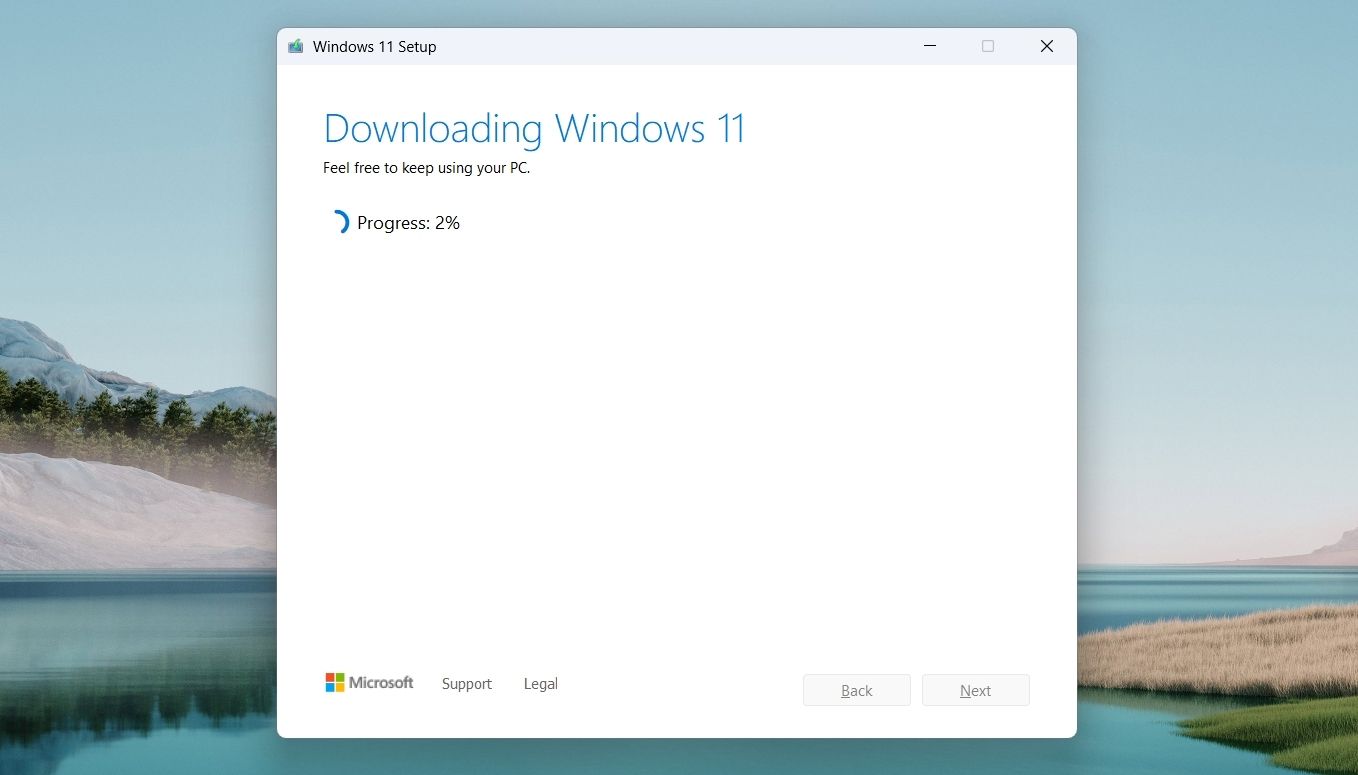
The Media Creation Tool will then download and set up a Windows 11 installer on your USB Drive. The process is going to take some time, depending on your internet speed.
Once your USB flash drive is ready, click the "Finish" option to close the window.
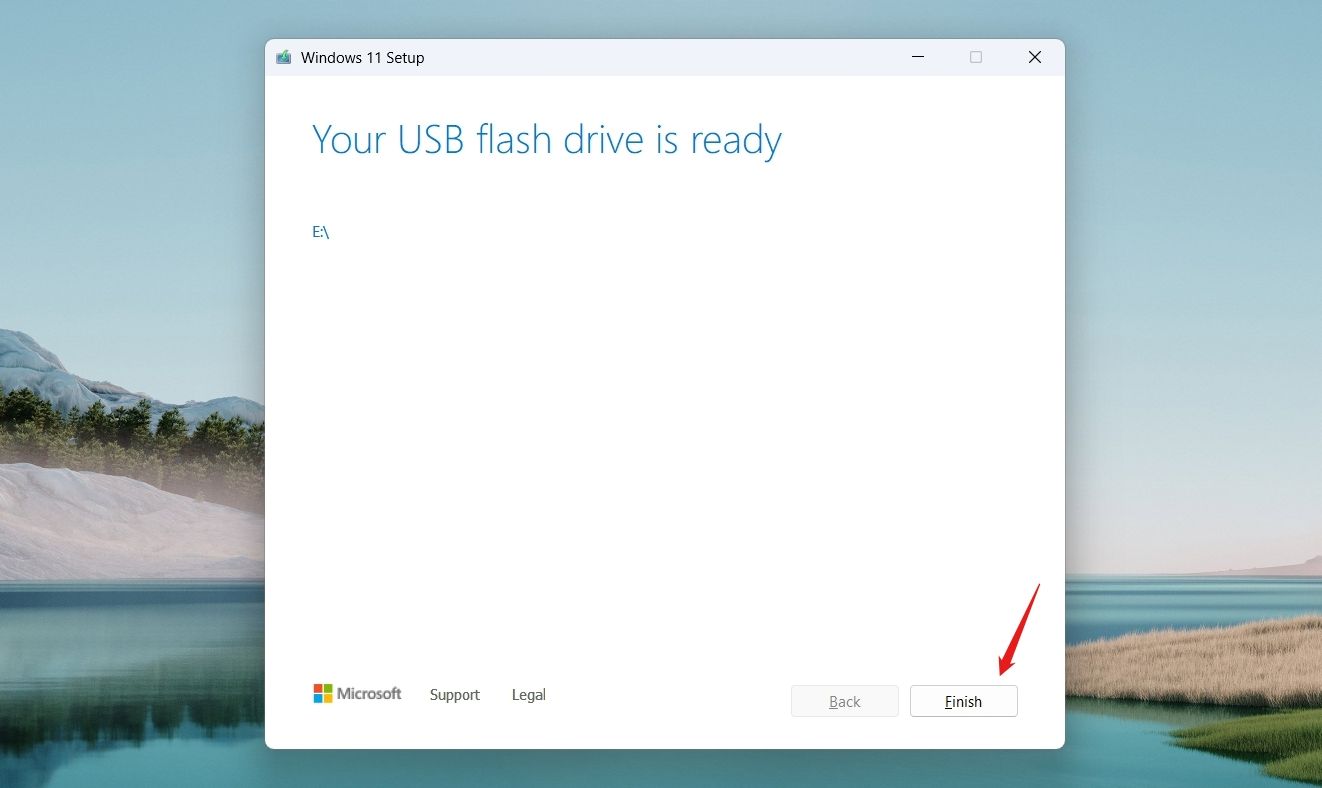
You can now use the USB drive to install Windows 11 on a computer.
Create a Bootable Windows 11 USB Drive Using Rufus
Rufus is a free and open-source utility that allows you to create a bootable USB flash drive for any operating system, including Windows 11. However, to use this tool, you will need to have the Windows 11 ISO file downloaded to your computer. You can get the Windows 11 ISO file from the Microsoft website.
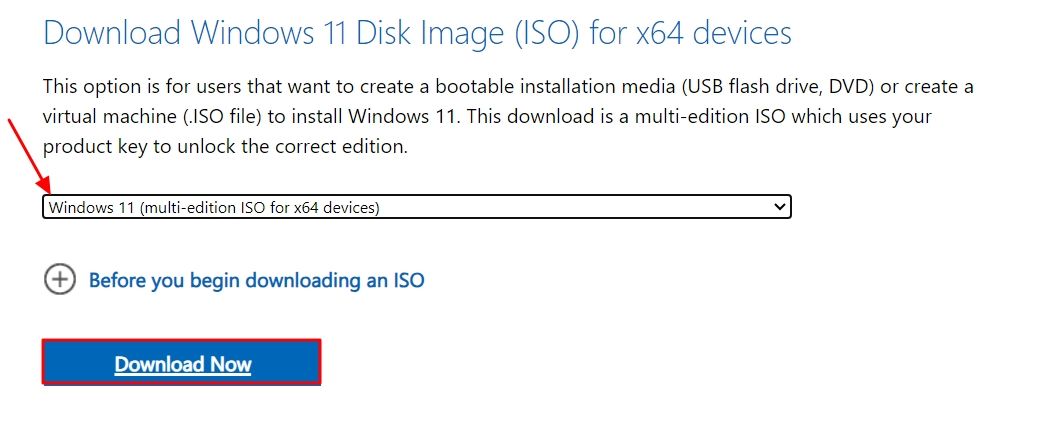
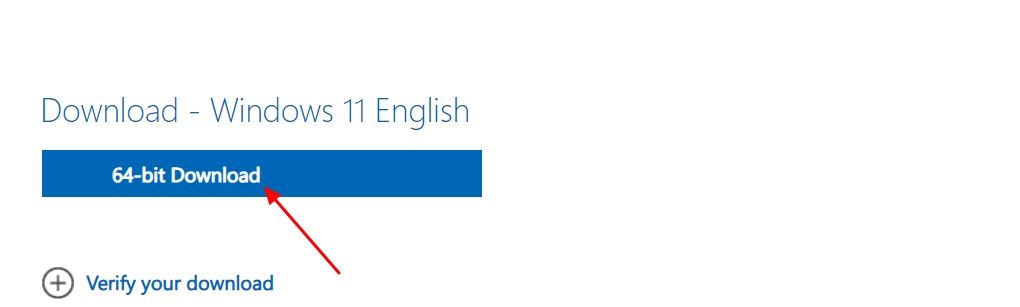
To do this, visit the Windows 11 download page, click the drop-down arrow under the Download Windows 11 Disk Image (ISO) section, and select the "Windows 11 (Multi-Edition ISO)" option. Then, click the "Download Now" button.
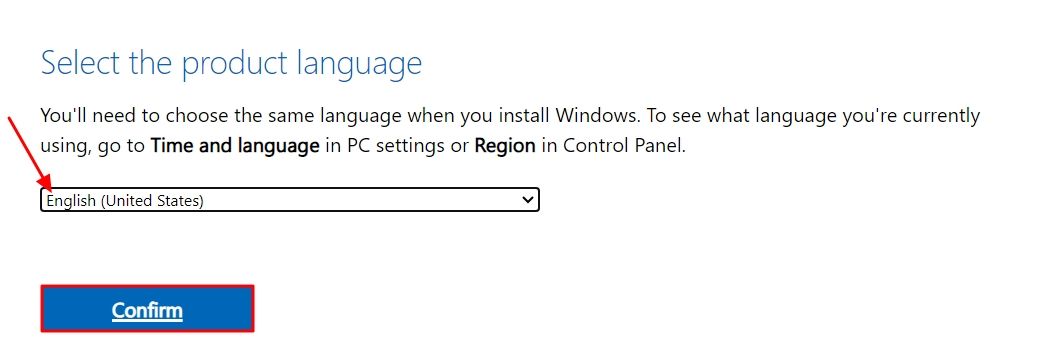
Choose your preferred language from the language drop-down menu, then click "Confirm."
Click the "Download" button to begin downloading the file. The ISO file is approximately 7GB in size, which may take some time to download, depending on your connection speed.
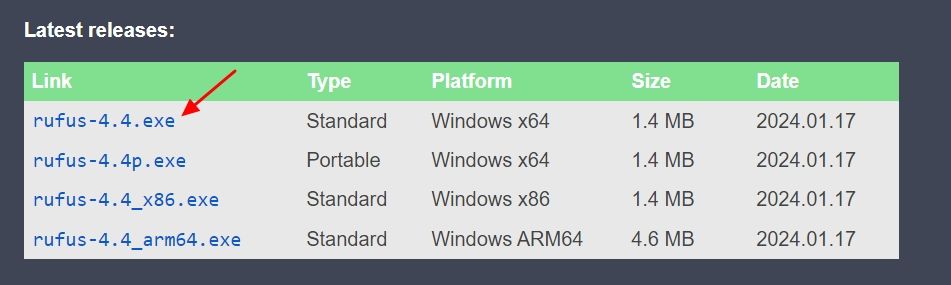
Once you have the Windows 11 ISO file, visit the Rufus official website and download its latest version. Make sure you select the link labeled "Standard" under the Type section.
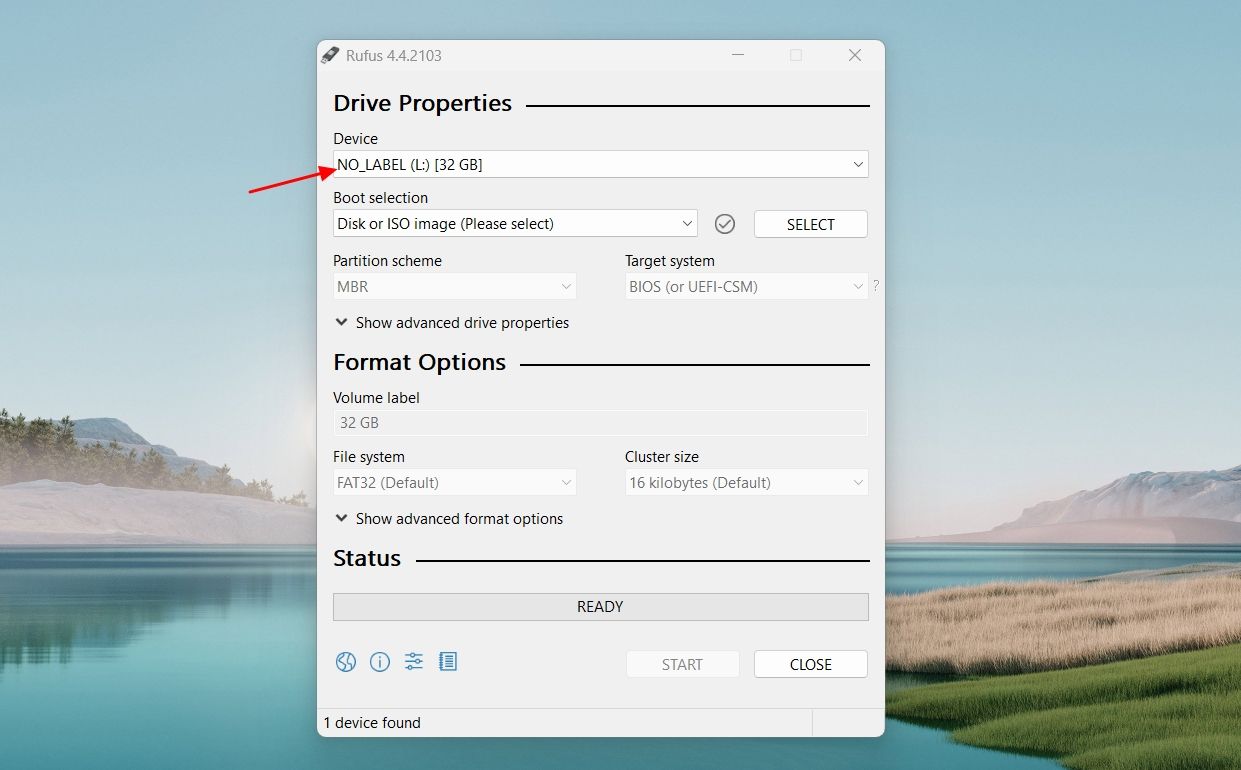
After downloading the Rufus app, open it, click the drop-down arrow for the "Device" option, and choose your USB device.
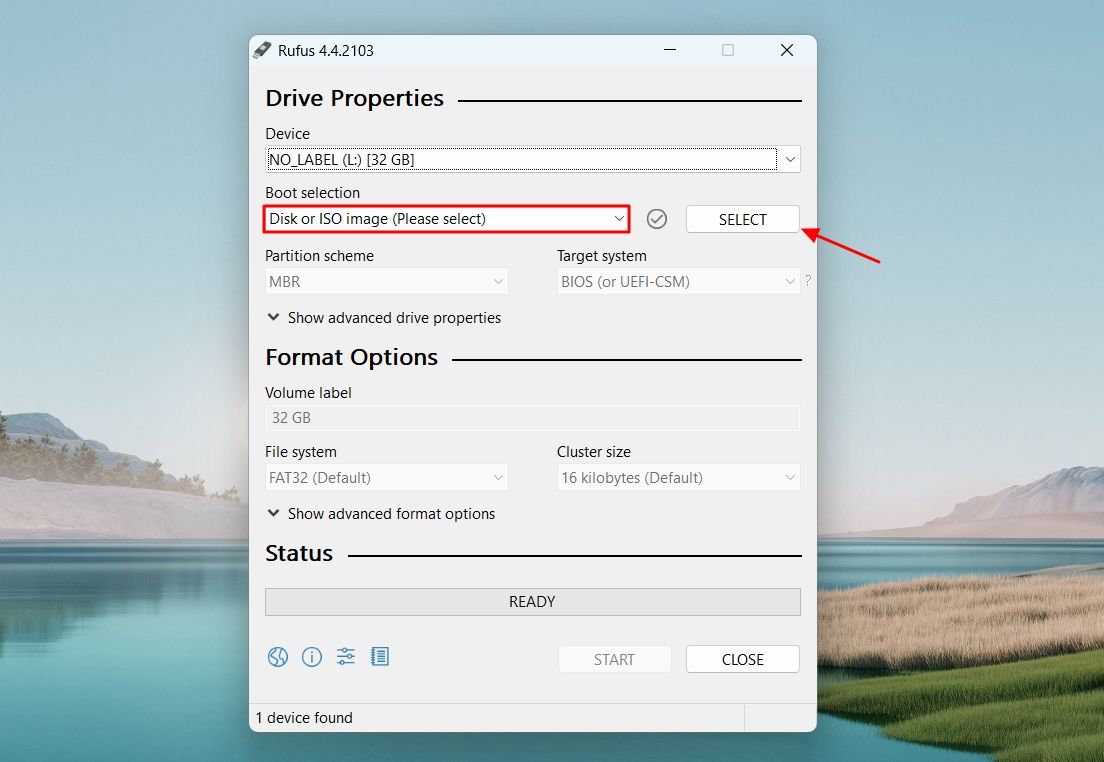
Select "Disk or ISO image" from the Boot selection drop-down menu, then click the "Select" button next to it.
Choose the Windows 11 ISO file you just downloaded and click "Open."

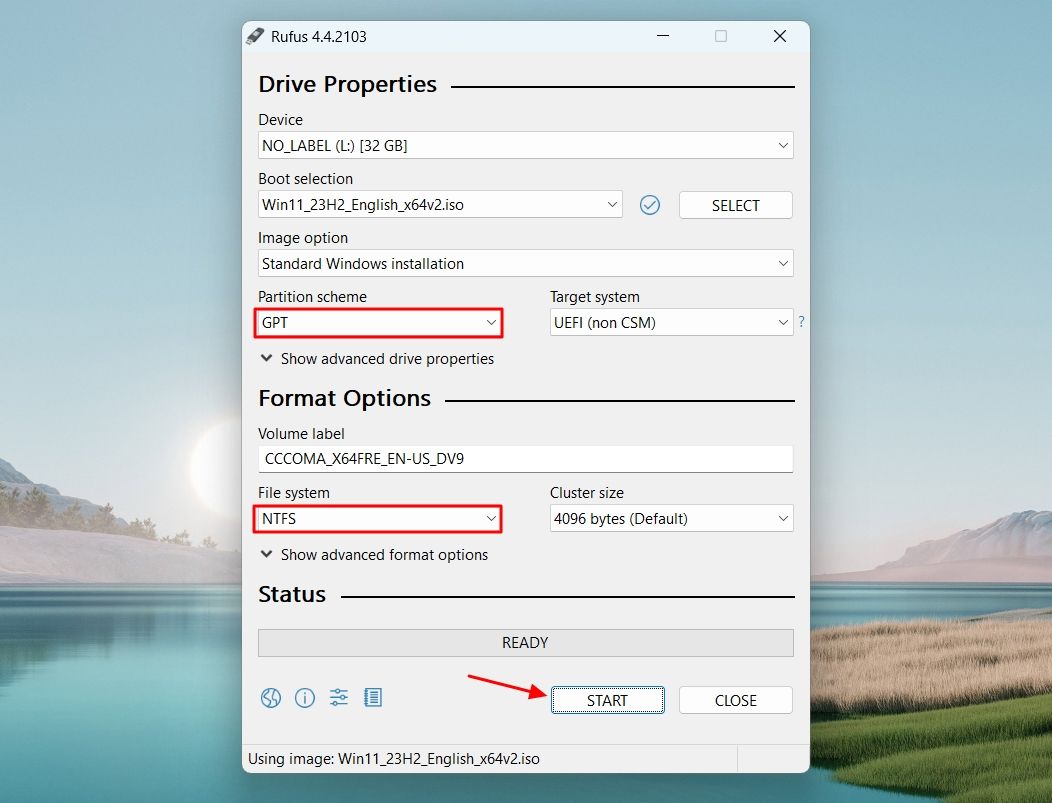
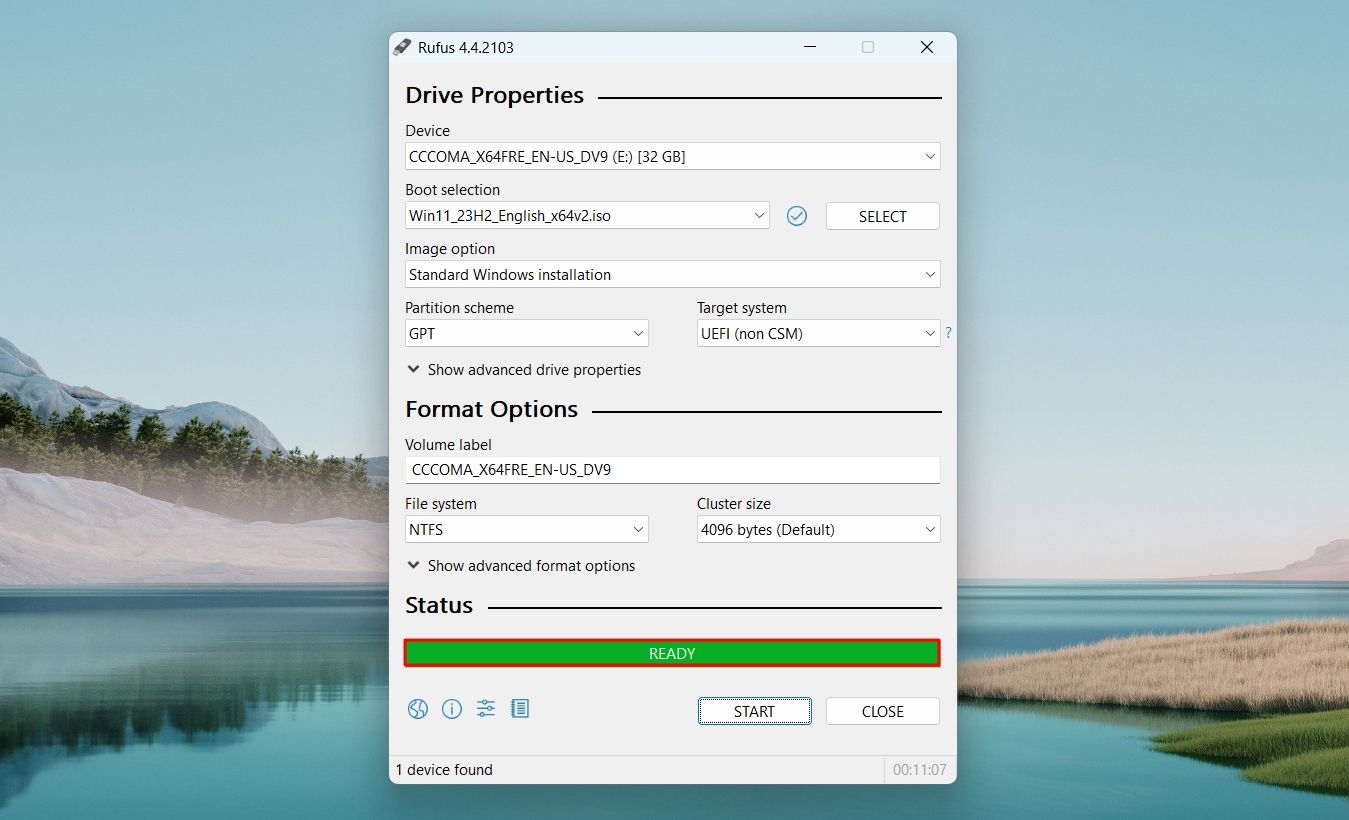
Make sure the Partition Scheme is set to "GPT" and File System is set to "NTFS." Then, click "Start."
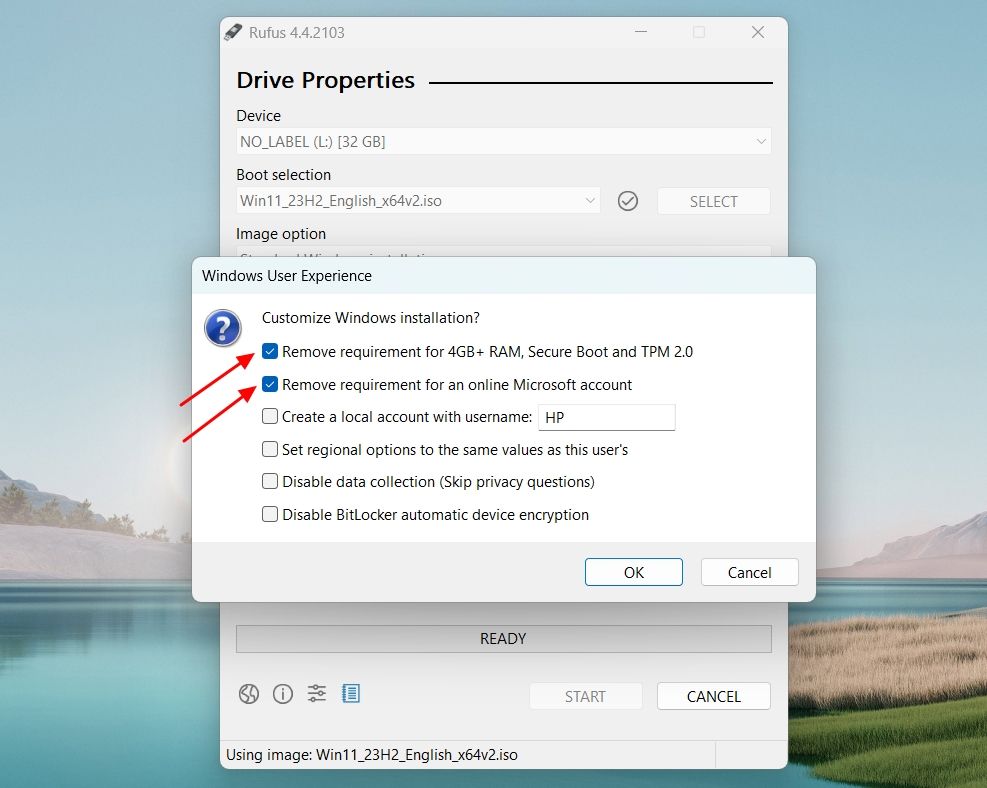
In the Windows User Experience window, check the boxes next to "Remove requirement for 4GB+ RAM, Secure Boot, and TPM 2.0" and "Remove Requirement for an Online Microsoft Account." Then, click "OK."
Click "Yes."
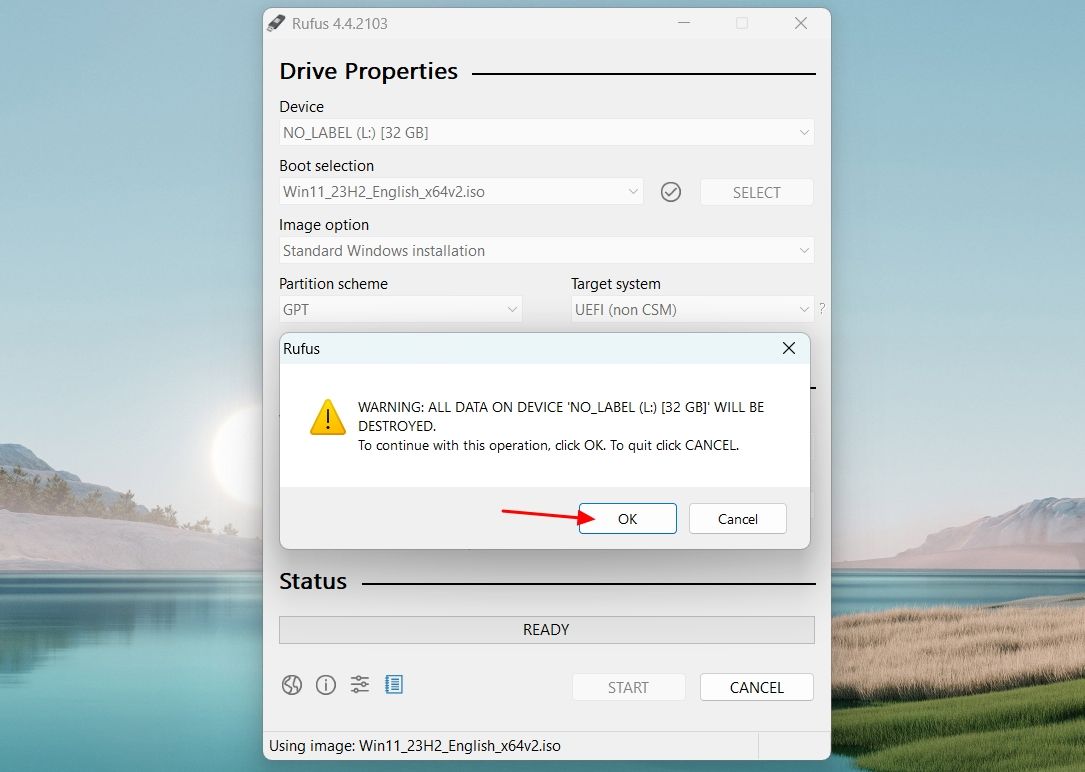
Click "OK" to grant Rufus permission to delete all data present on your USB drive and turn it into a bootable Windows 11 drive.
Rufus will initiate the process, and you can monitor the progress under the Status section.
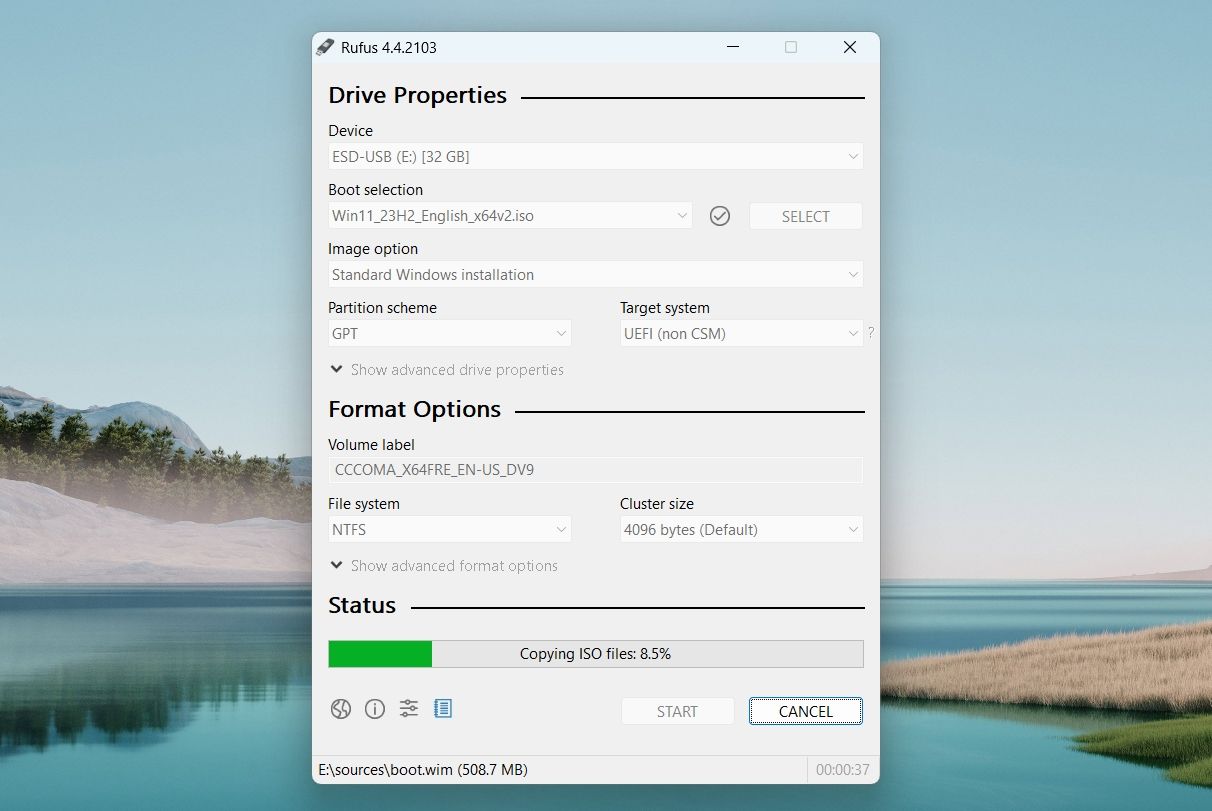
Once the process is complete, you will see the Ready message with a green background under the Status section.
Create a Bootable Windows 11 USB Using Command Prompt
You should always prefer the Media Creation Tool or the Rufus method to create a bootable USB drive. However, if both of these methods fail to work, you can use Command Prompt to create a bootable USB drive. To do this, first, make sure you have the Windows 11 ISO file on your computer.
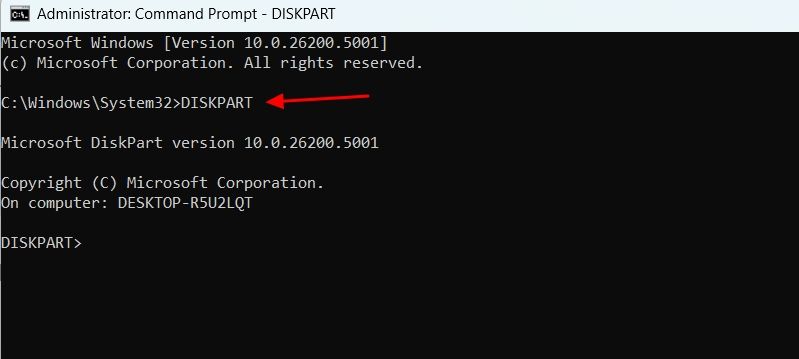
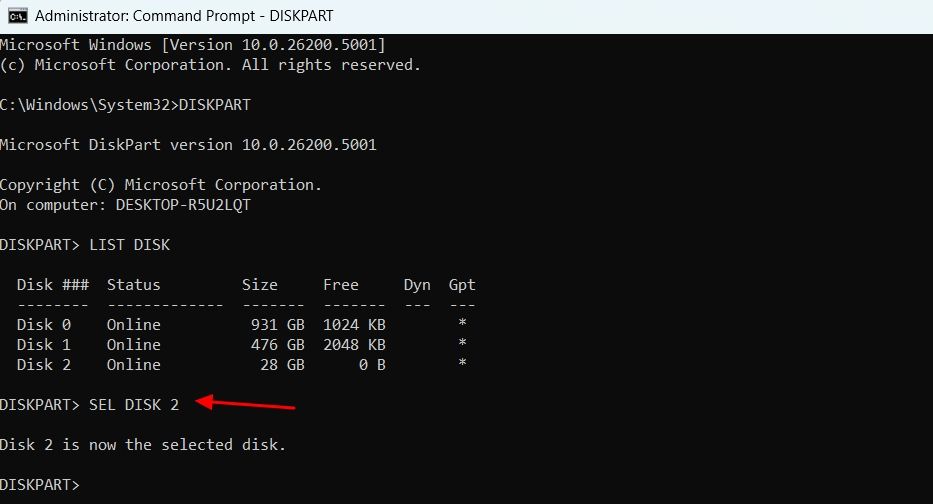
Next, open Command Prompt as an administrator, type DISKPART and hit Enter.
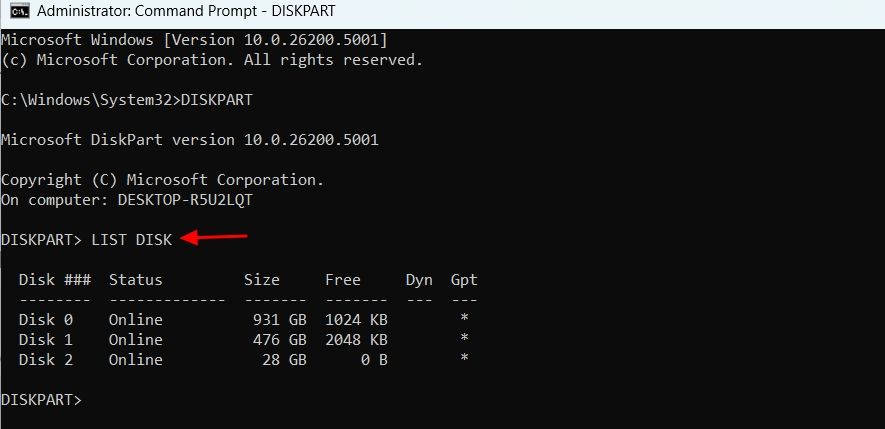
Then, type LISTDISK and hit Enter. This will list all the storage devices connected to your computer.
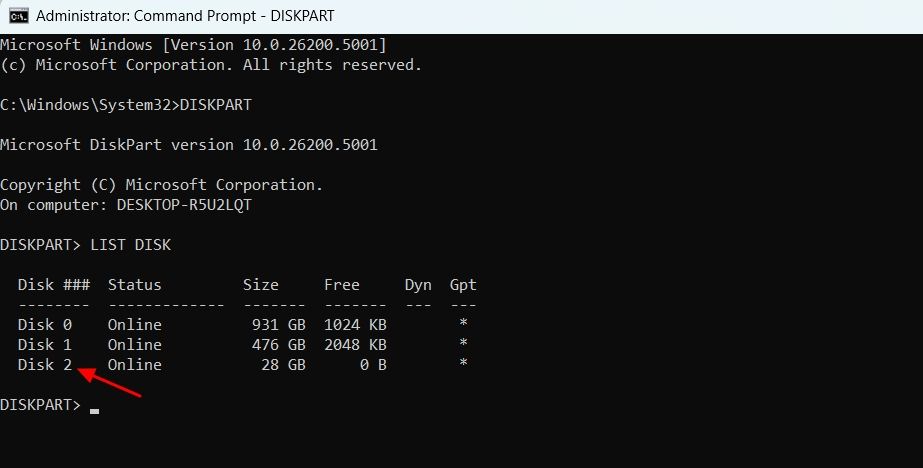
Note the disk number of your USB drive. In our case, it’s DISK 2.
Type SEL (YourDisk) and hit Enter to select your USB drive.
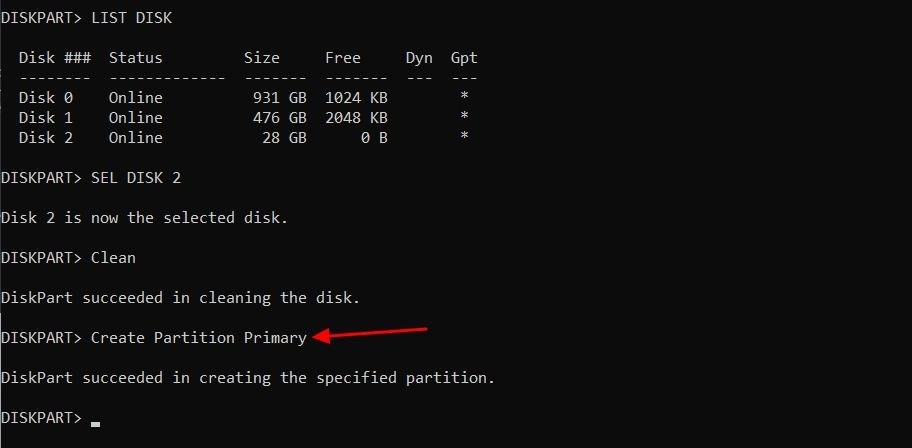
You will now have to clean the drive. For this, type Clean and hit Enter.

Next, type the following command and hit the Enter key to create a primary partition:
<code class="hljs sql">CreatePartition Primary</code>
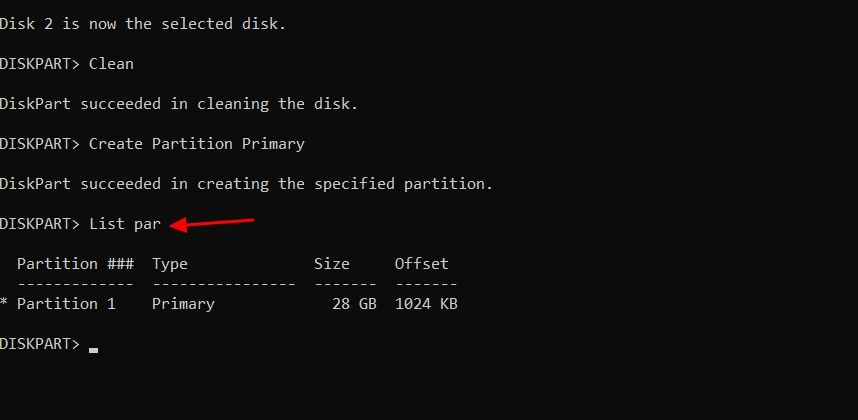
Type List par and press Enter to choose the main partition.
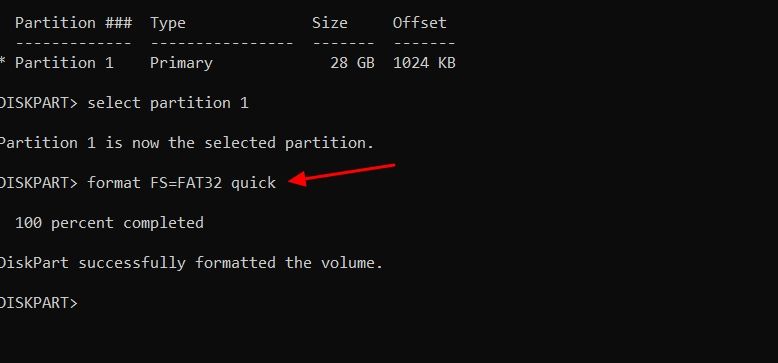
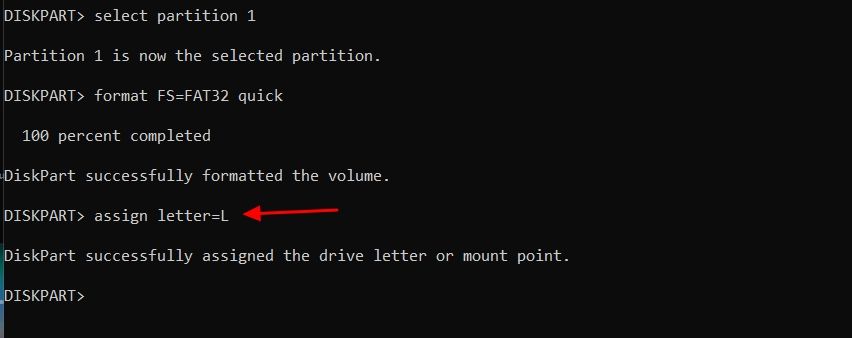
You’ll now have to format the USB drive. For this, type the following command and hit Enter:
<code class="hljs ">format FS=FAT32 quick</code>
Now, you need to assign a volume letter to the USB drive. To do this, type the following command and press Enter.
<code class="hljs ">assign letter=(Letter)</code>
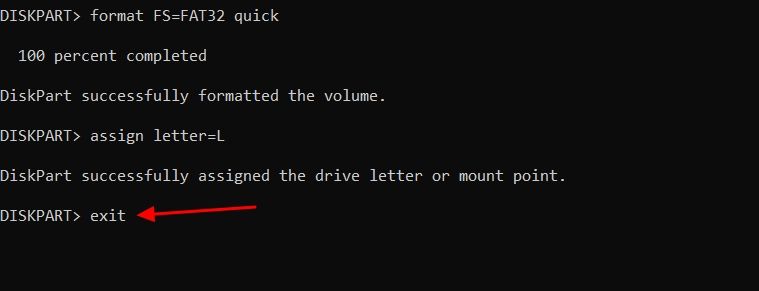
Type exit and hit Enter to exit the Diskpart utility.
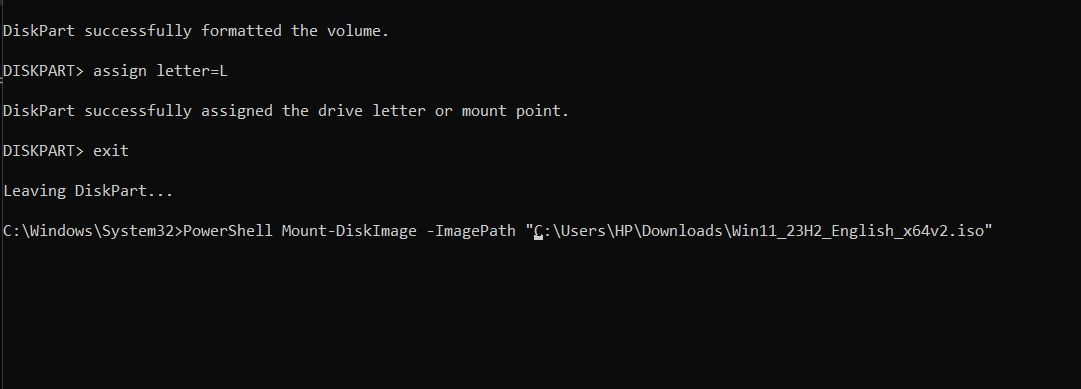
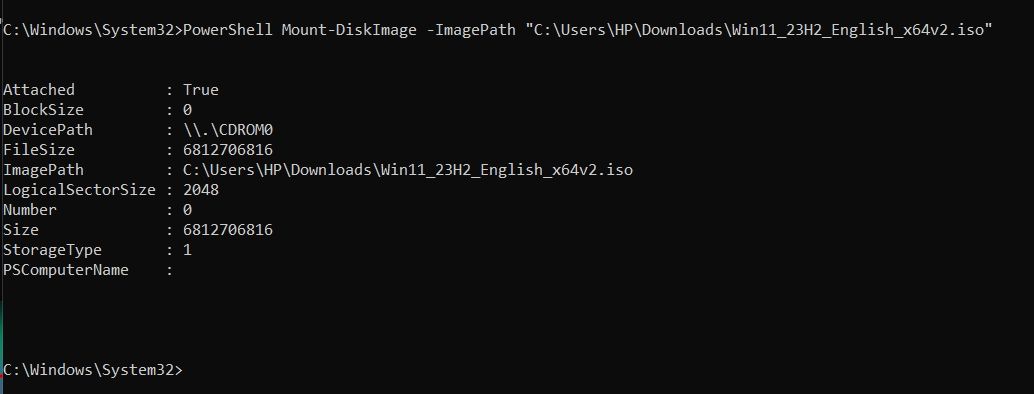
You’ll now have to mount the Windows 11 ISO file. For this, execute the following command:
<code class="hljs xml">PowerShell Mount-DiskImage -ImagePath "ISO_FIle_Location"</code>
After the mounting process is complete, restart the Command Prompt window with administrative rights.
Type DISKPART and hit Enter. After that, execute the List Volume command. This will show the mounted volume (DVD-ROM). Note down the "Ltr" of the mounted volume, as you’ll need it later. In our case, it’s “E.”

Type exit and hit Enter to get out of the Diskpart utility.
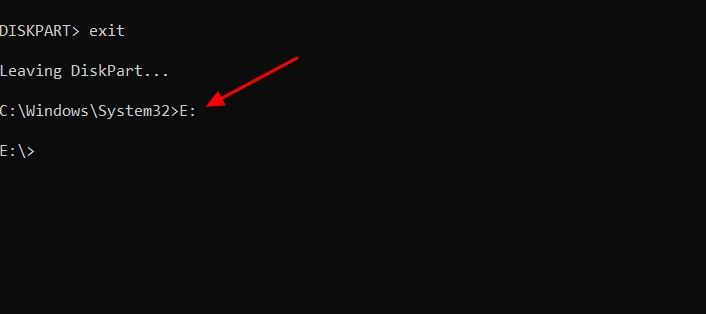
Then, type the mounted volume letter followed by the colon sign. For instance, if the volume letter is E, then the command will look like:
<code class="hljs ">E:</code>
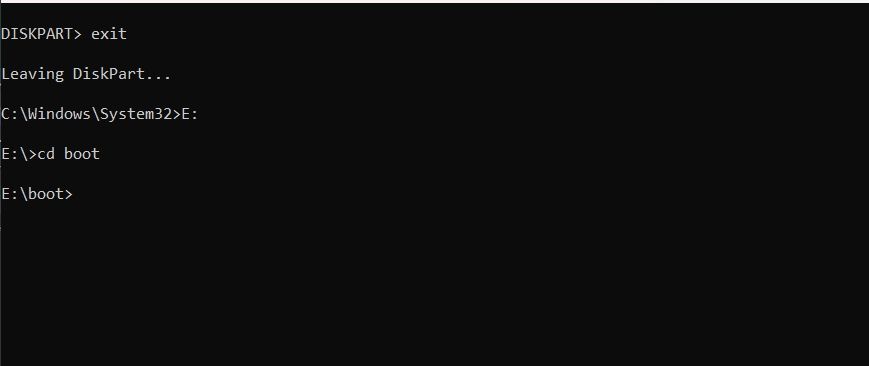
Type cdboot and hit Enter.
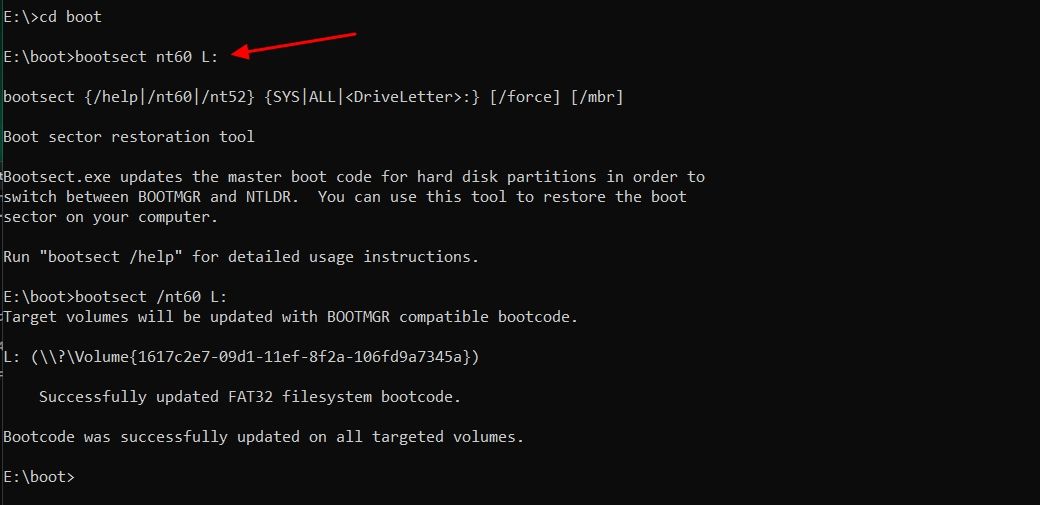
After that, type the following command and press Enter:
<code class="hljs ">bootsect /nt60 (USB_Letter)</code>
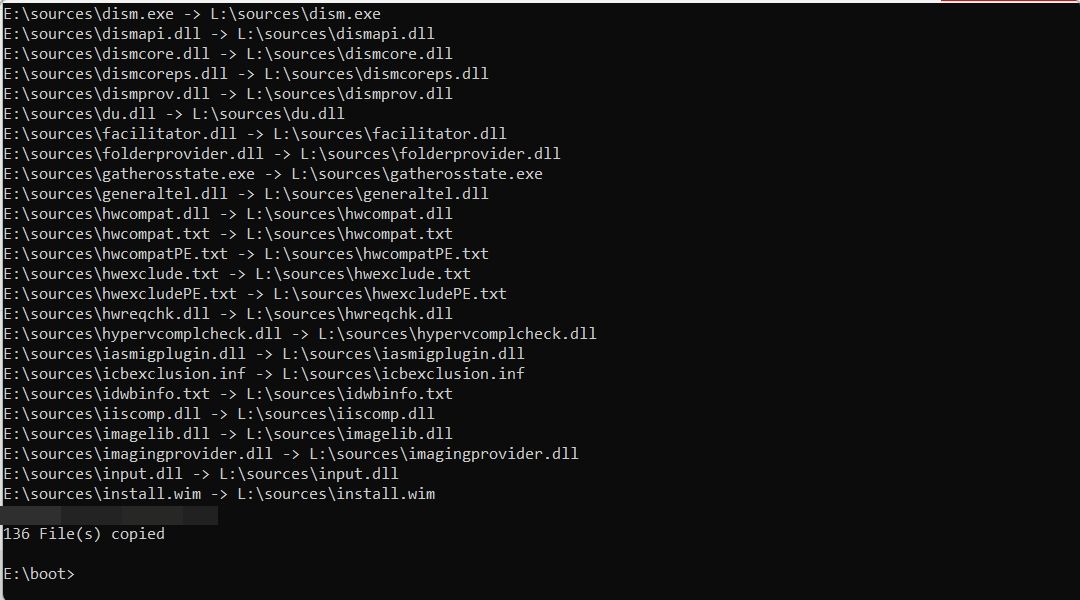
Next, you will have to copy the Windows 11 system files to your USB flash drive. For this, execute the following command. Make sure to replace “E:” and “L:” with your mounted ISO volume and USB Drive letter, respectively.
<code class="hljs ">xcopy E:*.* L:/E /F /H</code>
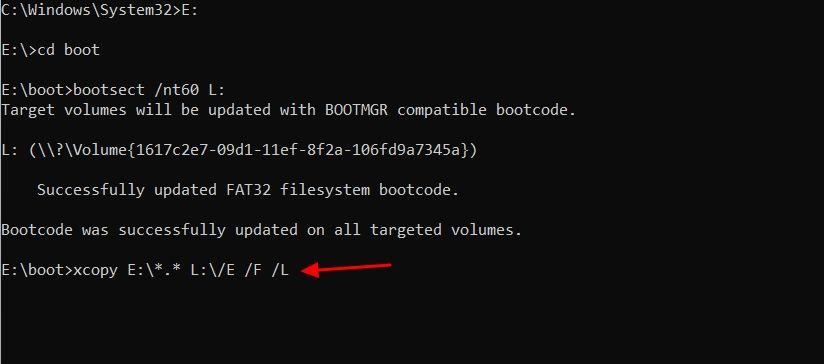
The process is going to take around 10 minutes to complete. Once it is done, you can use your USB bootable drive to install Windows 11.
These were all the methods to make a bootable Windows 11 USB. Just as a reminder, the Media Creation Tool should always be your preferred method for creating the bootable USB drive. In case it doesn't work, the Rufus method is a good alternative. And in the worst-case scenario, if neither of these methods were helpful or you prefer not to use a third-party application (Rufus), you can use the Command Prompt method.
The above is the detailed content of Don\'t Wait for an Emergency, Here\'s How to Create a Bootable Windows 11 USB Drive Now. For more information, please follow other related articles on the PHP Chinese website!

Hot AI Tools

Undresser.AI Undress
AI-powered app for creating realistic nude photos

AI Clothes Remover
Online AI tool for removing clothes from photos.

Undress AI Tool
Undress images for free

Clothoff.io
AI clothes remover

Video Face Swap
Swap faces in any video effortlessly with our completely free AI face swap tool!

Hot Article
Hot Tools

Notepad++7.3.1
Easy-to-use and free code editor

SublimeText3 Chinese version
Chinese version, very easy to use

Zend Studio 13.0.1
Powerful PHP integrated development environment

Dreamweaver CS6
Visual web development tools

SublimeText3 Mac version
God-level code editing software (SublimeText3)
Hot Topics
 1670
1670
 14
1428
52
1329
25
1274
29
1256
24
14
1428
52
1329
25
1274
29
1256
24

 Windows kb5054979 update information Update content list
Apr 15, 2025 pm 05:36 PM
Windows kb5054979 update information Update content list
Apr 15, 2025 pm 05:36 PM
KB5054979 is a cumulative security update released on March 27, 2025, for Windows 11 version 24H2. It targets .NET Framework versions 3.5 and 4.8.1, enhancing security and overall stability. Notably, the update addresses an issue with file and directory operations on UNC shares using System.IO APIs. Two installation methods are provided: one through Windows Settings by checking for updates under Windows Update, and the other via a manual download from the Microsoft Update Catalog.
 Nanoleaf Wants to Change How You Charge Your Tech
Apr 17, 2025 am 01:03 AM
Nanoleaf Wants to Change How You Charge Your Tech
Apr 17, 2025 am 01:03 AM
Nanoleaf's Pegboard Desk Dock: A Stylish and Functional Desk Organizer Tired of the same old charging setup? Nanoleaf's new Pegboard Desk Dock offers a stylish and functional alternative. This multifunctional desk accessory boasts 32 full-color RGB
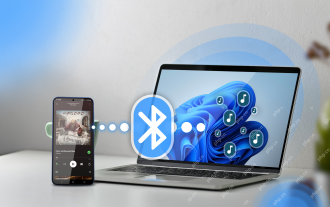 How to Use Windows 11 as a Bluetooth Audio Receiver
Apr 15, 2025 am 03:01 AM
How to Use Windows 11 as a Bluetooth Audio Receiver
Apr 15, 2025 am 03:01 AM
Turn your Windows 11 PC into a Bluetooth speaker and enjoy your favorite music from your phone! This guide shows you how to easily connect your iPhone or Android device to your computer for audio playback. Step 1: Pair Your Bluetooth Device First, pa
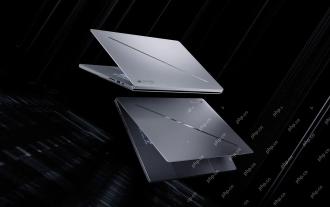 ASUS' ROG Zephyrus G14 OLED Gaming Laptop Is $300 Off
Apr 16, 2025 am 03:01 AM
ASUS' ROG Zephyrus G14 OLED Gaming Laptop Is $300 Off
Apr 16, 2025 am 03:01 AM
ASUS ROG Zephyrus G14 Esports Laptop Special Offer! Buy ASUS ROG Zephyrus G14 Esports Laptop now and enjoy a $300 offer! Original price is $1999, current price is only $1699! Enjoy immersive gaming experience anytime, anywhere, or use it as a reliable portable workstation. Best Buy currently offers offers on this 2024 14-inch ASUS ROG Zephyrus G14 e-sports laptop. Its powerful configuration and performance are impressive. This ASUS ROG Zephyrus G14 e-sports laptop costs 16 on Best Buy
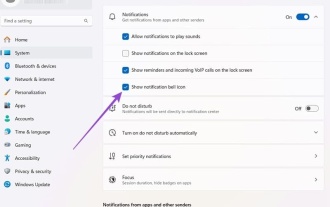 How to Customize Your Windows 11 Notifications
Apr 14, 2025 am 04:05 AM
How to Customize Your Windows 11 Notifications
Apr 14, 2025 am 04:05 AM
Detailed explanation of Windows 11 notification settings: Create a personalized notification experience Windows 11 integrates the Notification Center into the calendar, and although it takes some time to adapt, the frequency of notifications has not changed. If you are tired of the constantly popping up system updates and useless application notifications, this article will guide you to customize Windows 11 notifications and optimize your workflow. Global notification settings Almost all notification-related options are located in Settings in Windows 11. Step 1: Click the "Start" menu and select "Settings" (or press "Windows I"). Step 2: Select System in the left sidebar. Step 3: Click "Notification" to access all notification options.
 5 Hidden Windows Features You Should Be Using
Apr 16, 2025 am 12:57 AM
5 Hidden Windows Features You Should Be Using
Apr 16, 2025 am 12:57 AM
Unlock Hidden Windows Features for a Smoother Experience! Discover surprisingly useful Windows functionalities that can significantly enhance your computing experience. Even seasoned Windows users might find some new tricks here. Dynamic Lock: Auto
 How (and Why) to Turn Off Mouse Acceleration on Windows 11
Apr 15, 2025 am 06:06 AM
How (and Why) to Turn Off Mouse Acceleration on Windows 11
Apr 15, 2025 am 06:06 AM
Improve mouse accuracy: Disable Windows 11 mouse acceleration function The mouse cursor moves too fast on the screen, even if you only move the mouse a few centimeters? This is what the mouse acceleration function is. This article will guide you on how to disable this feature to better control mouse movement. Is it wise to disable mouse acceleration? There is no direct "Mouse Acceleration" option in Windows systems. Instead, it is the "Enhanced Pointer Precision" setting, which Microsoft sees as a mouse acceleration feature. When this feature is enabled, the mouse's DPI (dots per inch) setting takes effect. It controls the relationship between the physical movement speed of the mouse and the distance the cursor moves on the screen. Move the mouse slowly, Windows will reduce the effective DPI and the cursor moves shorter
 Your Keyboard Needs a Big Ol' Volume Knob
Apr 18, 2025 am 03:04 AM
Your Keyboard Needs a Big Ol' Volume Knob
Apr 18, 2025 am 03:04 AM
In today's touchscreen world, the satisfying tactile feedback of physical controls is a welcome change. That's why a keyboard with a large volume knob is surprisingly appealing. I recently experienced this firsthand, and it's been a revelation. For
