laravel实现无限极分类

大家讲道理
Release: 2023-03-05 22:24:02
Original
4017 people have browsed it

说明

大家通常都是使用递归实现无限极分类,都知道递归效率很低,下面推荐一个 Laravel 的扩展包 etrepat/baum,快速让你的数据模型支持无限极树状层级结构,并且兼顾效率。

使用 Baum 嵌套集合模型来实现 Laravel 模型的无限极分类

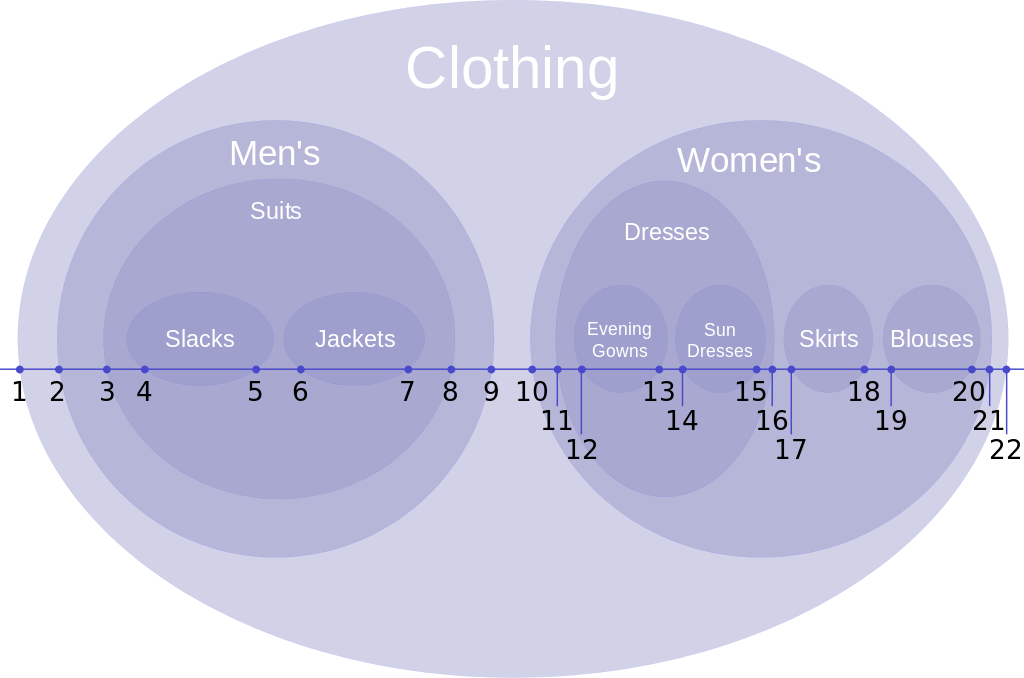
扩展包的 官方文档 里有解释的篇幅,下面这张图的也是一个简单的例子:

86T4nyGJkb.png

用例说明#

接下来讲几个无限树状层级模型的例子。

标签系统#

参考:Laravel Taggable 为你的模型添加打标签功能一个标签可以有无数多子标签,属于一个父标签,有多个同辈标签。

如下面的这颗标签树:

$tagTree = [
    'name' => 'RootTag',
    'children' => [
        ['name' => 'L1Child1',
            'children' => [
                ['name' => 'L2Child1'],
                ['name' => 'L2Child1'],
                ['name' => 'L2Child1'],
            ]
        ],
        ['name' => 'L1Child2'],
        ['name' => 'L1Child3'],
    ]];
Copy after login

评论系统#

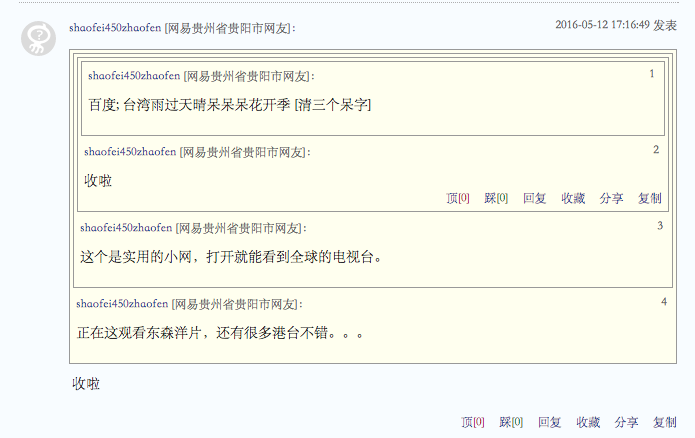
评论的无限极别嵌套,如网易的 跟帖系统。

YSFXydiNO9.png

Laravel 有一个评论扩展包支持无限极别嵌套,请见 Slynova-Org/laravel-commentable。

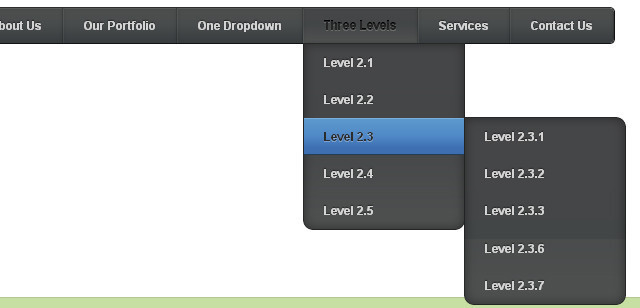
「导航栏」数据模型#

管理员后台需要提供「导航栏」自定义功能,树状结构导航栏。

MpuwWp4dqi.png

集成 Baum#

etrepat/baum 快速让你的数据模型支持无限极树状层级结构,且兼顾效率。

接下来我们讲如何集成。

1. composer 安装#

composer require "baum/baum:~1.1"
Copy after login

2. 增加 provider#

修改 config/app.php 文件,在 providers 数组中添加:

'Baum\Providers\BaumServiceProvider',
Copy after login

此服务提供者注册了两个命令:artisan baum, artisan baum.install

3. 创建 migration#

安装到已存在的数据模型上:

php artisan baum:install MODEL
Copy after login

然后执行

php artisan migrate
Copy after login

关于 migration 的字段介绍#

  • parent_id: 父节点的 id

  • lft: 左边索引值

  • rgt: 右边索引值

  • depth: 层级深度

下面是个例子:

class Category extends Migration {
  public function up() {
    Schema::create('categories', function(Blueprint $table) {
      $table->increments('id');

         // 这四行代码
      $table->integer('parent_id')->nullable();
      $table->integer('lft')->nullable();
      $table->integer('rgt')->nullable();
      $table->integer('depth')->nullable();

      $table->string('name', 255);

      $table->timestamps();
    });
  }}
Copy after login

4. 配置数据模型#

继承 Baum\Node

class Category extends Baum\Node {}
Copy after login

继承后有这些属性可以重写:

class Category extends Baum\Node {
  protected $table = 'categories';

  // 'parent_id' column name
  protected $parentColumn = 'parent_id';

  // 'lft' column name
  protected $leftColumn = 'lidx';

  // 'rgt' column name
  protected $rightColumn = 'ridx';

  // 'depth' column name
  protected $depthColumn = 'nesting';

  // guard attributes from mass-assignment
  protected $guarded = array('id', 'parent_id', 'lidx', 'ridx', 'nesting');}
Copy after login

至此集成成功。

使用

$root = Tag::create(['name' => 'Root']);

// 创建子标签
$child1 = $root->children()->create(['name' => 'Child1']);

$child = Tag::create(['name' => 'Child2']);
$child->makeChildOf($root);

// 批量构建树
$tagTree = [
    'name' => 'RootTag',
    'children' => [
        ['name' => 'L1Child1',
            'children' => [
                ['name' => 'L2Child1'],
                ['name' => 'L2Child1'],
                ['name' => 'L2Child1'],
            ]
        ],
        ['name' => 'L1Child2'],
        ['name' => 'L1Child3'],
    ]
];

Tag::buildTree($tagTree);
Copy after login


Related labels:
source:php.cn
Statement of this Website
The content of this article is voluntarily contributed by netizens, and the copyright belongs to the original author. This site does not assume corresponding legal responsibility. If you find any content suspected of plagiarism or infringement, please contact [email protected]
Latest Articles by Author
Popular Tutorials
More>
Latest Downloads
More>
Web Effects
Website Source Code
Website Materials
Front End Template
About us Disclaimer Sitemap
php.cn:Public welfare online PHP training,Help PHP learners grow quickly!