dreamweaver怎么给网页制作跳转菜单?网页需要一个跳转菜单,该怎么制作这个跳转菜单呢?下面我们就来看看详细的教程,很简单,需要的朋友可以参考下
网页中会有各种菜单,今天我们就来看看使用dw制作跳转菜单的方法,很简单,需要的朋友可以学习一下。
软件名称:
Adobe Dreamweaver CC 2017 v17.0 中文破解版(附破解补丁) 64位
软件大小:
758MB
更新时间:
2016-11-05
一、前期准备
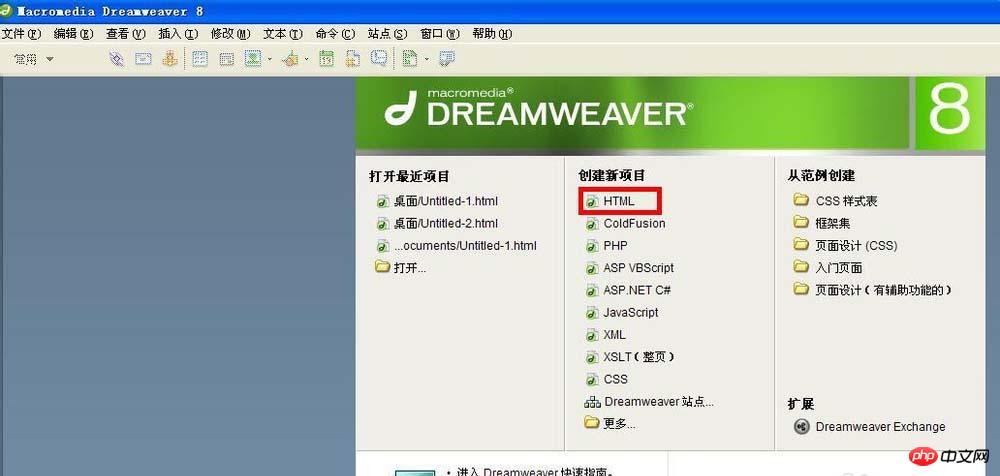
1、打开Dreamweaver软件,选择“创建新项目”中的“Html”。
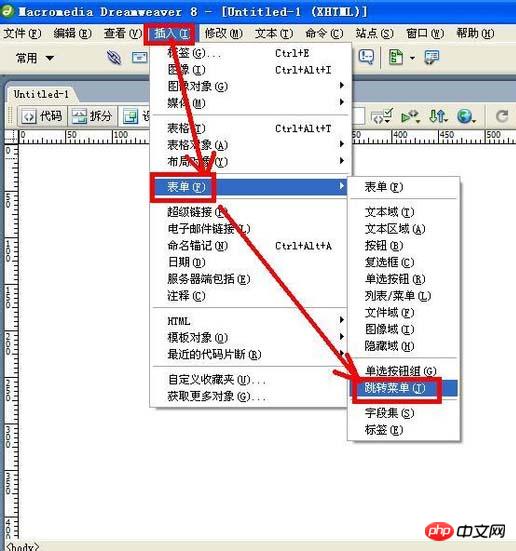
2、单击菜单栏中的“插入”——表单——跳转菜单。
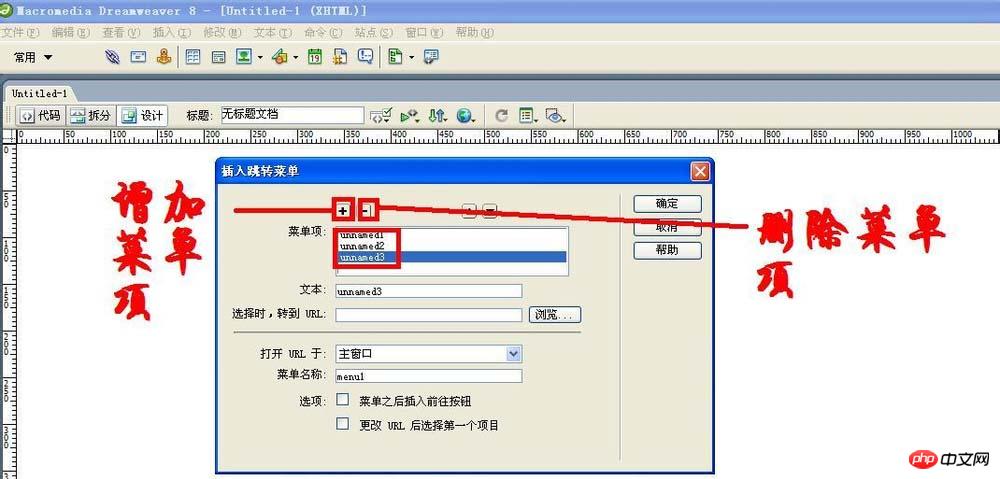
3、在弹出的“插入跳转菜单”对话框中,单击“+”按钮,可以增加菜单项;单击“-”按钮,可以删除菜单项,菜单项在下面的列表中显示。
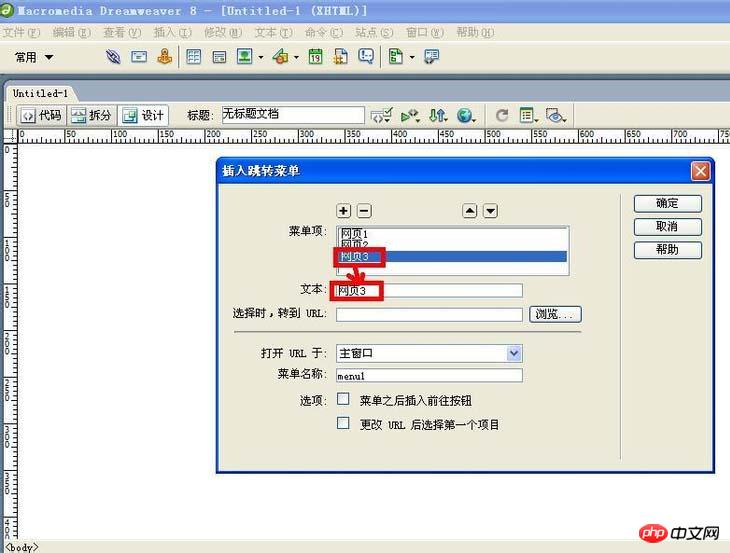
4、现在选定“菜单项”列表中的菜单项,在“文本”框中输入新的名称。
5、选定“插入跳转菜单”对话框中的菜单项,单击“浏览”按钮。
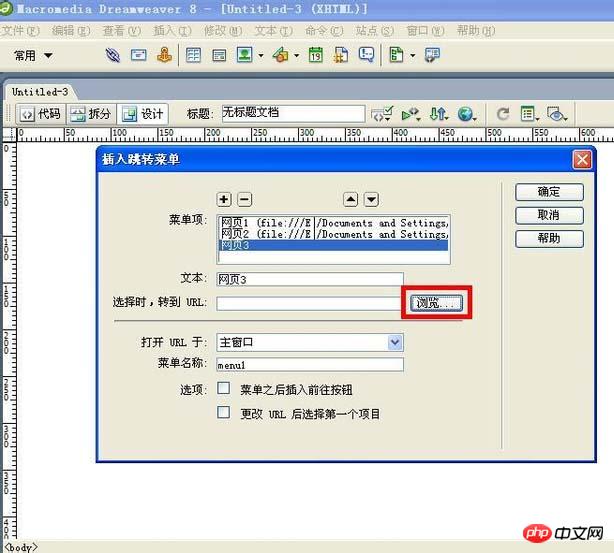
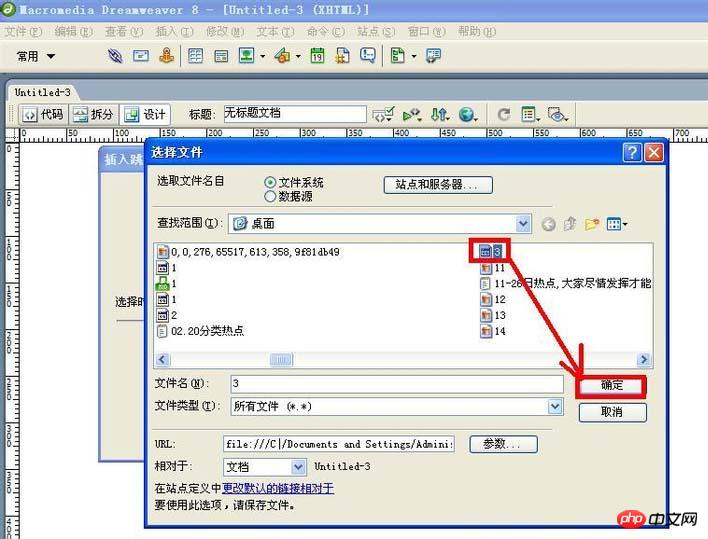
6、在弹出的“选择文件”对话框选择要跳转的文件,单击“确定”按钮。
二、直接跳转菜单:
1、在“插入跳转菜单”对话框中不要勾选“菜单之后插入前往按钮”。将来网页跳转菜单中的菜单项只要单击就能跳转。

2、现在单击“确定”按钮,跳转菜单就制作好了,在浏览器中就可以见到效果。

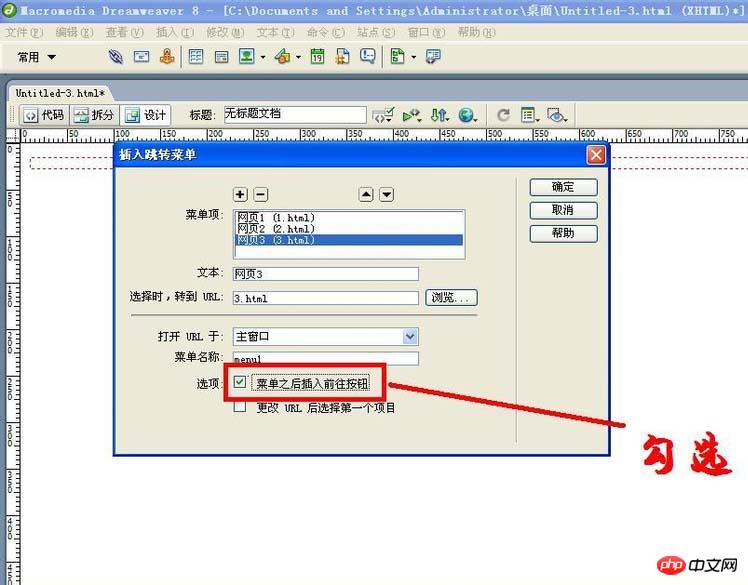
三、前往跳转菜单:
1、在“插入跳转菜单”对话框中勾选“菜单之后插入前往按钮”。将来网页跳转菜单中的菜单项选定后再单击“前往”按钮就能跳转。
2、现在单击“确定”按钮,跳转菜单就制作好了,在浏览器中就可以见到效果。

四、附加注意事项:
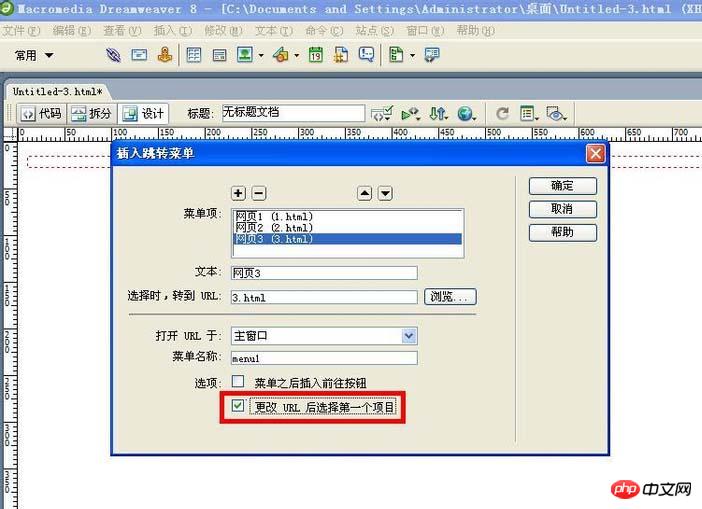
1、在“插入跳转菜单”对话框最下面有个“更改URL后选择第一个项目”,如果勾选了它,则在跳转后会回到初始状态;不勾选它,则在跳转后不回到初始状态。
2、如果要再加入菜单项,只要在第一个菜单的后面单击“回车”,换行。
以上就是Dreamweaver网页制作跳转菜单的方法介绍的详细内容,更多请关注php中文网其它相关文章!

每个人都需要一台速度更快、更稳定的 PC。随着时间的推移,垃圾文件、旧注册表数据和不必要的后台进程会占用资源并降低性能。幸运的是,许多工具可以让 Windows 保持平稳运行。

 广告
广告


Copyright 2014-2025 https://www.php.cn/ All Rights Reserved | php.cn | 湘ICP备2023035733号


 338
338


