
本文是针对linux下mysql5.7安装教程,其他版本可能略有不同,仅供参考。
第一步:下载mysql
http://www.php.cn/xiazai/gongju/116
第二步:解压文件
由于我是在我本机software目录中下载的文件,为了方便管理首先将此文件移动到/usr/local 目录下
mv /software/mysql-5.7.17-linux-glibc2.5-x86_64.tar /usr/local
接下来去到移动后的目录cd /usr/local ,然后解压 tar zxvf mysql-5.7.17-linux-glibc2.5-x86_64.tar
解压后为了方便后面操作可把解压后文件名修改为mysql: mv mysql-5.7.17-linux-glibc2.5-x86_64 mysql
第三步:配置启动文件
去到之前解压后并改名为mysql的目录下会有以下文件
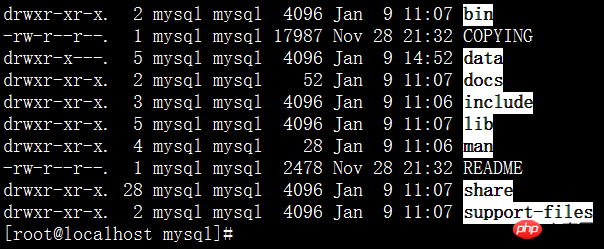
然后去到support-files目录下
1、复制my.cnf 到 /etc/my.cnf (mysqld启动时自动读取)
cp my-default.cnf /etc/my.cnf
注意:如果你在安装时Linux虚拟机时同时安装了默认的mysql,此时操作以上步骤,终端将会提示你文件已存在是否覆盖,输入yes覆盖即可。
2、配置数据库编码
vi /etc/my.cnf
在这份文件中可以添加以下配置信息(如果有修改即可)
[mysql]
default-character-set=utf8
[mysqld]
default-storage-engine=INNODB
character_set_server=utf8
3、复制mysql.server 到/etc/init.d/ 目录下【目的想实现开机自动执行效果】
执行命令: cp mysql.server /etc/init.d/mysql (mysql是服务名)
4、修改 /etc/init.d/mysql 参数
vi /etc/init.d/mysql
给与2个目录位置
basedir=/usr/local/mysql
datadir=/usr/local/mysql/data
5、出于安全便利,创建一个操作数据库的专门用户
1)、groupadd mysql #建立一个mysql的组
2)、useradd -r -g mysql mysql #建立mysql用户,并且把用户放到mysql组
3)、passwd mysql #给mysql用户设置一个密码
4)、给目录/usr/local/mysql 更改拥有者 chown -R mysql:mysql /usr/local/mysql/
第四步:初始化 mysql 的数据库
首先去到mysql的bin目录
1.初始化
./mysqld --initialize --user=mysql --basedir=/usr/local/mysql --datadir=/usr/local/mysql/data
生成出一个data目录,代表数据库已经初始化成功
并且mysql的root用户生成一个临时密码:SHNq8Qvd2g>L(最好先记录这个临时密码)
2.给数据库加密
./mysql_ssl_rsa_setup --datadir=/usr/local/mysql/data
3.启动mysql(为了不让进程卡主,可在启动mysql的命令后加上&代表此进程在后台运行)
./mysqld_safe --user=mysql &
4.检查ps -ef|grep mysql

发现有以上进程便代表启动成功。
第五步:进入客户端
1.登录 ./mysql -uroot -p回车后输入之前的临时密码
2.修改密码
set password=password('新密码');
第六步:设置远程访问
1,在远程访问之前需先配置防火墙 systemctl stop firewalld.service(不推荐,可配置开通3306端口)
2,授权
mysql>grant all privileges on *.* to 远程访问用户名@'%' identified by '用户密码';
mysql>select host,user from user; 【多出1条远程登录用户记录】
mysql>flush privileges;(刷新)
此时使用远程机器进行访问
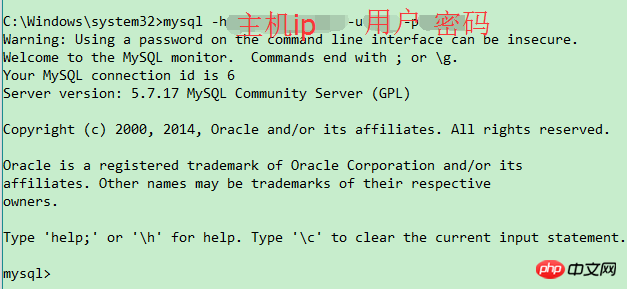
解析:使用mysql -h主机ip -u用户名 -p密码即可进行远程访问
第七步:设置开机自启动
1、添加服务mysql
chkconfig --add mysql 【mysqld -install】
2、设置mysql服务为自动
chkconfig mysql on
3、重启查看进程
init 6
ps -ef|grep mysql
第八步:配置环境变量
为了方便操作,配置环境变量还是有必要的。
vi /etc/profile
export PATH=$JAVA_HOME/bin:/usr/local/mysql/bin:$PATH
小结:到这一步基本的配置基本就完成了。
相关教程:
以上就是Linux下安装MySQL-5.7教程(图文)的详细内容,更多请关注php中文网其它相关文章!

每个人都需要一台速度更快、更稳定的 PC。随着时间的推移,垃圾文件、旧注册表数据和不必要的后台进程会占用资源并降低性能。幸运的是,许多工具可以让 Windows 保持平稳运行。

Copyright 2014-2025 https://www.php.cn/ All Rights Reserved | php.cn | 湘ICP备2023035733号


 769
769


