This time I will show you how to configure and build the environment for Webpack ES6. What are the precautions for configuring and building the environment for Webpack ES6? The following is a practical case, let's take a look.
1, Preparation
1. Download node.js and npm
2. Replace the image source with the Taobao image
2, create the directory and install webpackCreate the project
in the command line Enter npm init -y

We see that there is an additional package.json file in the project, which defines the various templates required in this project and the configuration information in the project . Each member of this object is a setting for the current project. For detailed setup information, please refer to https://docs.npmjs.com/files/package.json
Install webpack
Install webpack globally and enter ## on the command line #
npm install webpack -g
npm install webpack-cli -g
Copy after login
In webpack4 webpack and webpack-cli are separated, so they need to be installed separately
Install a webpack in the current directory
Enter on the command line
npm installwebpack-cli--save-dev
npm installwebpack--save-dev
Copy after login
What is global installation?
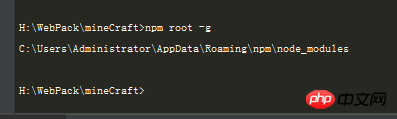
The parameter -g means installation into the global environment. The package is installed in the node_modules folder under the Node installation directory, usually in the \Users\username\AppData\Roaming\ directory. , you can use npm root -g to view the global installation directory.
 After global installation, it can be used by the command line (command line). Users can directly run the components supported by this component package in the command line. Command, as shown below, the cmd file after global installation of cnpm
What is local installation
The local installation method is to enter the command: npm install eslint or npm install eslint --save -dev, etc. The parameter --save-dev means writing your installation package information into the devDependencies field of the package.json file. The package is installed in the node_modules folder in the root directory where we execute the command. After local installation, you can directly introduce the modules in the node_modules directory of the project through require(). As shown in the following example, after local installation, directly require('webpack') in gulpfile.js. As shown below
 When we use it, it is recommended to use local installation. Local installation allows each project to have an independent package, which is not affected by the global package and is convenient for the project. Move, copy, package, etc. to ensure interdependence between different versions of packages. The disadvantages are that it takes a long time to install and takes up a lot of memory. However, as disks become larger and larger today, its disadvantages can be ignored.
Using webpack
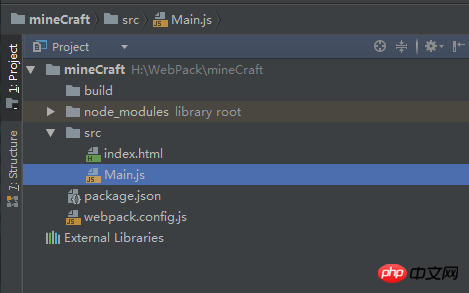
1. We create a folder src in the directory to store the source files
2. Create a folder build to store the compilation The following file
3. Create a new index.html file
4. Create the configuration file webpack.config.js
 Create index.html
Hi webpack4!
Copy after login
Create Main.js
document.write("Hi webpack4 + ES6!");Copy after login
Configure webpack.config.js
var path = require('path');
var appPath = path.resolve(dirname, './src/Main.js');
var buildPath = path.resolve(dirname, './build');
module.exports = {
 entry: appPath,//整个页面的入口文件
 output: {
  path: buildPath,//打包输出的地址
  filename: "bundle.js",//输出的文件名称
 },
 module: {
   }
}
Copy after login
Enter on the command line
webpack --mode development
bundle.js
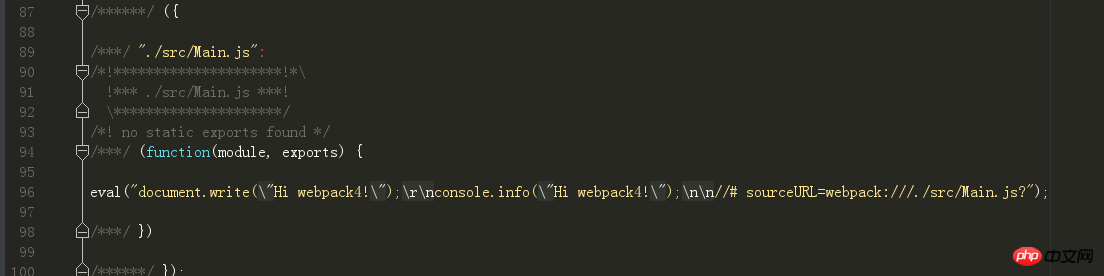 webpack --mode development
bundle.js
webpack4 optimization. Including reduction, scale increase, tree-shaking, etc., the development mode is optimized for speed, but only provides unminified bundles######We use ES6 syntax to give it a try###
//Main.js
import {Dog} from "./Dog";
class Main {
 constructor() {
  document.write("Hi webpack4 + ES6!");
  console.info("Hi webpack4 + ES6");
  let dog = new Dog();
 }
}
new Main();
Copy after login
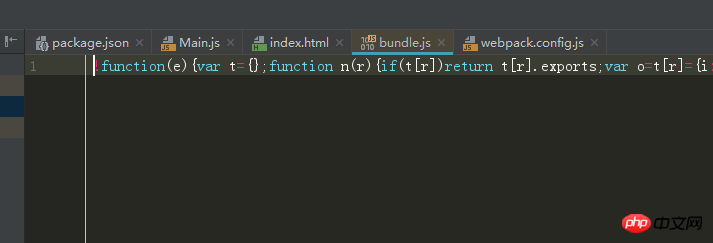
## #Compiled bundle.js###
打开index.html

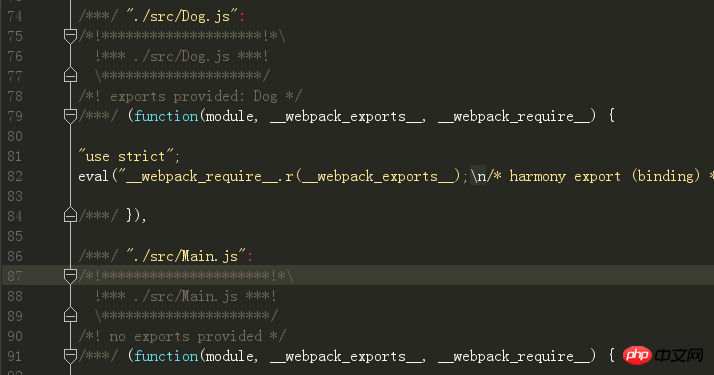
webpack-v4.10.2会识别es6语法并编译
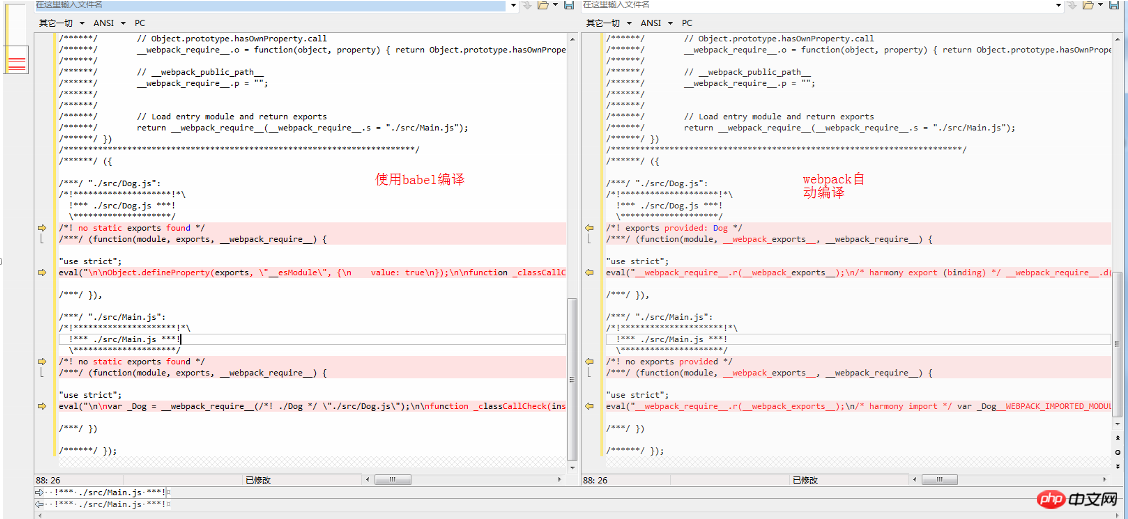
我们也可以使用babel来对ES6进行编译
输入 npm install babel-loader --save-dev
修改配置项webpack.config.js
var path = require('path');
var appPath = path.resolve(dirname, './src/Main.js');
var buildPath = path.resolve(dirname, './build');
module.exports = {
 entry: appPath,//整个页面的入口文件
 output: {
  path: buildPath,//打包输出的地址
  filename: "bundle.js",//输出的文件名称
 },
 module: {
  rules: [
   {
    test: /\.js$/,
    loader: 'babel-loader?presets=es2015'
   }
  ]
 }
}
Copy after login
两者的编译结果存在部分差异,并不影响正确性。
三,webpack加载资源文件根据模版文件生成访问入口
我们在部署项目时,部署的是build中的文件,并不会将我们src/index.html作为访问的入口,因此,我们需要将index.html移动到build下,但是简单的复制过去是不行的,由于文件目录的不同,如果使用了相对路径,那么就会找不到文件。这时候我们就可以用到webpack的插件 html-webpack-plugin,它可以将我们src/index.html作为模版,生成一份新的index.html在build下。
具体的用法请查看https://github.com/jantimon/html-webpack-plugin#third-party-addons
在本例只是简单使用。
执行
npm i --save-dev html-webpack-plugin
Copy after login
之前我们是将index.html中的js入口指定为build/bundle.js,使用这个插件后,我们设置它直接指向Main.js
Hi webpack4!
Copy after login
/* webpack.config.js */
var path = require('path');
var appPath = path.resolve(dirname, './src/Main.js');
var buildPath = path.resolve(dirname, './build');
const HtmlWebpackPlugin = require('html-webpack-plugin')
module.exports = {
 entry: appPath,//整个页面的入口文件
 output: {
  path: buildPath,//打包输出的地址
  filename: "bundle.js",//输出的文件名称
 },
 module: {
  rules: [
   {
    test: /\.js$/,
    loader: 'babel-loader?presets=es2015'
   }
  ]
 },
 plugins: [
  new HtmlWebpackPlugin({
   /*
   template 参数指定入口 html 文件路径,插件会把这个文件交给 webpack 去编译,
   webpack 按照正常流程,找到 loaders 中 test 条件匹配的 loader 来编译,那么这里 html-loader 就是匹配的 loader
   html-loader 编译后产生的字符串,会由 html-webpack-plugin 储存为 html 文件到输出目录,默认文件名为 index.html
   可以通过 filename 参数指定输出的文件名
   html-webpack-plugin 也可以不指定 template 参数,它会使用默认的 html 模板。
   */
   template: './src/index.html',
   /*
   因为和 webpack 4 的兼容性问题,chunksSortMode 参数需要设置为 none
   https://github.com/jantimon/html-webpack-plugin/issues/870
   */
   chunksSortMode: 'none'
  }),
 ]
}
Copy after login
输入指令打包我们会发现,build下的index.html已经生成,并且指向了编译的后js

使用webpack打包图片和文件
我们新增资源文件夹asset 并添加一张图片

import {Dog} from "./Dog";
class Main {
constructor() {
document.write("Hi webpack4 + ES6!");
console.info("Hi webpack4 + ES6");
let dog = new Dog();
document.write(" ");
}
}
new Main();
");
}
}
new Main();Copy after login
并将图片展示到页面

图裂了,找不到资源,大家应该都猜到了,应为在编译时,直接将 添加到了build/index.html,build下并没有asset包,所以找不到资源。难道我们需要在build下在建立一个资源文件夹吗?答案是不用,webpack可以对图片的路径进行转换和图片打包。
输入指令
npm install url-loader --save-dev
npm install file-loader --save-dev
Copy after login
/*webpack.config.js*/
var path = require('path');
var appPath = path.resolve(dirname, './src/Main.js');
var buildPath = path.resolve(dirname, './build');
const HtmlWebpackPlugin = require('html-webpack-plugin')
module.exports = {
 entry: appPath,//整个页面的入口文件
 output: {
  path: buildPath,//打包输出的地址
  filename: "bundle.js",//输出的文件名称
 },
 module: {
  rules: [
   {
    test: /\.js$/,
    loader: 'babel-loader?presets=es2015'
   } ,
   {
    //url-loader的主要功能是:将源文件转换成DataUrl(声明文件mimetype的base64编码)
    //小于limit字节,以 base64 的方式引用,大于limit就交给file-loader处理了
    //file-loader的主要功能是:把源文件迁移到指定的目录(可以简单理解为从源文件目录迁移到build目录
    test: /\.(jpg|png|gif)$/,
    loader: 'url-loader?limit=8192&name=asset/[hash:8].[name].[ext]'
   }
  ]
 },
 plugins: [
  new HtmlWebpackPlugin({
   /*
   template 参数指定入口 html 文件路径,插件会把这个文件交给 webpack 去编译,
   webpack 按照正常流程,找到 loaders 中 test 条件匹配的 loader 来编译,那么这里 html-loader 就是匹配的 loader
   html-loader 编译后产生的字符串,会由 html-webpack-plugin 储存为 html 文件到输出目录,默认文件名为 index.html
   可以通过 filename 参数指定输出的文件名
   html-webpack-plugin 也可以不指定 template 参数,它会使用默认的 html 模板。
   */
   template: './src/index.html',
   /*
   因为和 webpack 4 的兼容性问题,chunksSortMode 参数需要设置为 none
   https://github.com/jantimon/html-webpack-plugin/issues/870
   */
   chunksSortMode: 'none'
  }),
 ]
}
Copy after login
编译后的目录如下(新增一张较大的图片book用于展示file-loader)

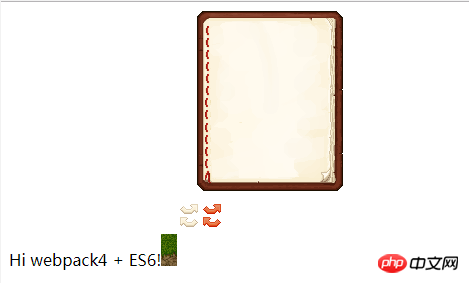
页面效果如下,图是随便找的,见谅。
注意:当我们引入一些资源需要使用变量引用时,像这样引用的话是会编译失败的

图片并没有像上图一样打包到asset中
当我们在require一个模块的时候,如果在require中包含变量,像这样:
require("./asset/" + name + ".png");Copy after login
那么在编译的时候我们是不能知道具体的模块的。但这个时候,webpack也会为我们做些分析工作:
1.分析目录:'./asset';
2.提取正则表达式:'/^.*\.png$/';
于是这个时候为了更好地配合wenpack进行编译,我们应该给它指明路径

使用webpack打包css文件
就像图片一样,webpack也提供了样式文件的打包,
npm install style-loader --save-dev
npm install css-loader --save-dev
Copy after login
//rules中添加
{
//css-loader使能够使用类似@import和url(...)的方法实现require,style-loader将所有的计算后的样式加入页面中
//webpack肯定是先将所有css模块依赖解析完得到计算结果再创建style标签。因此应该把style-loader放在css-loader的前面
test: /\.css$/,
use: ['style-loader', 'css-loader']
}
Copy after login
添加main.css文件,
span{color:red;}
目录如下


四,搭建webpack微服务器
在开发过程中,我们不可能修改一次,打包一次。因此我们需要使用到webpack提供的服务器。
cnpm install webpack-dev-server --save-dev
Copy after login
为了方便我们在pack.json中配置脚本。
"start":"webpack-dev-server--modedevelopment",
"dev":"webpack--modedevelopment",
"build":"webpack--modeproduction"
Copy after login
npm run start
Copy after login

启动成功后访问服务地址,就可以实现修改代码之后,页面实时刷新。
启动时使用的是默认配置。
当我们需要个性化设置时,在webpack.config.js中添加设置即可
//以下是服务环境配置
devServer:{
port:8085,//端口
host:'localhost',//地址
inline:true,//用来支持dev-server自动刷新
open:true,//开启webpack-dev-server时自动打开页面
historyApiFallback:true,
contentBase:path.resolve(dirname),//用来指定index.html所在目录
publicPath:'/build/',//用来指定编译后的bundle.js的目录
openPage:"build/index.html"//指定打开的页面
}
Copy after login
相信看了本文案例你已经掌握了方法,更多精彩请关注php中文网其它相关文章!
推荐阅读:
JS实现统计字符串内数据规律
在项目中如何使用JS严格模式
The above is the detailed content of How to configure and build the environment for Webpack + ES6. For more information, please follow other related articles on the PHP Chinese website!


 0
0 2
2 282
282


![[Web front-end] Node.js quick start](https://img.php.cn/upload/course/000/000/067/662b5d34ba7c0227.png)


